You can install an inline catch can to an ~oem inspired set up which will help some, yet it's still eating it's own barf, just less of it.
You can install a real catch can. And if so you can pull your induction boot after a year using it and your compressor blades are as clean as can be. A catch can helps clean it all up and everything down stream, yet if placed wrong, or sitting at traffic a lot complain about smelling oil. In addition, the top of the air filter outlet of the catch can does have a bit of oily residue around it at all times and a little messy (kinda).
So here's a plan C, a scavenger set up. This takes all your pvc and dumps it into the exhaust.
This system has a couple extra perks too.


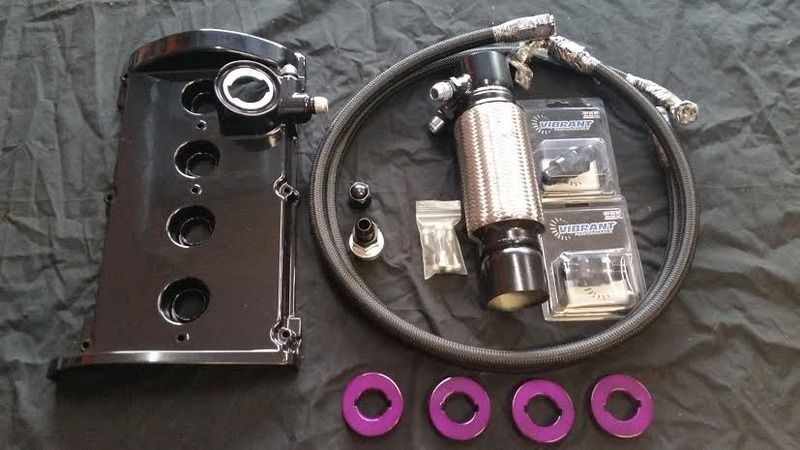
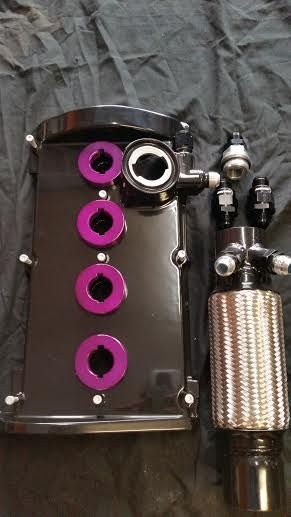
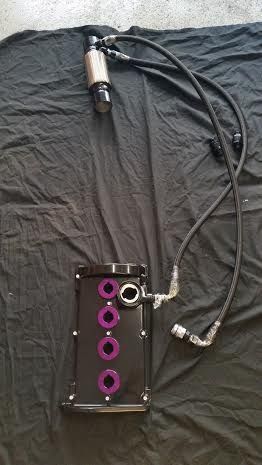
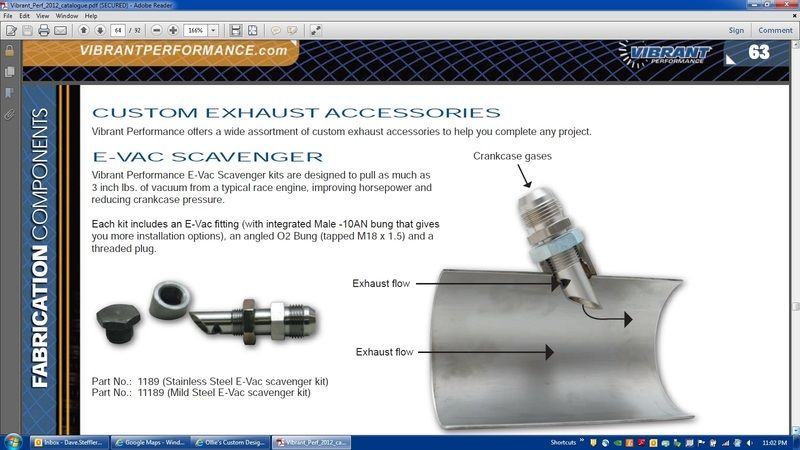
So you buy any vc you like and add a -10AN barb to it. Buy the 034 Motorsport block breather bung and add a -10AN barb to it. Buy a ~12" section of flex pipe and have 2 -10AN scavenger barbs welded to it. All your lines will have -10AN swivel females to secure everything together. My vc I added two barbs, yet one will be capped (just in case I do anything extra down the road I have another barb). The last picture shows it how it will be installed in the car. Note the Vibrant fittings, which I placed half way down the lines in the last picture. Those are -10AN check valves (like the oem pancake valves) which simply go inline. What's kinda neat is you delete needing a catch can all together and the system is cleaner. I also am using a ~2.5" "Slip On" flex pipe
 (it's actually like 2.65" in diameter, so slips directly onto 2.5" pipe with zero welding needed). This is awesome as the whole system is a bolt on/off affair. I simply got under the car, and in 2 minutes cut out the ~5" long welded in flex pipe, with an extra ~1" of pipe cut off at either end. So all together I cut out a 8" section. So the "slip on pipe" gets 2 Vibrant male -10AN bungs welded to it, and is 12" long all together. Now the 12" slip on simply slides in place of the 8" cutout piece. A 12" long "slip on pipe" vs the 8" cut out section, leaves 2" of pipe overlap at each end to place a simple stainless steel pipe clamp on to secure everything.
 What's awesome about this too, is the most pesky bottom KKK dp to exhaust flange is a snap! Everyone who's installed a test pipe knows that pita section using 3' of extensions to mate the test pipe to the dp by the transmission while the gaskets falls off and shifts. Since the section of flexpipe is gone (slides off), you can mate the test pipe to the dp pipe flange out of the car, then simply slide the assembly into the car and then slip over the "slip on pipe" to complete the system. Also when you cut out the welded aftermarket/oem flexpipe you can do it in a fashion with out cutting off the dp support bracket so everything remains secure and bolted up. FYI, I've been running a "slip on pipe" for years (yet no scavenger system).
I also found unique non-bolt on 2.0/R8 coil billet spacers which work awesome for AGN valve covers. They do not secure to the vc yet the 2.0 coils already lock into place via the dust boots and gravity keeps them down anyways. I am going to place a dot of adhesive/silicone on the underside of them however to make them ~secure to the vc and make a water proof seal between them and the vc . I also went another direction with the AGN vc and excepting 2.0 coils. The problem with these vc's is they have to be notched and bored to take 2.0 coils. I had a huge problem trying to find a machine shop who could bore it. They where taking about having to make a jig to secure it, and special bores as the diameter is a funky size and there's very little wall thickness material to begin with in that coil pack bore hole. The last shop said "So this is going to take a bit of work, would you want me to stop if it gets upwards of $300?" Lol wut! The solution? Easy! I simply took a 1 3/8" step drill bit: http://www.amazon.com/ABN-1-3-Titani.../dp/B00H3Q6KOY which sets perfectly on top of bore hole and ran it down ~1/2"+. Perfect, I simply just took off the top ~25% of the bore hole all together. So now it doesn't have to be side notched either. The coils still lock into place and can't spin as the billet spacers are notched anyways
 . Not to mention the most bottom of the rubber coil boot locks into the bottom of the bore hole of the vc, and up top into the billet spacer creating a water proof seal twice.
 You'll also note doing the valve cover "stud to bolt conversion" which is cleaner too.


 Reply With Quote

 , so to ask a motor to vent everything out of a single small 5/8" line is too much.


Bookmarks