Use these links to set up your browser to show the pictures that photobucket has taken down:
Chrome:
https://chrome.google.com/webstore/d...fegnfnflicjjgj
Firefox:
http://redirect.viglink.com/?format=...mbedded-fix%2F
So I've seen a lot of guys on here saying their wheel offsets are not the same on both sides after lowering their car, and I've worked on a few Audi's that also seem to have this problem. Basically this is what I'm talking about:
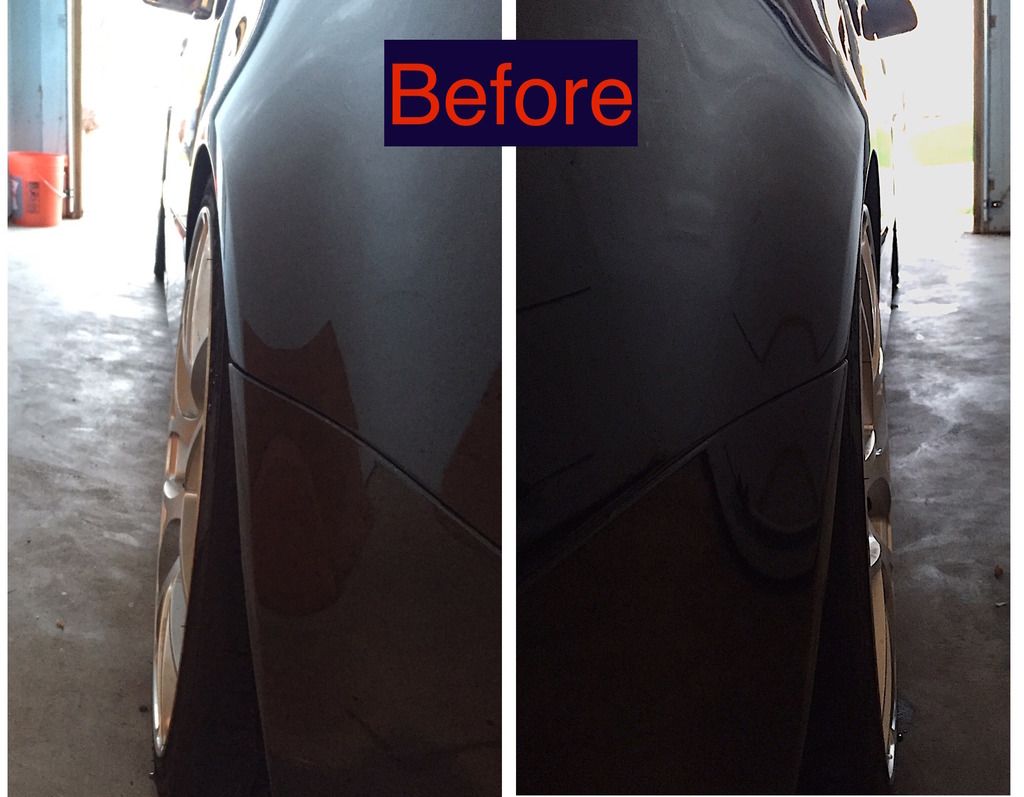
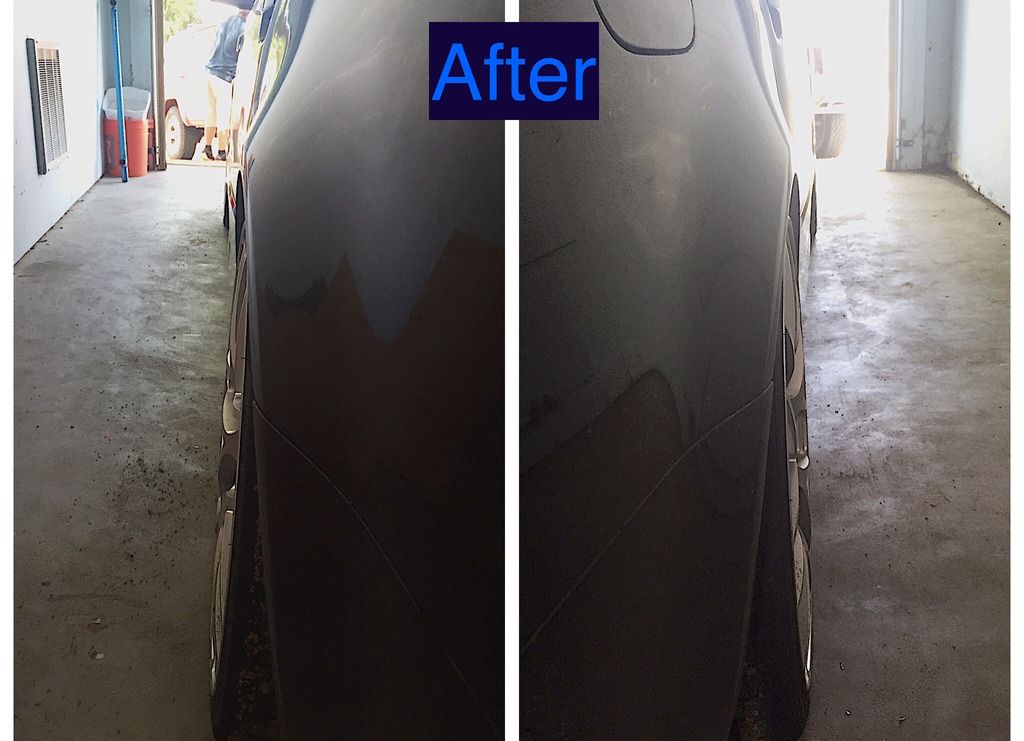
Some of you may notice this after lowering your car and it bugged me for the longest time. The difference in wheel gap/offset is entirely due to the alignment of the subframe. Now a standard wheel alignment won't fix this, and most shops don't even want to touch the subframes. The good news is that aligning the car's subframes is not a very difficult project and can be done in under 2 hours. So for those of you that have uneven wheel offsets and want to know how to realign your subframes, you stumbled across the right thread! lets get started!
First lets learn the location of the bolts that will need to be loosened.

The rear subframe bolts are easy to find because they have big washers that look like saucers.
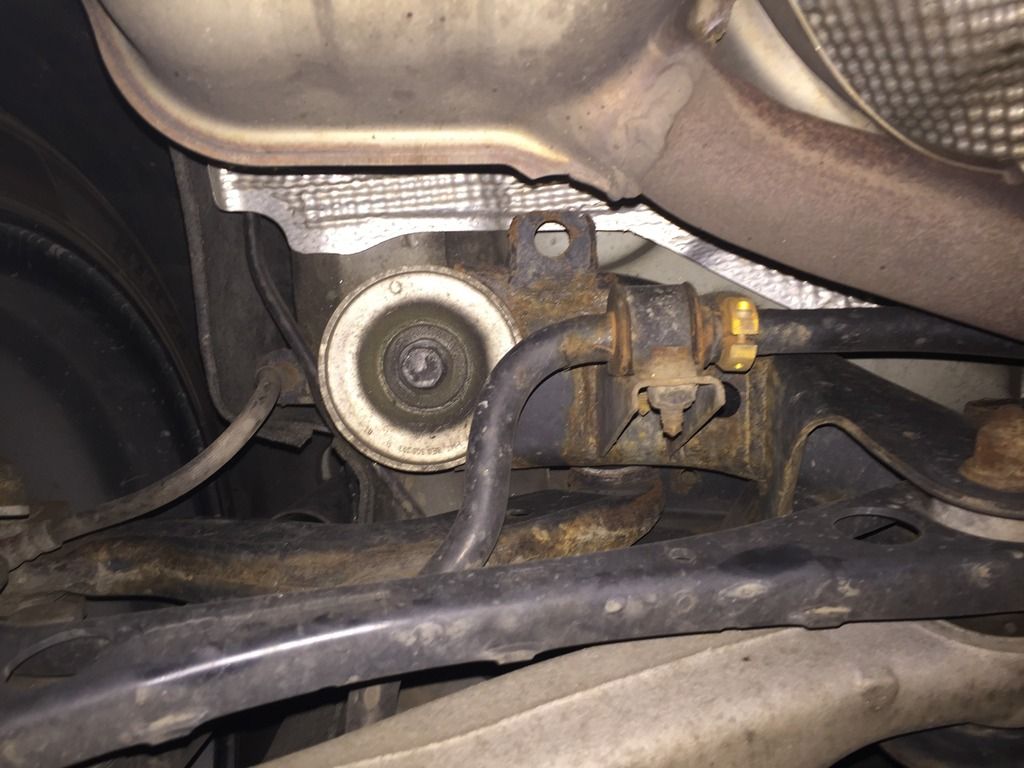
The fronts don't have the big washers, but if you follow the subframe to each corner you can find the bolts (they're 18mm, same as the rear). On the front of the front subframe you'll want to loosen the 18mm subframe bolt on each side and also the two bolts that hold the motor mount.
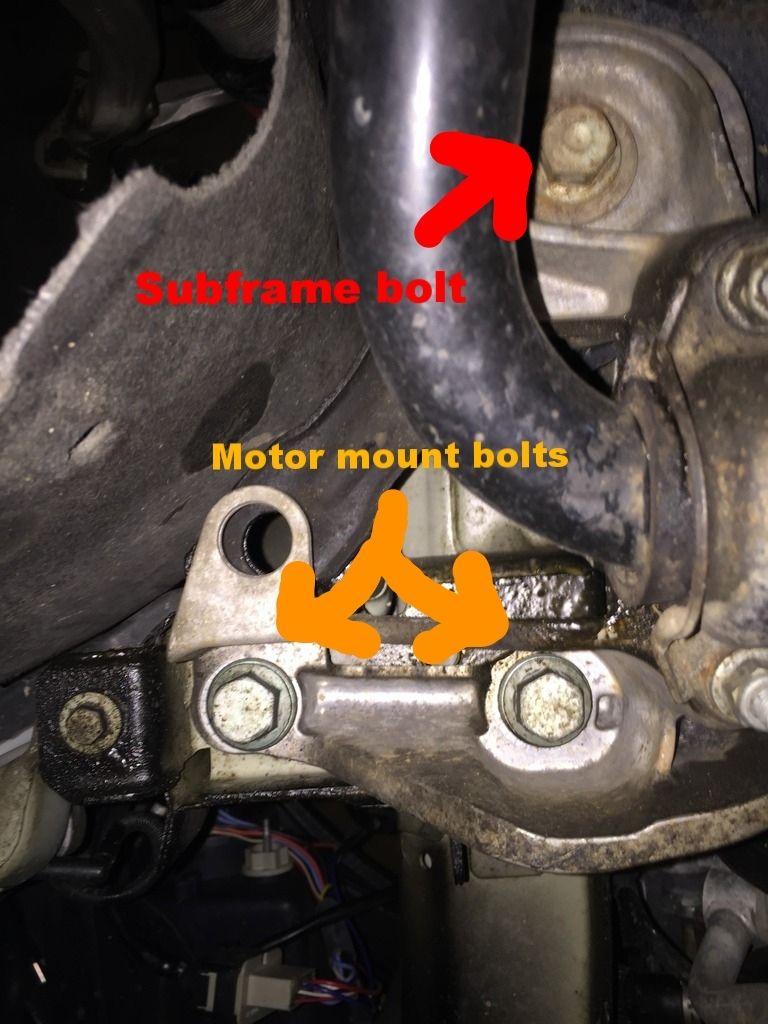
On the rear of the front subframe you'll loosen just the 18mm subframe bolts, not the bolts for the transmission crossmember.
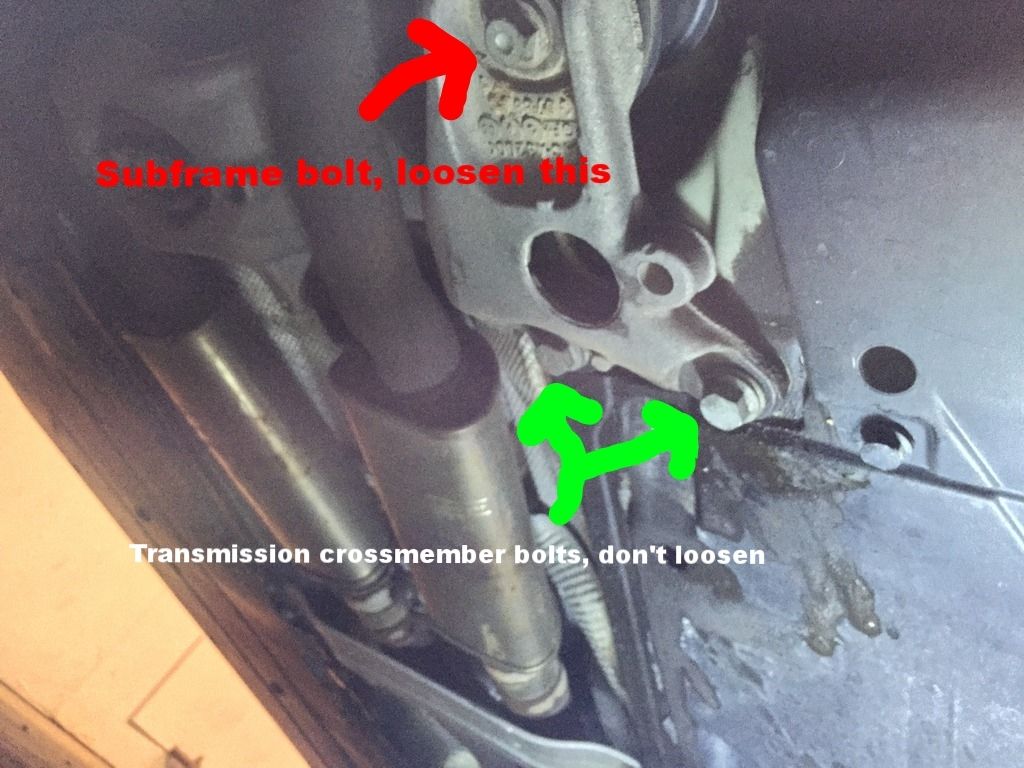
So now we know where everything is, lets get these sloppy subframes aligned.
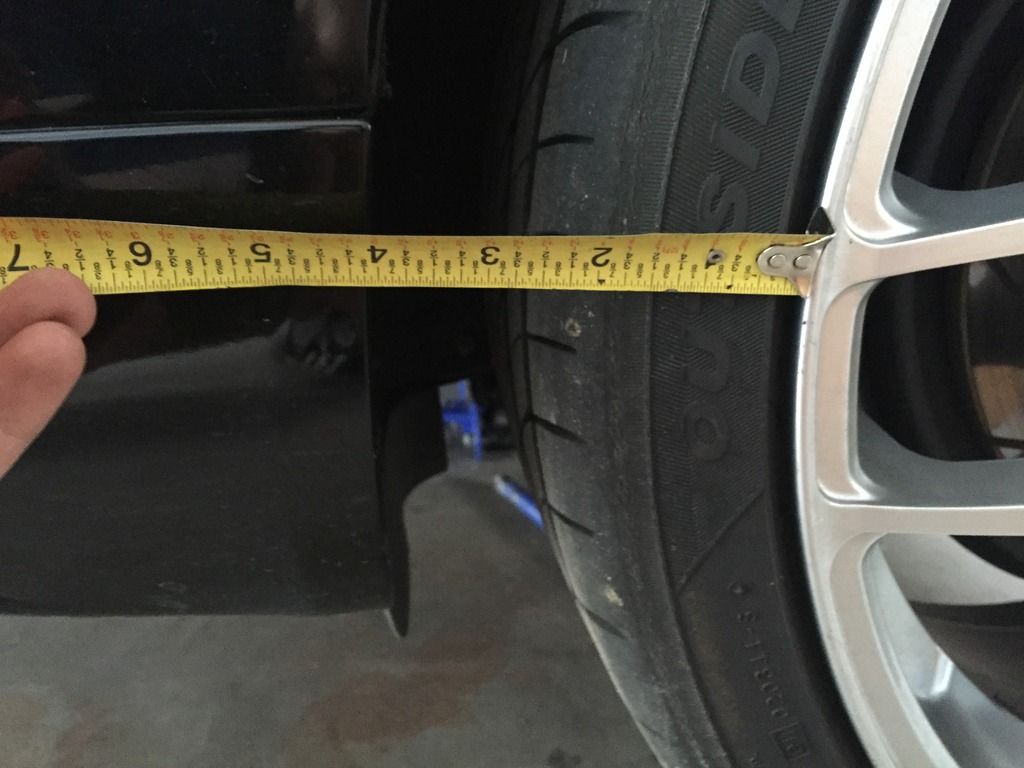
Get the car up on jack stands. You don't need to have all 4 wheels off the ground, you can do the front and rear separately, but please use jack stands! Going underneath the car with just a jack holding it would be a really dumb way to get smushed by a car. DON'T LOOSEN ANY BOLTS UNTIL YOU TAKE YOUR MEASUREMENTS AND WRITE THEM DOWN! Keep all 4 wheels on the car while you perform the alignment. We will be needing the wheels on the car to take the measurements. Now this is the important part, the more measurements the better. I took two measurements per wheel and that's really all you need, but if it makes you feel more comfortable you can take more. For the rear I measured the distance between the edge of the wheel and the fender closest to the front of the car.
And for the front I measured the distance between the edge of the wheel and fender closer to the back of the car.
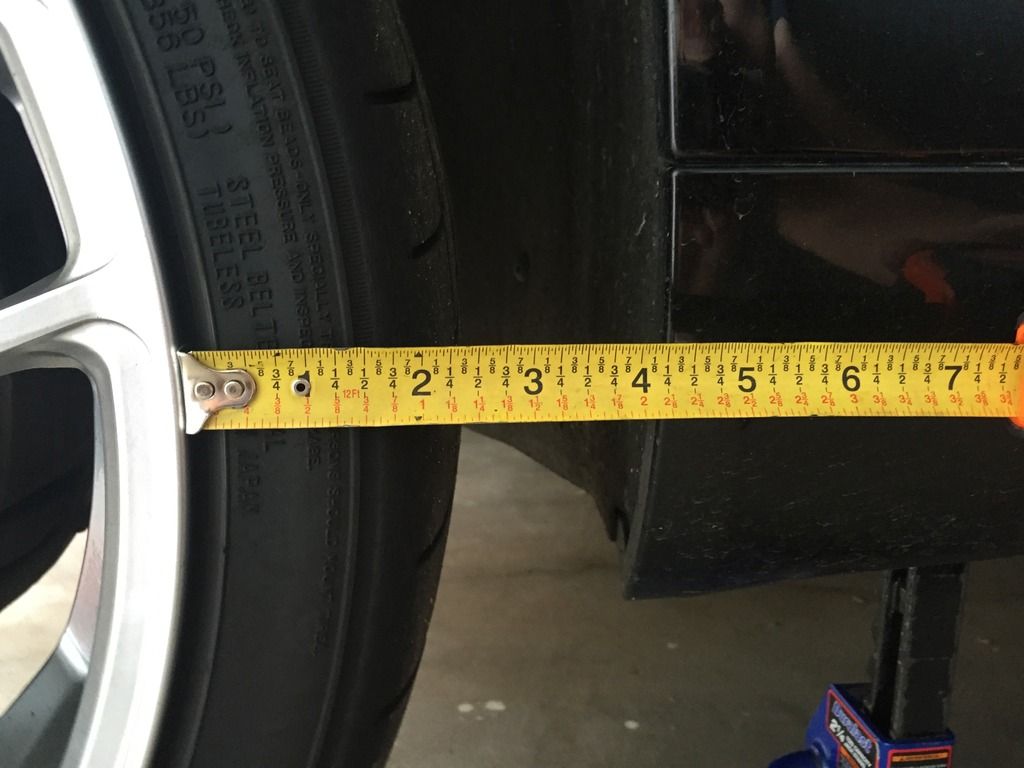
(both pictures taken on driver side).
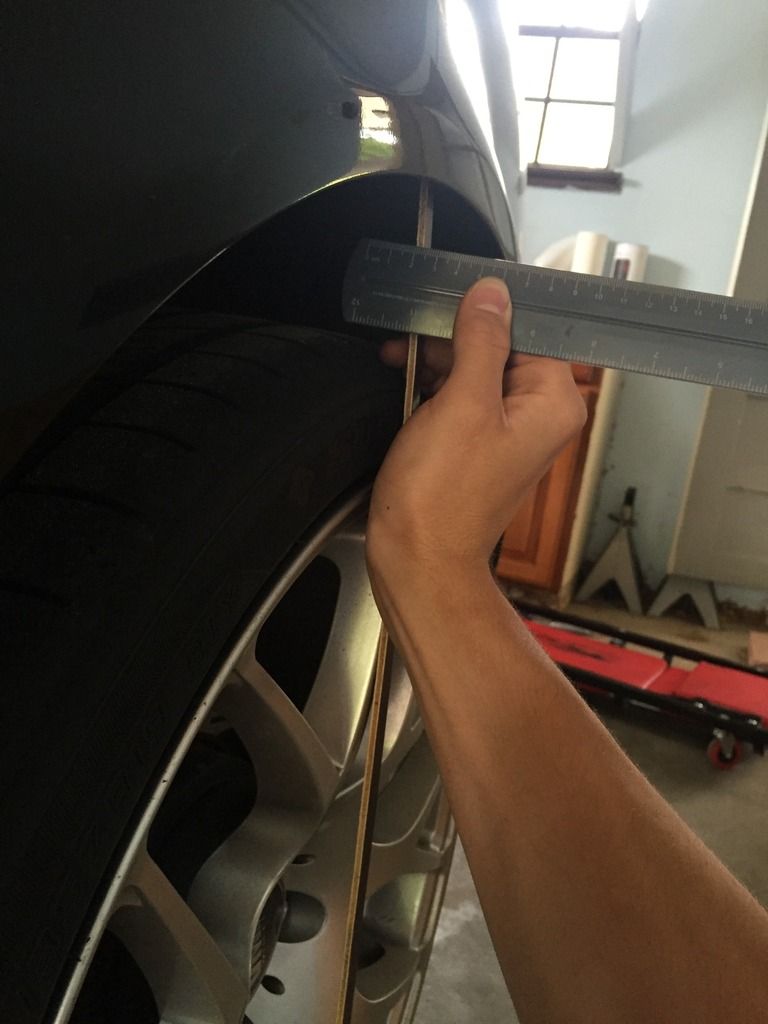
I then measured the gap between the wheel and the fender by lining a wooden stick up against the wheel and measuring the distance between the stick and the fender like so:
Also if you don't perform this measurement with the wheel in the same position on both sides, you will get an inaccurate measurement:
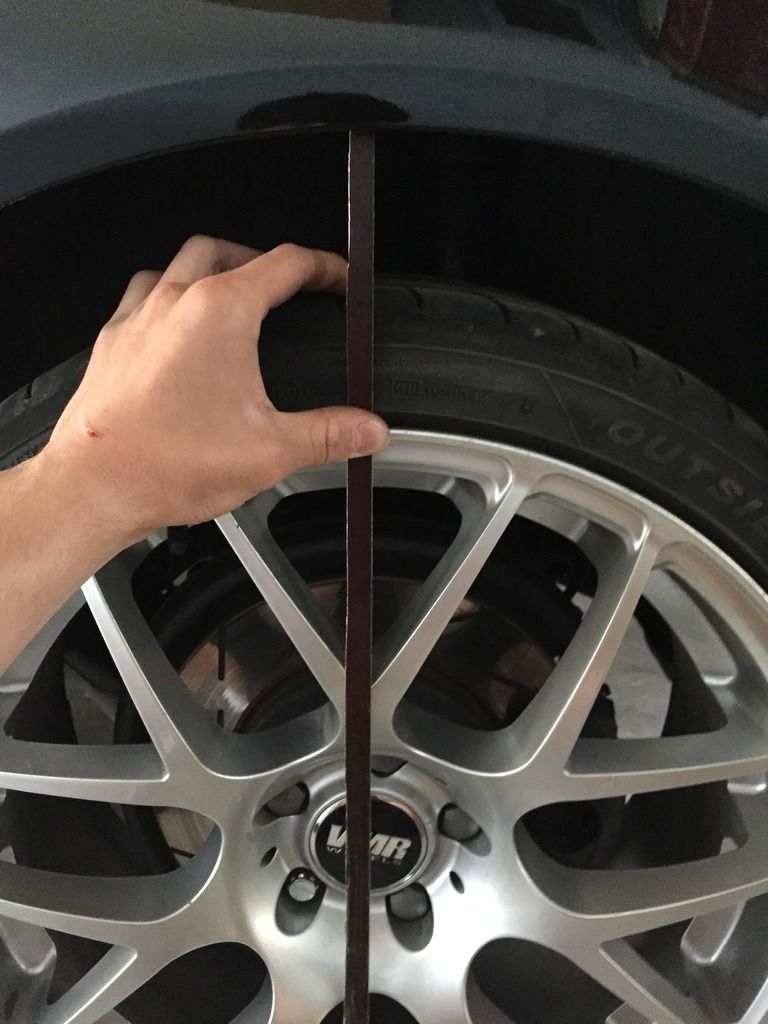
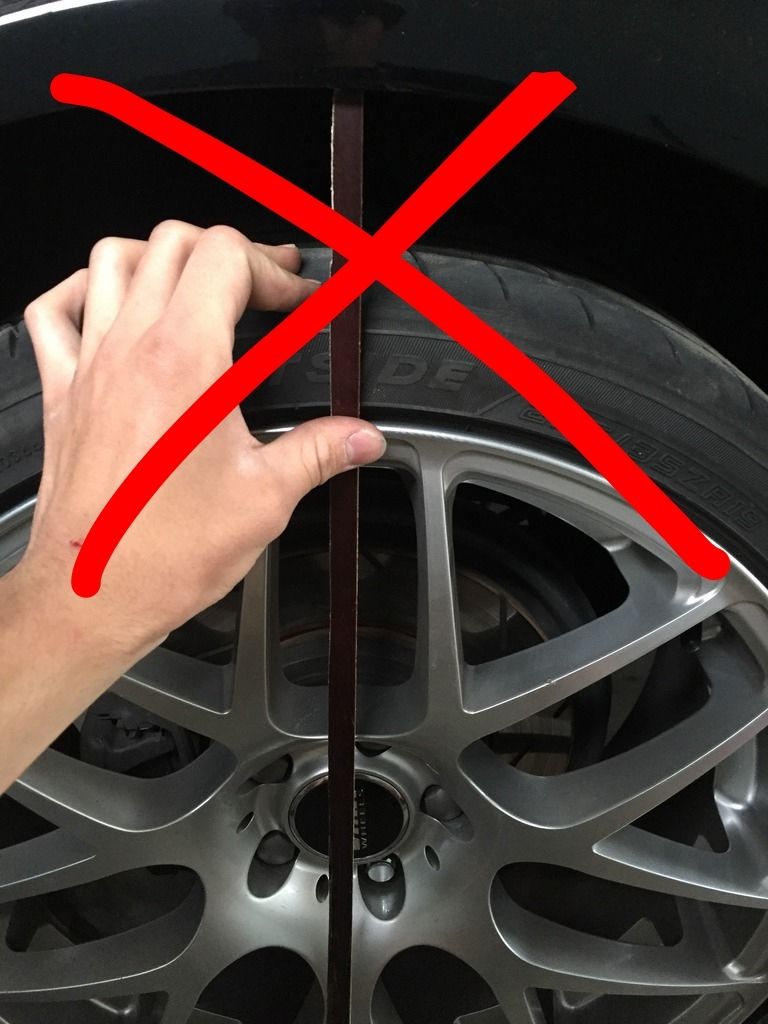
Take all these measurements with the car in the air and the wheels off the ground.
Starting with the rear subframe
Use that handy dandy jack to place securely under your subframe. loosen all 4 subframe bolts. Here's a very important step: you only need to loosen these bolts less than half an inch! This way the subframe can shift around but it is still being held to the car. Lower the jack so that the subframe can now be shifted. How you shift the subframe is up to you, but what I did was put my feet on one wheel and give it some strong pushes. If you're paying close attention you can feel the subframe move. Then you pretty much play guess and check. Push one wheel, take some measurements, maybe go around to the other side, push on that wheel. Be really patient because this part can take a while. By shifting the subframe you can not only correct the wheel offsets, but also correct the position of the wheels from a side view. That measurement you took from the edge of the side of the wheel to the fender can be adjusted (just make sure it ends up being the same on both sides). Some Audi's have the back wheels sitting really far forward and you can actually kick the subframe back to make the wheels sit more centered in the wheel well. Once you've played around and have the subframe centered, make sure that AFTER the subframe is jacked back up and tightened down a bit that all the measurements are the same on both sides. I noticed when doing mine that I had all the measurements set but when I snugged the subframe back up to the car the numbers changed a bit. This is why you have to be really patient with this part. When the subframe is sitting pretty snug up against the car, you want your offset measurements and side of wheel to fender measurements to be exactly the same on both sides. Once you have accomplished this the bolts can be torqued to spec. Here's another thing to think about: these are stretch bolts so they are recommended to be replaced every time you loosen them. I replaced my rear bolts a while ago, but have probably loosened and retightened them 15 times since then and have not had a problem. My front ones have not been replaced at all and I have zero problems. So proceed at your own risk and do not hold me responsible for any mistake you make by not taking caution with these bolts. Now that we understand that, the torque specs for the rear subframe bolts are 81 Ft-lbs + a 1/4 turn. Hurray! The rear subframe is done! (The front is a lot easier)
And now the front subframe
The front subframe actually has alignment holes, but I still took measurements. Again put the jack under your subframe and loosen all 8 bolts shown above (only loosen them a 1/2"). Now lower the jack so the subframe can shift around. You'll want a tool to stick in the alignment holes and I found this cheap harbor freight tool to work perfectly: http://www.harborfreight.com/11-3-4-...ator-1740.html (you'll want 2 of these). I used jack stands to hold them both in the alignment holes at the same time like so:
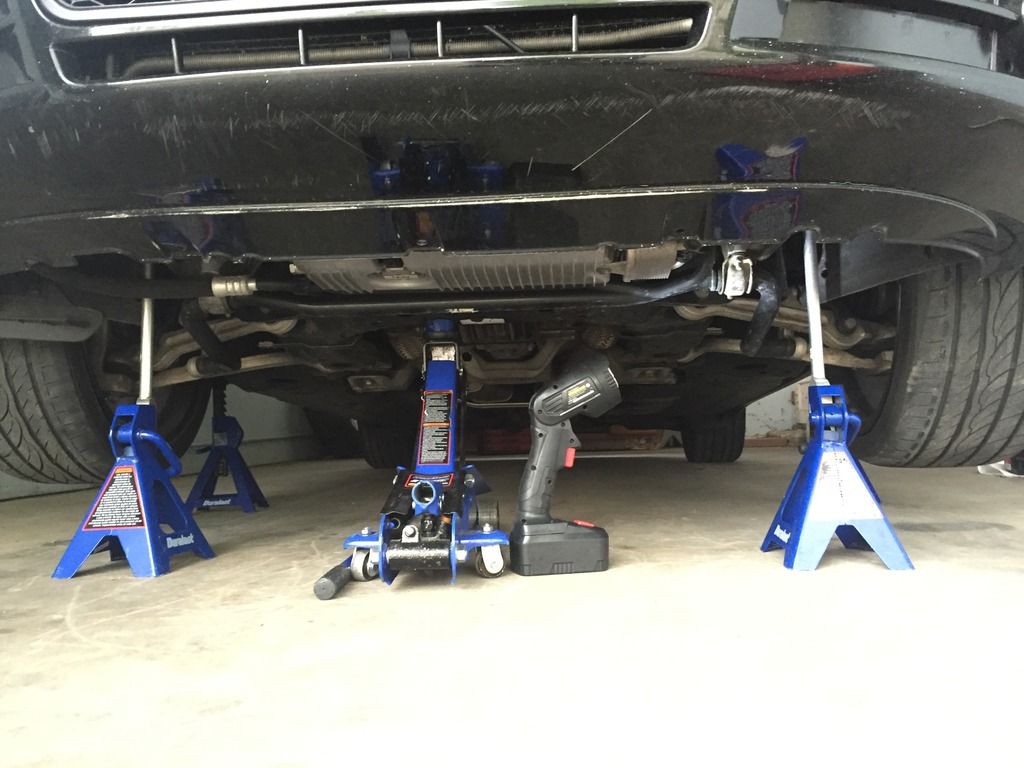
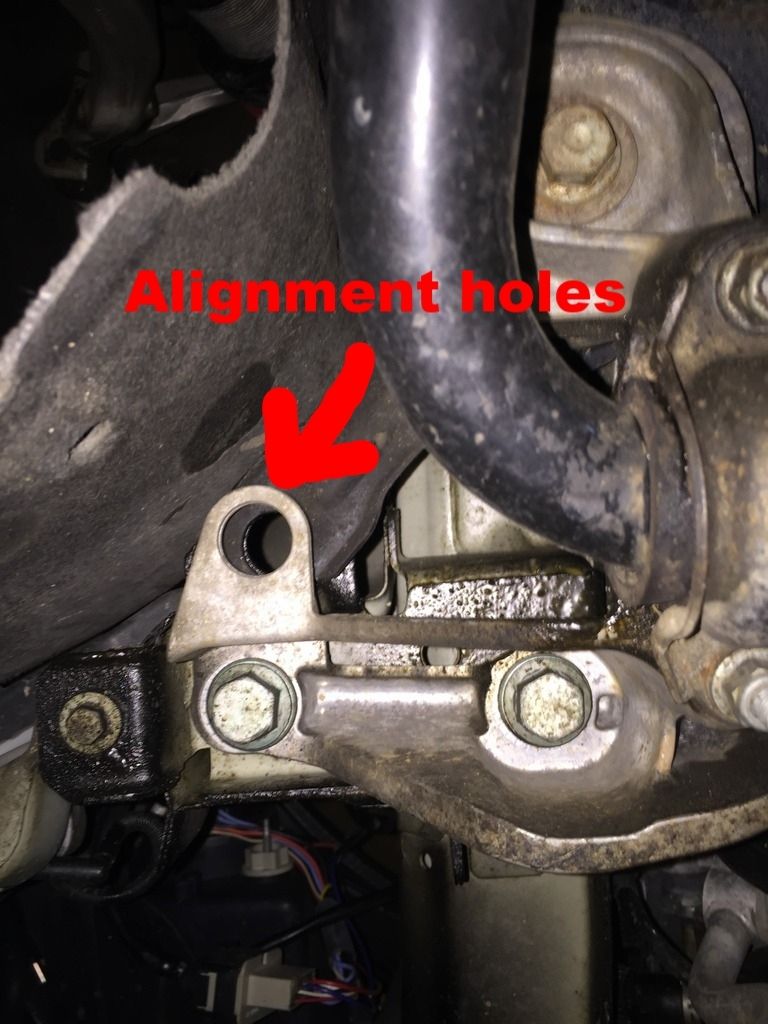
After aligning it check your measurements and see how it came out. Also make sure the steering wheel is still straight when measuring the side of the wheel to fender. It took me forever to figure out why those measurements were different on both sides and that was why lol. Once you're happy with the measurements tighten the subframe back to the car and check again to make sure the measurements are still the same. The torque specs for the 4 18mm subframe bolts (red bolts in the first picture) are 81 Ft-lbs + a 1/4 turn (same as the rear). The torque specs for the motor mount bolts (orange ones in the first picture) are 55 Ft-lbs.
For reference these are the measurements I had
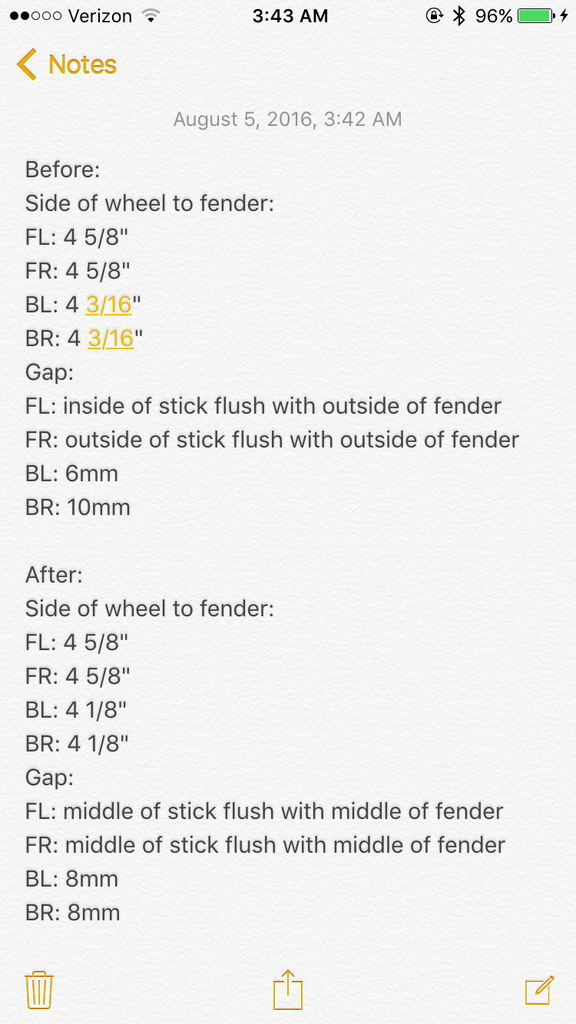
Now lower your car back to the ground and congratulate yourself because you are all done! It is recommended that you get a wheel alignment after messing with any suspension components, but I didn't get a wheel alignment done afterward and my car drives fine. I may be going through my tires faster, but it isn't necessary to get a wheel alignment done right away.
I hope this DIY helps for anyone interested in performing this themselves and like always, please ask me any questions you have!


 Reply With Quote
 "Boudica"
 Do you notice a difference in handling having such a wide tire? Some people say it doesn't help.
 JHM SC'ed / 08 Evolution X (full bolt on) / 05 M3 Dinan SC'ed / 05 LGT w/ Hybrid Turbo ......and many others!


Bookmarks