Audizine - An Automotive Enthusiast Community

Page 1 of 3 123 LastLast
Results 1 to 40 of 119
  1. #1
    Veteran Member Four Rings DRAKLORE's Avatar
    Join Date
    Oct 14 2009
    AZ Member #
    49253
    My Garage
    '81 Mk1 VW CADDY/2012 Honda Ruckus
    Location
    Okinawa Japan

    Boost Manager Plus & Water/Meth (Wiring Walk Through)

    Guest-only advertisement. Register or Log In now!
    For those of you who are interested, or have purchased a Eurodyne Boost Manager Plus and are curious on how to do a clean install on a B7 A4...

    Please Note: This is a Overview on the wiring and routing involved, And I Nor Eurodyne Is responsible for YOU F*cking up YOUR install. I am available Via PM or Email and will offer support for those who need it, along with RAI, and Eurodyne.*
    *
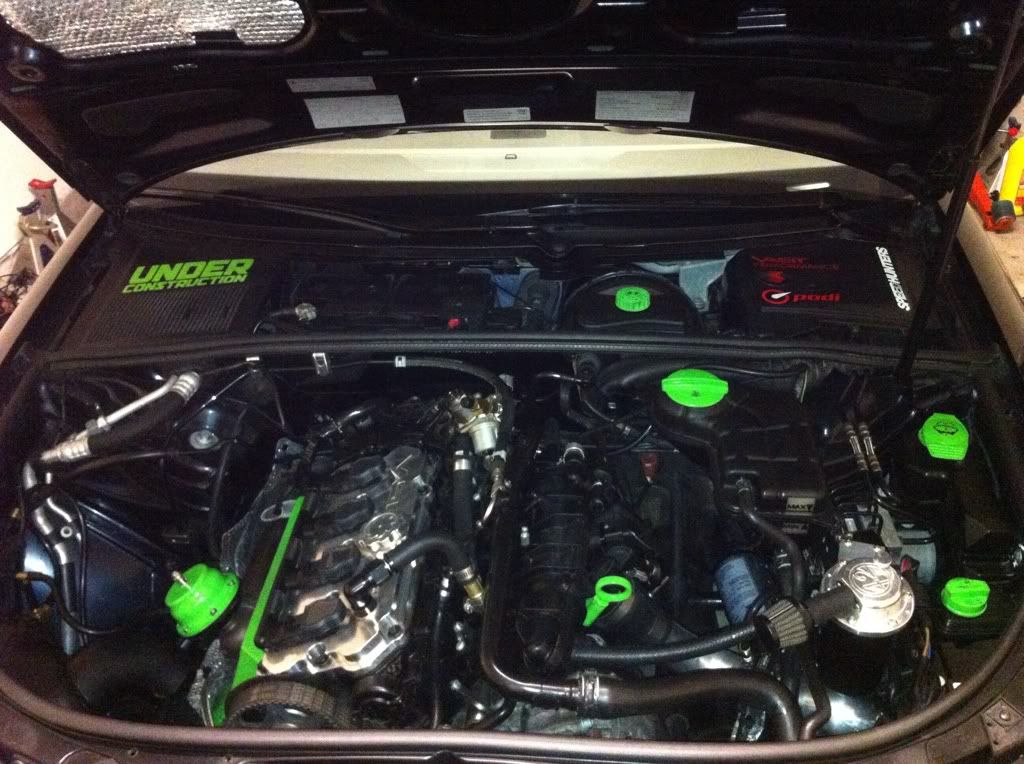
    NOTE: This install is on a stripped And pre prepped BAT B7 A4...

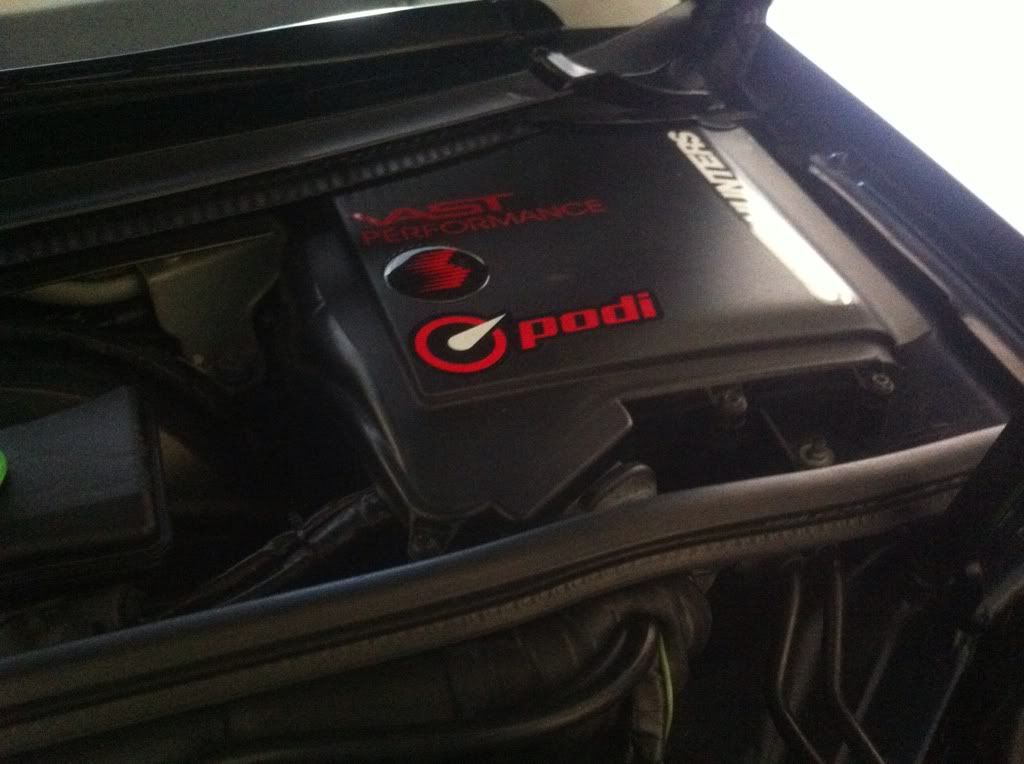
    When you get the Kit It should look something like this:
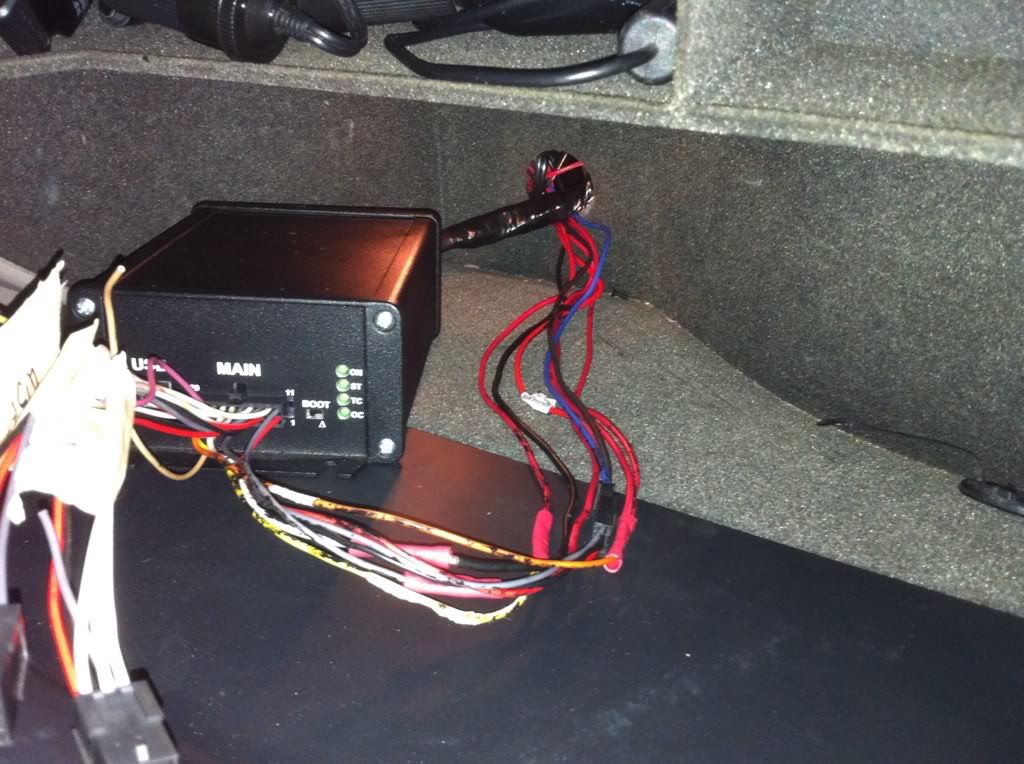
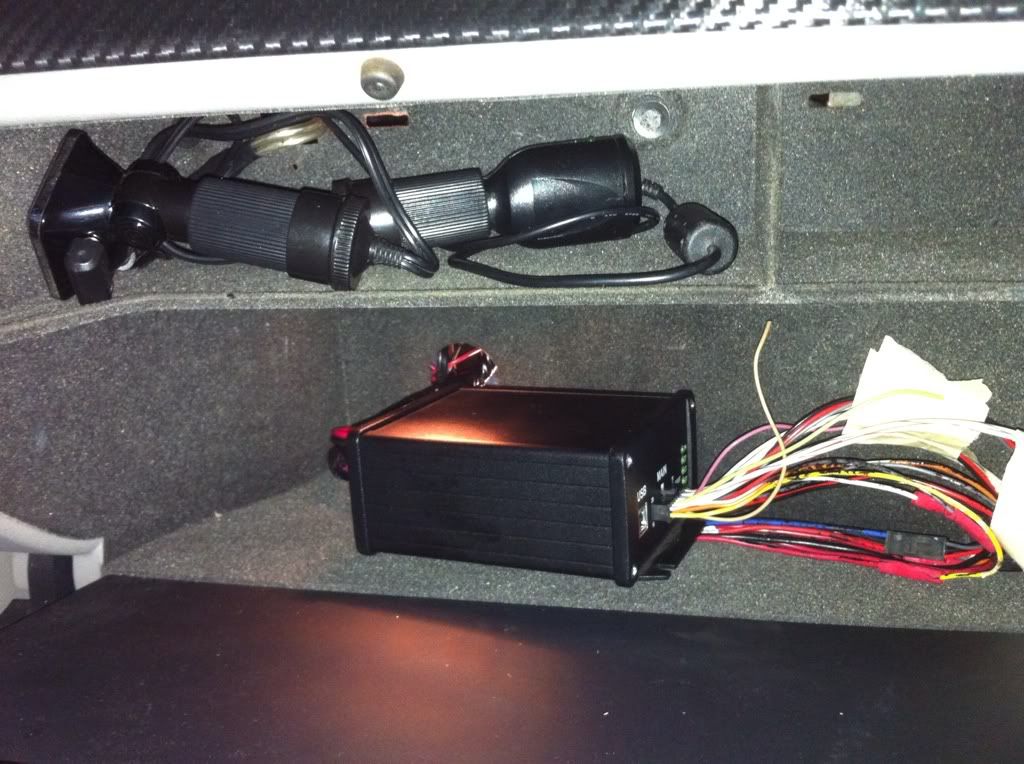
    (Controller box+6Bar map)
    Mine didn't have the "Eurodyne" decal.. But I'm not going to sweat it!
    (AquaMist 200 PSI pump+Devils Own 10 nozzle+ Tubing+ 2 quick disconnect fittings+nozzle seat)

    This is at the minimum what you need to begin setup.*
    Please keep
    In mind I had an existing methanol setup (snow stage2 w/220 psi pump)*
    - you will need to weld in a nozzle bung, or if you choose to do direct manifold injection, placing the nozzle(s) after the throttle body, you will need to buy and install a solenoid to prevent W/M syphoning.

    Suggested Additional Items-
    16 gauge wire-3 different colored*
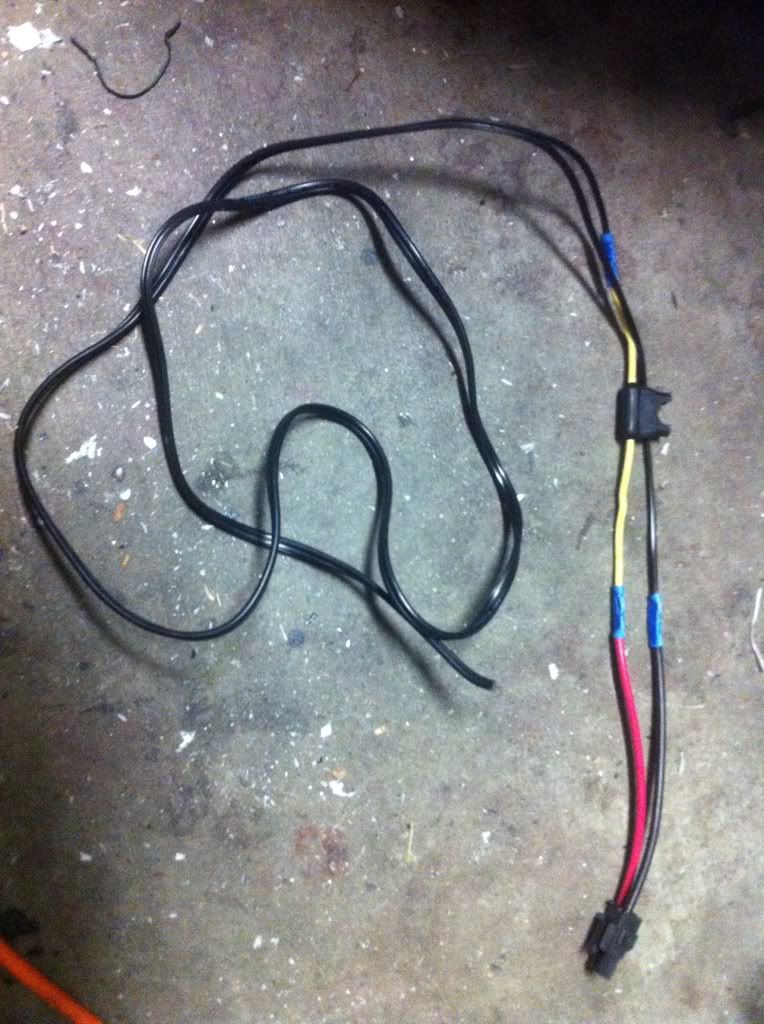
    Old power cord
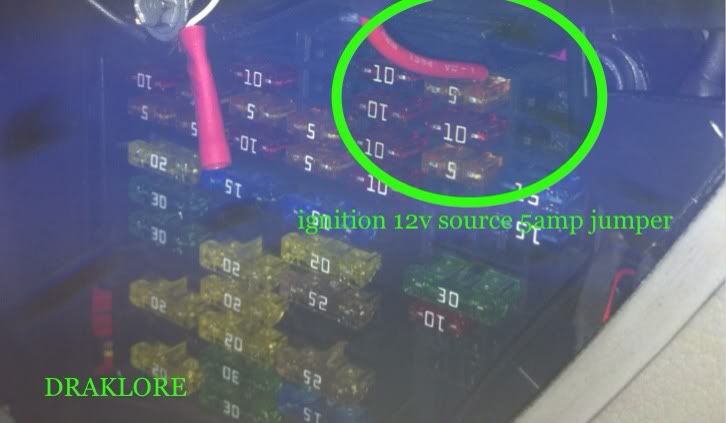
    Fuse jumper and 30 amp fuse
    Butt connectors/solder
    Electrical tape
    Cold activated Electrical wrapping
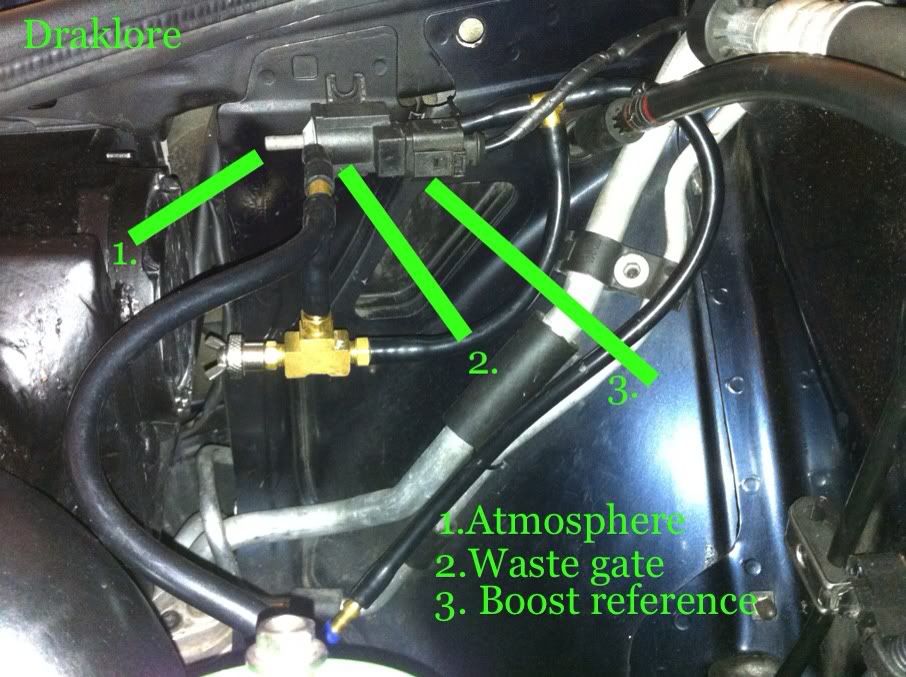
    Spare N80 valve
    Dykes
    Vacuum tubing
    Boost tap (can use existing)
    *2X bolts M6X1.25X30mm
    Razor *blade
    Scotch Brite Electrical Splice connector
    And other misc tools... Screw drivers bit drivers and torx ect.

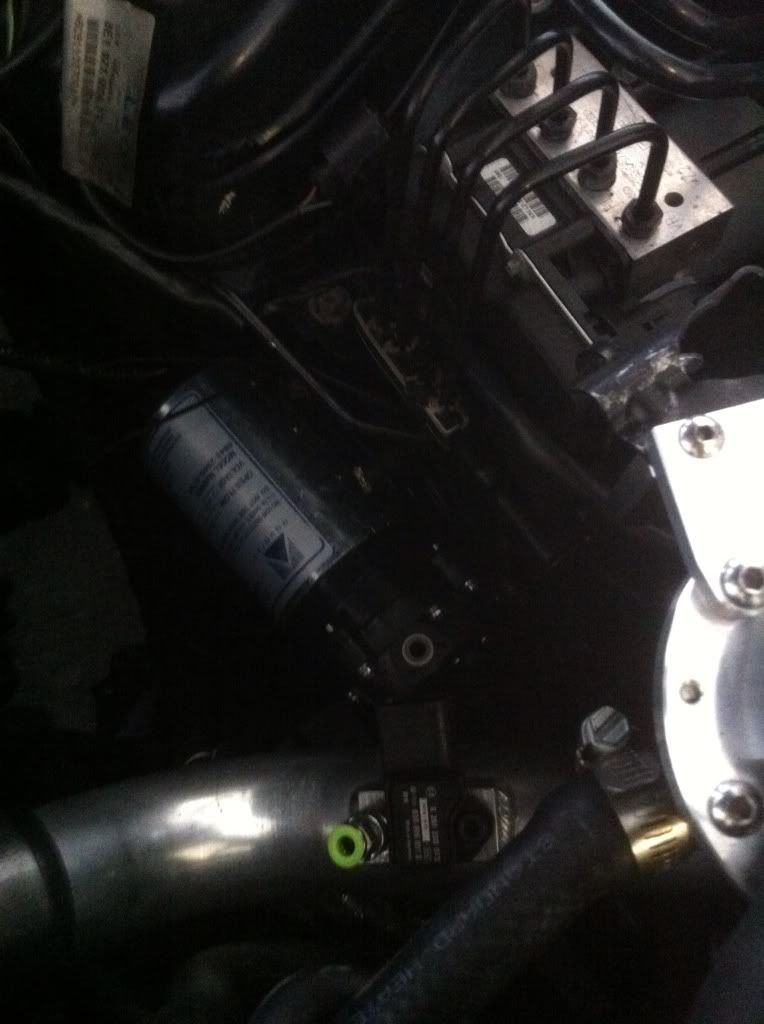
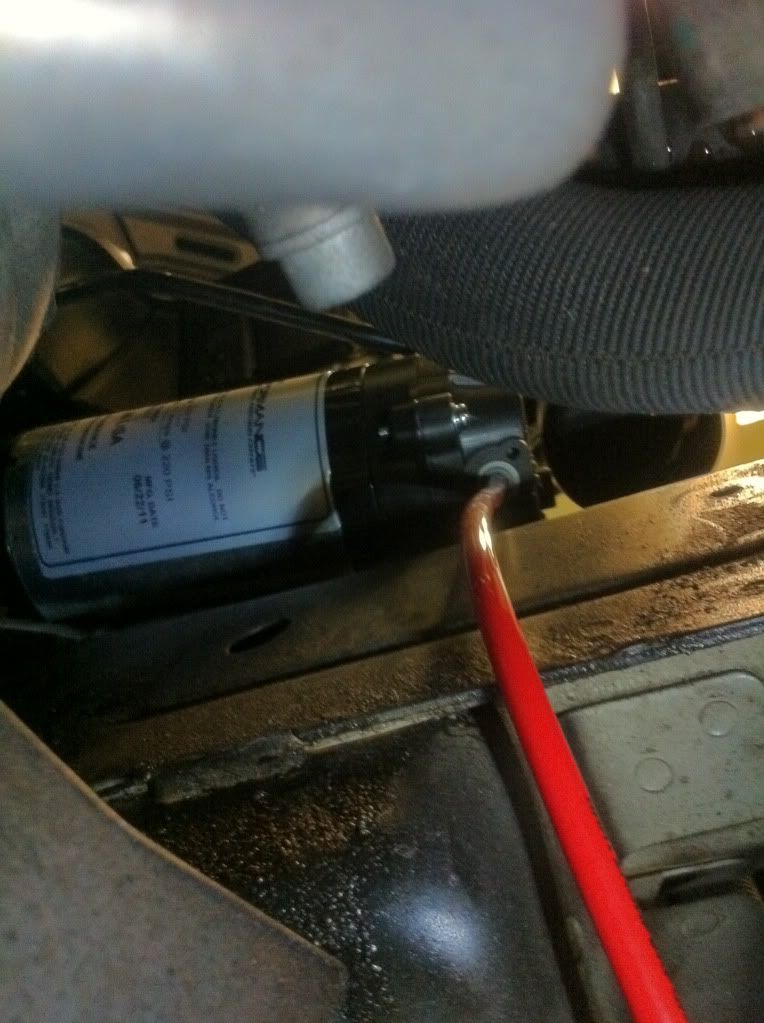
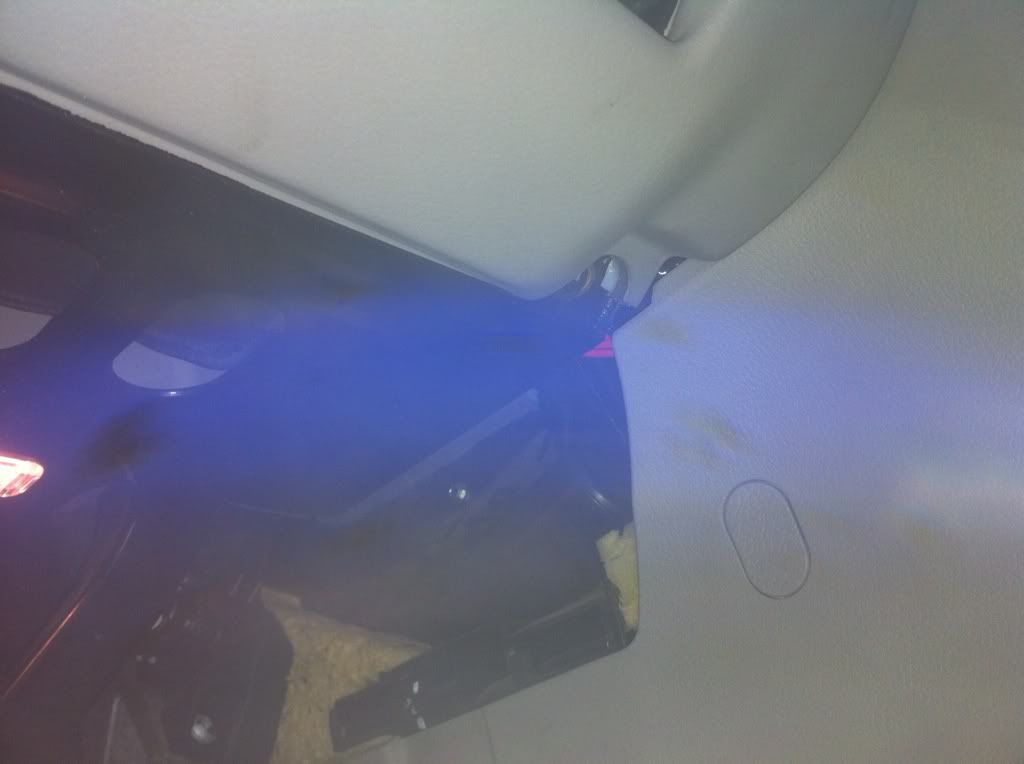
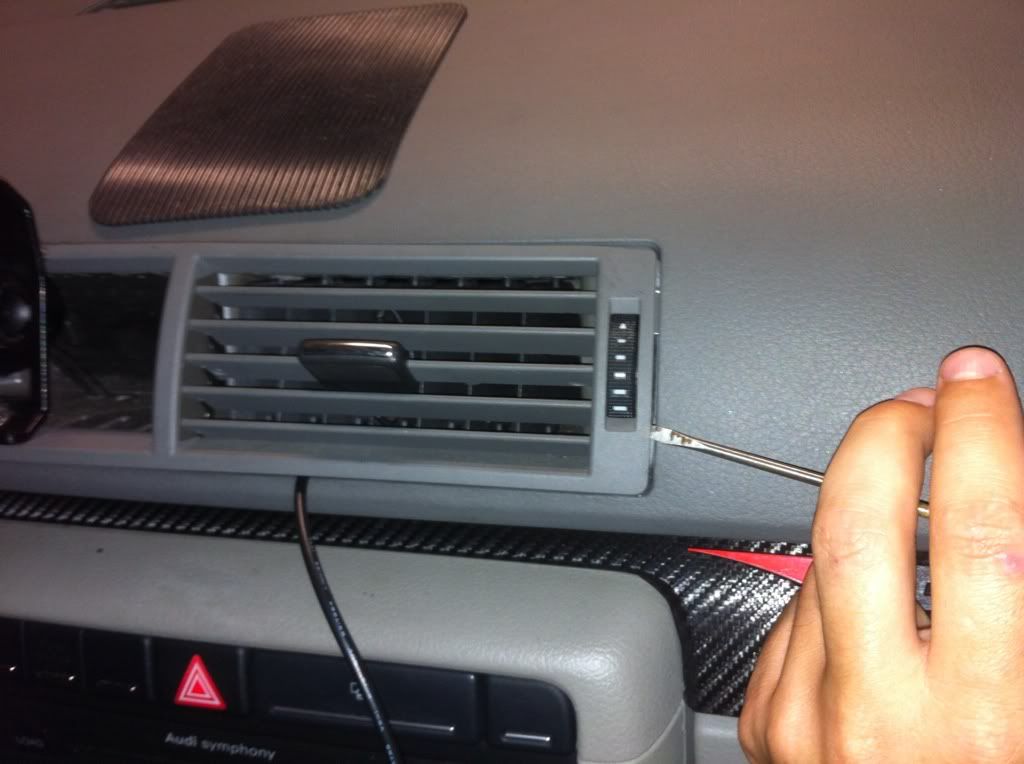
    1.First step for me was removing my existing methanol setup and re installing the pump and nozzle for the BMP. I am not going to cover getting the nozzle tap installed. But here's where mine is installed:

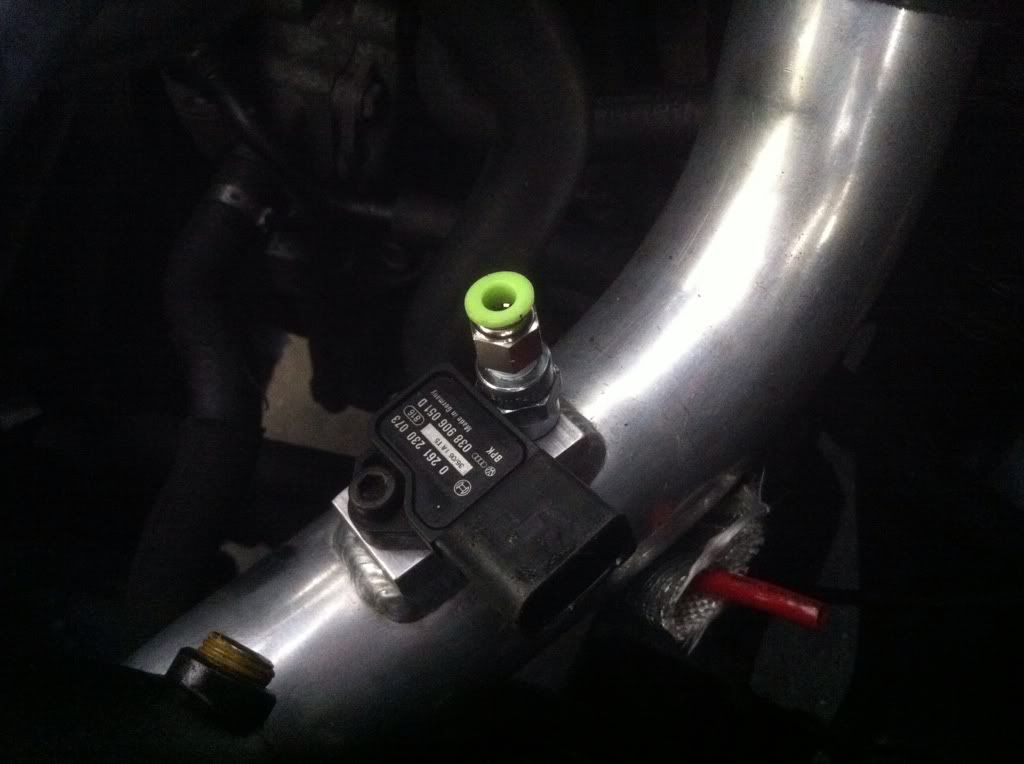
    (I'm using a snow performance 625 nozzle in place of the DO10, the difference is SP#6=14.28Gph@150psi vs DO10=14.14Gph@200psi -some modifications to the DO nozzle seat were needed to make the SP nozzle fit)
    I am also not going to cover solenoid install, or location. But if you choose to use a post Throttle body position, or multi port injection, than you will need to install a solenoid which the BMP is able to control.

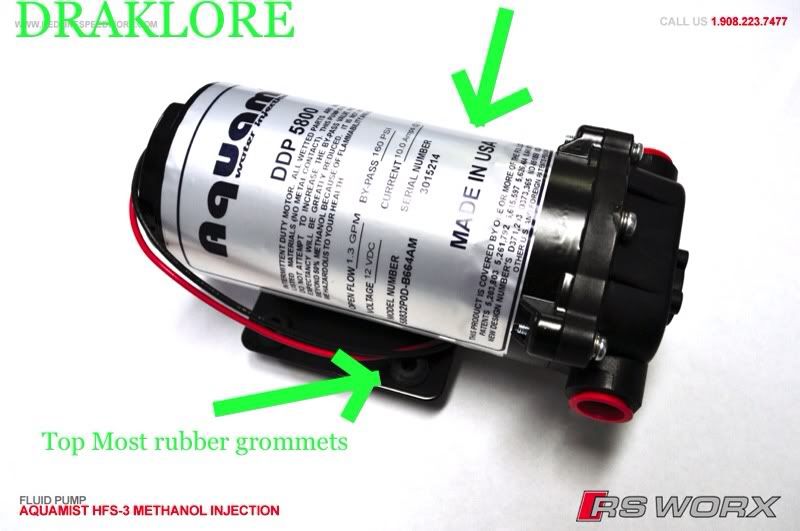
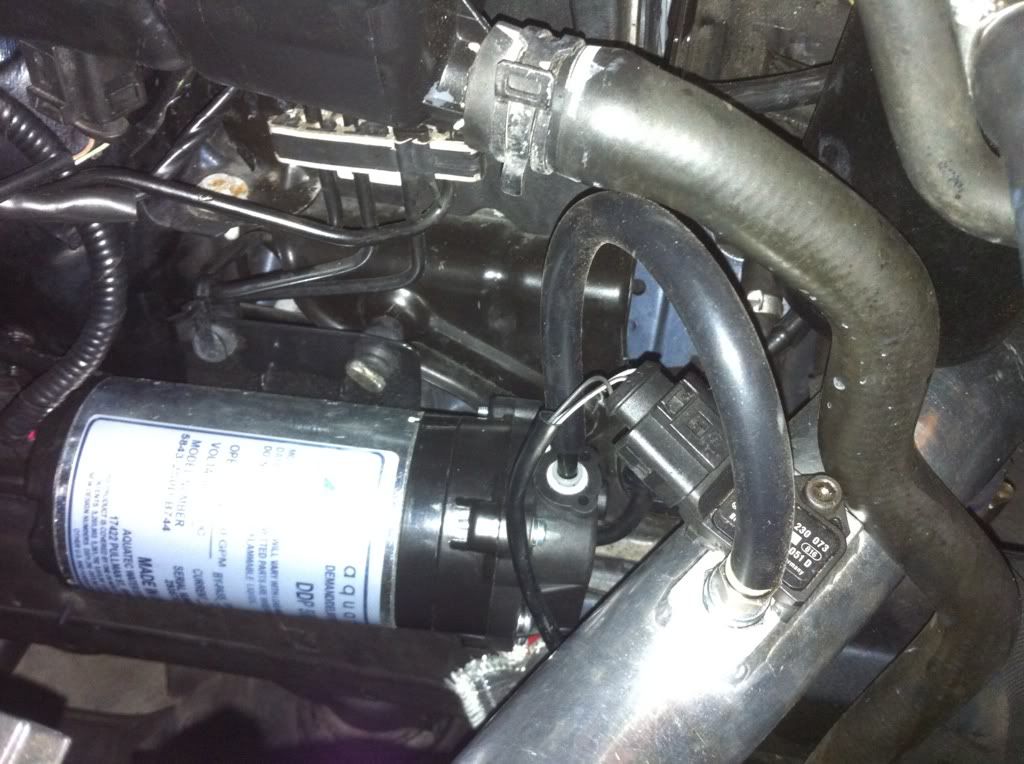
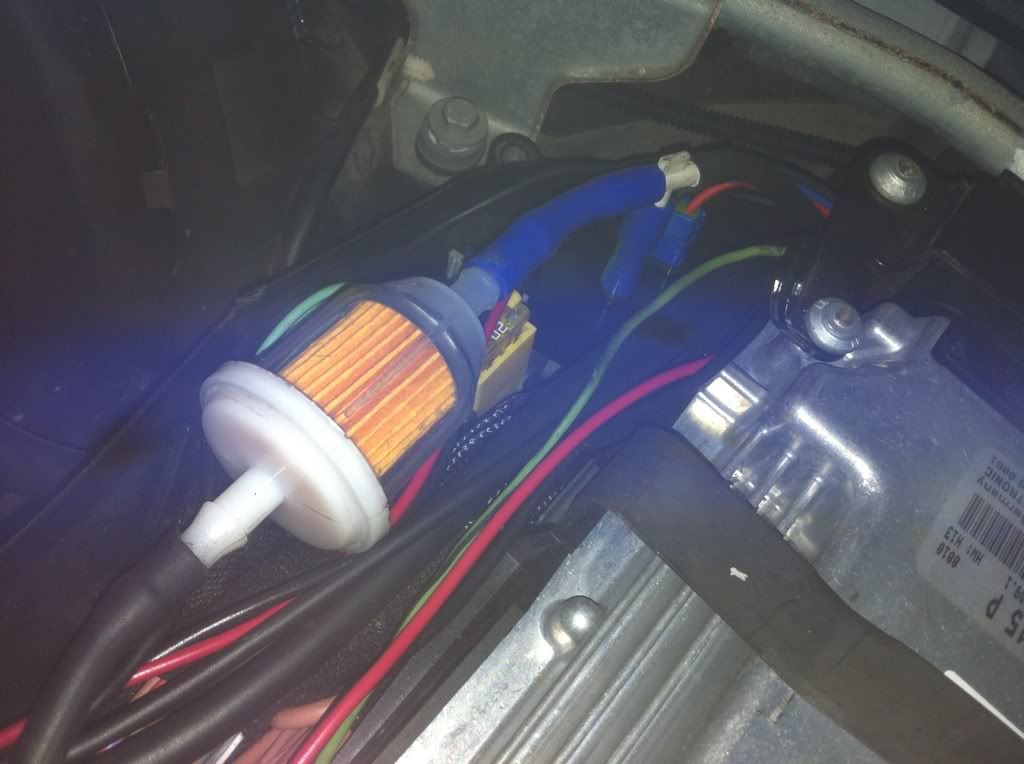
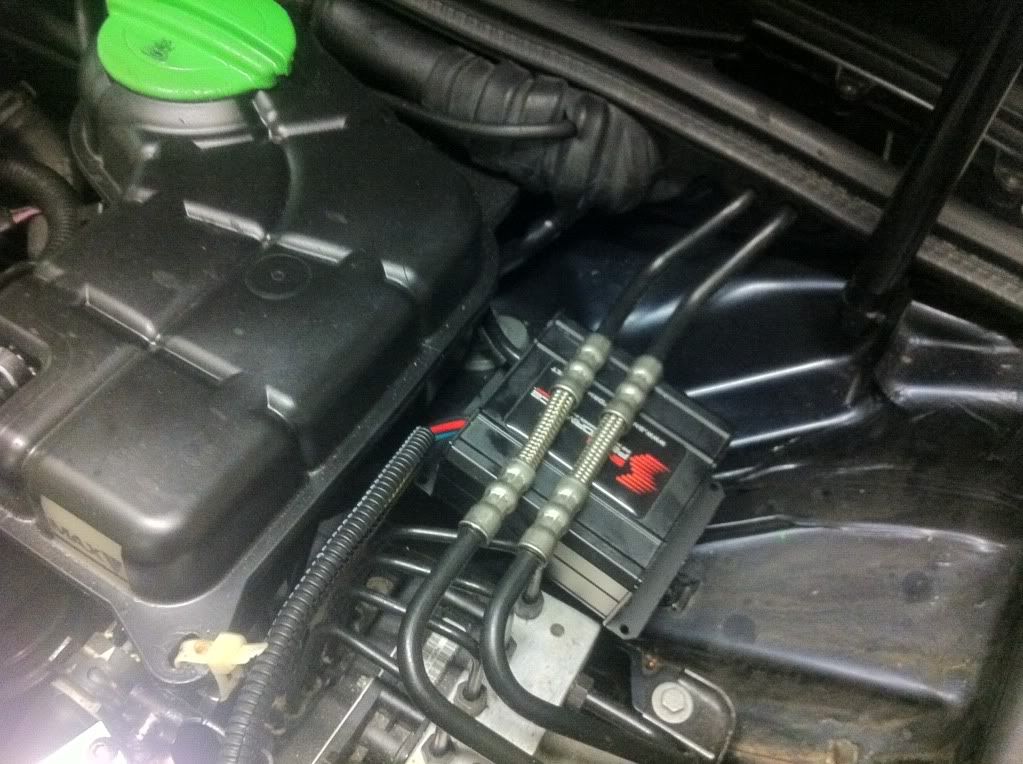
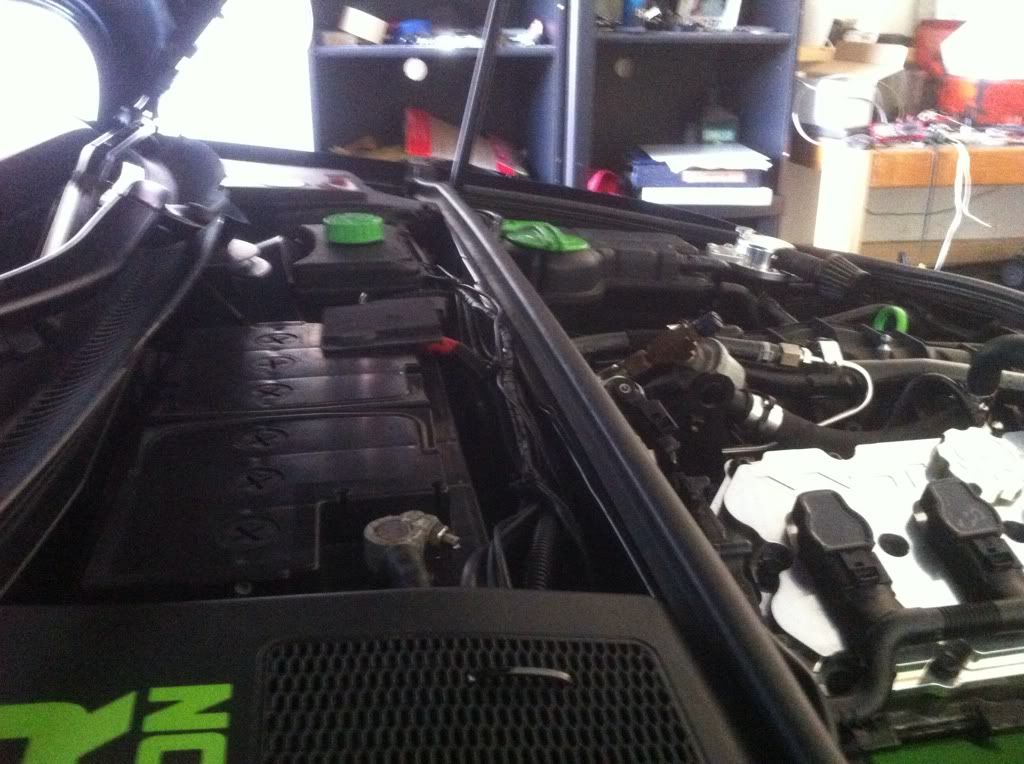
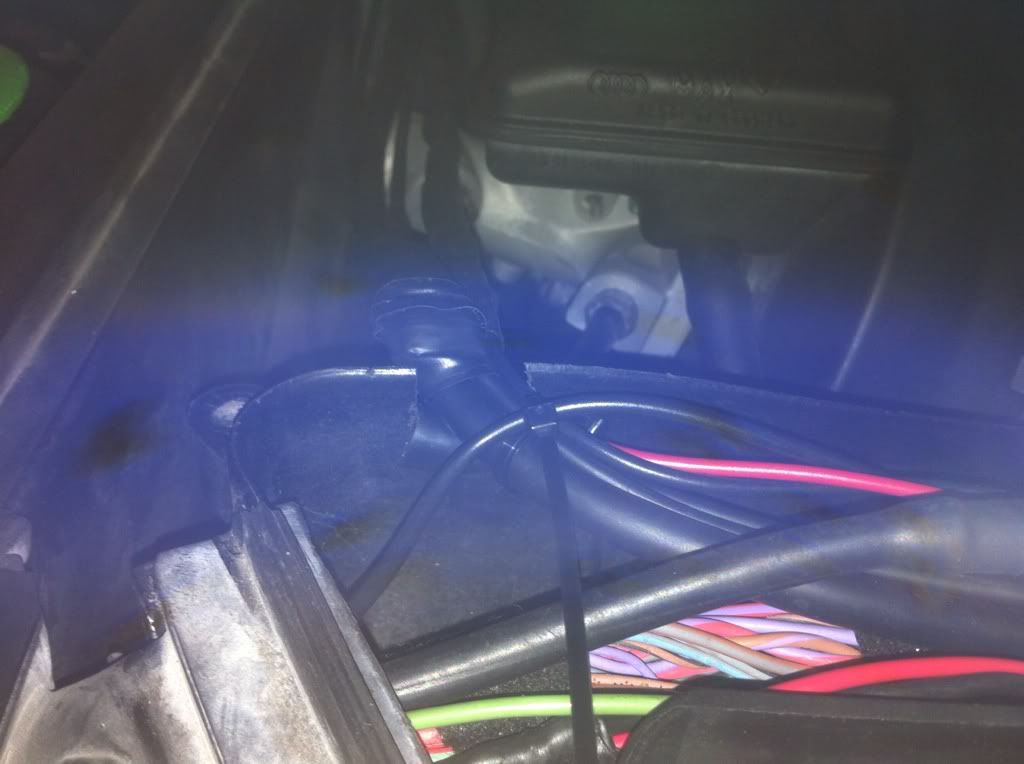
    2.so you got the nozzle in place, now you need to mount your pump, luckily Audi has conveniently put a bracket in the right spot with the right holes.*
    This is where the two M6X1.25 bolts come into place. Feeding the bolts through the RUBBER grommets, or feet on the pump mounting brackets top holes here:

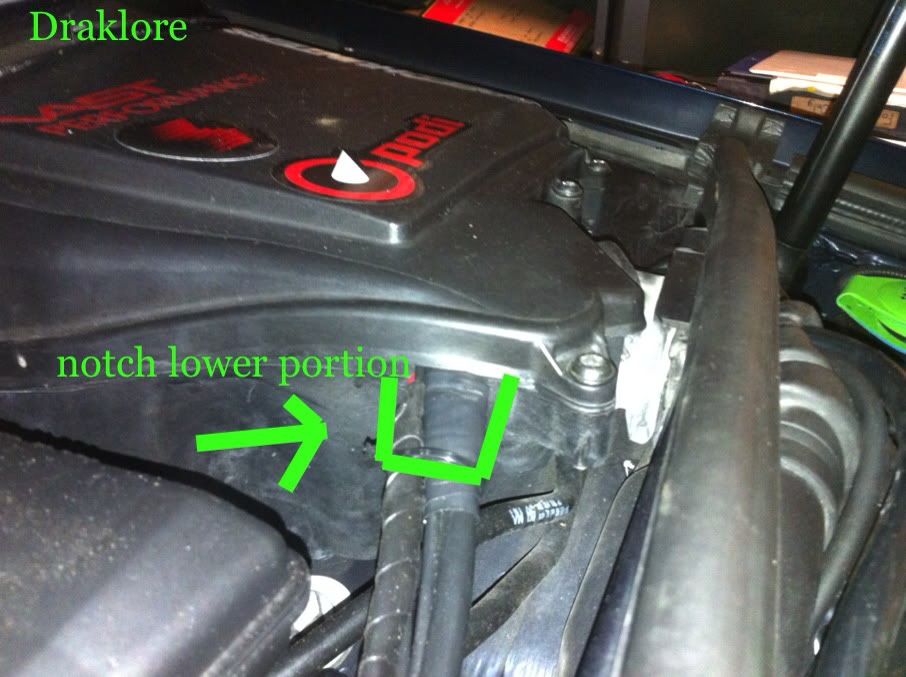
    You should be able *to line it up with one or more of these holes below the Coolant reservoir here:
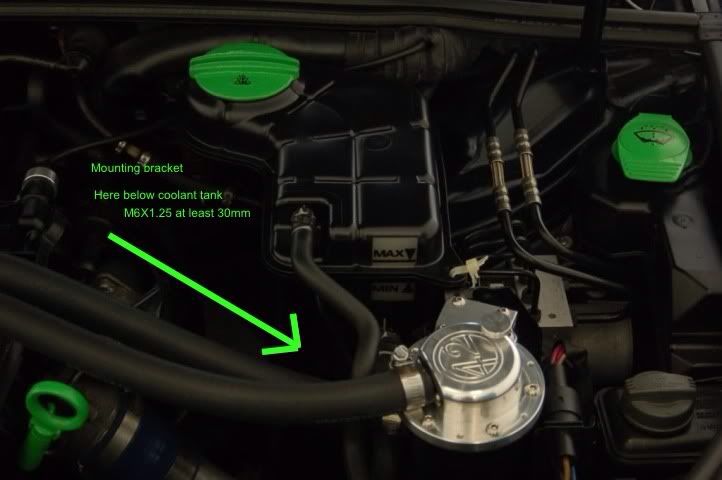
(see tubing pic for better hole picture)
    *For a mounting position like this:
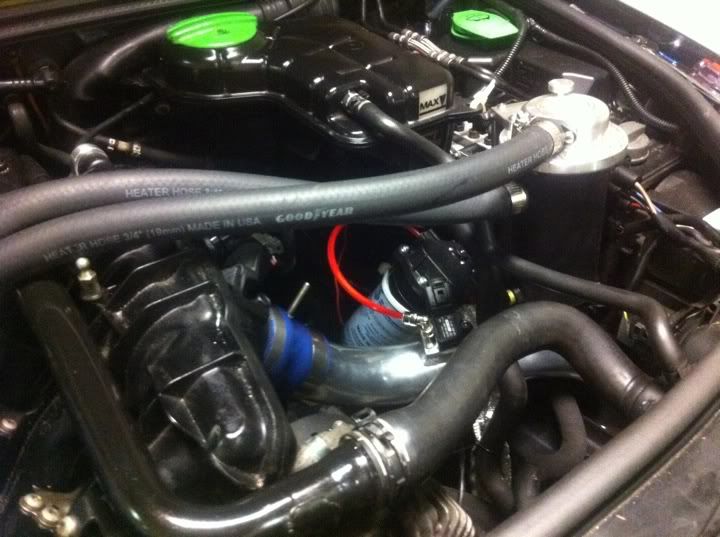
    Or like this:
    As you can see it may be ideal to use large zip ties to hold it tight. I did this to reduce vibrations and for added security ect....*
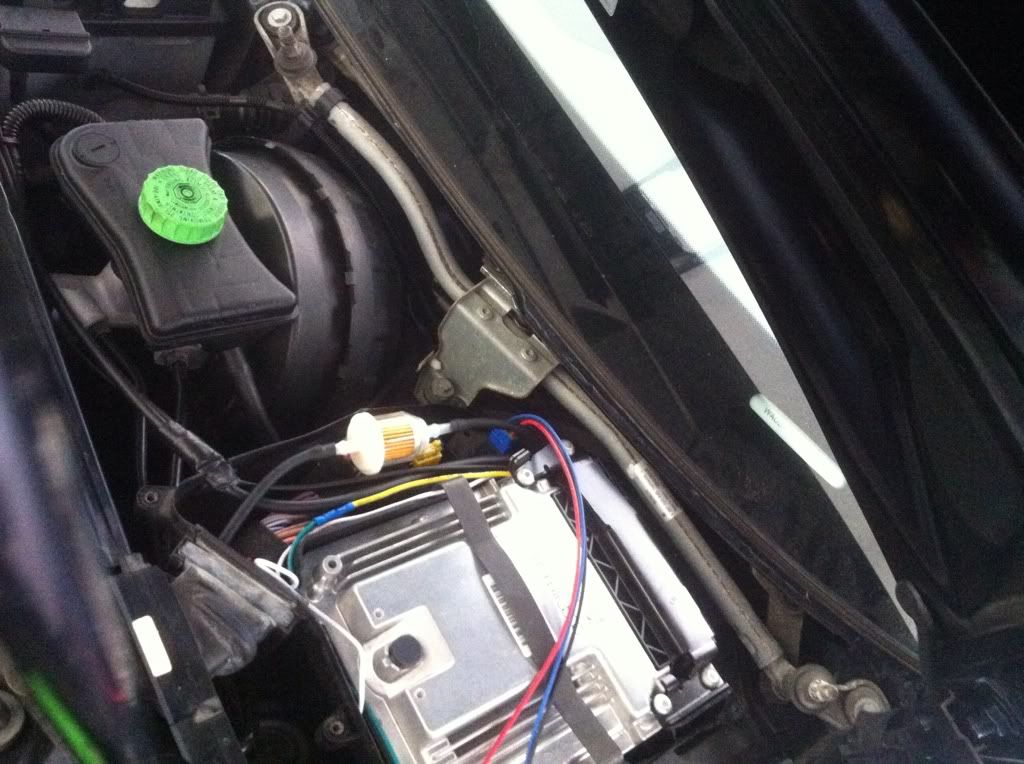
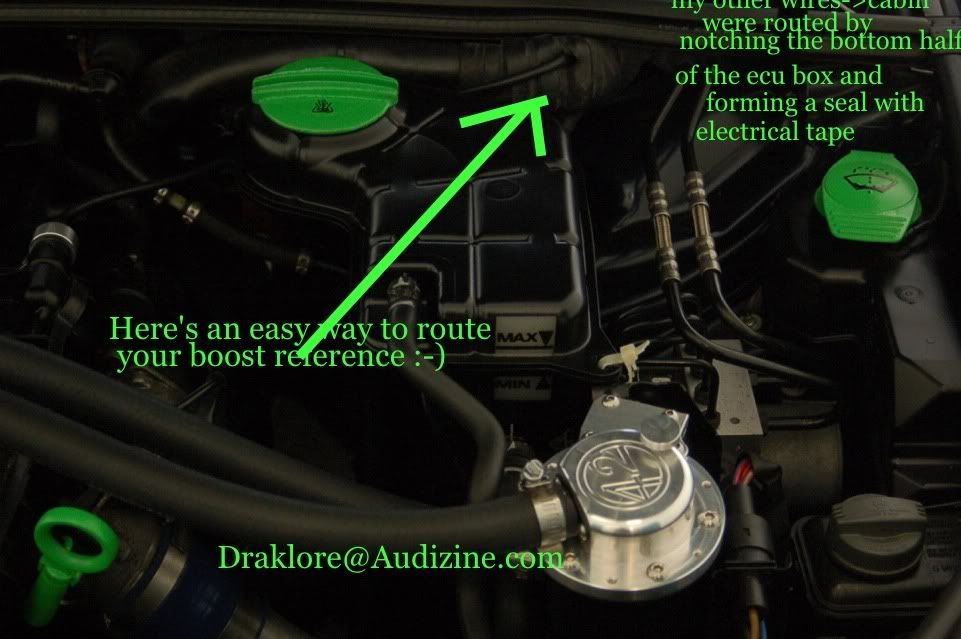
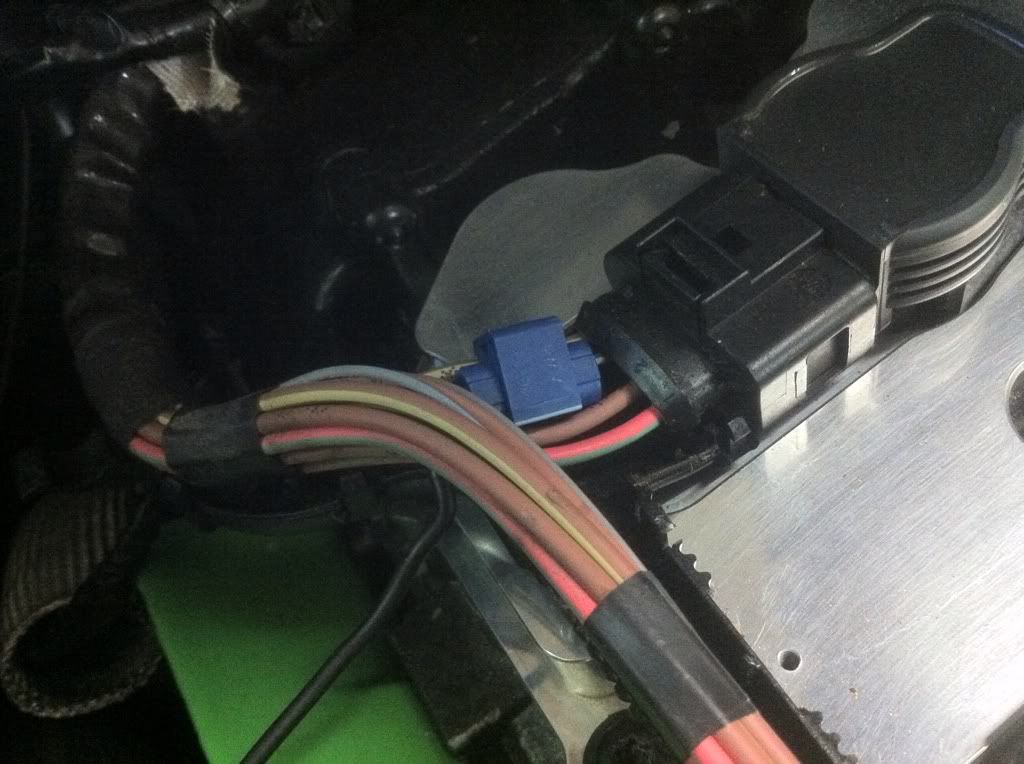
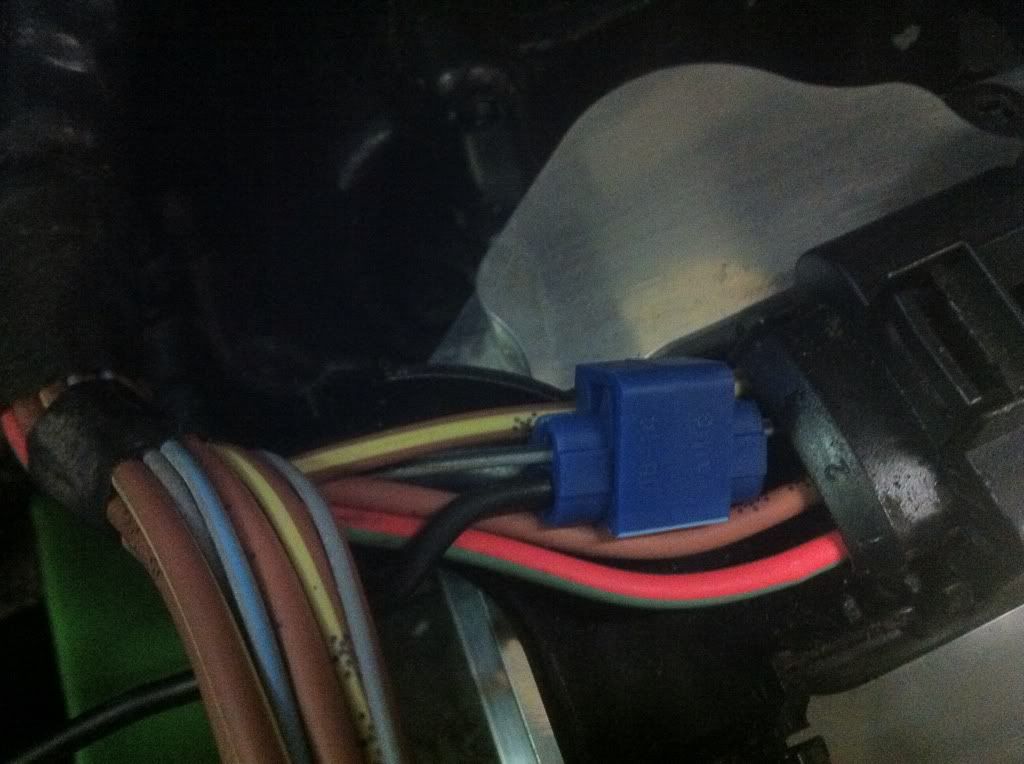
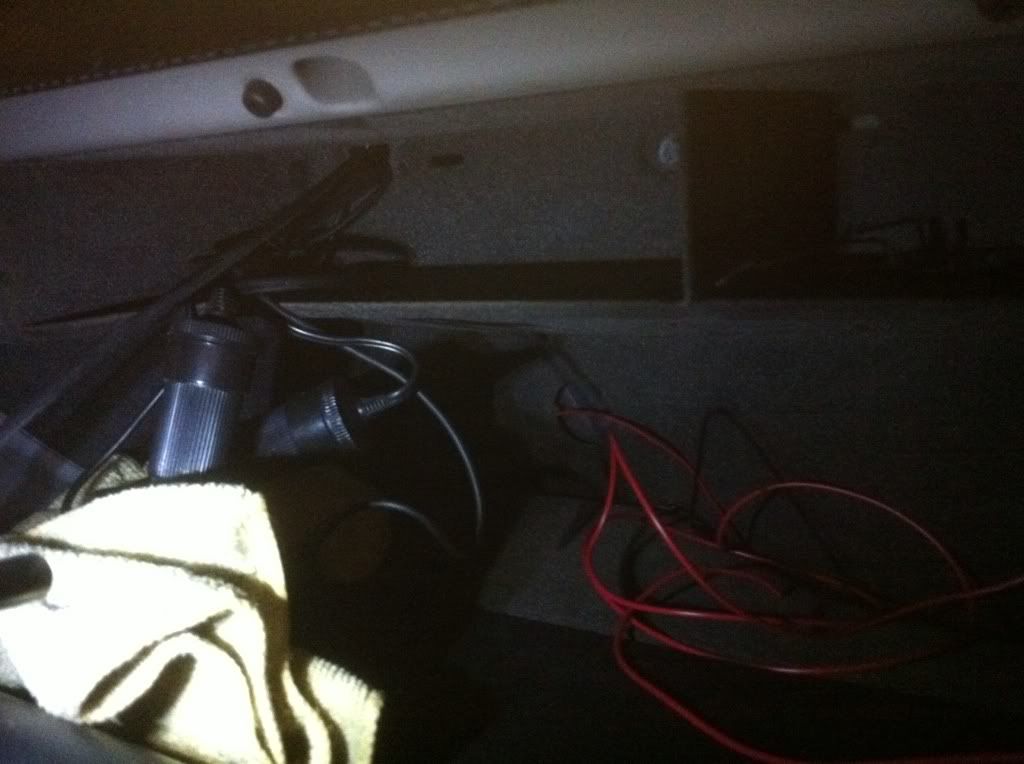
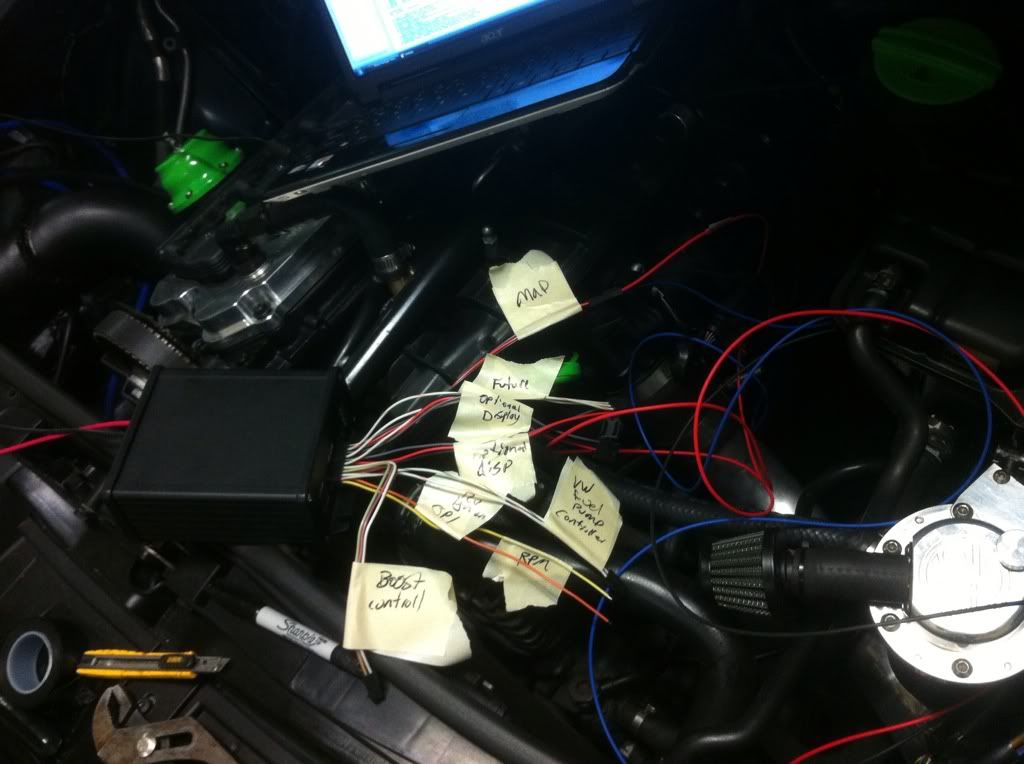
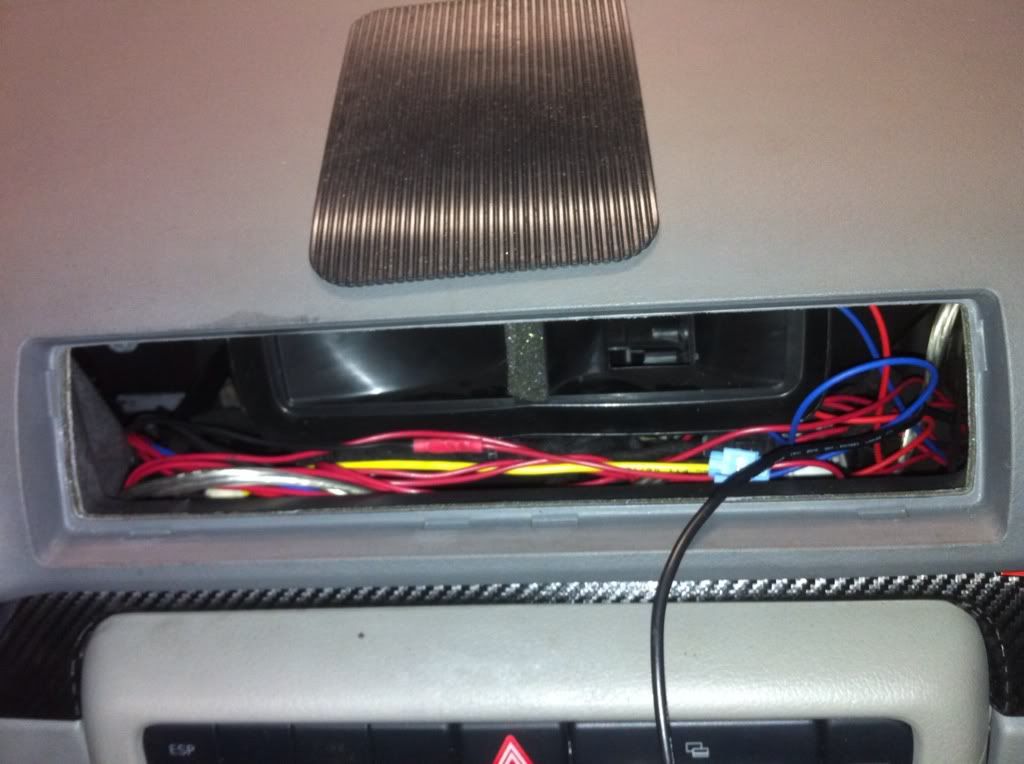
    NOW you can route the power wires up behind the coolant reservoir.

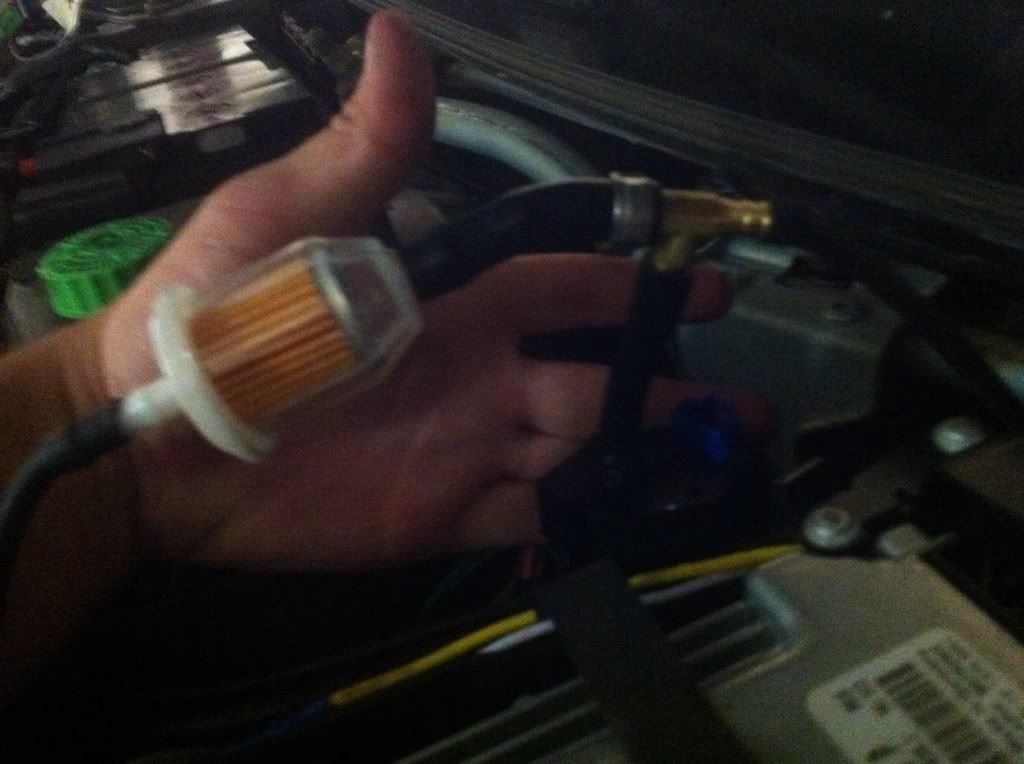
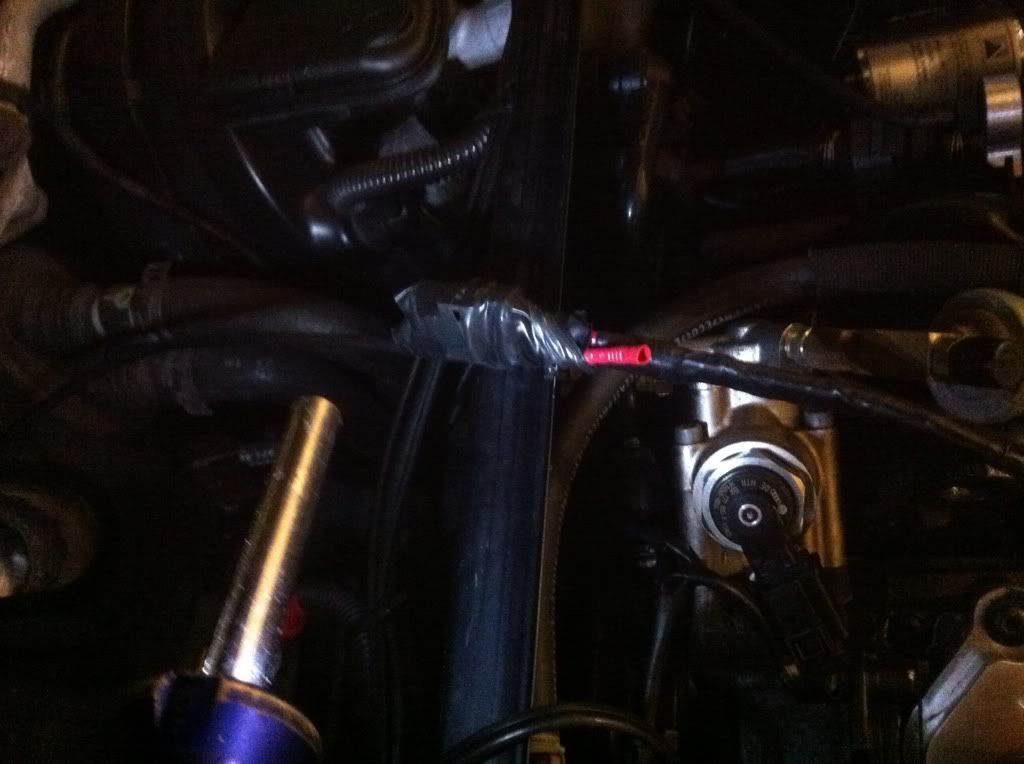
    3.Now you need to supply the pump with methanol. (Of whatever mixture you choose)*
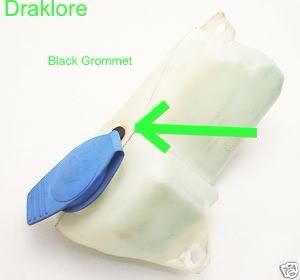
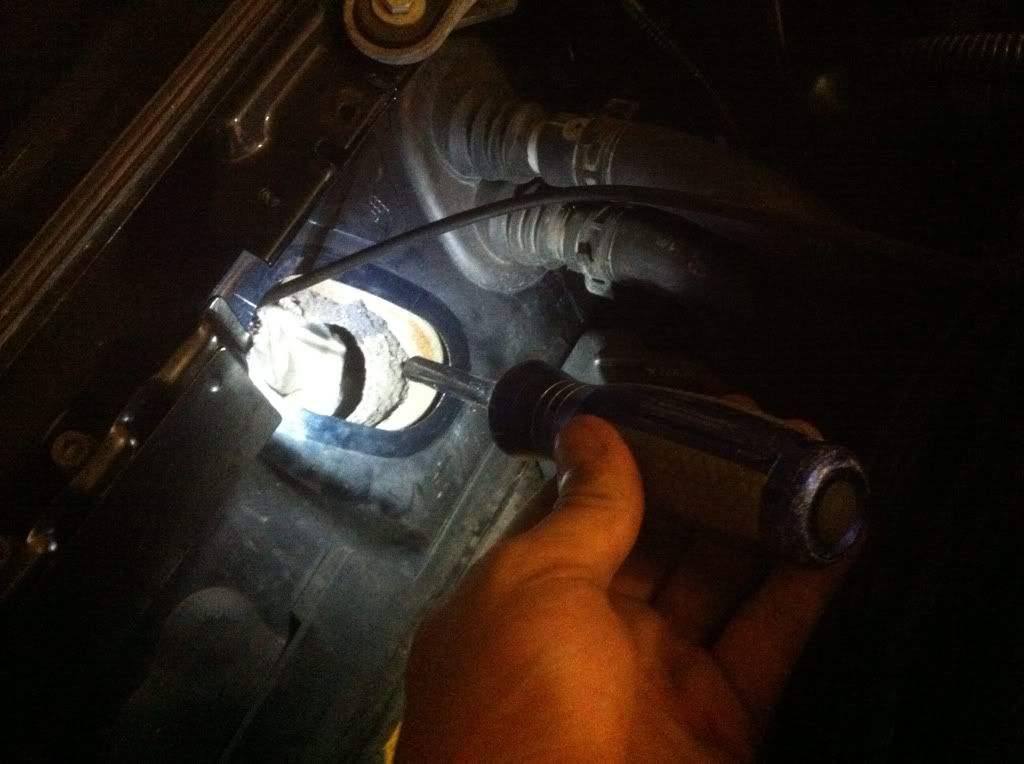
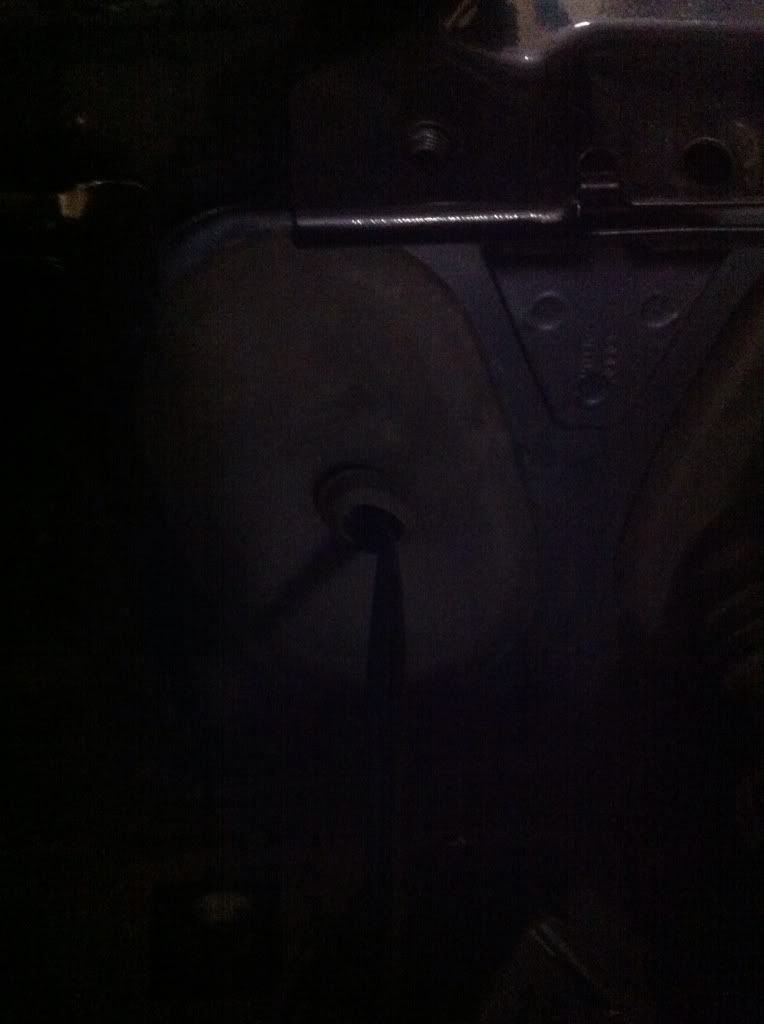
    Here's a trick I used to use my own stock washer reservoir. I took this existing OEM rubber grommet:

    I then used a dremel to create a similar size hole at this point in the washer reservoir (called meth source) and installed the grommet:

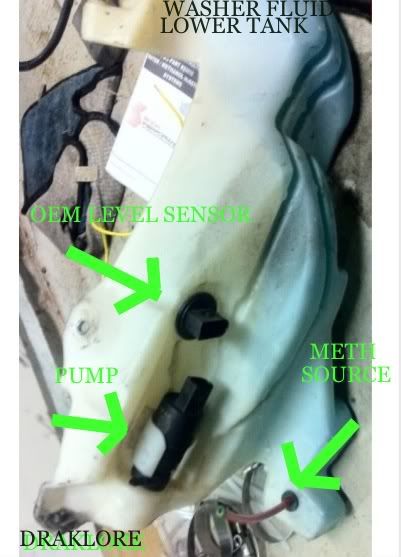
    You do not need to remove the reservoir, but it does make it easier, with less mess... Installed:

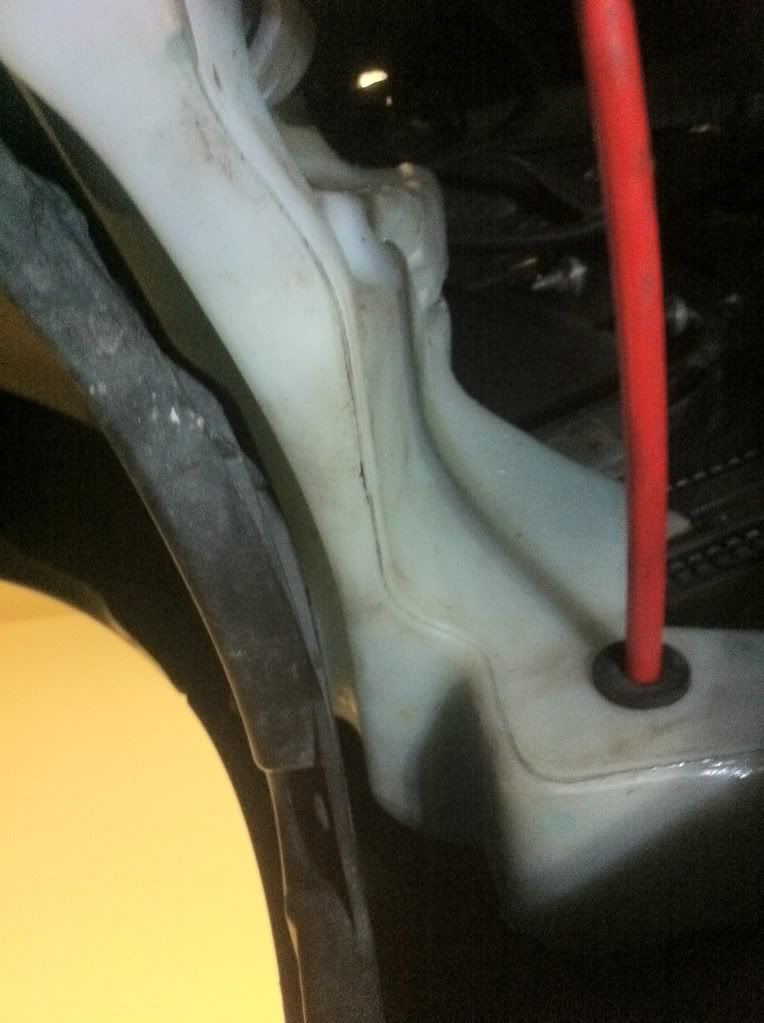
    And then routed to the pump:
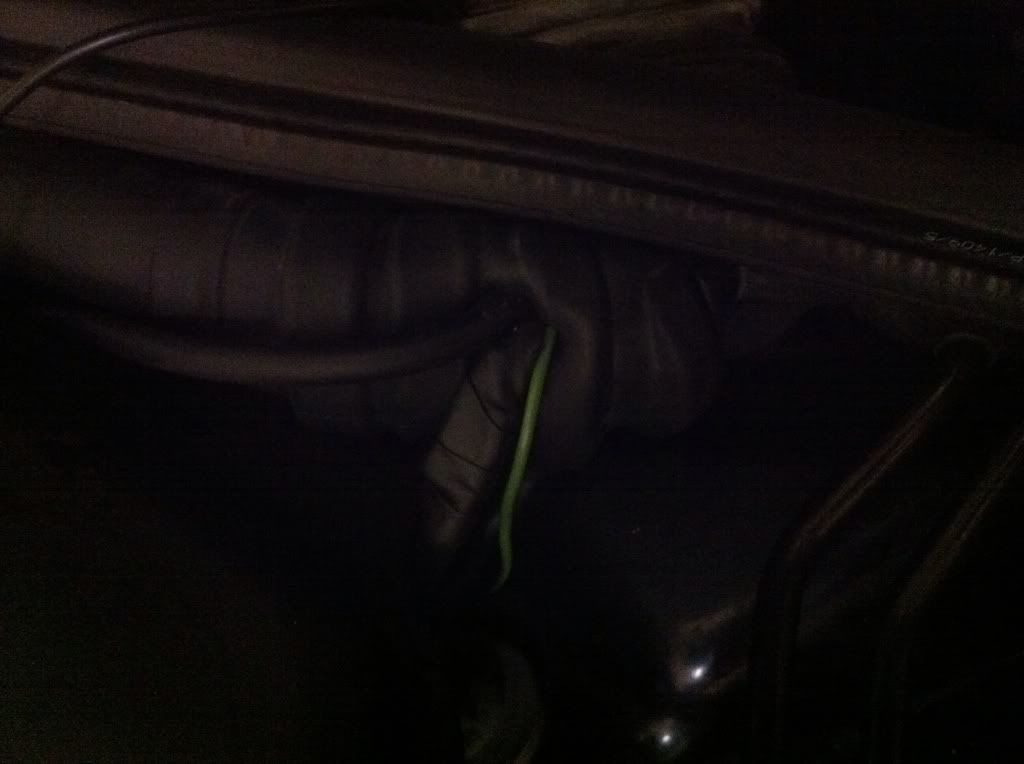
    And up:

    Note: The pump had arrows indicating direction of flow. Make clean square cuts on the tubing, and make sure it is locked into the fittings.

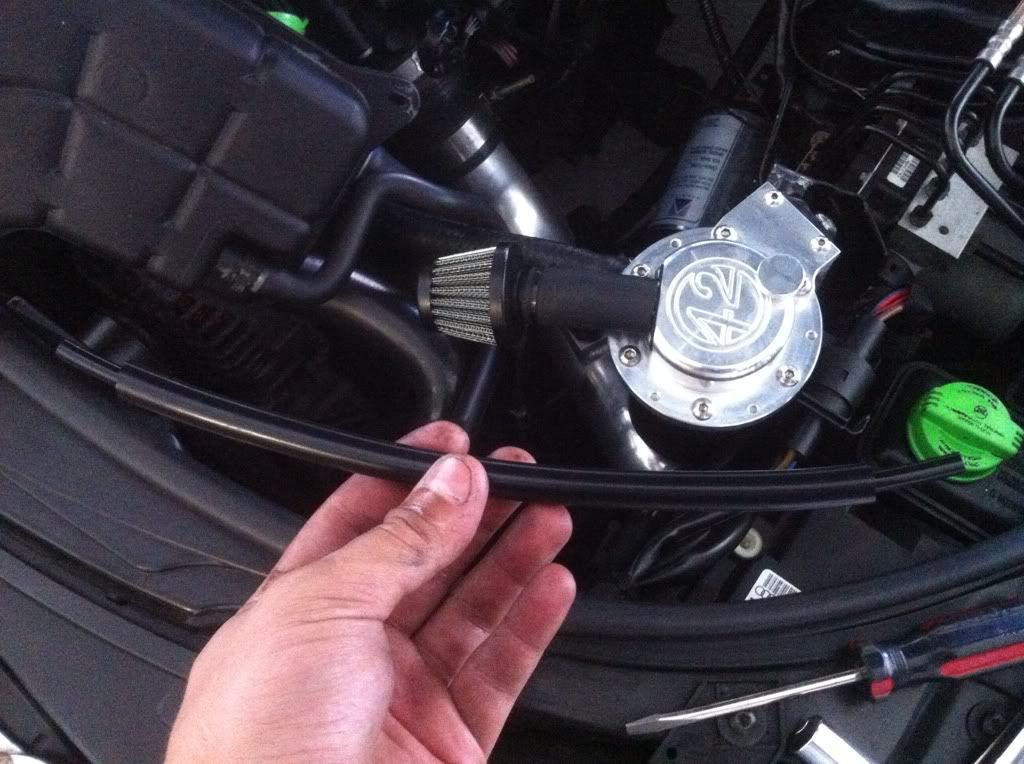
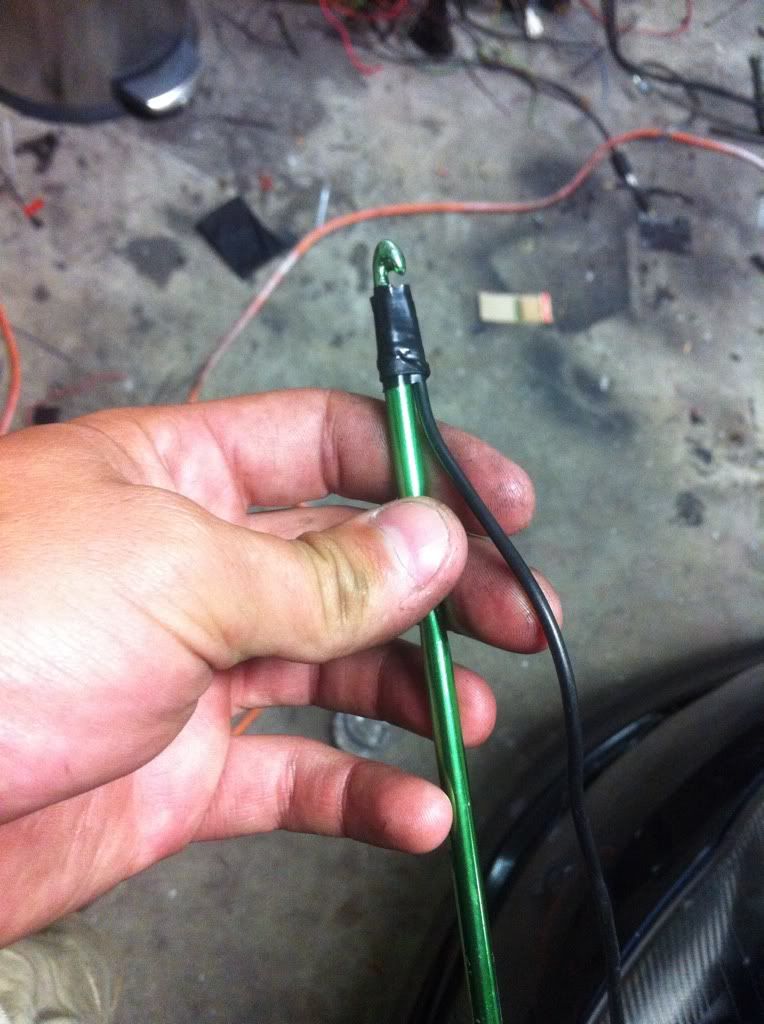
    I used some 8mm silicone tubing to insulate and clean up the look of my tubing:

    Last edited by kristokes; 07-08-2012 at 08:23 AM.

  2. #2
    Veteran Member Four Rings DRAKLORE's Avatar
    Join Date
    Oct 14 2009
    AZ Member #
    49253
    My Garage
    '81 Mk1 VW CADDY/2012 Honda Ruckus
    Location
    Okinawa Japan

    4. You've got your Pump,nozzle, and supply all taken care of, now it's time for the 6bar map install, you can literally mount this anywhere, but consider your controller location before proceeding. the Map comes with a pre made harness. With my Map installed in my Ecu box there was just enough harness left to reach the glovebox... Hopefully you have a boost gauge... If not a catch can? Of not you will need to locate a vacuum/boost source. Here's my two options:

    *
    4A. Now to remove the ECU box cover, use a small flathead to lift off the wiper Nut covers, remove the wipers 16mm nuts. Now with the hood down work the wipers back and forth until they come loose (may take some effort... ) Remove the two cowl cover clips (passenger side and center) and work off the cowl cover. Now using a bit driver remove the 5 T27 torx screws holding the ECU cover down... For a result like so:

    4B. Routing the vacuum lines*and the Pump Power Wires:

    I used My Wife's crochet needle thing:

    For an end result like so:

    4c. Placing The map
    I placed mine here:

    as you can see I have a very crowded box due to lots of aftermarket goodies.. I eventually decided to use two seperate boost sources, because I have heard T-fittings may cause different readings. So where I previously had the map t-from the boost gauge reference, I ran a new source for it.
    The Maps *resting place:

    4D. Getting your RPM reference,
    Special thanks to Shiro for helping me with pinouts and diagrams. Unfortunately I wasn't able to find a current Pinout for the cluster and the G28 crank sensor was not giving good/accurate readings..
    Finally I removed the coil pack harness cover, and exposed the wires:


    Note-Any of the Coils Smaller wires will work as RPM sources, I chose the closest one

    Here is a close up:

    Note: If you use a scotch Brite, make sure the connection is clean and doesn't interfere with normal coil pack operation.

    Cover back on and routed through the firewall:

  3. #3
    Veteran Member Four Rings DRAKLORE's Avatar
    Join Date
    Oct 14 2009
    AZ Member #
    49253
    My Garage
    '81 Mk1 VW CADDY/2012 Honda Ruckus
    Location
    Okinawa Japan

    4E. Wiring the N75 for use with the BMP. The BMP needs a solenoid to control the wastegate, but the ECU also needs to see a solenoid plugged in or else it defaults to "limp mode"*
    After some trials and tribulations I found that I could use an old N80 valve in place of the OE N75 connection and the ECU will be happy. Here is an overview in case your not sure what I'm talking about..

    Fortunately the three solenoids use the same connector 
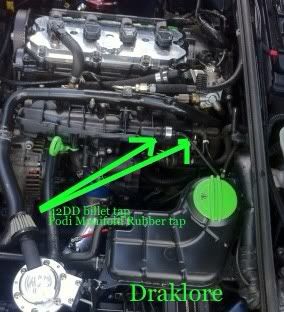
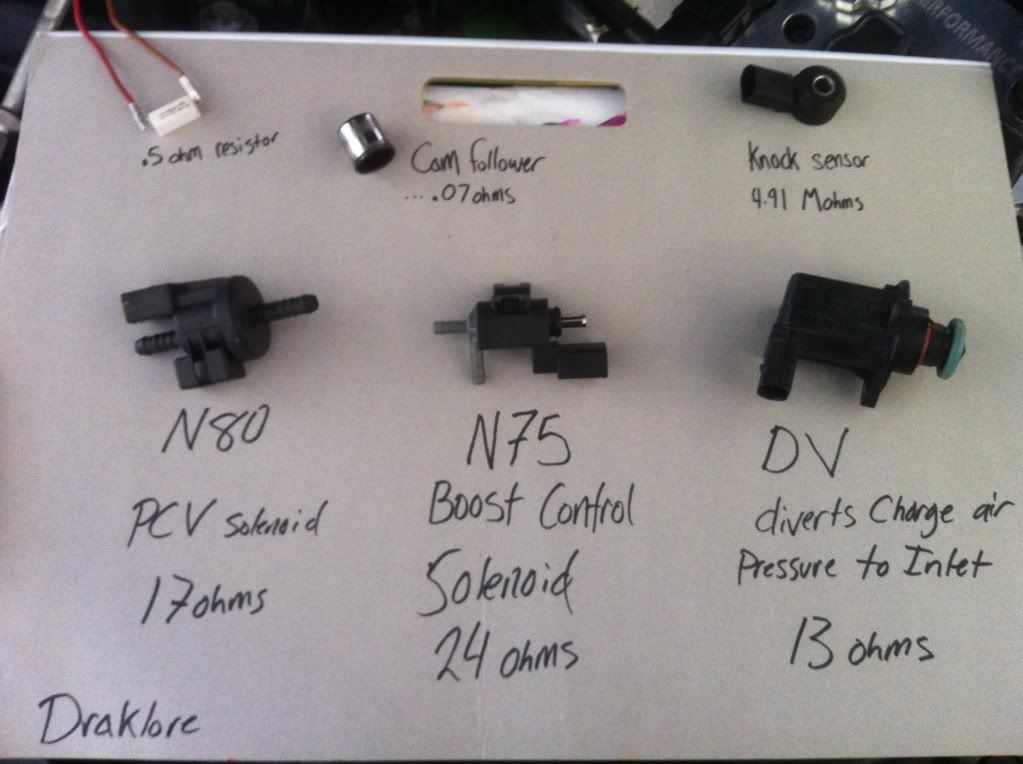
(new N80=12$ compared to a new or spare N75)
    On the N75 you can see a "+" and a "-" (notice the "-" mark is on the flat side of the connector):


    NOTE: Please take into account I no longer have the Electronic DV, this allowed me to use that connector in place of the BMP N75 connection.*If you do not have a spare connector than you will need to source one for either the BMP N75 connection, or OE Wiring (with force the DV connector will slide over an N80):


    *Referring to the wiring diagram I routed the "-" wire from my connector to PIN 17 on the BMP, and I ran the "+" wire from the connector to a Key on or switched 12V ignition source. to this same source I spliced a wire that goes to PIN 9 on the BMP.*
    Note: you can use whatever switched ignition source you please, I use this 5amp fuse for all of my aftermarket accessories:

    Label your wires and make sure you have enough slack to get to the BMP controller.

    N75 vacuum routing, for those of you with stock turbo this shouldn't be an issue, for those with aftermarket setups here is what works for me:


    4F:BMP controller Main power.
    Now you don't need to do this. But because I was using thicker gauge wiring I decided I wanted a really short & clean route from the battery directly to the controller.*
    Note: You need to go directly from the battery and is a requirement to use large gauge wire, with an inline fuse of 30amps... I used an old power cable, not only is it the correct gauge, but because the leads are together it is easier to run.
    Here is my power harness:

    I removed the battery and found my access point, using a heavy gauge coat hanger I fished it through the firewall until I was able to snag it and route it to the glove compartment.
    (see routing below for more details)
    Battery removed, rubber panel off:

    Cutting out foam insulation to route wiring:

    And the wiring attached to a hanger to be force fed to the glove box:
    *
    The destination (where the red wires are exiting):

    And the final cleaned up product:

    Now you can install the battery and connect your power supply to the battery terminals.
    Last edited by DRAKLORE; 05-28-2012 at 12:13 PM.

  4. #4
    Veteran Member Four Rings DRAKLORE's Avatar
    Join Date
    Oct 14 2009
    AZ Member #
    49253
    My Garage
    '81 Mk1 VW CADDY/2012 Honda Ruckus
    Location
    Okinawa Japan

    5. Where are you going to install the BMP? I chose to hide mine in my Glove compartment (I don't have an extensive glove collection) but in all seriousness the controller doesn't appear to be weather proof, so I want to keep it away from the elements. I previously had my SPSTg2 box here:

    NOTE:*
    You need to label everything (short of the map harness which is obvious)*
    You will kick yourself if you do not..
    Refer to the Wiring diagram:

    The connector Pinout can also be found on the BMP software... You need to contact Eurodyne for an acct and then download your software, here is an overview of the software:
    Quote Originally Posted by DRAKLORE View Post
    Ok this is a video I put together, I hope this answers questions and is a good overview of the BM+ software

    And a couple screen shots...


    I really hope my rambling isn't to bad lol
    Did I mention labeling?:

    And labeling the wires you send through the cab.

    5A. Routing wiring to your BMP in the glovebox. You've already got your ECU cover off, now remove your kick panel via these two screws under the steering column (don't recall the size sorry):


    Next remove the Center Vent, I used a small flathead:


    5B. Open the glove box, inspect the rear and notice there is a round semi cut out, using a screw driver I popped it out. See the red wires coming through:

    The next few steps are going to be frustrating for you, because it is hard to describe exactly how to get the wires from one area to another. I used a mixture of coat hangers, small flashlights and string and luck... This can be tedious...

    You need to route your labeled N75 wire, and RPM reference, you can go through this hole in the firewall or at the corner of the weather strip:

    *Now with the wires up in the rain tray, I tucked them up and zip tied them along the weather strip like so:


    Now to get these wires into the Ecu box, you don't have to do this, there are other ways to get the wires routed. But here's how I did it:

    And with the cover removed:

    Obviously I have other wiring routed through here (innovate LC-1) so you don't need to cut such a large notch.

    6. Final Routing
    Take the power harness you made and labeled for the pump, the map harness, the RPM source, & The N75 wires. And route these down behind the ECU untill they are visible under the steering column (with kick panel removed)

    Connect your N75 Power source to your ignition source. And take your other wires and route them up by the center vent:


    With much patience route these down and into the rear glove box hole:


    Your RPM signal goes to PIN 10
    Your "-" wire from the N75 goes to PIN 17
    And connect the pump wires to "MAIN" on the controller box.*
    Be sure to install a 30 amp fuse into your power harness and connect to "Battery".
    Connect the Map harness to the Map harness connector.

    NOTE: Don't forget to connect PIN 9 to your Ignition 12v source!

    Now that your wiring is complete, you can hook the battery up, connect the harness for the BMP and power on.
    Hook up your laptop and follow the calibration steps, you will have to click the upper left icon in the BMP software, then search through the BMP files to find base2.0t file. Double*Click that, then click the connect to BMP, then click the green "up arrow" to upload the base software. Set up your N75 target boost, you may need to create a map for the N75.*
    Note: the 6bar map sensor is not designed for "vacuum" and will read different or immaculate vacuum when compared to a boost gauge:

    Note: If your receiving errors:

    Check your system for latest updates, cable issues. Some people with windows vista or 7 may experience errors*

    *For further assistance with the BMP software contact your distributor.

    Now time to tidy up,*
    -Push down the wires at the center vent and re install the vent.
    -zip tie loose wires out of pinch points and away from the steering column, re install the kick panel.
    -re install the fuse door panel
    -re-install the Ecu cover, make sure no wires are pinched:

    -re-install cowl and wipers, install rain tray cover:


    In the coming weeks I will POST the Install for the LPFP controller.*
    (this will be connected to my DW-300 in tank pump)


    ENJOY!:


    Keep updated for the LPFP install, BMP display release, wideband, ect ect....

    Email:*
    [email protected]
    Shane Drake
    Draklore

    Comments and feedback Welcome
    Last edited by DRAKLORE; 05-28-2012 at 03:01 AM.
    -Shane Drake-
    1981 VW Caddy 5.4L V8 Swap Speedhunters Feature!
    2006 A4 Avant Dolphin Grey
    2007 GT3071R A4 Moro Blue-RIP
    >DRAKLOREs Build<
    Formerly DRAKES-PERFORMANCE

  5. #5
    Veteran Member Four Rings shiro1745's Avatar
    Join Date
    Jul 26 2009
    AZ Member #
    45522
    Location
    DMV Area

    Wow! This is an awsome DIY, I didn't have time to read it all carefully, but it seems you put tons of details in there. This should make our BMP guys installation 10 times easier.

    Thanks!
    - Chip

    K0R-GT -- S3 injectors -- Maestro tune -- IE Drop-in rods

    "It took 4 bad crankshaft seals and lots of cursing to build my avatar"

  6. #6
    Veteran Member Three Rings ignus99's Avatar
    Join Date
    Nov 08 2009
    AZ Member #
    50417
    Location
    Calgary/Alberta/Canada

    Aaaand this thread is going to explode in 3, 2, 1....
    Thats an intense writeup! took me a while to get through it all.

    I knew the Eurodine would be labor intensive to install, had no idea how much was actually involved.

    Do you find a difference in how much Meth you're consuming now? Or when it comes on/off?
    - Karl

    Engine: GT28RS by ATP / Turbosmart 38mm dual BOV/Recirc / Carbonio CAI / APR TBE / APR Testpipe / REVO St2+ / Snow Performance ST2 / APR HPFP
    Body/Suspension: KW V2 / DPE ST-10 19x8.5 et35 / Thor Skid Plate
    Pretty Stuff: AWE Vent Boost Gauge / OEM Bixenon + V4 LED / Supertones / Votex SS / CF Hood & Mirrors / RS4 Grille & Fogs

  7. #7
    Veteran Member Four Rings DRAKLORE's Avatar
    Join Date
    Oct 14 2009
    AZ Member #
    49253
    My Garage
    '81 Mk1 VW CADDY/2012 Honda Ruckus
    Location
    Okinawa Japan

    Haven't had a chance to really drive the car yet. Super busy weekend :-/
    -Shane Drake-
    1981 VW Caddy 5.4L V8 Swap Speedhunters Feature!
    2006 A4 Avant Dolphin Grey
    2007 GT3071R A4 Moro Blue-RIP
    >DRAKLOREs Build<
    Formerly DRAKES-PERFORMANCE

  8. #8
    Veteran Member Four Rings shiro1745's Avatar
    Join Date
    Jul 26 2009
    AZ Member #
    45522
    Location
    DMV Area

    Quote Originally Posted by ignus99 View Post
    Aaaand this thread is going to explode in 3, 2, 1....
    Thats an intense writeup! took me a while to get through it all.

    I knew the Eurodine would be labor intensive to install, had no idea how much was actually involved.

    Do you find a difference in how much Meth you're consuming now? Or when it comes on/off?
    It's not going to explode so fast really, cause it's a lot of info haha
    But this is really awesome, I cannot wait to install mine, just need to make the time, I've been really busy lately.
    - Chip

    K0R-GT -- S3 injectors -- Maestro tune -- IE Drop-in rods

    "It took 4 bad crankshaft seals and lots of cursing to build my avatar"

  9. #9
    Veteran Member Four Rings DRAKLORE's Avatar
    Join Date
    Oct 14 2009
    AZ Member #
    49253
    My Garage
    '81 Mk1 VW CADDY/2012 Honda Ruckus
    Location
    Okinawa Japan

    But I'm going from a snow performance #2 nozzle, which is like 3.25Gph@150 psi to a #6 which is 14.28Gph @ 150 psi...
    That's like 4X the methanol so I'll likely go through methanol about 4X as fast....

    That being said, the OEM washer resevoir is quite large, and after 10 months of my other methanol kit, I only used about 2 1/2 gallons of 50/50 mixture & I always keep a gallon of pre mix in my trunk.


    Quote Originally Posted by shiro1745 View Post
    It's not going to explode so fast really, cause it's a lot of info haha
    But this is really awesome, I cannot wait to install mine, just need to make the time, I've been really busy lately.
    The cool thing is, this is Also helpful for general water methanol installation. Along with a bunch of other
    good info. It can literally serve a bunch of purposes
    -Shane Drake-
    1981 VW Caddy 5.4L V8 Swap Speedhunters Feature!
    2006 A4 Avant Dolphin Grey
    2007 GT3071R A4 Moro Blue-RIP
    >DRAKLOREs Build<
    Formerly DRAKES-PERFORMANCE

  10. #10
    Veteran Member Three Rings ignus99's Avatar
    Join Date
    Nov 08 2009
    AZ Member #
    50417
    Location
    Calgary/Alberta/Canada

    Quote Originally Posted by DRAKLORE View Post
    That being said, the OEM washer resevoir is quite large, and after 10 months of my other methanol kit, I only used about 2 1/2 gallons of 50/50 mixture & I always keep a gallon of pre mix in my trunk.
    I run out of a tank of meth approximately every tank of gas (the 1 gallon tank)... under moderate daily driving... obviously boosting on occasion but not constantly.... You make me wonder if I have a leak somewhere. Here I was thinking this was normal.
    The LED only goes on when I'm boosting, but I am curious if my Solenoid is functioning correctly...

    My throttle body spacers is ice cold after boosting, so I know it is working... weirdddd...

    Any ideas how I would go about checking for a leak? Meth is clear... so I cant look based on color, and it evaporates so quickly I cant really feel for it... Everything would just feel COLD so its hard to tell if its wet or just cold.
    - Karl

    Engine: GT28RS by ATP / Turbosmart 38mm dual BOV/Recirc / Carbonio CAI / APR TBE / APR Testpipe / REVO St2+ / Snow Performance ST2 / APR HPFP
    Body/Suspension: KW V2 / DPE ST-10 19x8.5 et35 / Thor Skid Plate
    Pretty Stuff: AWE Vent Boost Gauge / OEM Bixenon + V4 LED / Supertones / Votex SS / CF Hood & Mirrors / RS4 Grille & Fogs

  11. #11
    Veteran Member Four Rings DRAKLORE's Avatar
    Join Date
    Oct 14 2009
    AZ Member #
    49253
    My Garage
    '81 Mk1 VW CADDY/2012 Honda Ruckus
    Location
    Okinawa Japan

    I'm not really sure how
    To check for syphoning....
    But please keep
    In mind, K03 hits target or "spray boost" much more often than a GT30 driven conservatively.

    K03 is like a casual daily turbo and hits 10 psi pulling out of your driveway haha
    While a GT30 hits 10 PSI only if you want to scare little children, or really intend to. Not saying I couldn't get it to hit 10psi constantly, but I don't think my body/neck could take the abuse, so I really just drive easily and it's not that hard to do if you avoid going more than partial throttle or stay below 3000rpms... Also BAT helps with gas mileage if you use this driving method.

    Ask Jeff Shirmer (Schirm) how his neck felt after the tail of the dragon in Helen...
    -Shane Drake-
    1981 VW Caddy 5.4L V8 Swap Speedhunters Feature!
    2006 A4 Avant Dolphin Grey
    2007 GT3071R A4 Moro Blue-RIP
    >DRAKLOREs Build<
    Formerly DRAKES-PERFORMANCE

  12. #12
    Veteran Member Three Rings ignus99's Avatar
    Join Date
    Nov 08 2009
    AZ Member #
    50417
    Location
    Calgary/Alberta/Canada

    Quote Originally Posted by DRAKLORE View Post
    I'm not really sure how
    To check for syphoning....
    But please keep
    In mind, K03 hits target or "spray boost" much more often than a GT30 driven conservatively.

    K03 is like a casual daily turbo and hits 10 psi pulling out of your driveway haha
    While a GT30 hits 10 PSI only if you want to scare little children, or really intend to. Not saying I couldn't get it to hit 10psi constantly, but I don't think my body/neck could take the abuse, so I really just drive easily and it's not that hard to do if you avoid going more than partial throttle or stay below 3000rpms... Also BAT helps with gas mileage if you use this driving method.

    Ask Jeff Shirmer (Schirm) how his neck felt after the tail of the dragon in Helen...
    Pssst.... I'm rockin a GT28RS, not a K03 ;D HAHAHA
    Guess time for me to do some searching and see if im siphoning... I'm not getting a rough idle which is a sign from a syphoned meth, hmmmm.....

    Sorry for the off topic!
    - Karl

    Engine: GT28RS by ATP / Turbosmart 38mm dual BOV/Recirc / Carbonio CAI / APR TBE / APR Testpipe / REVO St2+ / Snow Performance ST2 / APR HPFP
    Body/Suspension: KW V2 / DPE ST-10 19x8.5 et35 / Thor Skid Plate
    Pretty Stuff: AWE Vent Boost Gauge / OEM Bixenon + V4 LED / Supertones / Votex SS / CF Hood & Mirrors / RS4 Grille & Fogs

  13. #13
    Veteran Member Four Rings DRAKLORE's Avatar
    Join Date
    Oct 14 2009
    AZ Member #
    49253
    My Garage
    '81 Mk1 VW CADDY/2012 Honda Ruckus
    Location
    Okinawa Japan

    My bad my bad lol
    I bet if I drove the car more I would be goin through meth faster lol.

    Your consumption seems a bit more aggresive than what te average user on here is reporting (one of those tiny tanks every other fill up)
    -Shane Drake-
    1981 VW Caddy 5.4L V8 Swap Speedhunters Feature!
    2006 A4 Avant Dolphin Grey
    2007 GT3071R A4 Moro Blue-RIP
    >DRAKLOREs Build<
    Formerly DRAKES-PERFORMANCE

  14. #14
    Veteran Member Four Rings jrtrainor's Avatar
    Join Date
    May 07 2011
    AZ Member #
    75168
    My Garage
    94 yj 88 bronco 15 fusion
    Location
    The mountains, CO

    one hell of a write up
    B7 A4, GTX2867R 8.3:1 CR 2.149L motor Build

    C5 Allroad 2.7TT

    C6 A6 3.0T

    Sunday Wrench Days

    "Call him the Redneck mechanic with the beard of glory"

  15. #15
    Veteran Member Four Rings DRAKLORE's Avatar
    Join Date
    Oct 14 2009
    AZ Member #
    49253
    My Garage
    '81 Mk1 VW CADDY/2012 Honda Ruckus
    Location
    Okinawa Japan

    Fixing errors and adding things lol

    Please Lmk if you notice any pics in wonky places ect lol

    And thanks guys! much sleep Was lost
    -Shane Drake-
    1981 VW Caddy 5.4L V8 Swap Speedhunters Feature!
    2006 A4 Avant Dolphin Grey
    2007 GT3071R A4 Moro Blue-RIP
    >DRAKLOREs Build<
    Formerly DRAKES-PERFORMANCE

  16. #16
    Veteran Member Three Rings ignus99's Avatar
    Join Date
    Nov 08 2009
    AZ Member #
    50417
    Location
    Calgary/Alberta/Canada

    Quote Originally Posted by DRAKLORE View Post
    Fixing errors and adding things lol

    Please Lmk if you notice any pics in wonky places ect lol

    And thanks guys! much sleep Was lost
    Yeah I noticed the time at which the original post was made.... Do you sleep???
    - Karl

    Engine: GT28RS by ATP / Turbosmart 38mm dual BOV/Recirc / Carbonio CAI / APR TBE / APR Testpipe / REVO St2+ / Snow Performance ST2 / APR HPFP
    Body/Suspension: KW V2 / DPE ST-10 19x8.5 et35 / Thor Skid Plate
    Pretty Stuff: AWE Vent Boost Gauge / OEM Bixenon + V4 LED / Supertones / Votex SS / CF Hood & Mirrors / RS4 Grille & Fogs

  17. #17
    Veteran Member Four Rings jsandor91's Avatar
    Join Date
    Jun 10 2011
    AZ Member #
    76682
    My Garage
    dead hookers
    Location
    South Jersey

    this is a lifesaver. not dreading the install nearly as much. thanks shane
    Quartz Grey B7 A4 Quattro 6MT
    Maestro + Epy Tuned / GTX2867r / S3's / Spintech Non-Resonated 3 Inch Exhaust / Cold Side Synapse DV / TR18 + 2.5" Piping / Hpfp S1 Pump
    Bi-Xenon retrofit + Fly's leds / ST Coils + Rsb / 18x9.5 Miro 111's
    Dat Der Build Thread
    Coming Soon: Boost Manager +, Drakes Performance Stage V Clutch

  18. #18
    Veteran Member Four Rings DRAKLORE's Avatar
    Join Date
    Oct 14 2009
    AZ Member #
    49253
    My Garage
    '81 Mk1 VW CADDY/2012 Honda Ruckus
    Location
    Okinawa Japan

    Quote Originally Posted by ignus99 View Post
    Yeah I noticed the time at which the original post was made.... Do you sleep???
    I don't sleep much lol but I'm trying to seperate my Audi time from family time when I can!
    Quote Originally Posted by jsandor91 View Post
    this is a lifesaver. not dreading the install nearly as much. thanks shane
    No problem man, I really hope that this thread doesn't die, because I honestly put a lot of effort in (if you compare it to my 20$ carbon thread lol)
    So Much info it's probably just hard to digest or sit and read it all haha
    Thanks again
    -Shane Drake-
    1981 VW Caddy 5.4L V8 Swap Speedhunters Feature!
    2006 A4 Avant Dolphin Grey
    2007 GT3071R A4 Moro Blue-RIP
    >DRAKLOREs Build<
    Formerly DRAKES-PERFORMANCE

  19. #19
    Veteran Member Four Rings shiro1745's Avatar
    Join Date
    Jul 26 2009
    AZ Member #
    45522
    Location
    DMV Area

    Shane, we need updates on how your car is running with this kit, can't wait to hear your review.
    - Chip

    K0R-GT -- S3 injectors -- Maestro tune -- IE Drop-in rods

    "It took 4 bad crankshaft seals and lots of cursing to build my avatar"

  20. #20
    Registered User Four Rings Sales@RAI's Avatar
    Join Date
    Jun 22 2009
    AZ Member #
    44077
    Location
    Dundalk, MD

    Great job with the write up!


    Note:
    You should have it picking up the RPM signal from the Number 1 coil pack, which is closest to the timing belt.

  21. #21
    Veteran Member Four Rings DRAKLORE's Avatar
    Join Date
    Oct 14 2009
    AZ Member #
    49253
    My Garage
    '81 Mk1 VW CADDY/2012 Honda Ruckus
    Location
    Okinawa Japan

    Oh alright, any reason why it matters which one? Just curious.
    I tried
    To make the install as easy to get the coil harness cover back on.

    And thanks, I'm still working out the software thing with my laptop. Honestly haven't had the time to do much after the install.
    I hope you feel good enough about it to refer other b7 guys to
    It for support lol
    -Shane Drake-
    1981 VW Caddy 5.4L V8 Swap Speedhunters Feature!
    2006 A4 Avant Dolphin Grey
    2007 GT3071R A4 Moro Blue-RIP
    >DRAKLOREs Build<
    Formerly DRAKES-PERFORMANCE

  22. #22
    Veteran Member Four Rings 613B6's Avatar
    Join Date
    Jul 29 2009
    AZ Member #
    45661
    Location
    Street racing in Ottawa

    Nice write up, your going to like the unit, Ive been running it for a few years now.
    A3 8V | 10.89@129 | Boss700 | Eurodyne

  23. #23
    Registered User Four Rings Sales@RAI's Avatar
    Join Date
    Jun 22 2009
    AZ Member #
    44077
    Location
    Dundalk, MD

    Quote Originally Posted by DRAKLORE View Post
    Oh alright, any reason why it matters which one? Just curious.
    I tried
    To make the install as easy to get the coil harness cover back on.

    And thanks, I'm still working out the software thing with my laptop. Honestly haven't had the time to do much after the install.
    I hope you feel good enough about it to refer other b7 guys to
    It for support lol
    1 & 4 both work, but traditionally everyone always uses cylinder #1.

    Definitely a nice DIY.

  24. #24
    Veteran Member Four Rings shiro1745's Avatar
    Join Date
    Jul 26 2009
    AZ Member #
    45522
    Location
    DMV Area

    Quote Originally Posted by 613B6 View Post
    Nice write up, your going to like the unit, Ive been running it for a few years now.
    few years? how come it wasn't advertised at all on this forum? I thought this was a new product...
    - Chip

    K0R-GT -- S3 injectors -- Maestro tune -- IE Drop-in rods

    "It took 4 bad crankshaft seals and lots of cursing to build my avatar"

  25. #25
    Veteran Member Four Rings DRAKLORE's Avatar
    Join Date
    Oct 14 2009
    AZ Member #
    49253
    My Garage
    '81 Mk1 VW CADDY/2012 Honda Ruckus
    Location
    Okinawa Japan

    Quote Originally Posted by 613B6 View Post
    Nice write up, your going to like the unit, Ive been running it for a few years now.
    What operating system do you use with it?
    And years!!
    No wonder they are trying to get word out lmao, seems like I just heard about it a month or two ago haha

    Can't wait to set it up 100%
    Need to get a Pinout for the LPFP controller, then I will dO the install for that with a write up

    Also thinking about a variable switch to change the peak boost on the fly without a laptop
    Yes it has that option :-) (I want a variable knob that clicks and locks, I'd have it set for W/G, then like 17psi and increase each position by 2 psi every click) then install the knob near the ECS button!
    I want to do something about a LED status light, as this pump seems to always have .43 volts even when not pumping, this in turn sets off the led I have hooked up, even at idle.

    I am curious about the "wideband" wiring this has... If it can replace my innovate LC-1 controller, than that would add another 200$ to the value this thing has lol :-)
    -Shane Drake-
    1981 VW Caddy 5.4L V8 Swap Speedhunters Feature!
    2006 A4 Avant Dolphin Grey
    2007 GT3071R A4 Moro Blue-RIP
    >DRAKLOREs Build<
    Formerly DRAKES-PERFORMANCE

  26. #26
    Veteran Member Four Rings 613B6's Avatar
    Join Date
    Jul 29 2009
    AZ Member #
    45661
    Location
    Street racing in Ottawa

    you didnt hear it from me...but tapp is making a full LED digital display that will show all parameters that you see in the viewing window. (maybe he will incorporate a +/- buttom for up and down boost) Its in his porsche right now but last i chatted with him he is having a hard time finding something that is cost effective and will work well. My car was originally part of the testing for the product.

    and your right about the LED, the system will always have a phatom voltage. Im going to run a pressure switch to an LED that T's off before the nozzle that way its fully independant of the system. Ive had my selenoid fail and it showed close mean while I sucked in a full jug of washer fluid at idle...but if you run it all the safe guards are pretty good to dial back boost if there is a pump failure, etc.
    A3 8V | 10.89@129 | Boss700 | Eurodyne

  27. #27
    Veteran Member Four Rings DRAKLORE's Avatar
    Join Date
    Oct 14 2009
    AZ Member #
    49253
    My Garage
    '81 Mk1 VW CADDY/2012 Honda Ruckus
    Location
    Okinawa Japan

    I didn't hear it from you ;-)
    But didn't want to
    Say anything incase it falls through :-/

    I vote that über wide panel display VEI shows on their buisness cards.
    I can't find a pic though :-(

    But could also e like this lol


    I would have a hard time getting rid of my Podi Dual VEI setup :-/
    -Shane Drake-
    1981 VW Caddy 5.4L V8 Swap Speedhunters Feature!
    2006 A4 Avant Dolphin Grey
    2007 GT3071R A4 Moro Blue-RIP
    >DRAKLOREs Build<
    Formerly DRAKES-PERFORMANCE

  28. #28
    Registered User Four Rings Sales@RAI's Avatar
    Join Date
    Jun 22 2009
    AZ Member #
    44077
    Location
    Dundalk, MD

    Quote Originally Posted by 613B6 View Post
    you didnt hear it from me...but tapp is making a full LED digital display that will show all parameters that you see in the viewing window. (maybe he will incorporate a +/- buttom for up and down boost) Its in his porsche right now but last i chatted with him he is having a hard time finding something that is cost effective and will work well. My car was originally part of the testing for the product.
    He was telling me about the other week. That will be so BAU5 if he is able to get it produced for a good price.

  29. #29
    Veteran Member Four Rings jsandor91's Avatar
    Join Date
    Jun 10 2011
    AZ Member #
    76682
    My Garage
    dead hookers
    Location
    South Jersey

    Quote Originally Posted by DRAKLORE View Post
    \

    No problem man, I really hope that this thread doesn't die, because I honestly put a lot of effort in (if you compare it to my 20$ carbon thread lol)
    So Much info it's probably just hard to digest or sit and read it all haha
    Thanks again
    yea i had to read it twice to begin to digest it all. this thing is a magical little box, my Subaru and Vag friends are pretty jealous, they just have simple kits if any.

    and one quick question out of all the spots you tapped the firewall which one would be the easiest to run a big wire (0 Gauge)? because i'm gonna try to tackle everything in one day. amp wire, fmic, bi xenon, rs4 grill and my BM+
    Quartz Grey B7 A4 Quattro 6MT
    Maestro + Epy Tuned / GTX2867r / S3's / Spintech Non-Resonated 3 Inch Exhaust / Cold Side Synapse DV / TR18 + 2.5" Piping / Hpfp S1 Pump
    Bi-Xenon retrofit + Fly's leds / ST Coils + Rsb / 18x9.5 Miro 111's
    Dat Der Build Thread
    Coming Soon: Boost Manager +, Drakes Performance Stage V Clutch

  30. #30
    Veteran Member Four Rings DRAKLORE's Avatar
    Join Date
    Oct 14 2009
    AZ Member #
    49253
    My Garage
    '81 Mk1 VW CADDY/2012 Honda Ruckus
    Location
    Okinawa Japan

    I would say that spot I used for the battery cable is the HARDEST lol
    The cable runs on top of the heater box between this like 4mm gap lol

    I would honestly just pull off all the rubber panels after removing the battery and see which one seems the best.
    I cut a hole and shone a flash
    Light through, pulled the side panel off, the vents out and with the lights dim looked for
    The flashlight.
    -Shane Drake-
    1981 VW Caddy 5.4L V8 Swap Speedhunters Feature!
    2006 A4 Avant Dolphin Grey
    2007 GT3071R A4 Moro Blue-RIP
    >DRAKLOREs Build<
    Formerly DRAKES-PERFORMANCE

  31. #31
    Active Member Two Rings
    Join Date
    Jul 10 2011
    AZ Member #
    78032
    Location
    Western New York

    Nice job!

  32. #32
    Veteran Member Three Rings ignus99's Avatar
    Join Date
    Nov 08 2009
    AZ Member #
    50417
    Location
    Calgary/Alberta/Canada

    Quote Originally Posted by Trigger200 View Post
    Nice job!
    ... Are you just trying to up your post count or something?
    This is the second thread I've noticed with you in it saying random stuff...
    - Karl

    Engine: GT28RS by ATP / Turbosmart 38mm dual BOV/Recirc / Carbonio CAI / APR TBE / APR Testpipe / REVO St2+ / Snow Performance ST2 / APR HPFP
    Body/Suspension: KW V2 / DPE ST-10 19x8.5 et35 / Thor Skid Plate
    Pretty Stuff: AWE Vent Boost Gauge / OEM Bixenon + V4 LED / Supertones / Votex SS / CF Hood & Mirrors / RS4 Grille & Fogs

  33. #33
    Veteran Member Four Rings shiro1745's Avatar
    Join Date
    Jul 26 2009
    AZ Member #
    45522
    Location
    DMV Area

    Any from the other three guys had this installed?
    - Chip

    K0R-GT -- S3 injectors -- Maestro tune -- IE Drop-in rods

    "It took 4 bad crankshaft seals and lots of cursing to build my avatar"

  34. #34
    Veteran Member Four Rings jsandor91's Avatar
    Join Date
    Jun 10 2011
    AZ Member #
    76682
    My Garage
    dead hookers
    Location
    South Jersey

    Quote Originally Posted by DRAKLORE View Post
    I would say that spot I used for the battery cable is the HARDEST lol
    The cable runs on top of the heater box between this like 4mm gap lol

    I would honestly just pull off all the rubber panels after removing the battery and see which one seems the best.
    I cut a hole and shone a flash
    Light through, pulled the side panel off, the vents out and with the lights dim looked for
    The flashlight.
    good idea, would like to use one hole for the majority of the wires if possible.


    Quote Originally Posted by shiro1745 View Post
    Any from the other three guys had this installed?
    i'm gonna be installing mine hopefully in the next two weeks, with much help from shanes diy
    Quartz Grey B7 A4 Quattro 6MT
    Maestro + Epy Tuned / GTX2867r / S3's / Spintech Non-Resonated 3 Inch Exhaust / Cold Side Synapse DV / TR18 + 2.5" Piping / Hpfp S1 Pump
    Bi-Xenon retrofit + Fly's leds / ST Coils + Rsb / 18x9.5 Miro 111's
    Dat Der Build Thread
    Coming Soon: Boost Manager +, Drakes Performance Stage V Clutch

  35. #35
    Veteran Member Four Rings DRAKLORE's Avatar
    Join Date
    Oct 14 2009
    AZ Member #
    49253
    My Garage
    '81 Mk1 VW CADDY/2012 Honda Ruckus
    Location
    Okinawa Japan

    You could just use an extended power cable and route through the Ecu box like the rest of the cables
    -Shane Drake-
    1981 VW Caddy 5.4L V8 Swap Speedhunters Feature!
    2006 A4 Avant Dolphin Grey
    2007 GT3071R A4 Moro Blue-RIP
    >DRAKLOREs Build<
    Formerly DRAKES-PERFORMANCE

  36. #36
    Veteran Member Four Rings DRAKLORE's Avatar
    Join Date
    Oct 14 2009
    AZ Member #
    49253
    My Garage
    '81 Mk1 VW CADDY/2012 Honda Ruckus
    Location
    Okinawa Japan

    And no problem man, I'm looking for as much feedback as possible. So you guys need to hurry up with your installs!! Lol
    -Shane Drake-
    1981 VW Caddy 5.4L V8 Swap Speedhunters Feature!
    2006 A4 Avant Dolphin Grey
    2007 GT3071R A4 Moro Blue-RIP
    >DRAKLOREs Build<
    Formerly DRAKES-PERFORMANCE

  37. #37
    Veteran Member Four Rings shiro1745's Avatar
    Join Date
    Jul 26 2009
    AZ Member #
    45522
    Location
    DMV Area

    Quote Originally Posted by DRAKLORE View Post
    You could just use an extended power cable and route through the Ecu box like the rest of the cables
    That's my plan too but it's really hard for me to make the time. I'm looking for the rest of things I need like connectors, cables, etc
    - Chip

    K0R-GT -- S3 injectors -- Maestro tune -- IE Drop-in rods

    "It took 4 bad crankshaft seals and lots of cursing to build my avatar"

  38. #38
    Veteran Member Four Rings DRAKLORE's Avatar
    Join Date
    Oct 14 2009
    AZ Member #
    49253
    My Garage
    '81 Mk1 VW CADDY/2012 Honda Ruckus
    Location
    Okinawa Japan

    I have so
    Many stupid unfinished projects, I
    Literally had everything just lying around haha
    -Shane Drake-
    1981 VW Caddy 5.4L V8 Swap Speedhunters Feature!
    2006 A4 Avant Dolphin Grey
    2007 GT3071R A4 Moro Blue-RIP
    >DRAKLOREs Build<
    Formerly DRAKES-PERFORMANCE

  39. #39
    Veteran Member Four Rings DRAKLORE's Avatar
    Join Date
    Oct 14 2009
    AZ Member #
    49253
    My Garage
    '81 Mk1 VW CADDY/2012 Honda Ruckus
    Location
    Okinawa Japan

    Small update- For the first time in the last week I got to sit down with the BMP.

    I was able to
    Load Chris' base map for the controller, at this point I want to
    Dial
    In the N75 and then I will do the LPFP. I then changed the boost settings for a wastegate of 14lbs and a target boost of 21lbs
    I pressed the green up arrow. And this time it worked. Now the controller errors out and freezes the program
    If I start the car, so
    No logging for now. Also I get the main array of errors even without the controller plugged in, this tells me Chris was right and this is likely a OS issue. I'm going to
    Contact Eurodyne tomorrow and see if there is a workaround :-/
    If not it looks
    Like I'll be borrowing my buddies laptop and loading him up some BMP software lol

    That being said, I
    Looked at the GP02 boost map, I'm not really sure what the "duty" portion of the map is?
    I get the target psi and rpm, but not sure what the other aspect is. Because on the map it has the boost target at 35psi at 8000 RPMs at a higher duty like 80?! And the lower the duty the lower the boost is at that rpm range....

    But whatever, I enabled "pump failsafes" took the car out and did two quick pulls. Car seems more reaponsive in the lower RPMs, the n75 is actually doing something now lmao
    Anyways I would spike 18psi then the car would cut back to
    12 psi... Not sure why but this happened both runs... This is good though considering I have been running off W/G 14lb for the last week since install, so this means that the wiring is good and I'm actually affecting something lol now if I can just get it to boost and hold where I want it...
    Need more time/better PC :(

    STAY TUNED, COMMENTS AND SUGGESTIONS WELCOME
    -Shane Drake-
    1981 VW Caddy 5.4L V8 Swap Speedhunters Feature!
    2006 A4 Avant Dolphin Grey
    2007 GT3071R A4 Moro Blue-RIP
    >DRAKLOREs Build<
    Formerly DRAKES-PERFORMANCE

  40. #40
    Veteran Member Four Rings DRAKLORE's Avatar
    Join Date
    Oct 14 2009
    AZ Member #
    49253
    My Garage
    '81 Mk1 VW CADDY/2012 Honda Ruckus
    Location
    Okinawa Japan

    P.S-
    I need someone with ETKA to get me the Pinout and pin description for the LPFP controller.

    If anyone can help that would be greatly appreciated!!
    -Shane Drake-
    1981 VW Caddy 5.4L V8 Swap Speedhunters Feature!
    2006 A4 Avant Dolphin Grey
    2007 GT3071R A4 Moro Blue-RIP
    >DRAKLOREs Build<
    Formerly DRAKES-PERFORMANCE

Tags for this Thread

Bookmarks

Posting Permissions

  • You may not post new threads
  • You may not post replies
  • You may not post attachments
  • You may not edit your posts
  •  


    © 2001-2025 Audizine, Audizine.com, and Driverzines.com
    Audizine is an independently owned and operated automotive enthusiast community and news website.
    Audi and the Audi logo(s) are copyright/trademark Audi AG. Audizine is not endorsed by or affiliated with Audi AG.