


Parts Required:
*5qts of your favorite variety oil (I used Castrol Syntec 5W40)
*Oil Filter
*Drain Plug Seal (Crush Washer)

Tools Required:
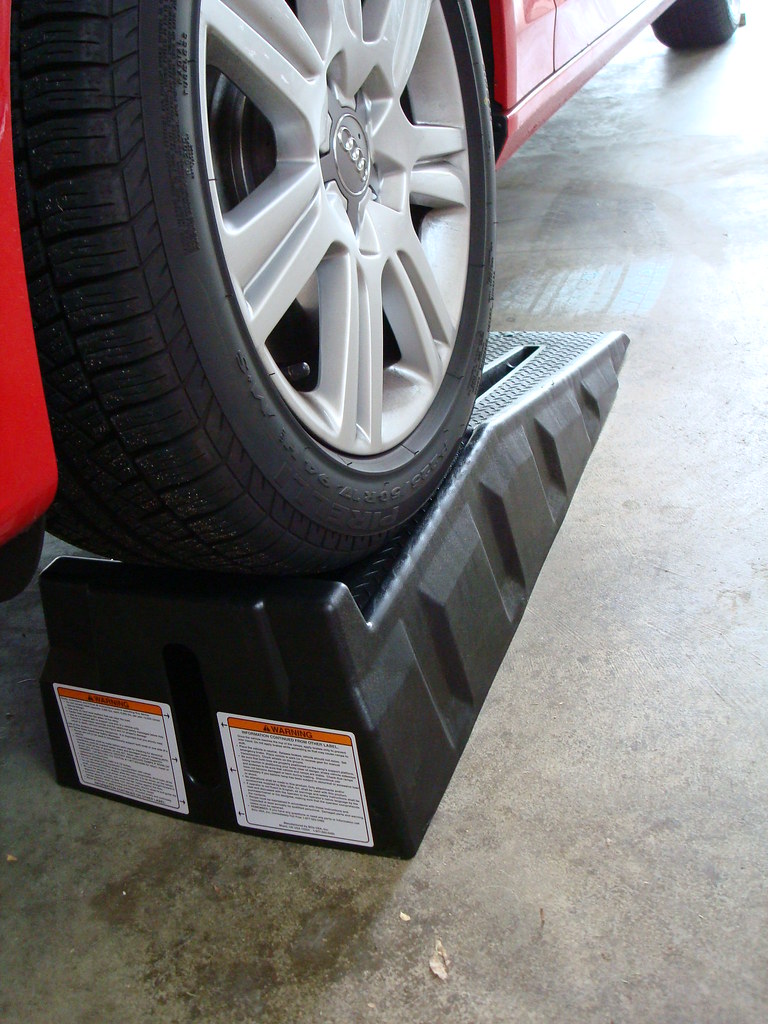
* Ramps
* Oil Drain Pan
* Phillips #2 Screwdriver
* 3/8 Drive Ratchet
* 18mm Socket
* 3/8 Drive Torque Wrench
* Oil Filter “B” Cap Wrench
Misc:
* Shop Towels
* Container for recycling used oil
Procedure:
1.) Prepare Automobile
a. Warm engine to operating temperature.
b. Position automobile on hard level surface.
c. Position ramps centered on tires and parallel to sides of vehicle.
d. Drive up ramps slowly and smoothly, this will help ensure the ramps do not slide or move as you are going up.
e. Engage parking brake or chock one of the rear wheels.
2.) Remove Underbody Pan
a. Remove three attaching screws passenger side (shown below).

b. Remove three attaching screws driver side.
c. Disengage three attaching screws (captive) from rear of pan.

d. Slide pan back towards rear of automobile, disengaging front tabs.
e. Pan should now be free, set aside for reinstallation later.
3.) Drain Oil
a. Position drain pan under oil pan.

b. Using ratchet w/ 18mm socket, loosen drain plug.
c. Finish loosening drain plug by hand and remove plug quickly, make sure oil flows into drain pan.

d. Keep watch as the oil drains and reposition drain pan as required.
e. Remove oil fill cap (allows more air into the engine helping the oil drain easier).
4.) Remove Oil Filter
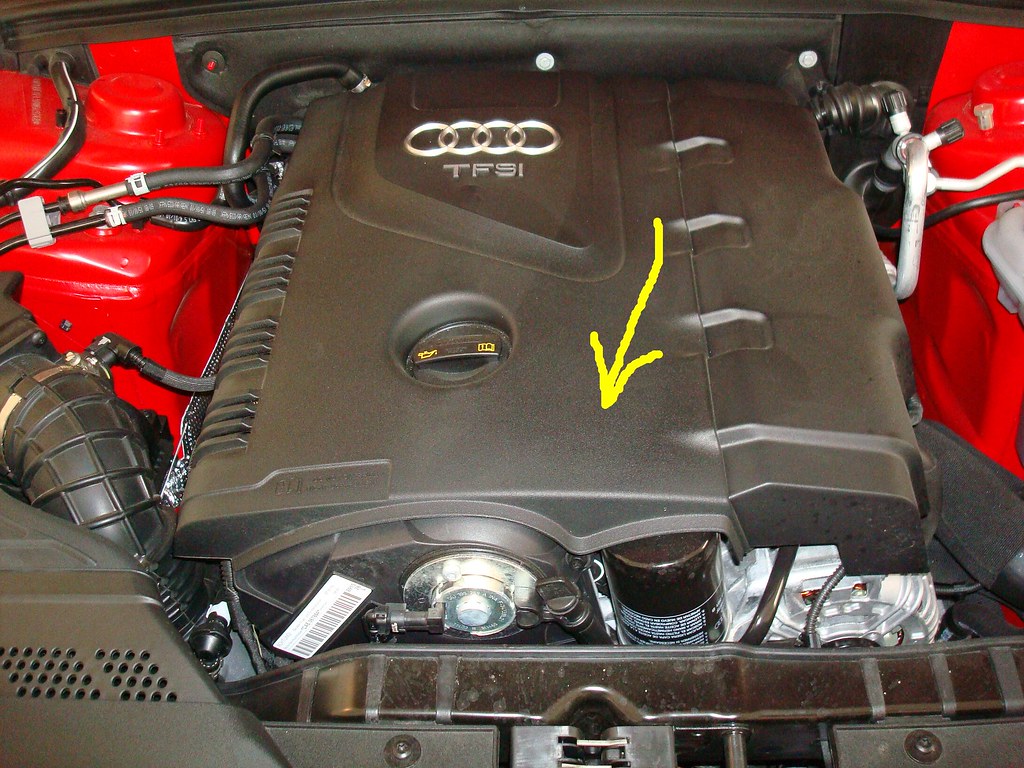
a. Remove engine cover by gently pulling up until rubber grommets are disengaged from ball studs on engine (there was some debris around the oil fill opening so I used a shop vac first to prevent any dirt etc from getting into the engine).

b. Position a shop towel around the base of the oil filter to absorb any residual oil that may drip out as filter is removed.

c. Using ratchet w/ cap wrench, loosen oil filter.

d. Remove oil filter and wipe up any oil remaining on engine mating surface.
5.) Install New Oil Filter
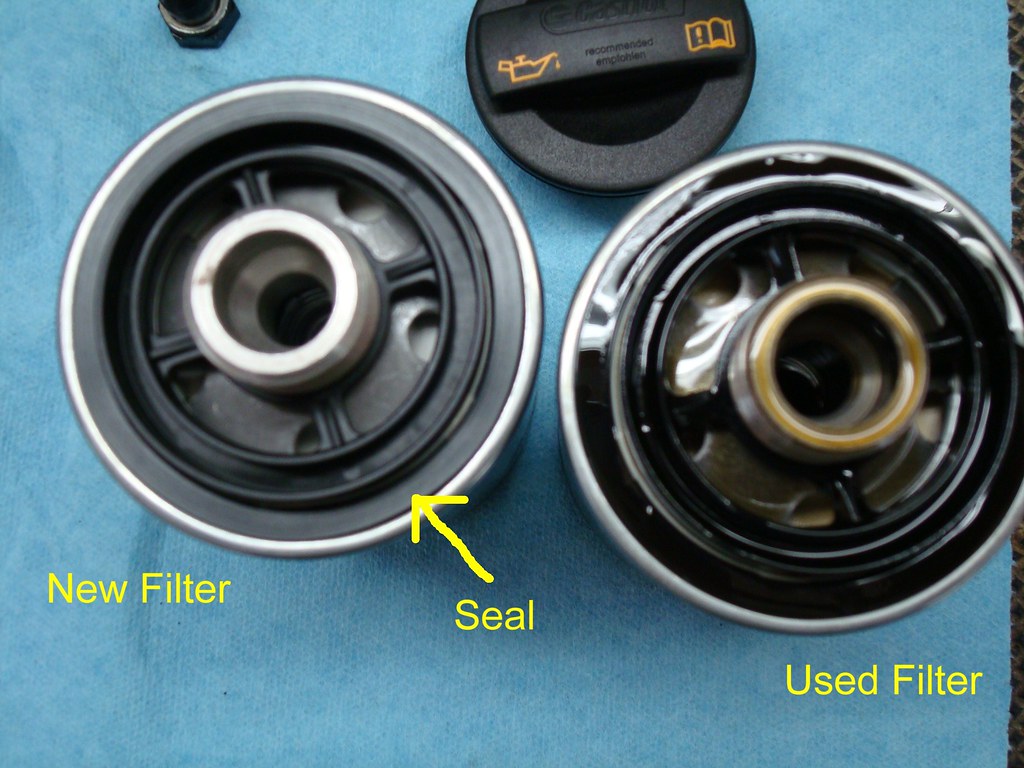
a. Using your finger or a shop towel, apply a light film of fresh engine oil onto oil filter seal.
b. Hand-tighten oil filter plus an additional 1/4 turn.
6.) Install Drain Plug
*** CAUTION *** Use care when installing drain plug, oil pan threads can be easily damaged if plug is over-tightened.
a. Discard old drain plug seal.
b. Wipe threads of drain plug and install new seal.
c. Thread drain plug, by hand only, into oil pan.
d. Wipe excess oil from oil pan and hand-tighten drain plug.
e. Using torque wrench and 18mm socket, tighten drain plug to 30nm (aprox 22lbft)
7.) Add Engine Oil
a. Carefully add 1qt fresh oil into oil fill opening (there is a metal baffle that prevents a funnel from being used, but it is just as easy to pour the oil directly into the engine).

b. Repeat previous step four more times (owner’s manual calls for 4.9qts)
c. Wipe off oil fill cap and reinstall.
8.) Finishing up
a. Start engine and check for leaks at oil pan drain plug and around base of oil filter.
b. Turn off engine.
c. Reinstall engine cover.
d. Reinstall underbody pan.
e. Carefully back your automobile off of the ramps.
f. If you own a dipstick, wait 5 minutes and then check the oil level. or Insert your key into the ignition (DO NOT START THE ENGINE), go to MMI/CAR/OIL LEVEL and wait for the computer to recalculate the oil level for you.
*** NOTE *** Do not forget to update your service records, whether it be in the owners manual or a separate log book. Be sure to save your oil/filter receipt somewhere safe... just in case you ever need to provide documentation that the oil change was performed.

 Reply With Quote


Bookmarks