


I did not write this, I found this when I installed my trim. I went from the piano black to the Brused Aluminum that I picked up for $100.00
My overview of removing and installing trim on a 2004 Audi A4.
As usual, I accept no responsibility for any damage or expense that may be caused by attempting to duplicate this procedure. There might be other ways to do this, but it worked for me and I am offering this simply for your review. Please feel free to contact me with any questions at mharris at mpaxconsulting dot com. With that said...
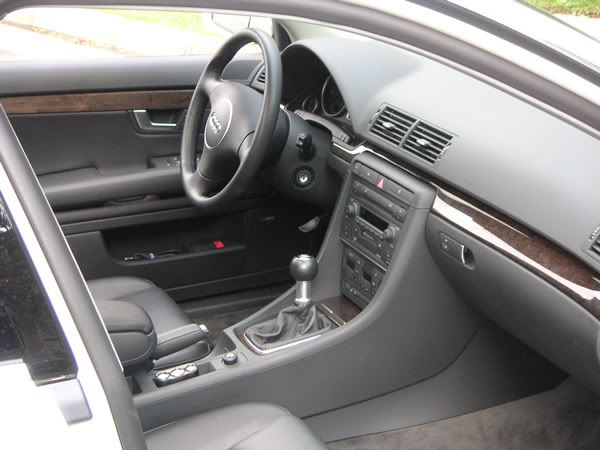
Here is what everything looked like at the beginning. Very nice UltraSport aluminum trim about to be replaced with S4 Bird's Eye Maple.

THE DOORS
The doors are extremely easy and should only take you about 10 minutes. The first one will take about 8 minutes. The door trim is held onto the door via little tabs that slid into a clip. They are not the cheesy little plastic clips of the old days. They are metal and/or solid plastic. Each piece has about 6 clips. Using a flat screw driver wrapped in paper or something to prevent scratches, slide the screwdriver under the trim and simply pop it out. It takes a little guts, but it is really quite easy.
e the first clip is popped out, you simply pull the trim out to you and go down the line of clips.
This should give you an idea of what you are pulling out of the door.
When you get to the end, the final clip slides out in the direction of the door hinge. Just simply push it towards the hinge and it will pop right out. The two rear doors have enough of an overhang that you do not need to use the screw driver to get them going. Just use your fingers to get the first one going.
THE REAR ASHTRAY
The rear ashtray, which I did not even bother taking pictures of, just pops out as one piece and is replace with the new one.
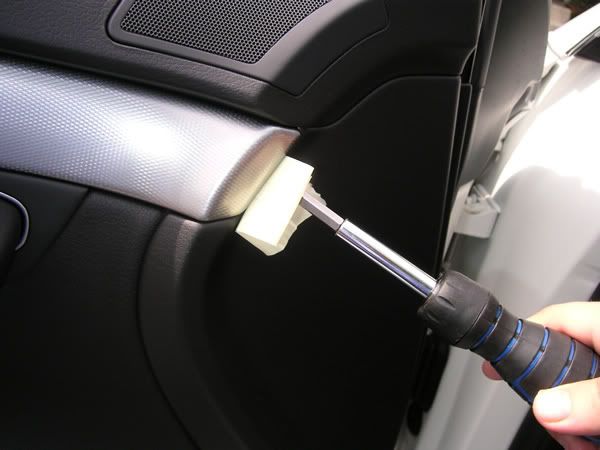
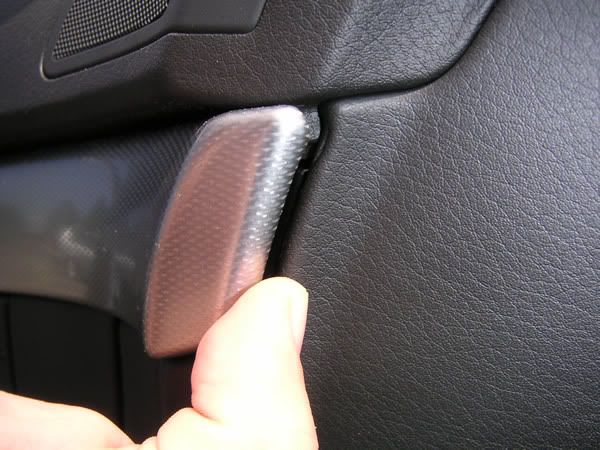
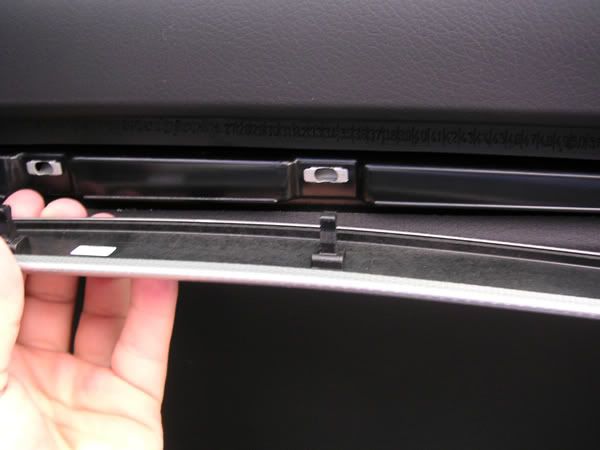
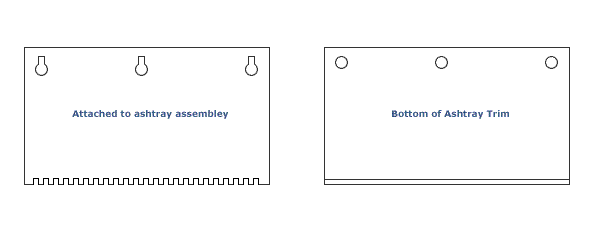
THE FRONT ASHTRAY
These two pieces are really not very difficult. The piece of trim on the ashtray fits onto a piece of similar size. removing this takes a little brut force and faith. On the bottom of the trim piece there are 3 little plastic pieces, these pieces fit into and lock into the female version on the piece attached to the ashtray. The front overhang fits over little thin teeth. Do not wiggle it or push it, pull straight out.
THE SHIFTER
To remove the trim around the shifter (on a manual transmission car), under the leather boot, there is a small piece of plastic that holds the leather in place, by squeezing together the east and west sides, the leather, with plastic attached, will pop out.
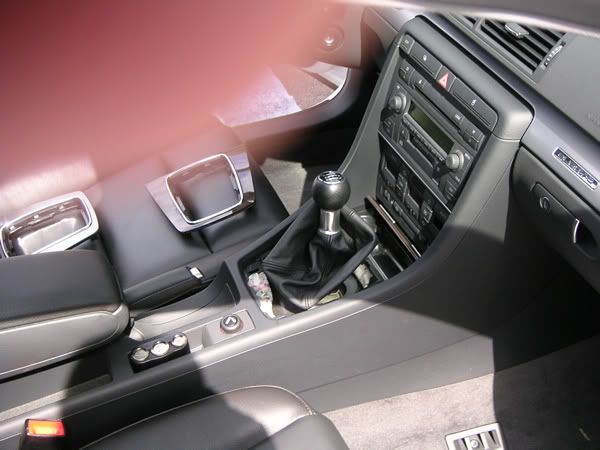
The trim piece just pulls straight up. It is secured by 4 little clips that fit into holes like the one below.

One you get the trim loose, just wiggle it over the shift boot and pop the new one in. I did notice that one of the metal clips stayed in the hole instead of coming out with the trim. Just get that little piece out before putting your new trim in. The new trim just pops right in, slide the shifter boot back into place, squeeze, and slid into place.
DASH TRIM (LEFT)
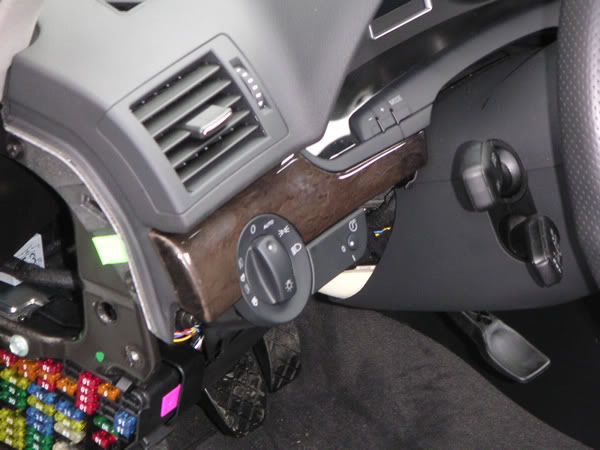
The short piece of trim near the headlight switch is the most difficult part to swap. To begin, remove the cover on the outside using the screwdriver and paper technique. This will pop a little section off big enough to get your fingers under and then just pull it out. It will resist a little bit, there are four plastic clips holding it in, just pull it straight out. This will expose the fuse box. Then you need to remove the lower part of the dash under the steering wheel. To remove this, there are two bolts located on the bottom. Remove these and pull the whole thing towards the seat. Keep in mind that there are wires connected to this piece, so you can not take it out unless you remove the wires. I didn't, I just lay it on the floor.

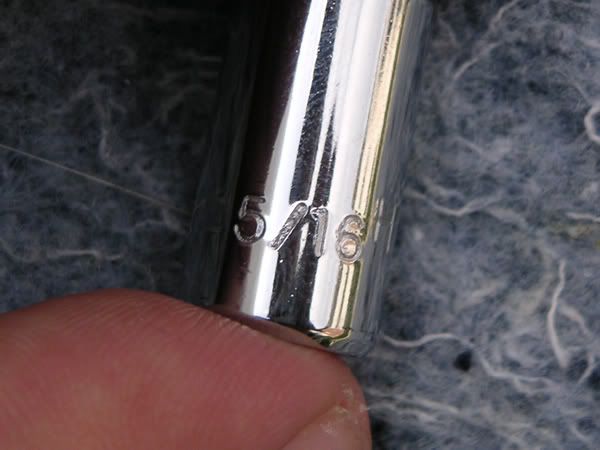
There are 3 bolts holding the trim in place (marked above). To remove these you need your new best friend, a 5/16ths socket with a screwdriver attachment and a socket wrench.
Most of the bolts can be removed with the screwdriver extension, the one nearest to the steering column will require a socket wrench because you can not get the direction/cruise control levers out of the way.

Once you get the bolts out, you need to remove the headlight switch assembly. To do this, you must turn the headlight switch just to the left of the "Auto" setting and push in, you will feel when you are in the right place because it will go in about a half an inch. Then turn to the right about 10 degrees and pull straight out. This took me a couple of tries, but when I got it right, I could feel it.

The lighting assembly of course has a few wires plugged into it. So too does the interior light dimming switch just to the right. Both can be easily unplugged and the unit themselves pushed through the trim (away from the dash). Once those are free, just put the lighting pieces into the new trim and re-secure everything. Do not put the lower dash back yet as you will need to access one of the bolts it covers when you replace the next trim piece.
DASH TRIM (RIGHT)
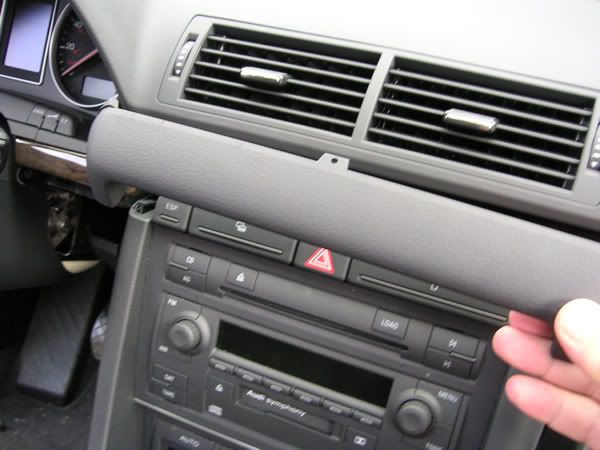
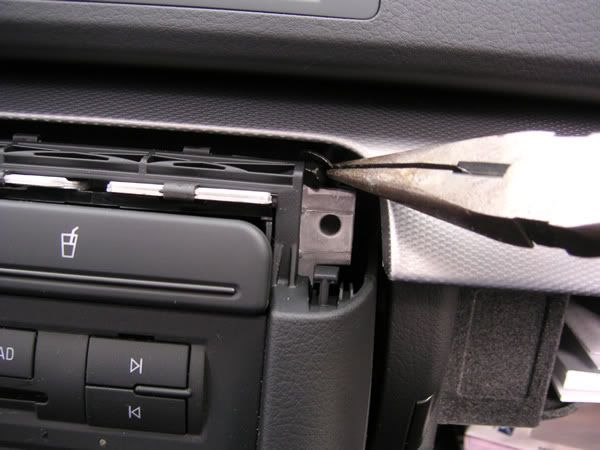
The last piece is very easy. The most difficult part is removing the plastic trim piece (below) above the center console. You can get your fingers underneath it on the left side, just push it out. It is difficult, you can get the other side loose by using the screwdriver and paper method through the open glove box. This piece does not come out easily. Unfortunately, you just have to have faith that it will pop out. Do not over do it with the screwdriver on the right side, just pop it enough so that you can get your fingers under it.
Once you get it out, there are four bolts that need to be removed. These bolts require the same 5/16ths bit on the screwdriver attachment. There is one on the far right (you need to remove the plastic cover similar to the one from the fuse box on the other side). The screw is parallel to the trim, there is a hole and the screw is about an inch behind it. The other three bolts are located on the dash, two in the corners where you removed the plastic trim pieces and one to the right of the steering column. BE CAREFUL: The two screws in the middle can fall down behind the stereo, I would recommend using a magnet or a pair of needle nose pliers to get the screw.
The whole thing pulls out straight. You may need to tilt the bottom of the trim upwards and wiggle it.
That's pretty much it. I was somewhat intimidated when I began this project. I figured it would take several hours and I would end up down at the dealership with random broken parts in the passenger seat. The whole thing, including sitting there for 30 minutes smoking cigarettes and trying to get the nerve to pop the first door trim off, took about an hour and a half. Everything came out about the way I expected and everything went back together easily. The two most annoying parts are getting the cover to the front ashtray and the lighting assembly. I am very happy with the results and I'm sure you will be too.


Bookmarks