


SlickFix for the Vacuum Line DIY
&
Spike00513 for the Oil Check Valve DIY
Both of these threads were a great help to me during this process, and inspired me to post my experience to hopefully benefit other 3.0 owners.
I also used the thread at http://audirevolution.net/forum/index.php?topic=283.0]DIY: Intake manifold spacers for the part diagrams, which I believe are taken from workshop-manuals.com.
A few notes:
I am not a mechanic and prior to this had never done vacuum line or manifold work.
This post will have lots of pictures "expertly" edited with good ole paint.
I was flat broke when I did this fix so I didn't replace ANY of the sensors, gaskets, or split loom that were available to me with the parts out. The other threads include those steps if you need them.
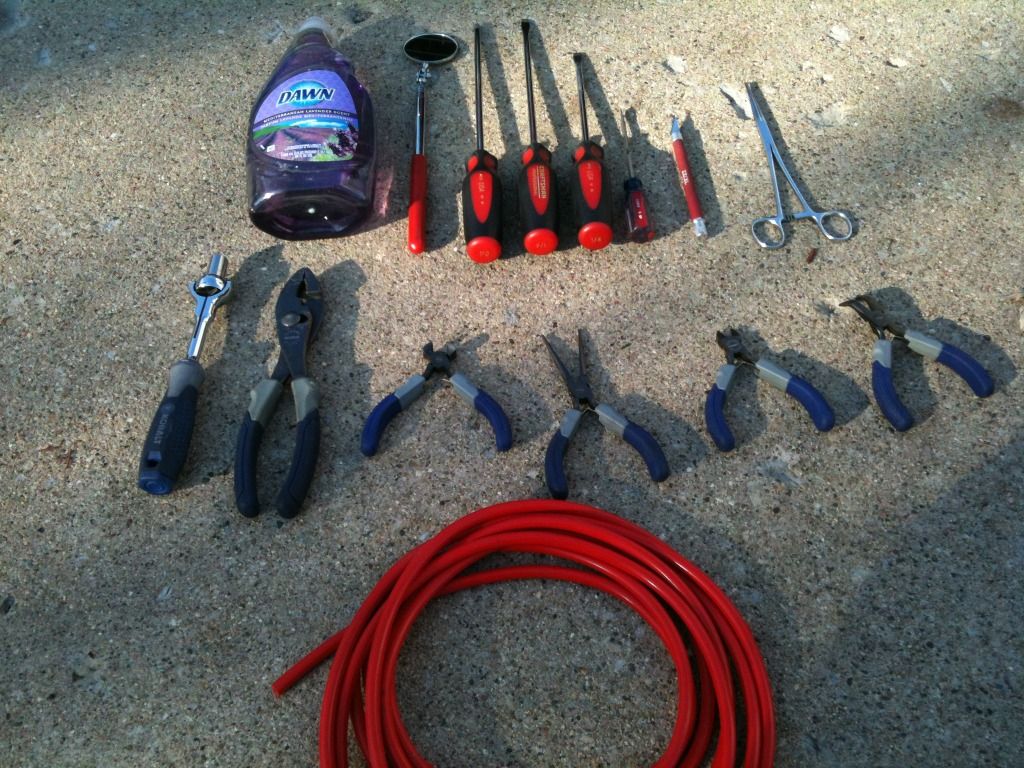
Tools required:
I'm going to use SlickFix nicely compiled list and add just a few things.
Large channel locks to open large hose clamps on intake, or some similar tool.
Long 1/4" ratchet extension, I believe mine was 6".
Torque Wrench with 1/4" socket head. Something like this, though I personally have the old style.

5mm 1/4" socket driver
6mm 1/4" socket driver
Torx 30 1/4" socket driver (or screwdriver type, but much harder to use)

1/4" ratchet
10mm 1/4" socket
Assortment of pliers
Assortment of small wire cutters
Assortment of screwdrivers: flathead, phillips
And if doing vacuum lines:
Small forceps(VERY important and helpful for this job. It allows you to lock the forceps onto the new silicone hose to use for leverage when installing onto a nipple in tight quarters).
Exacto hobby knife
Telescoping mirror
LED Headlamp or small bright flashlight
Dish soap(Fragrance of your choice).
~20 ft. of 3.5 mm silicone vacuum line(I bought mine from verociousmotorsports)
Backround:
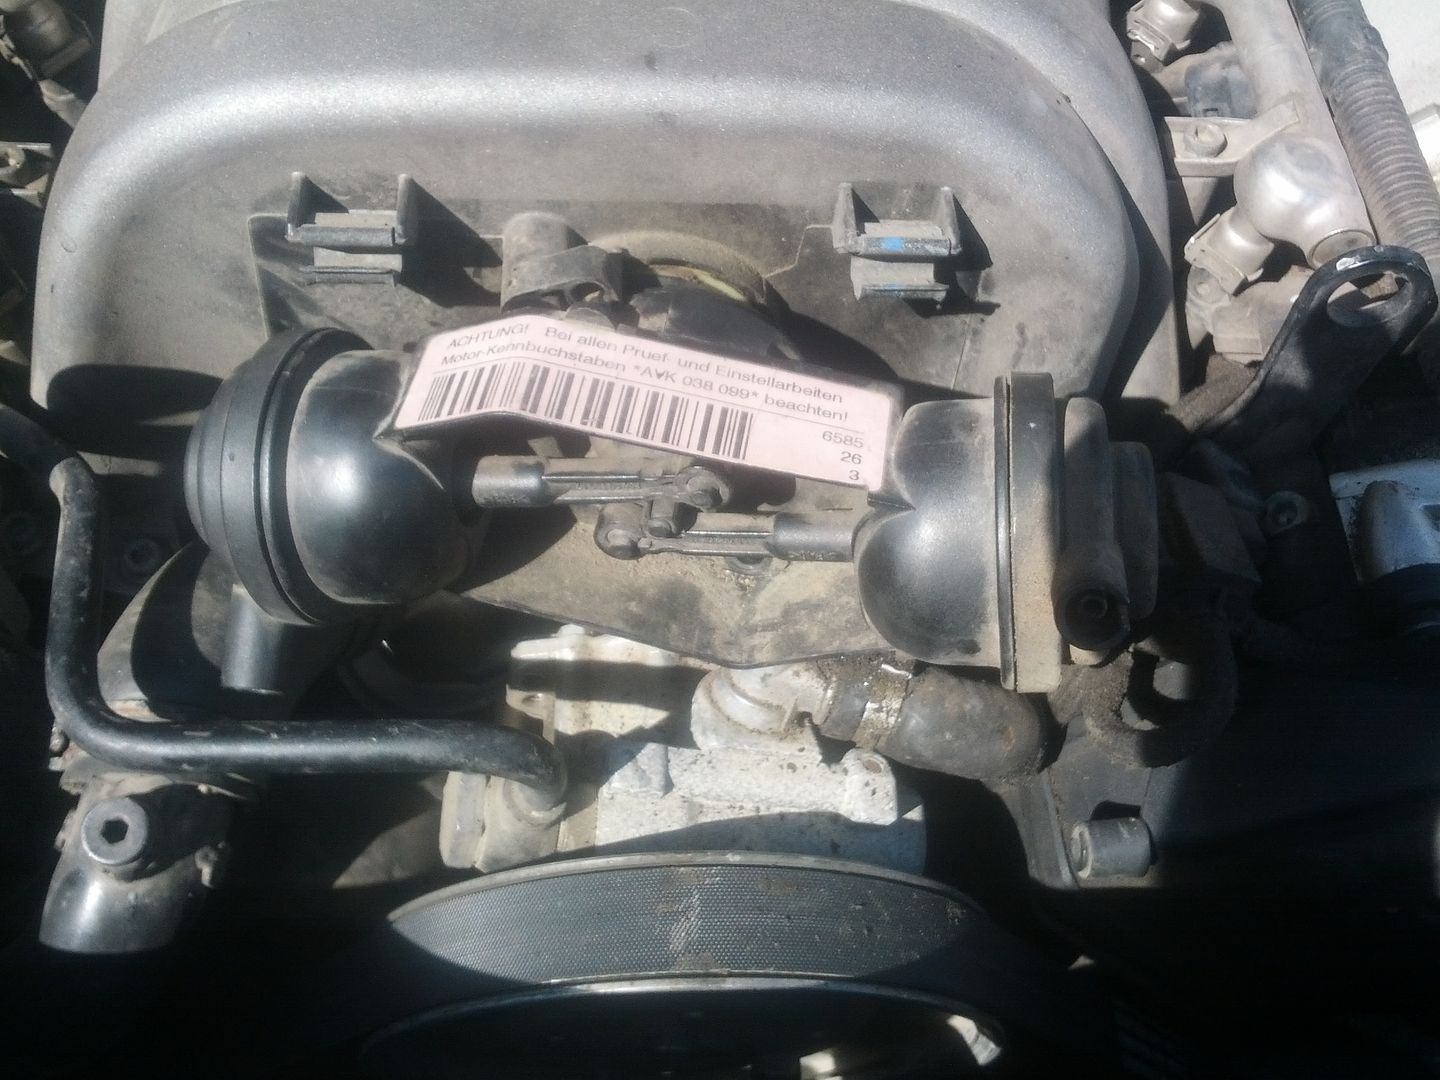
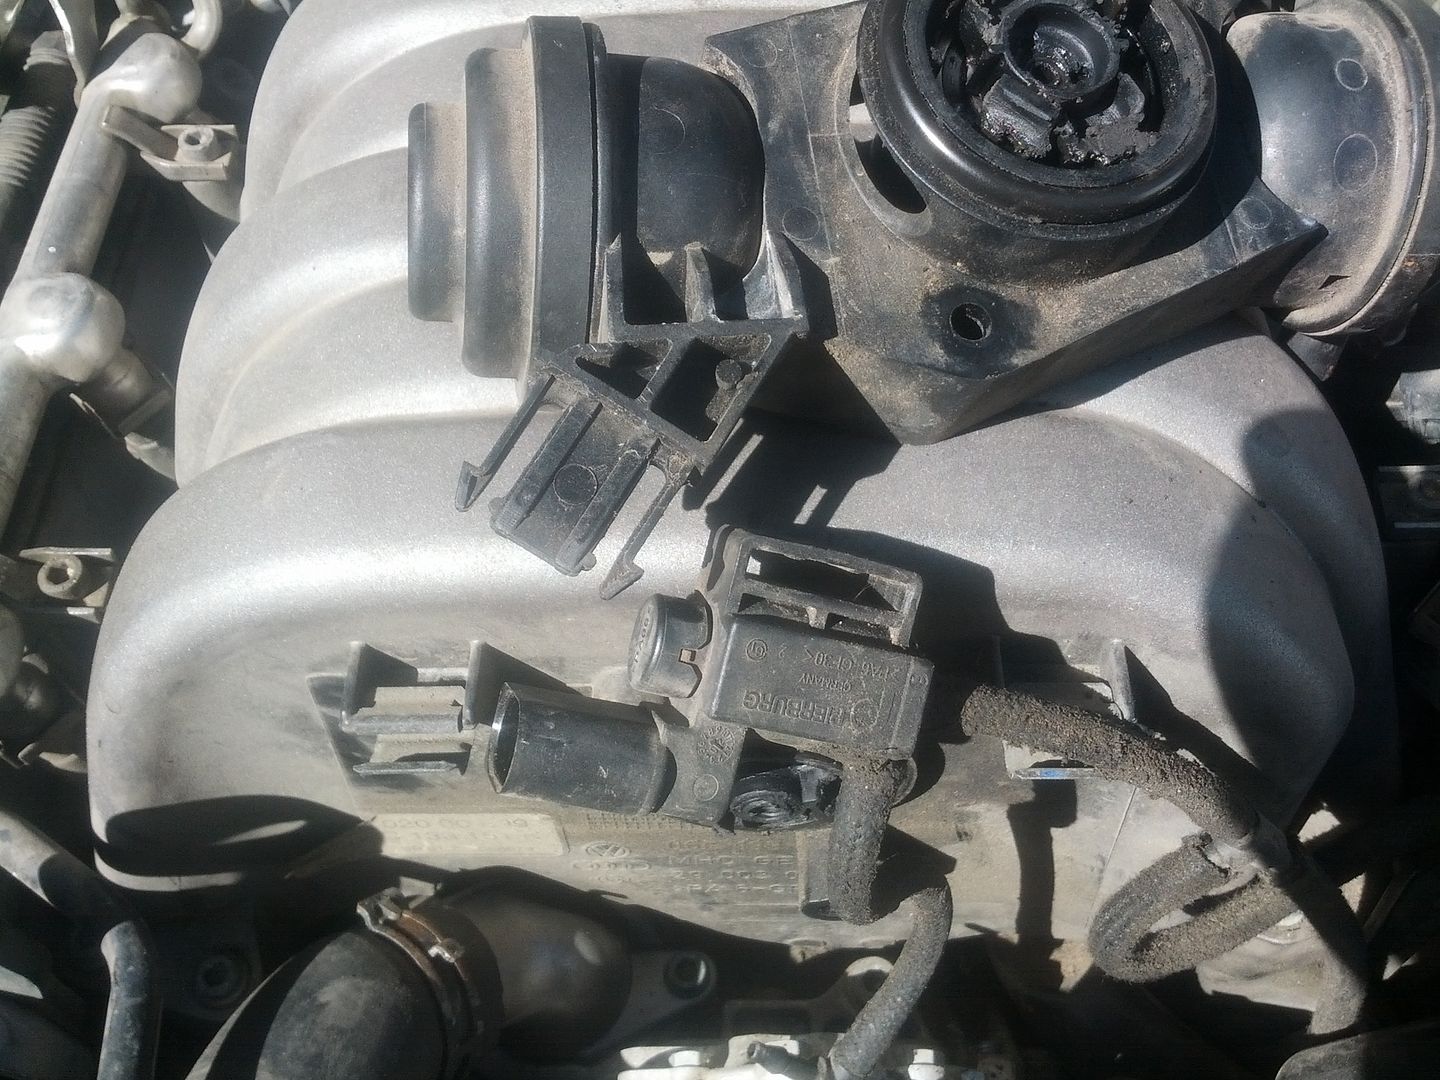
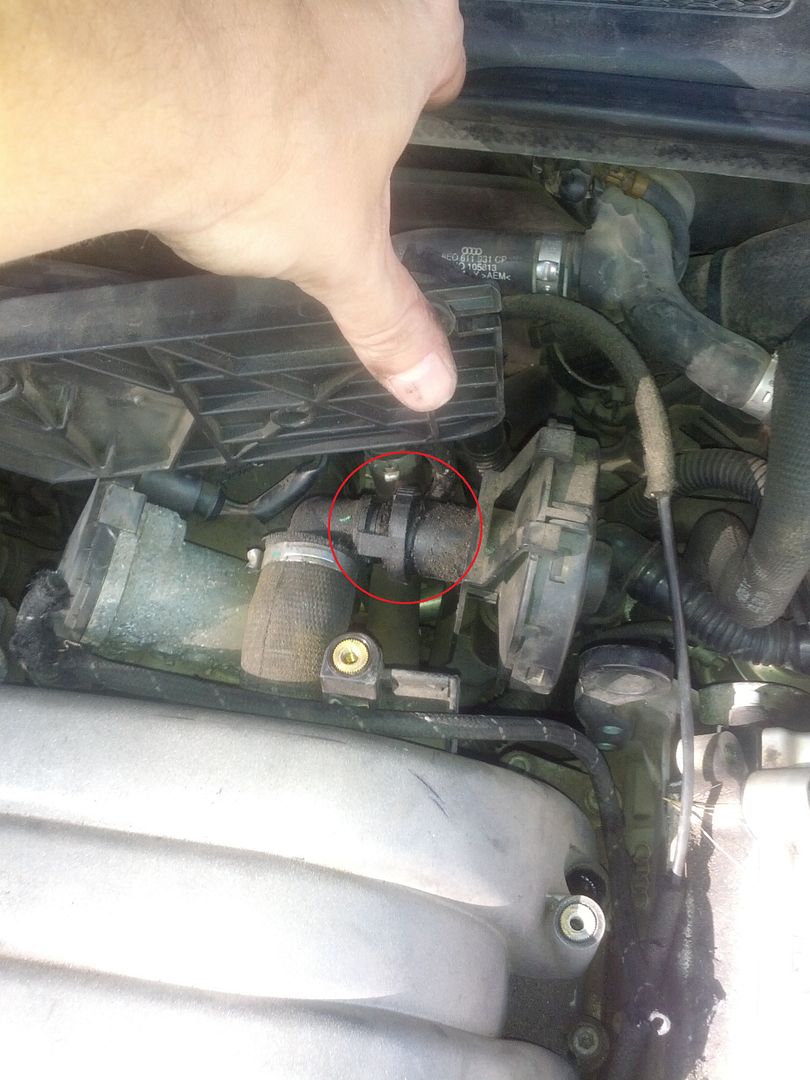
Had obvious fuel trim problems, and hissing noise under the hood. Decided to follow SlickFix DIY for the vacuum line. When replacing the vacuum lines going into the part below I broke one of the nozzles housed in the rotary valves. This part is a Vacuum Actuator, sometimes called Drive Unit:
And here is the nozzle that I broke out of the other side.

I tried several used ones, but every place I went only had broken ones, so I ended up ordering the part from Romney Papesh over at AudiUSAParts.com. MFG Part#: 06C133611 roughly $400.
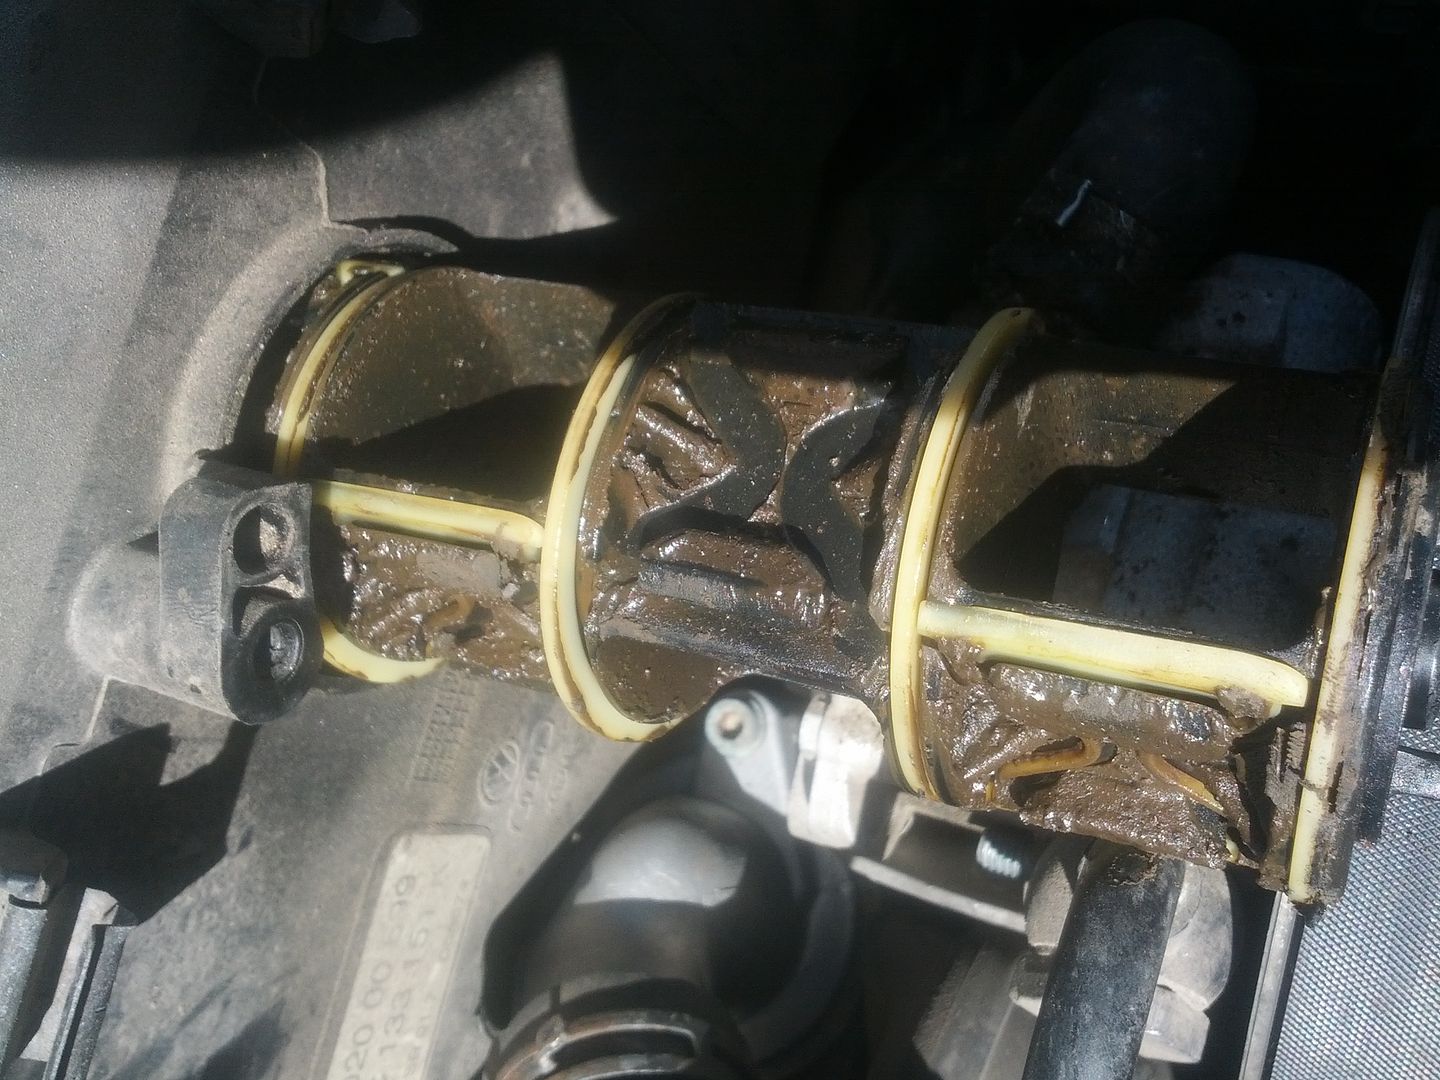
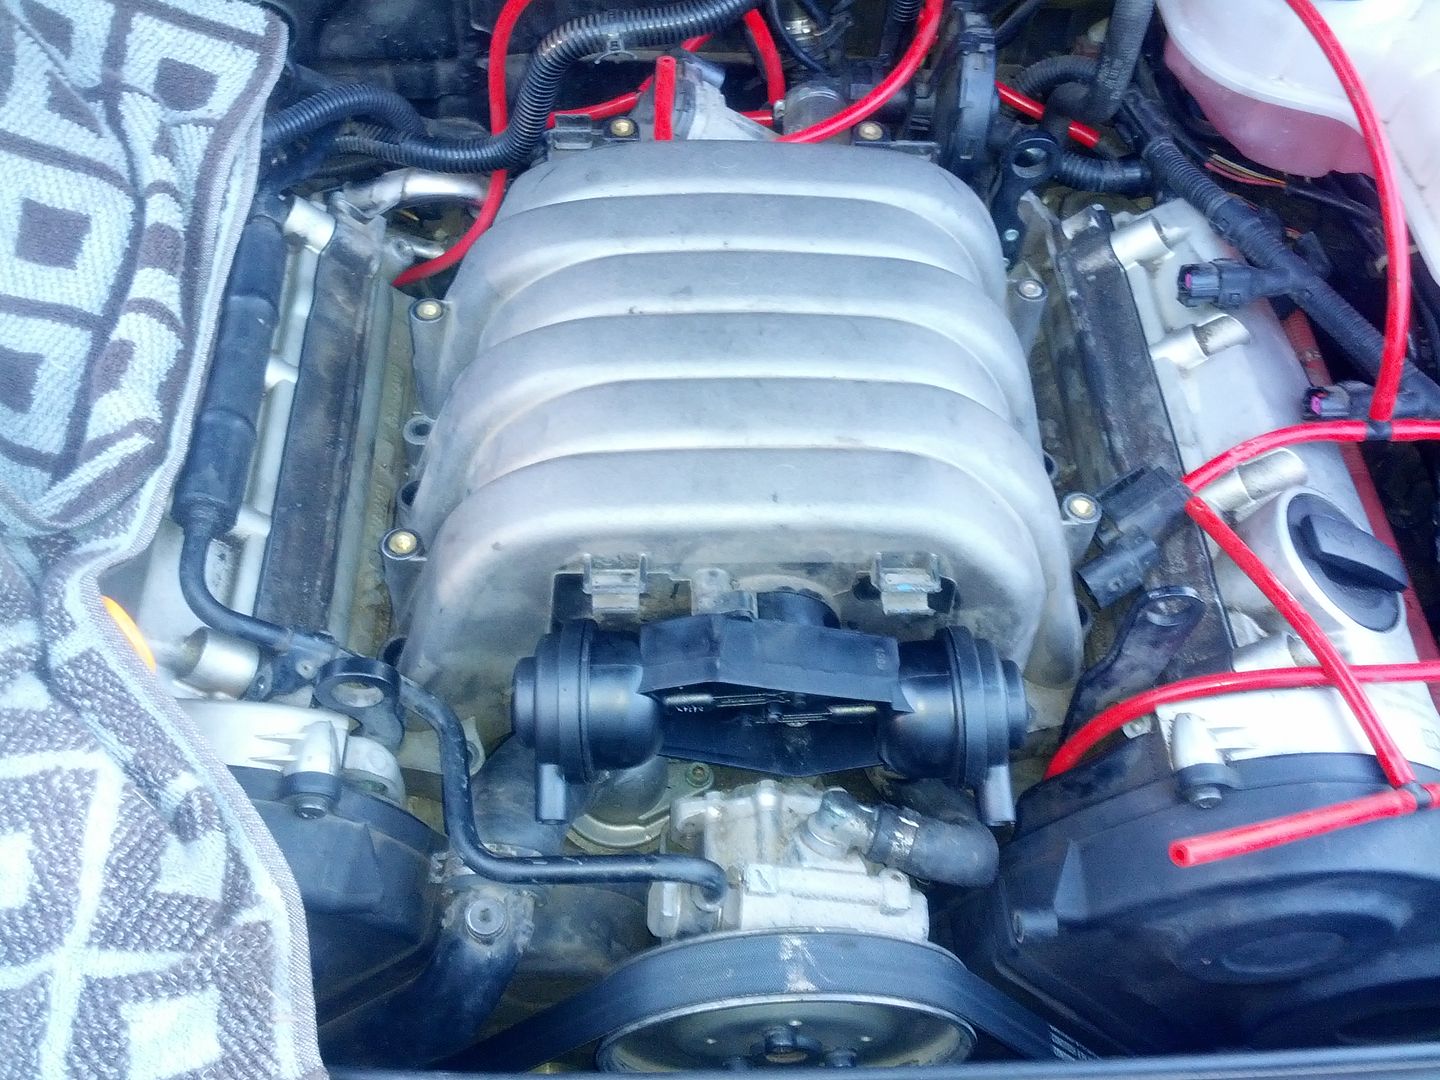
After trying to pull the old cylinder out of the front of the manifold, I realized the whole manifold had to come off, but couldn't find a guide that didn't include a bunch of other work that I wasn't doing, which meant they were pulling parts out that I might not need to. Look how much gunk is on this. It was a nasty wet clay consistency.
Ok enough with all that on to what you are here for.
DIY: B6 3.0L Vacuum Actuator/Drive Unit + Intake Manifold.
Start with the basic safety stuff. Disconnect negative terminal of battery.
Remove plastic covers, or be like me and accidentally break all of them when you close the hood without remembering they are on the intake manifold.
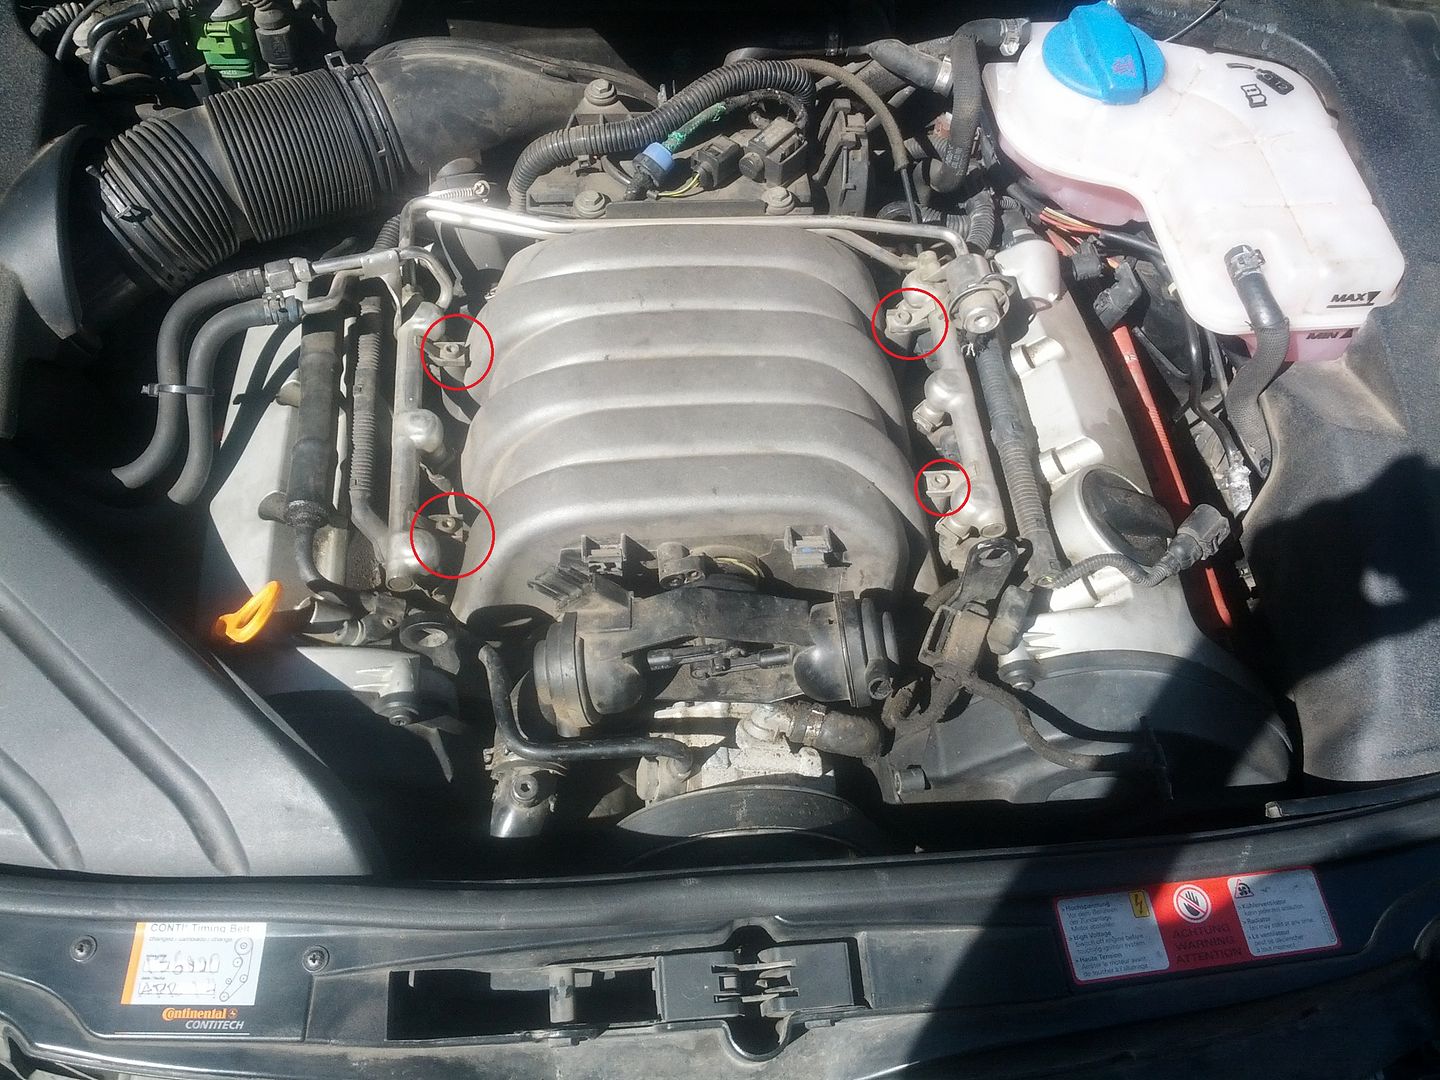
Disconnect this plug.
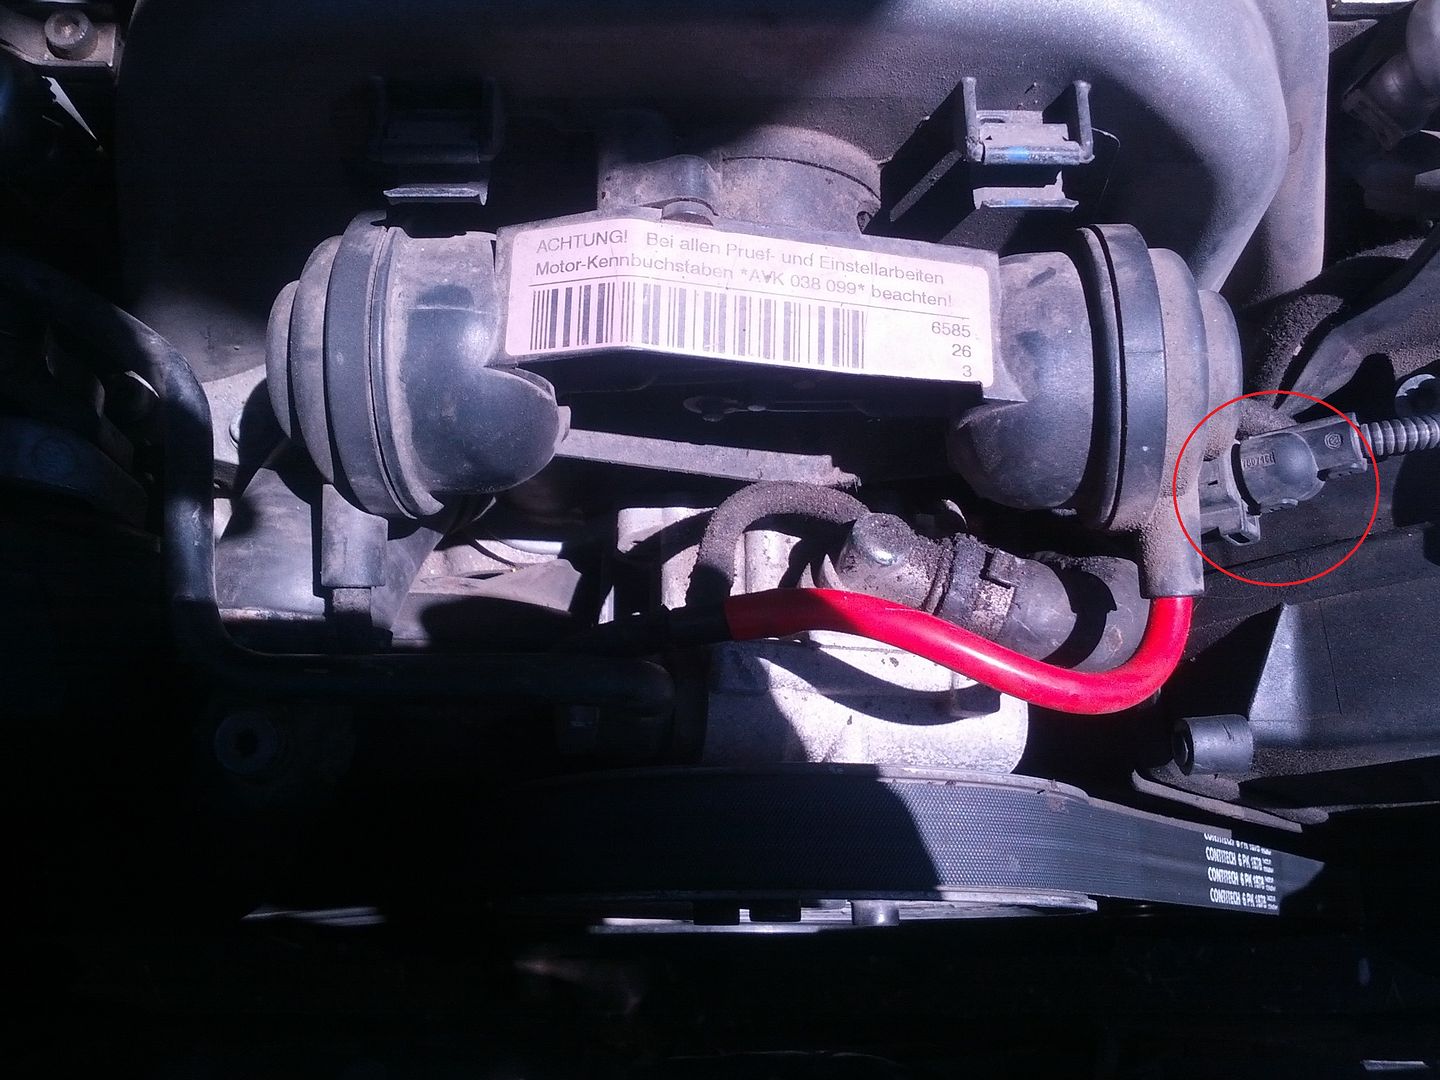
Remove the 2 t30 torx bolts holding the actuator in. The bolts are in the peaks of the plastic housing. Then remove vacuum lines from unit.
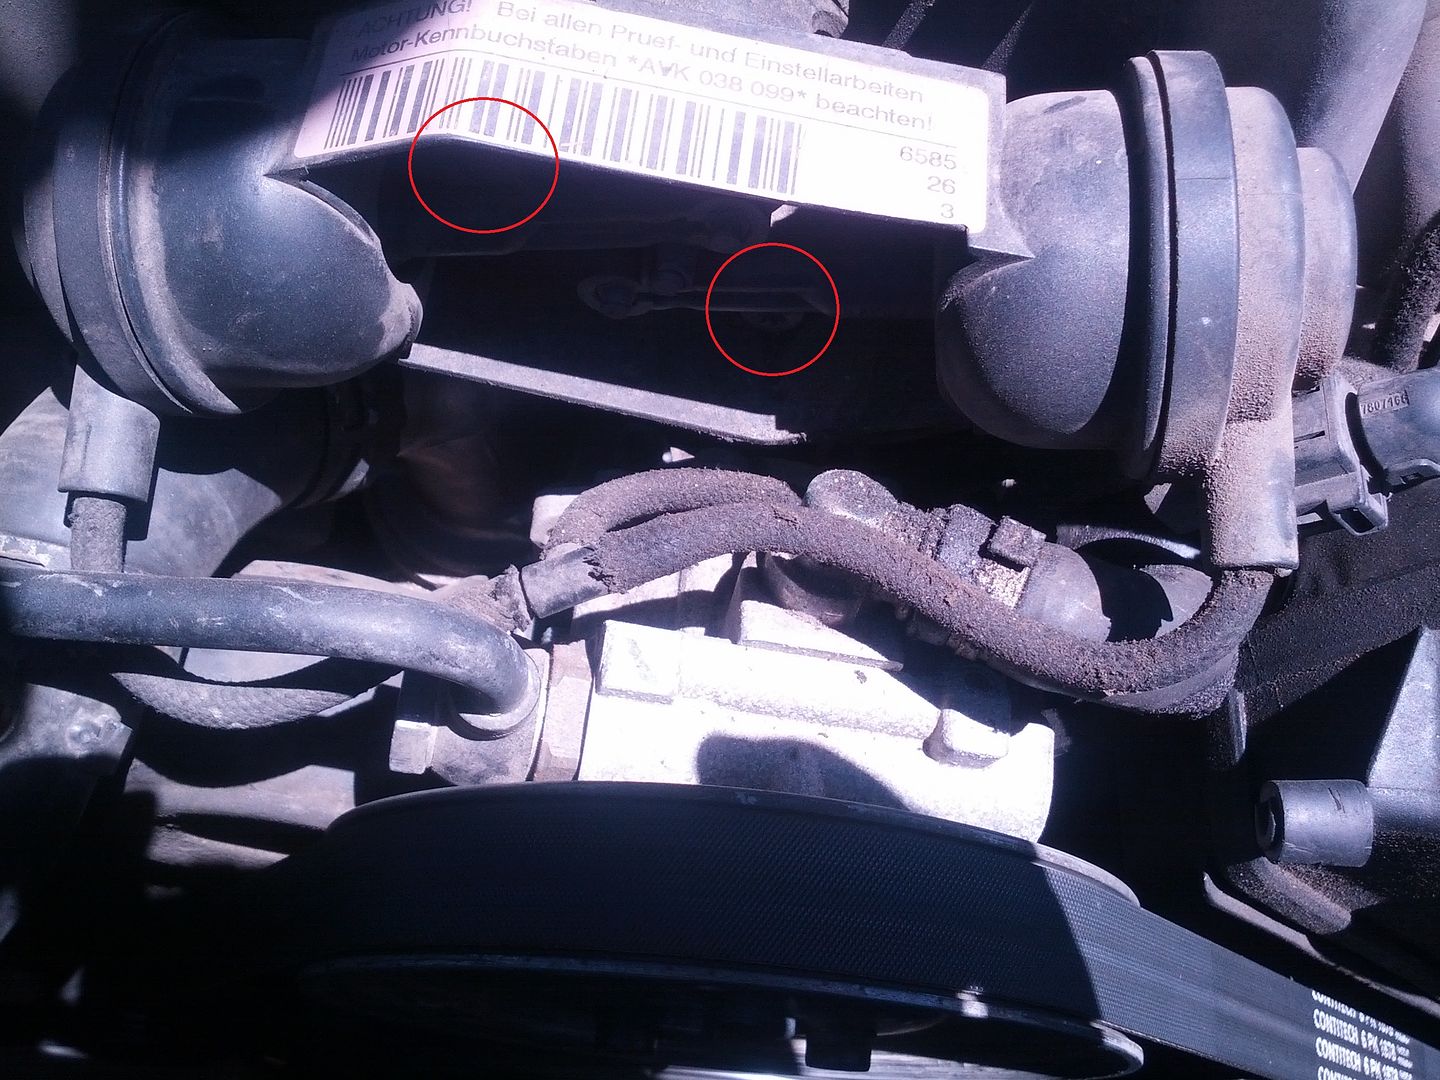
Detach this piece from its clip on the bottom of the actuator. I found it much easier after I turned it over.
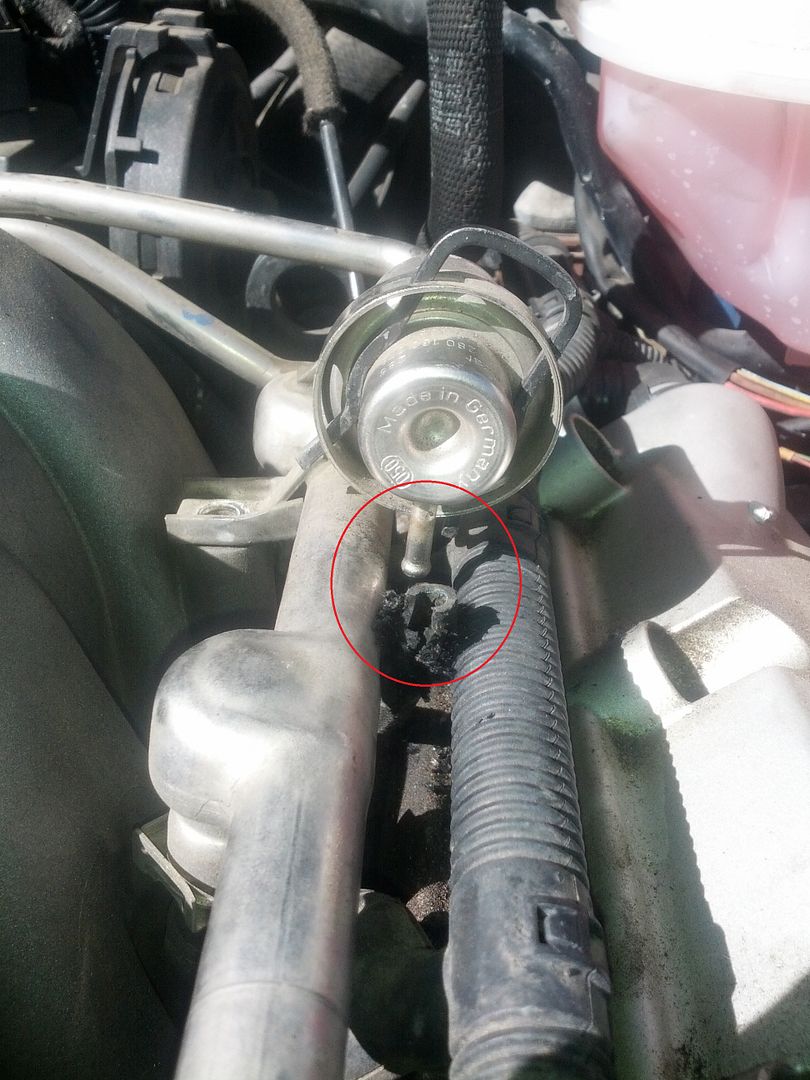
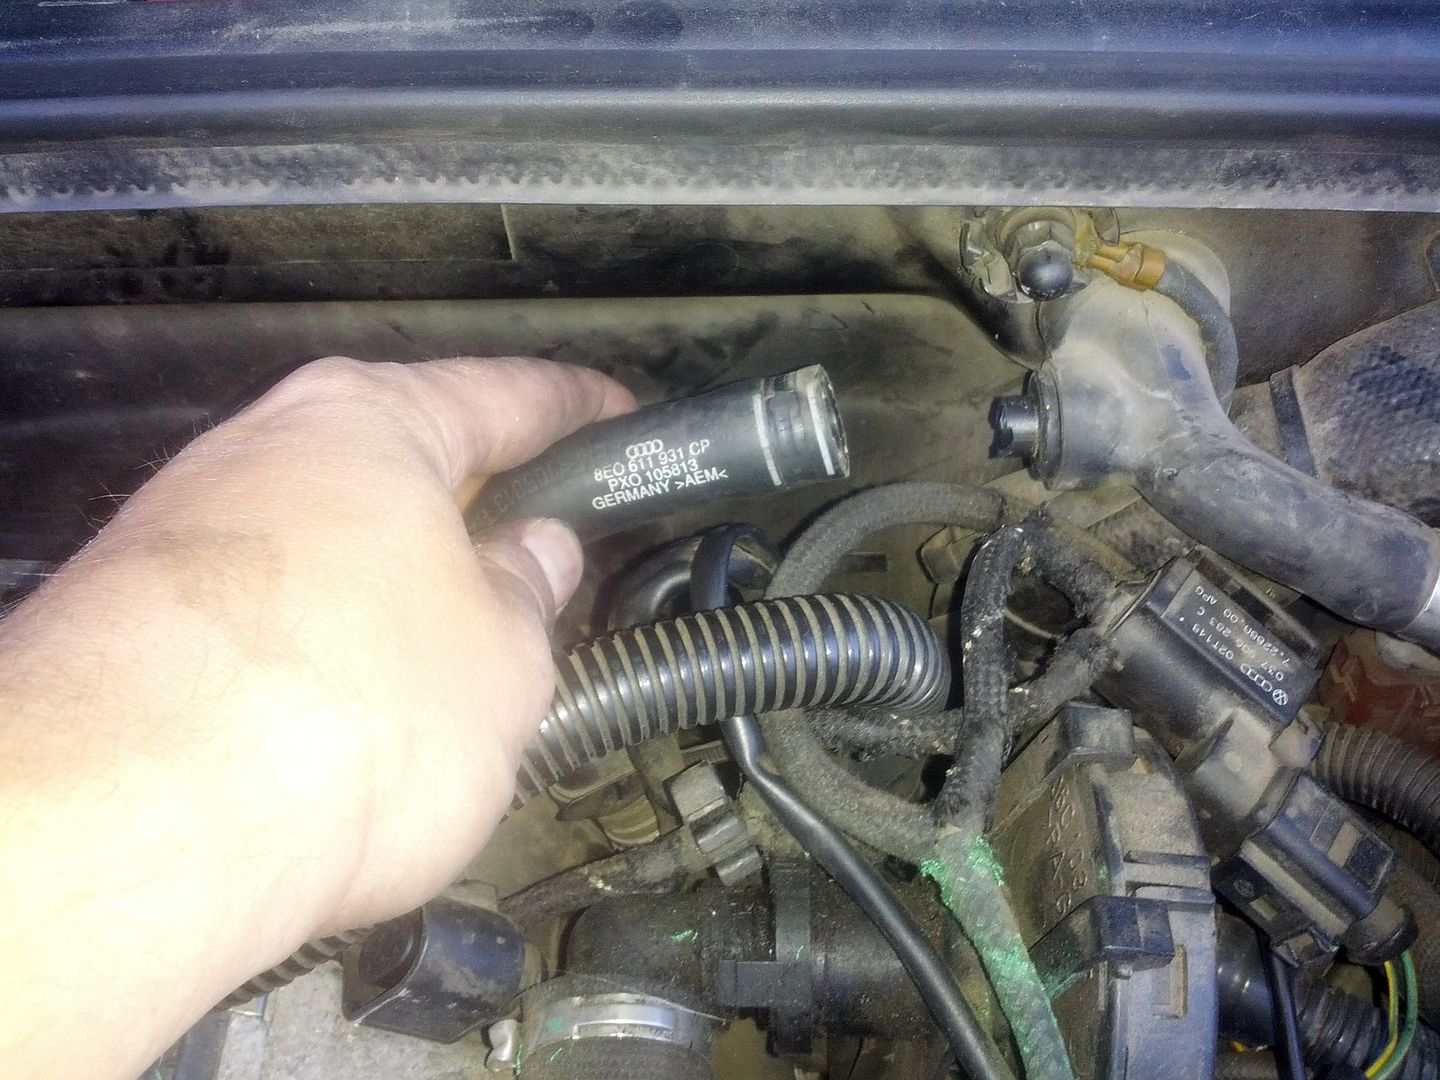
You also need to remove this vacuum hose from the fuel rail if your car has it. I hear only the '02 and '03 do, I'm not sure. I have the '03.
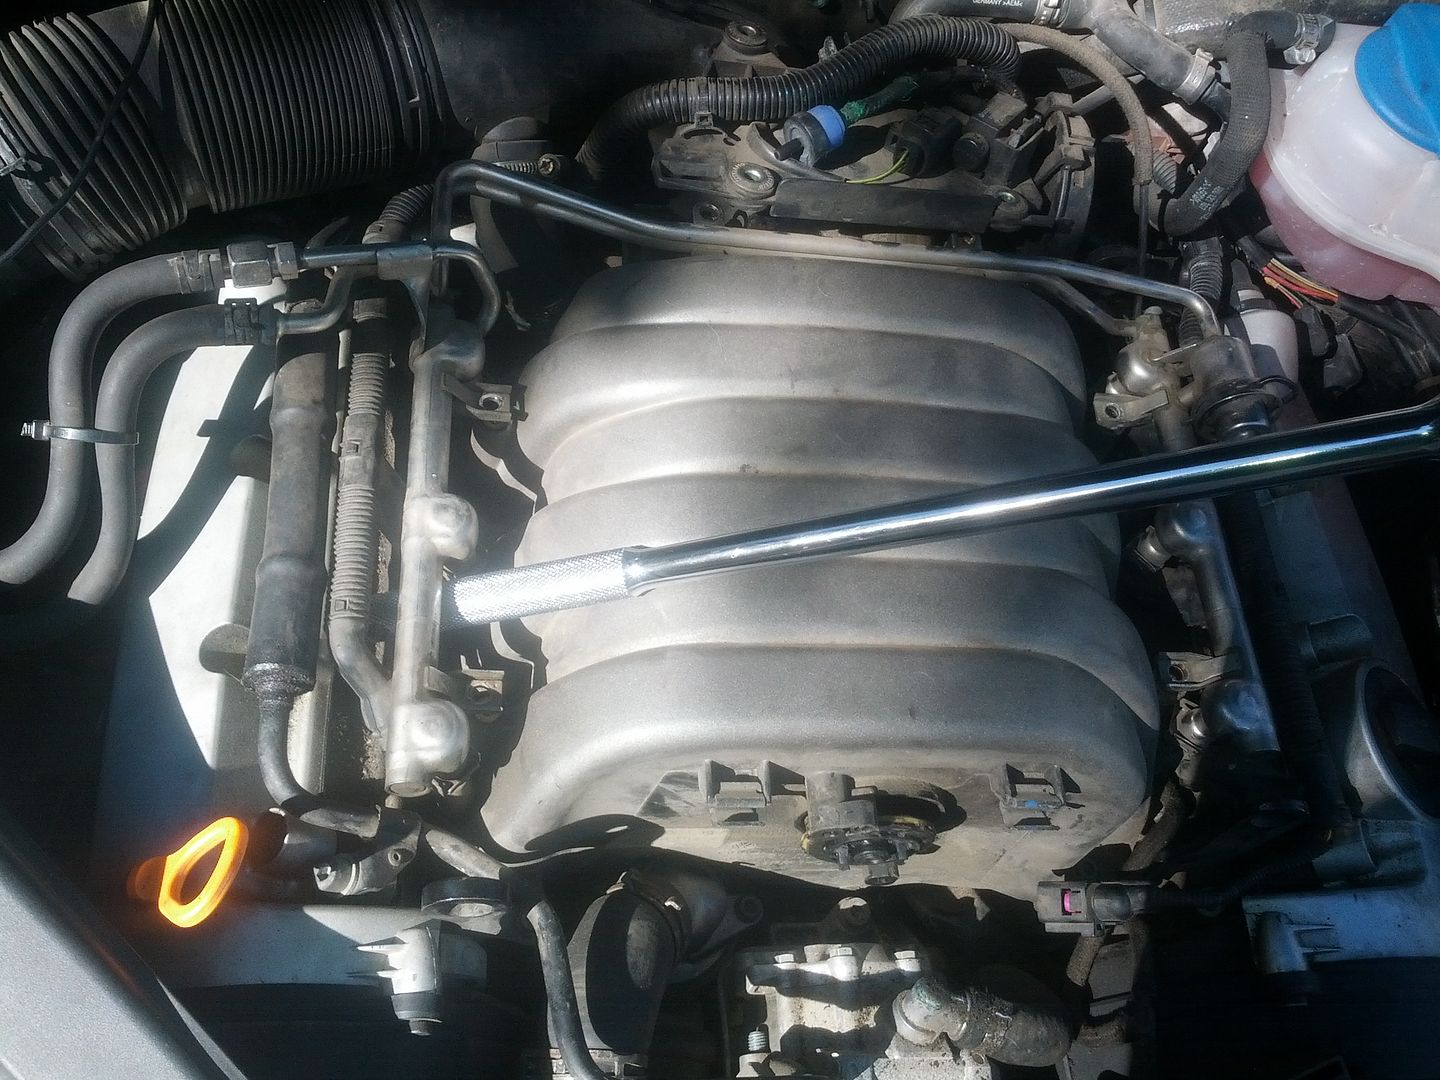
Now to the fuel rails. These are held in by 4 5mm hex bolts.
Once those are out, you have to pry the entire metal rail off. You are supposed to remove the electronic components first, but I found it MUCH easier to get them off after I pulled the injectors out a few inches. Be gentle, it takes a little force, but don't he-man it. I just used the breaker bar I use to do under the car stuff. You only need it to come free, not to be completely out. Do the same on both sides.
Here is a shot of what the underside of the fuel injector electronic clips look like. You won't be able to see them so hopefully this will help you open them without breaking them. I broke 5 out of 6 myself, but they seem to be staying on the injectors snugly anyway.
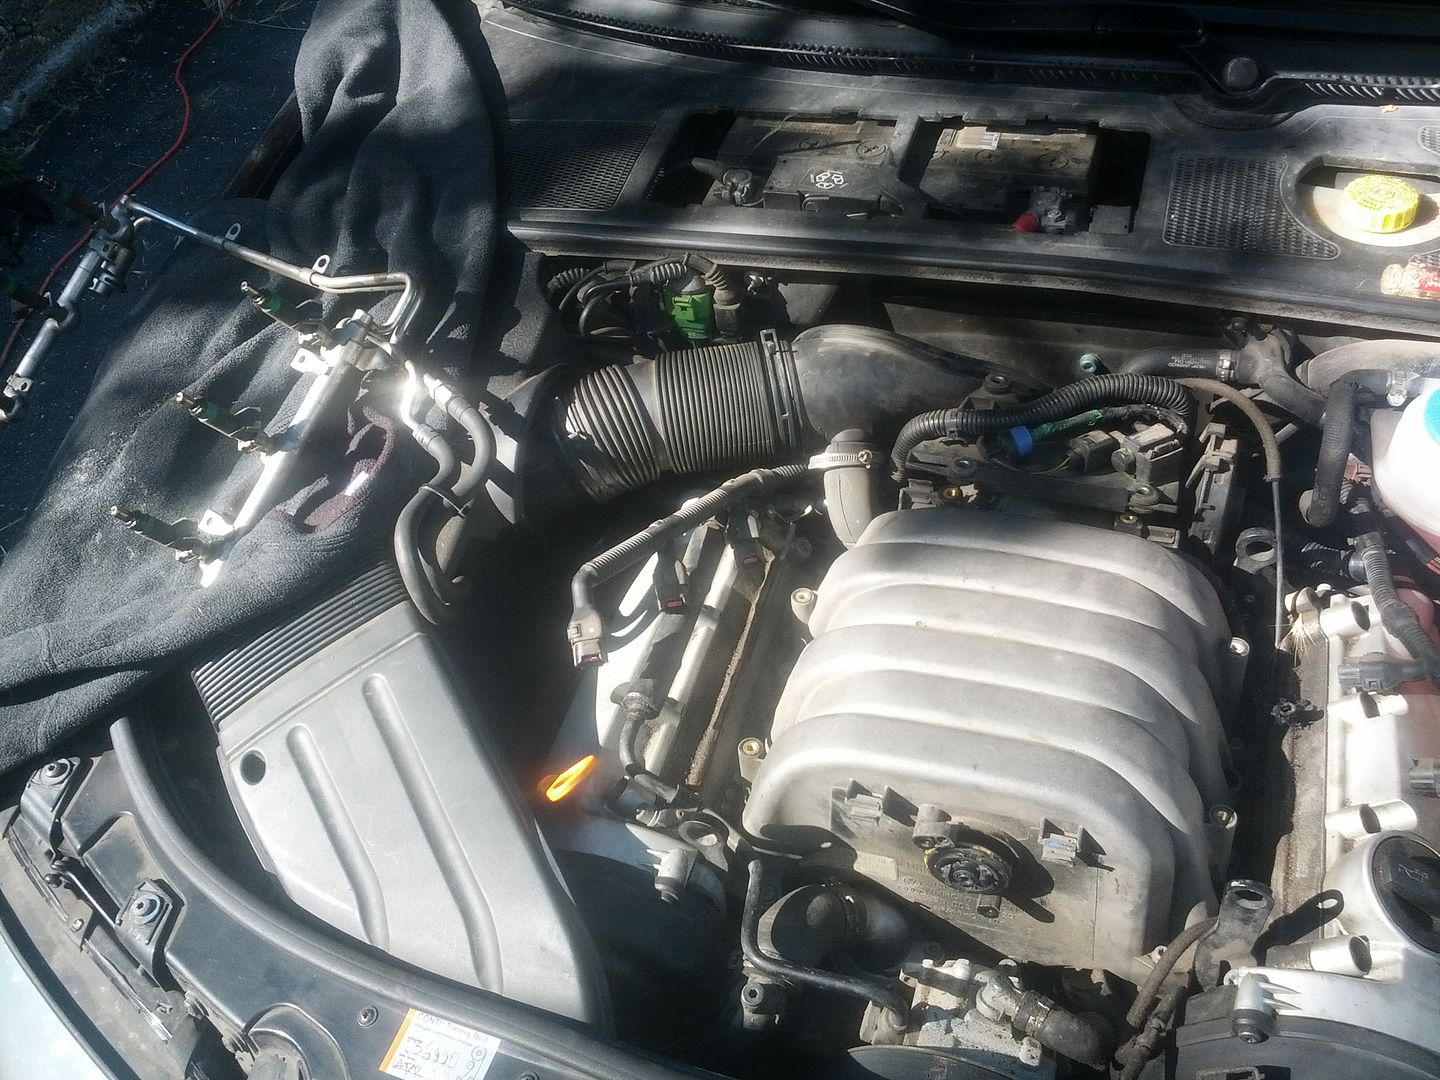
Get the injectors and those plugs out of the way. I set the injectors on a nearby sweatshirt, and then covered them with some other cloth I had laying around. Ignore the still connected battery in this shot, I was being bad.
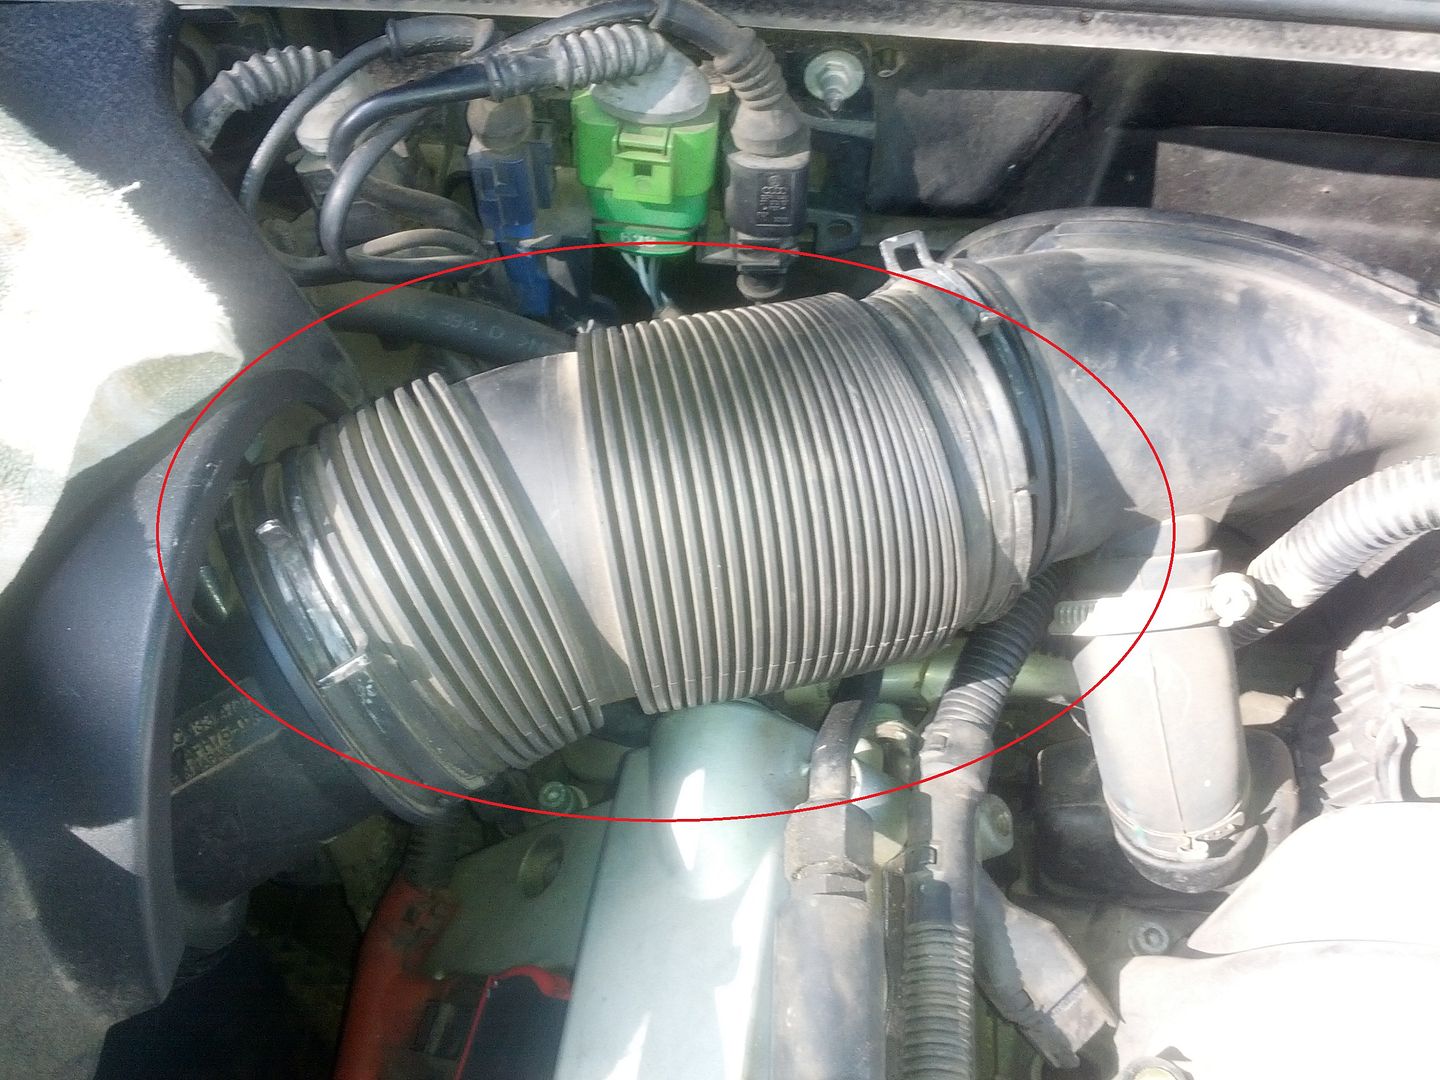
Take this part of the intake off by opening the 2 hose clamps on either end and pulling the hose free. I put the clamps back on to the hard plastic housings for safe keeping.
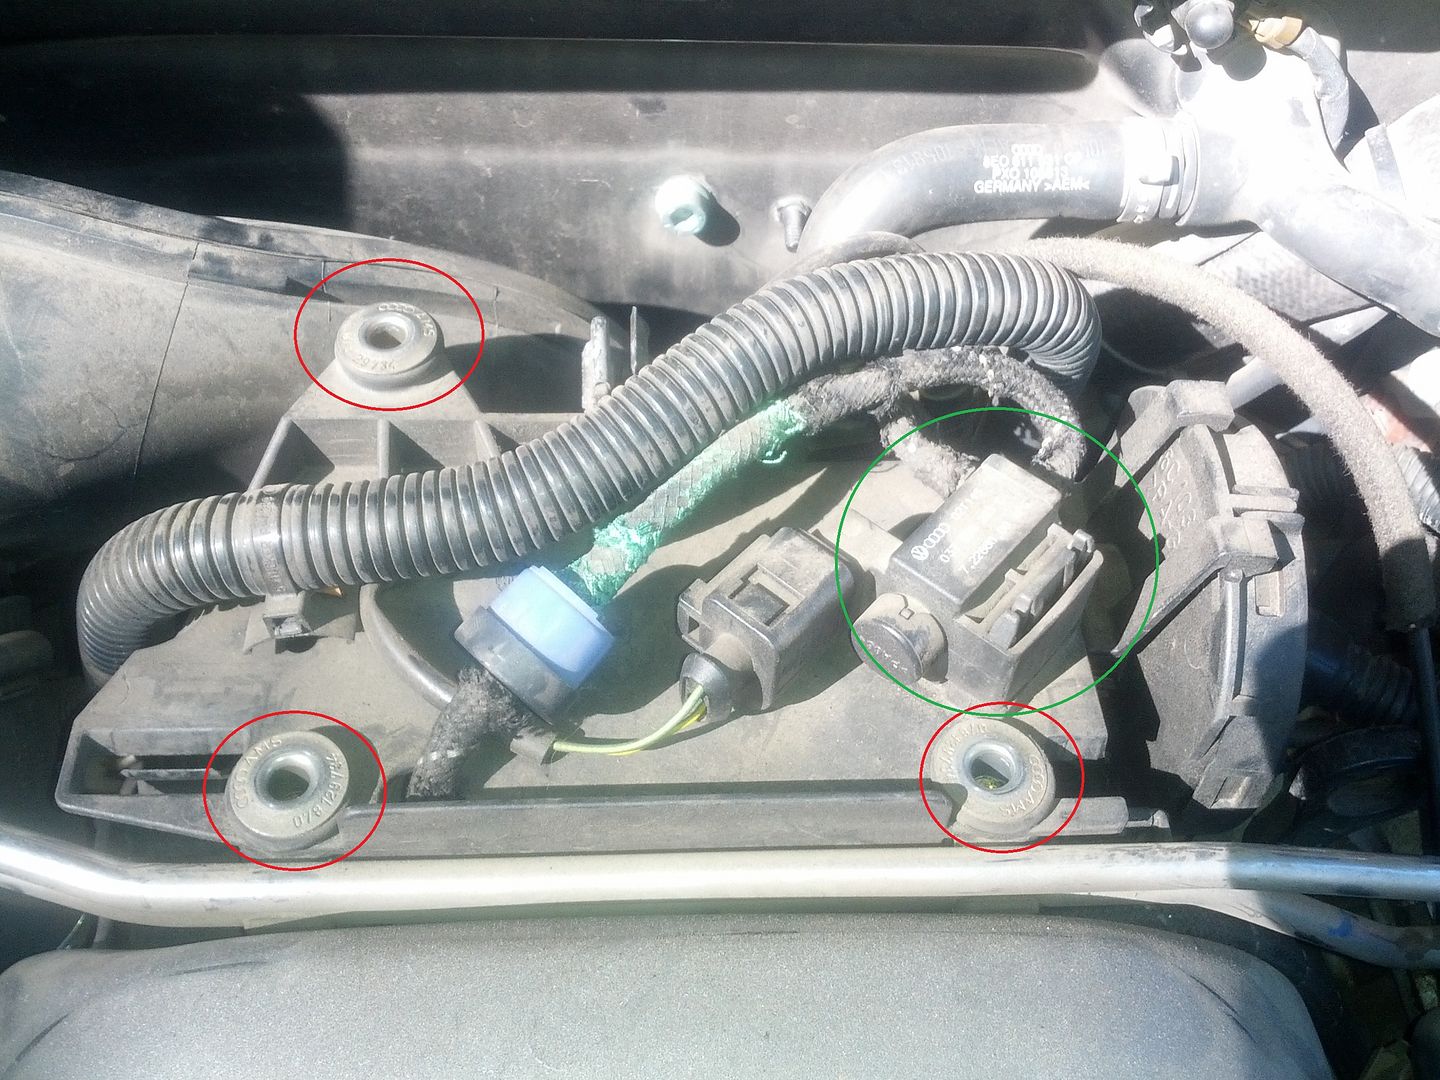
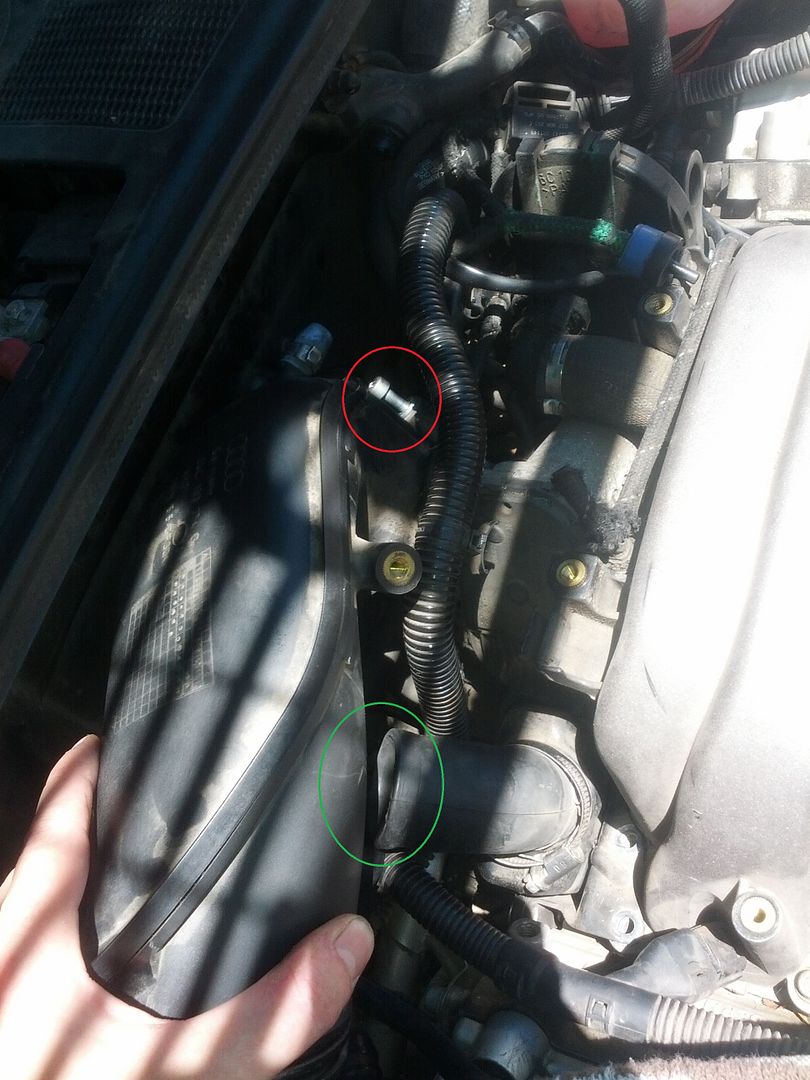
Remove the 3 10mm bolts holding this plastic plate in and disconnect the BLACK side vacuum line of that little thingamabob. I also disconnected the green circled plug on the right, and just pulled the whole plate out.
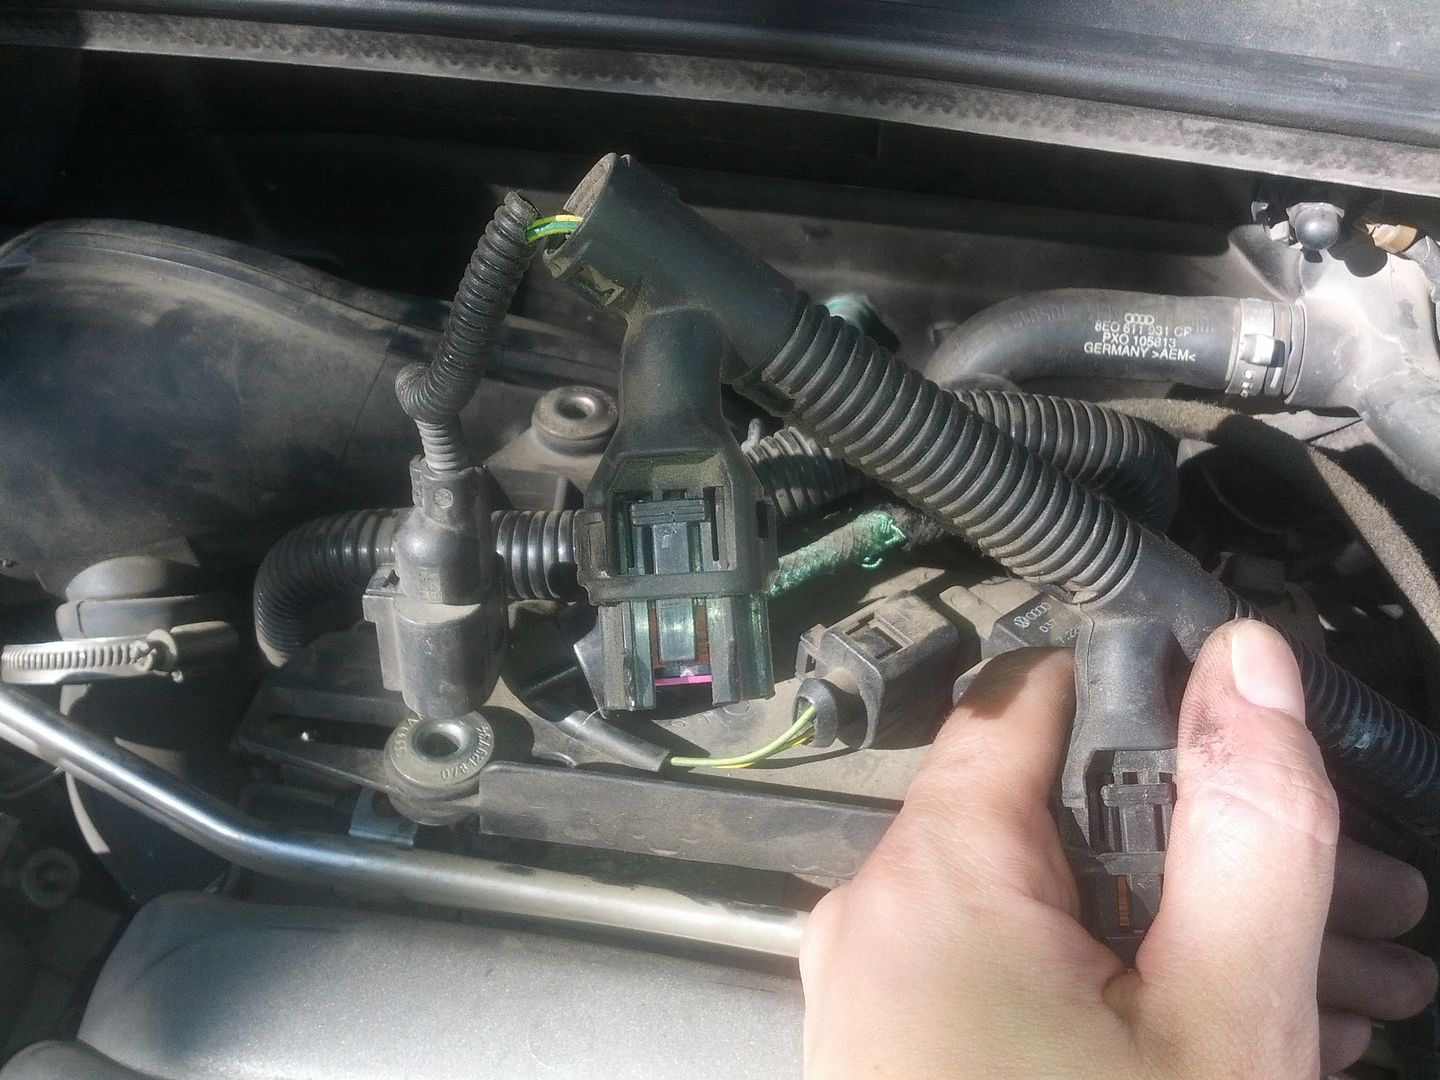
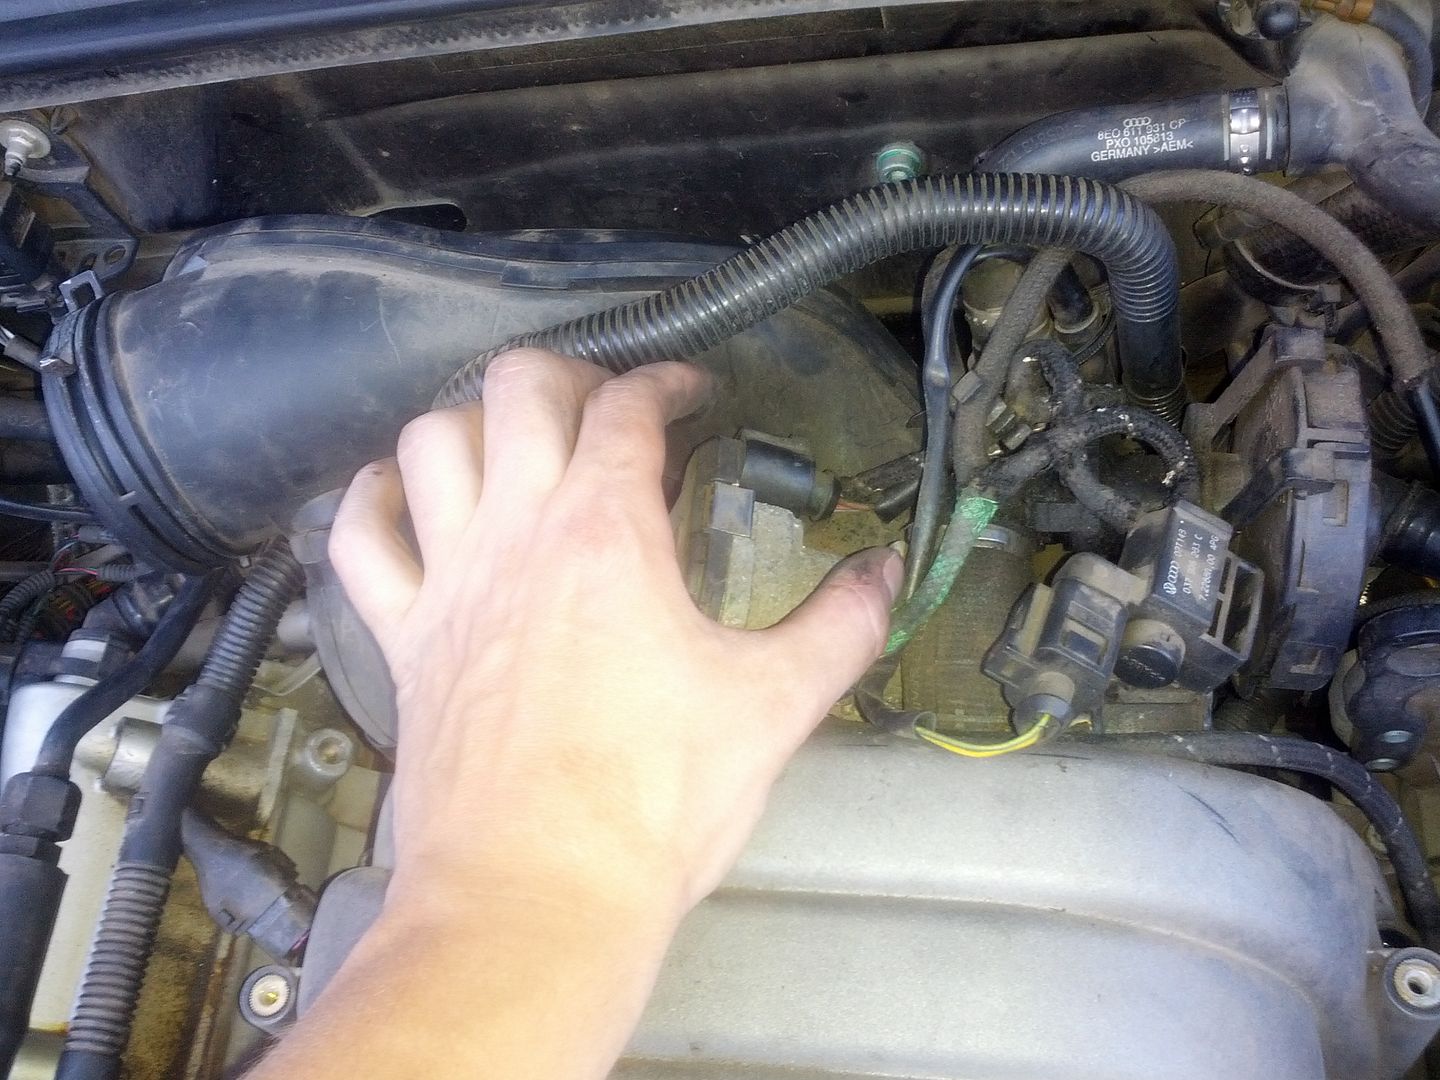
Either way, you need to disconnect this next. Be careful, the clips next to that elbow will likely be very very brittle.
I suggest unplugging this plug, but it probably isn't REQUIRED.
Ok this hose in the back has a one time clamp. I removed it and in the process broke the interior nozzle, but a with a replacement hose clamp it still stays snug. It was convenient to move this hose out of the way for removing more of the intake, but may not be required.
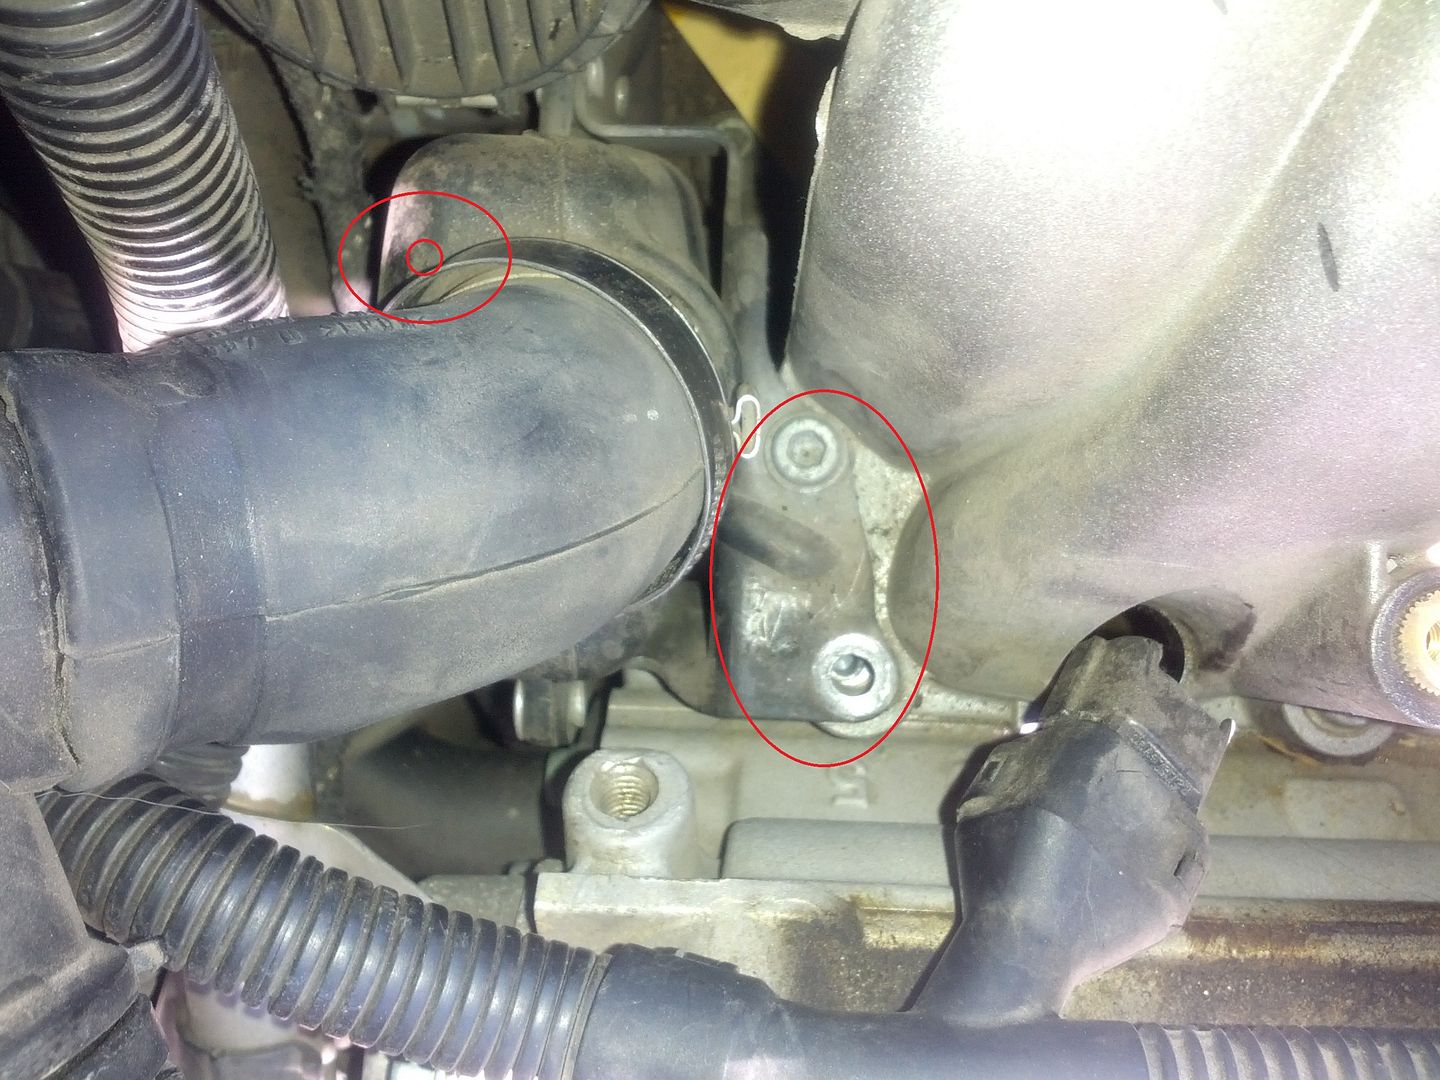
Loosen the upper hose clamp, highlighted in green going into the resonator from the intake. And then loosen the 5mm hex bolt circled in red. This pic has both disconnected to show the location of the bolt better. The bolt is kind of a pain to get your hex driver onto, but is pretty easy to turn once u get any kind of bite. When you get a ratchet behind it, you only have about 2-3 inches of ratchet turning to work with so it takes forever.
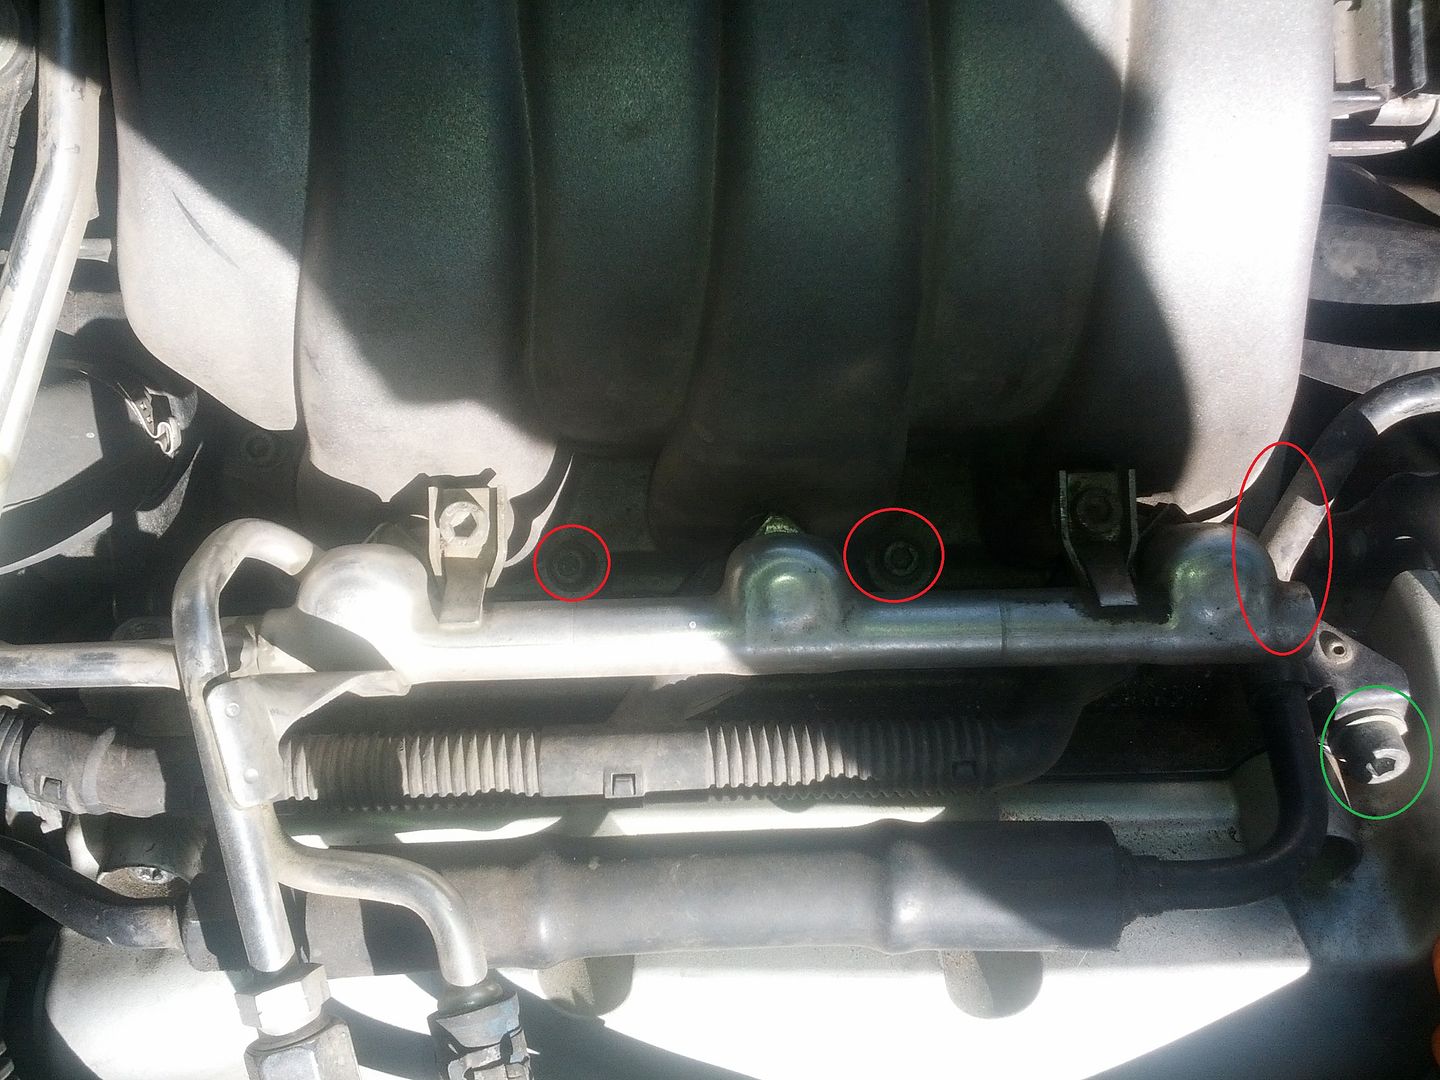
Pull the 3 5mm bolts out of the Resonator bracket, 2 of which are also intake manifold bolts. Pretty important to not strip these manifold bolts, and my hex head didn't quite fit in the bolts due to to build up. Put the hex head on you ratchet extension, line it up on the bolt, and tap the back of the extension with a hammer. I would never directly strike a ratchet like that. Apply slow force to the bolts and you should be fine. The 3rd 5mm hex bolt not visible in the pic below (under the bullseye) is much shorter than the rest of the actual manifold bolts.
I am going to skip all the work that was done on the vacuum line, because I don't have anything of value to add to SlickFix guide.
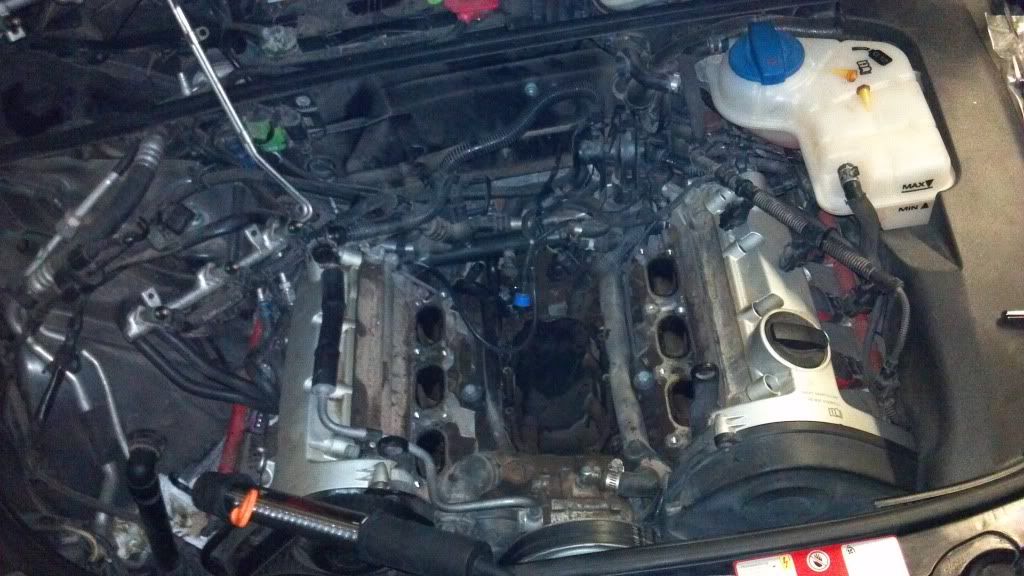
You now will need to remove the remaining 10 5mm hex bolts. I undid the bracket for whatever this part is circled in green here. I think that is a 6mm hex there, but it MAY have been a 7mm hex. I apologize for not having a good pic of the manifold with the rails off so you can clearly see all the bolts, but my back was starting to hurt and I was losing light. Make sure to use the standard star pattern when loosening these bolts
Once all the bolts are out the manifold should freely move with very little effort. I did not bother to pull it the whole way out, I just angled the front up and latched onto the front of the actuator cylinder with needle nose pliers and pulled it out. I then used a hammer and my breaker bar to prop the manifold up and install the new actuator complete with the front face with 2 t30 torx screws. I then set the manifold back into place and bolted it and the resonator back in. 10nm or roughly 7.5 ft lbs of torque is spec on the manifold bolts, and again follow a star pattern when putting the bolts back in. The short resonator screw it just into a bracket housing, does not need torqued.
Now do it all in reverse!
My car is running better than it ever has, and it feels good to be done with it. My gas mileage is much better as well!
Hope this helps someone out.
ScottZirra
edit: apologies if this got necro'd. I was checking out old content i wrote and was unhappy that the pics were missing rendering the guide less than useful. replaced all image links. I've since replaced this 03 3.0L A4 with a 2016 Golf R and couldn't be happier with it =D.

 Reply With Quote


 His: 2012 Moonlight Blue Metallic S5 Prestige
 Hers: 2014 Lava Gray Metallic Q5 2.0T
 Son's: 2005.5 Imola Yellow B7 S4 4.2 Sedan


Bookmarks