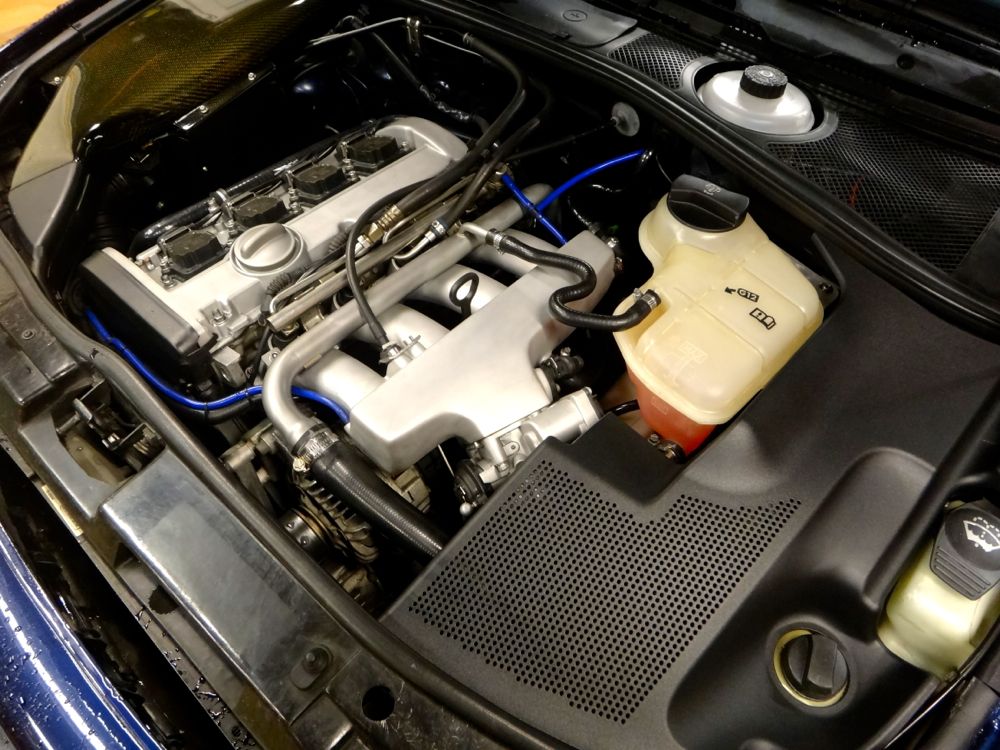
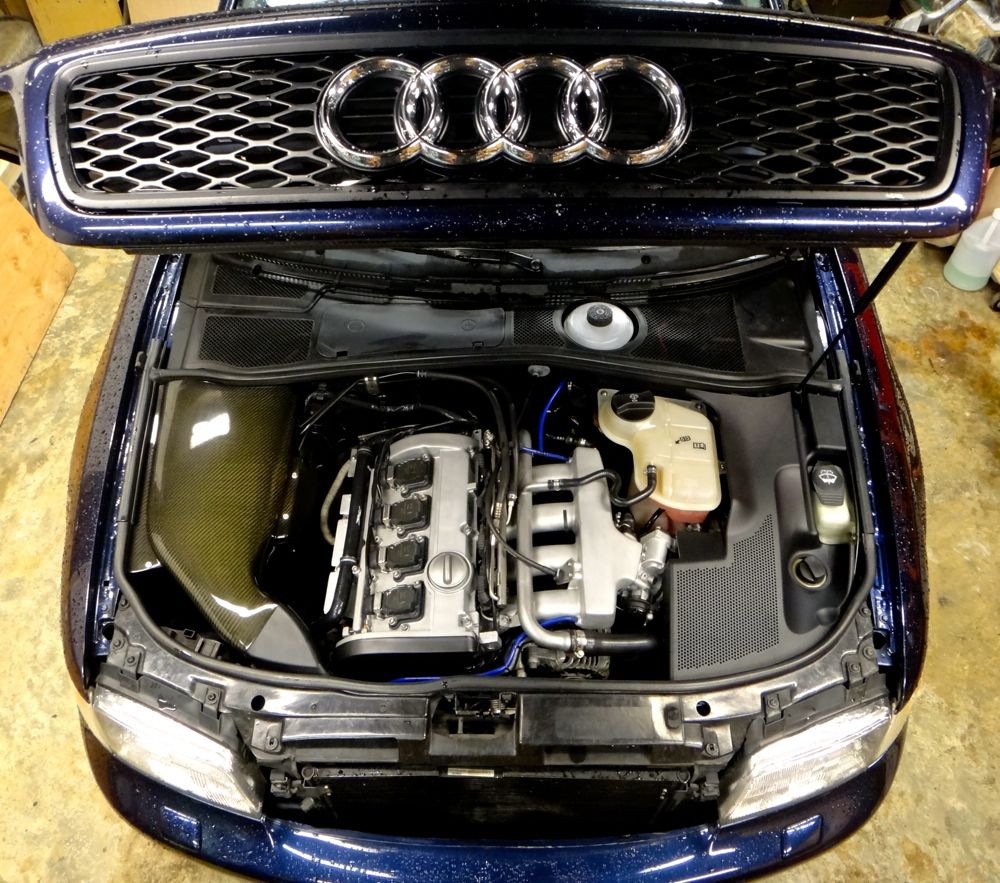
Audizine - An Automotive Enthusiast Community

Page 8 of 21 FirstFirst ... 67891018 ... LastLast
Results 281 to 320 of 814
  1. #281
    Veteran Member Four Rings RENOxDECEPTION's Avatar
    Join Date
    Nov 04 2012
    AZ Member #
    103464
    My Garage
    2000 B5 A4 1.8TQM, 2000 B5 A4 1.8TQM
    Location
    Reno

    Guest-only advertisement. Register or Log In now!
    a transistor is basically a relay, depends on which type though.


    http://www.technologystudent.com/elec1/transis1.htm

    2000 Audi A4 B5 1.8TQM AEB/06A
    1998 Audi A4 B5 4.2QM (Thread)
    2000 Audi A4 B5 1.8TQM K24 Turbo, AEB Wideband
  2. #282
    Veteran Member Four Rings BaseDrifter's Avatar
    Join Date
    May 18 2010
    AZ Member #
    59183
    Location
    Bay Area, CA

    Finished the project and everything works perfectly. Camera goes on and off with the ignition and the switch works as a manual override to keep the power on with no key in the ignition.

    I'm a little confused though because with the key in the on position terminal 15a reads only .4 volts. I hooked it up initially and only had power from the switch, not ignition, found the lack of voltage and moved it over to 75x. No problems now. The camera doesn't shut down when starting since it switches to battery power briefly until power resumes, if it doesn't get power in 5-10 seconds it will shut down as desired though.

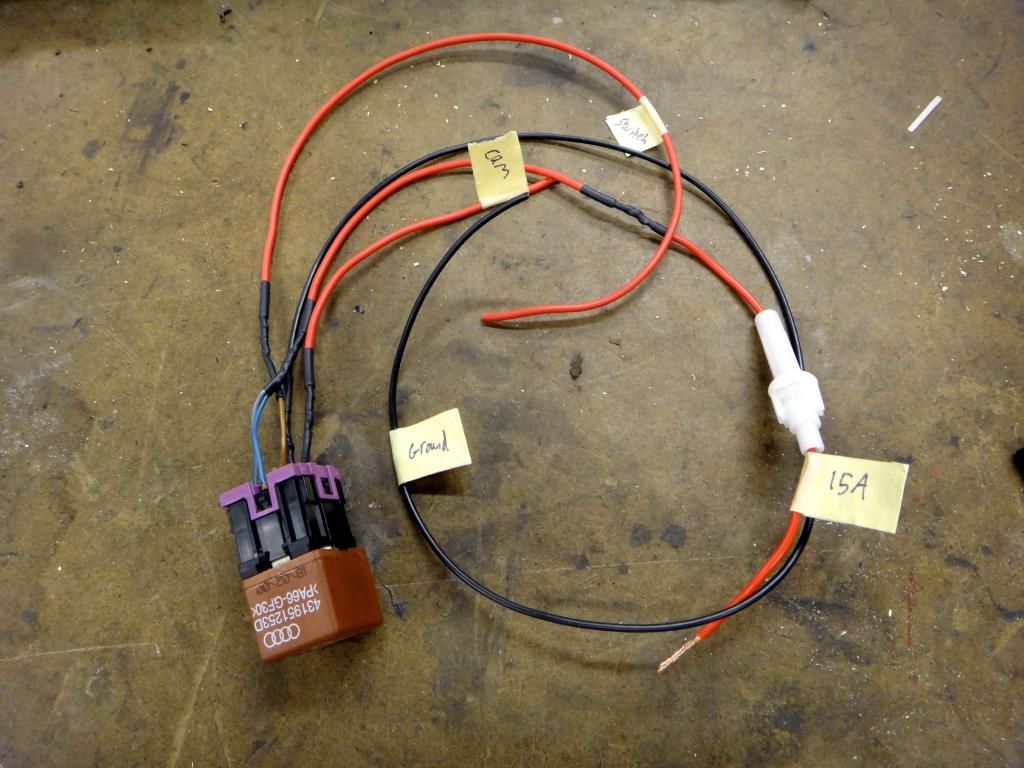
    Here's the completed harness ready to install.


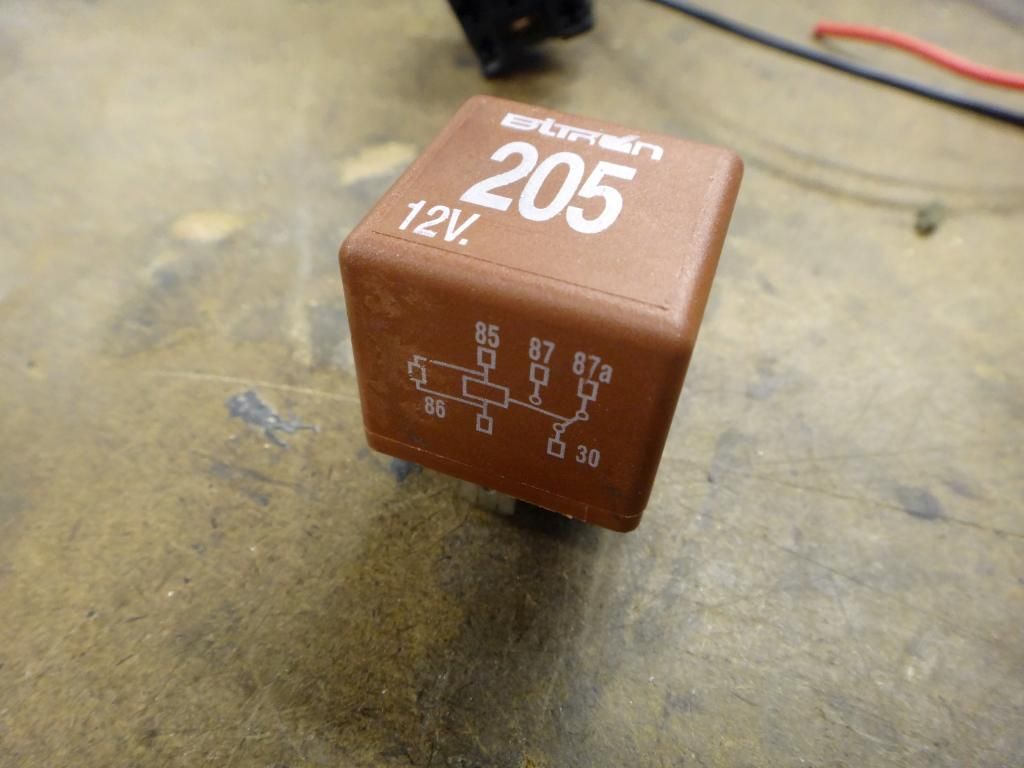
    This is the relay I ended up using, a 205 instead of the 204 I normally use. The 205 has an 87a pin where the 204 doesn't. I used a stock relay plug and patched it into the relay panel.


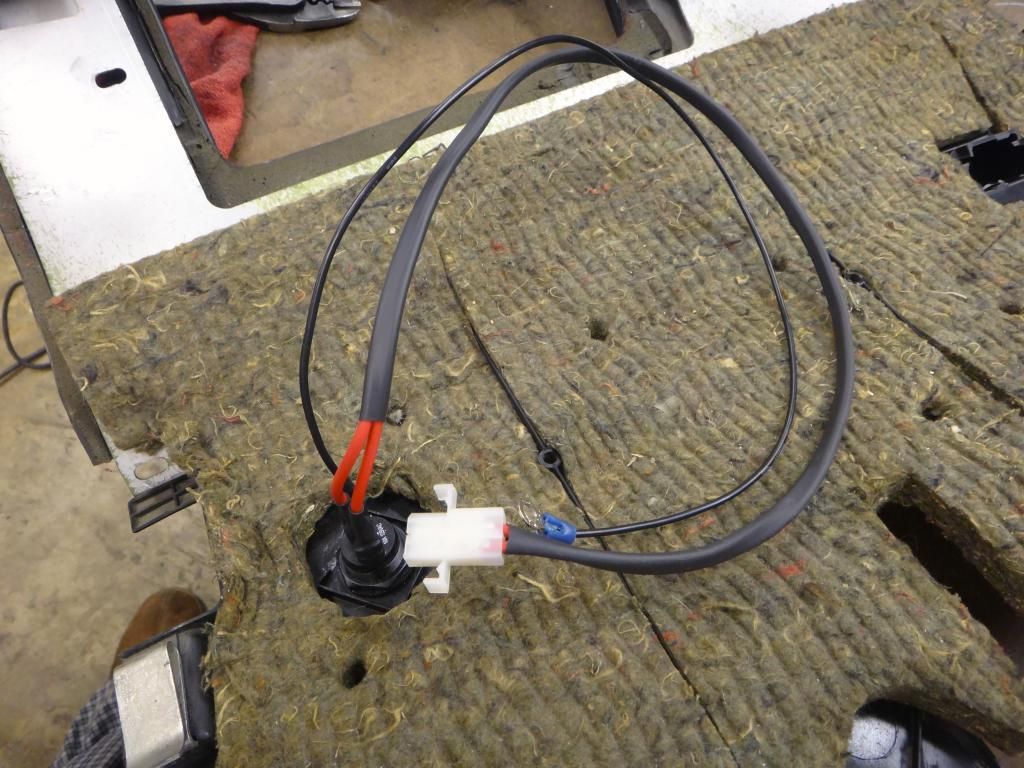
    Harness for the switch connection.


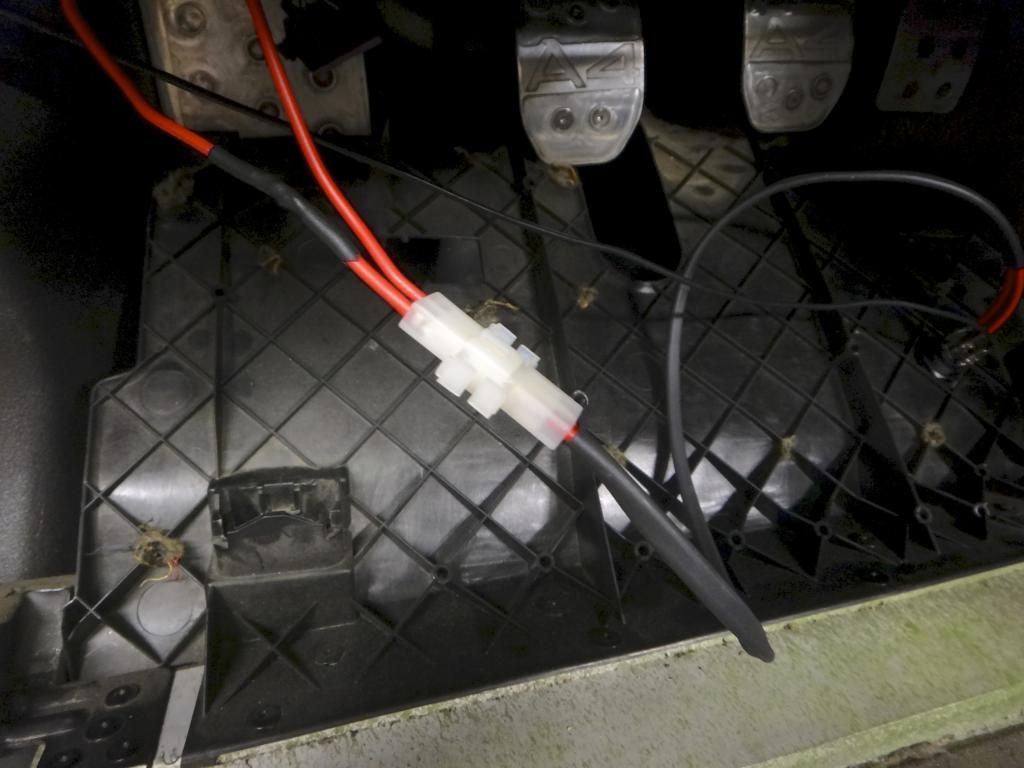
    Quick disconnect plugs so that I can pull the knee bolster easily, this was a requirement of the install. There's enough length on the wires to allow me to drop the bolster to the floor without worrying about tugging on anything.


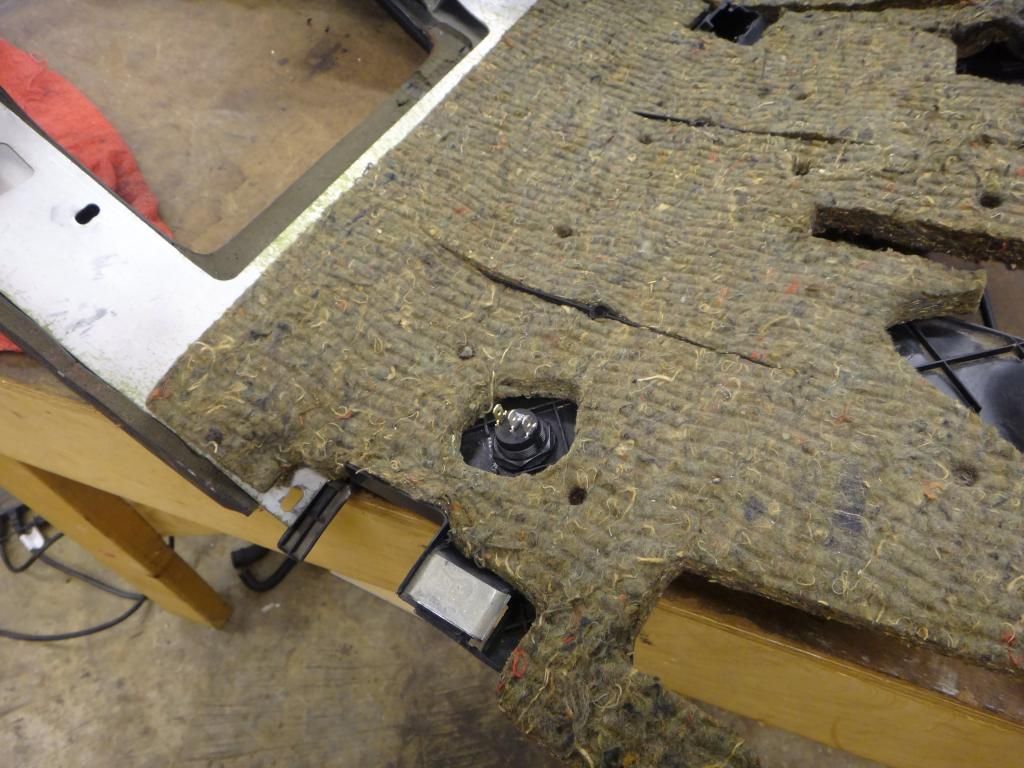
    Used a matte knife and scissors to cut a hole in the bolster sound deadening.


    Insulated the terminals and connected the harness. The wire I used was way overkill for the project but it was all I had laying around, too lazy to go get more today! Everything is protected by 1 amp fuses on both power feed lines.

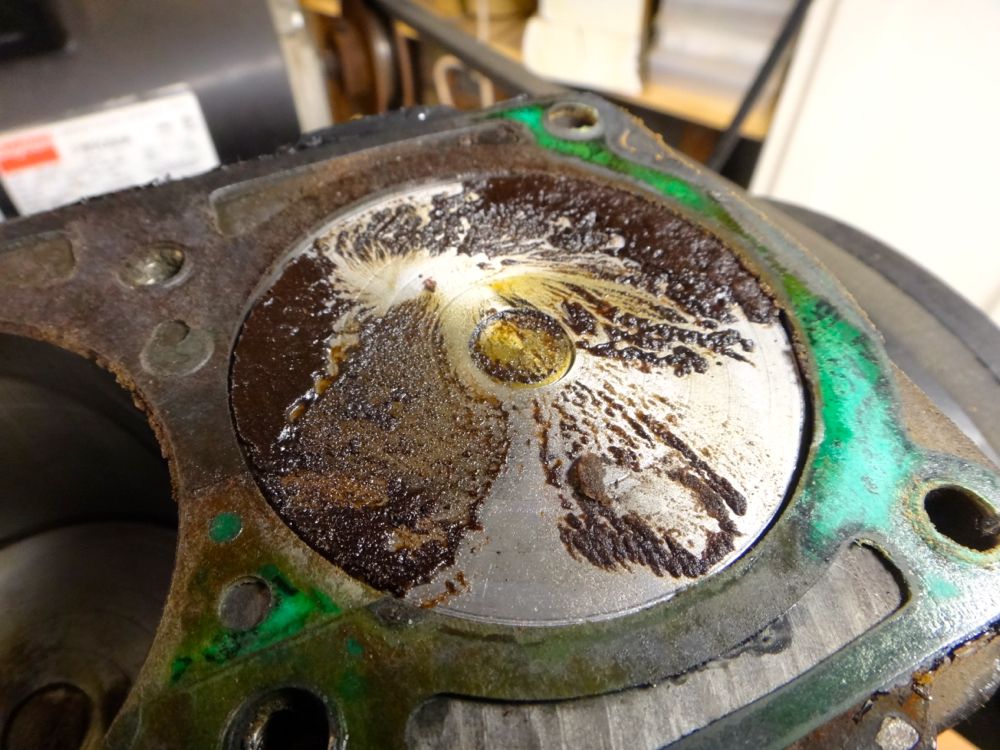
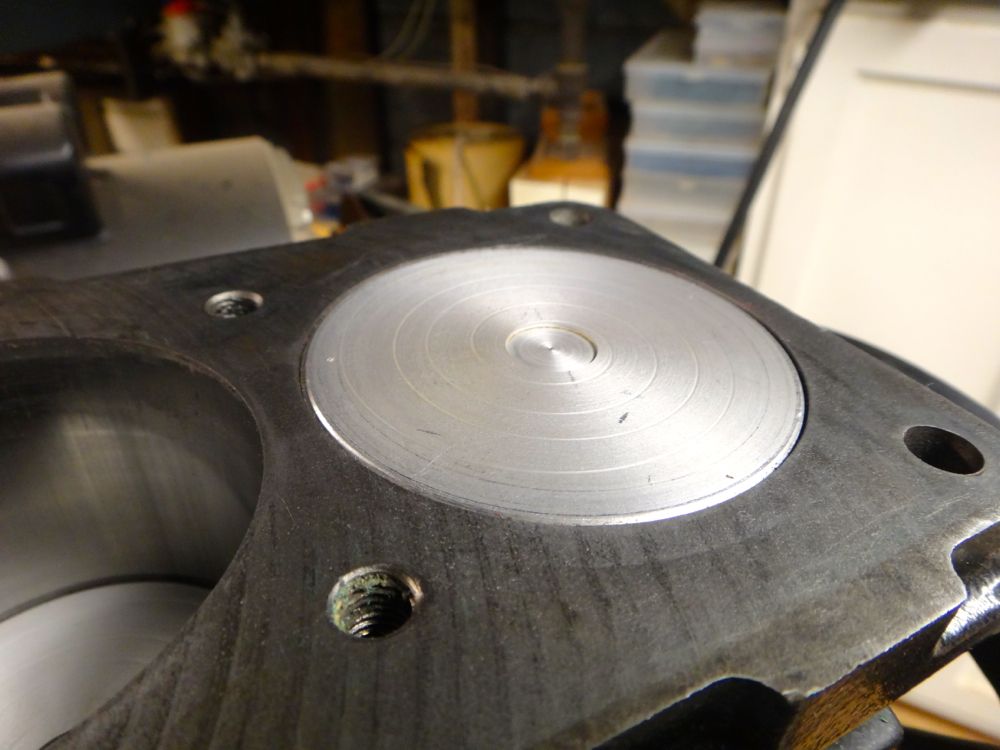
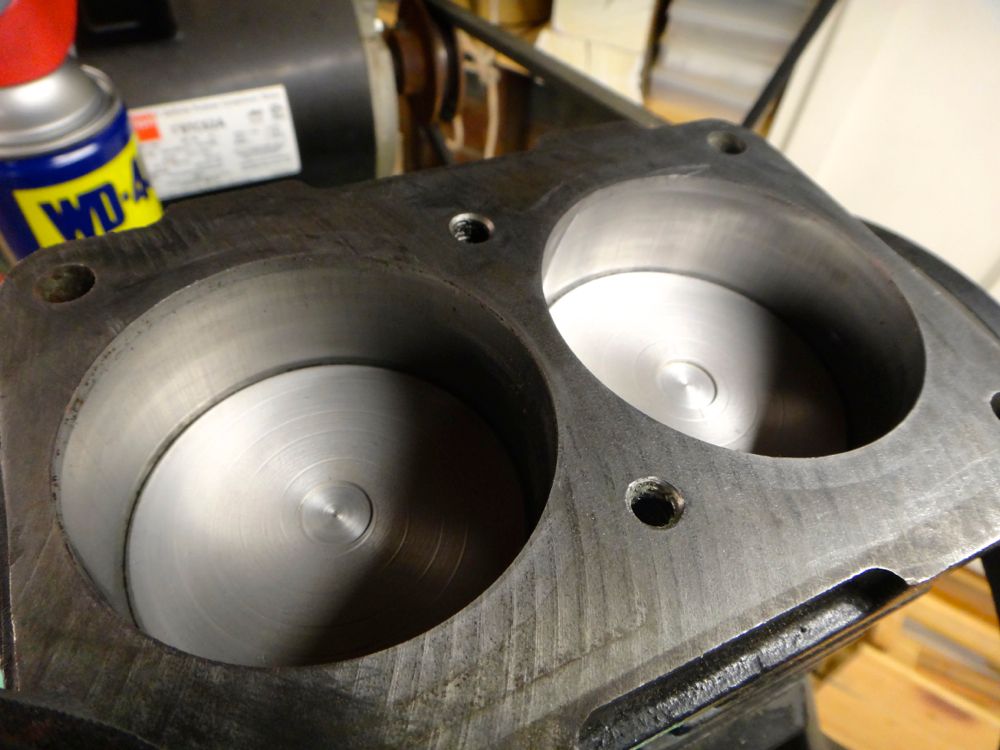
    I have the ground wire running to the bolt for the knee bolster below the fuse box, automatically disconnects the ground as I unbolt it.


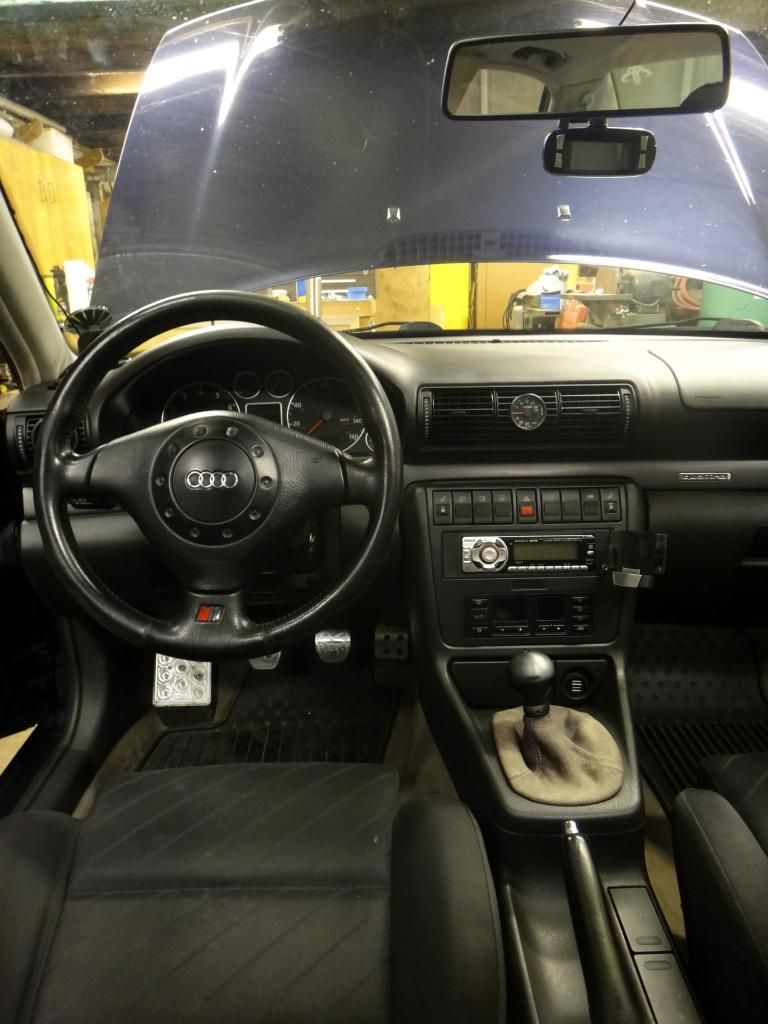
    Everything mounted up. With that lip on the edge of the bolster you can only see the switch by putting your head below the dash.

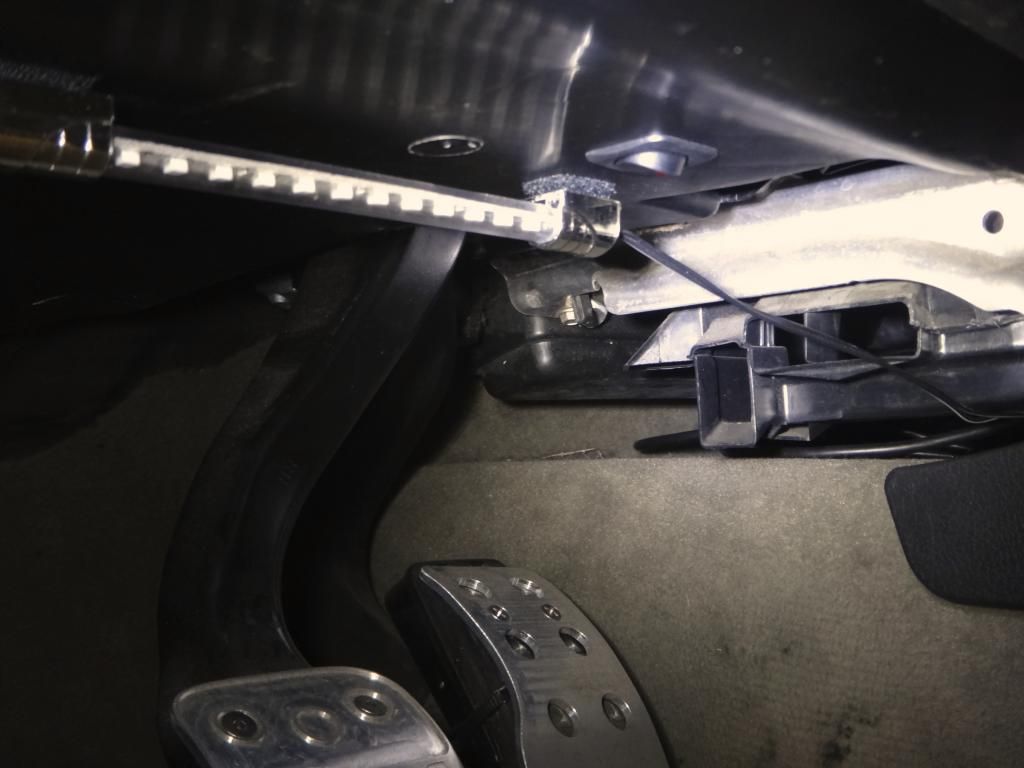
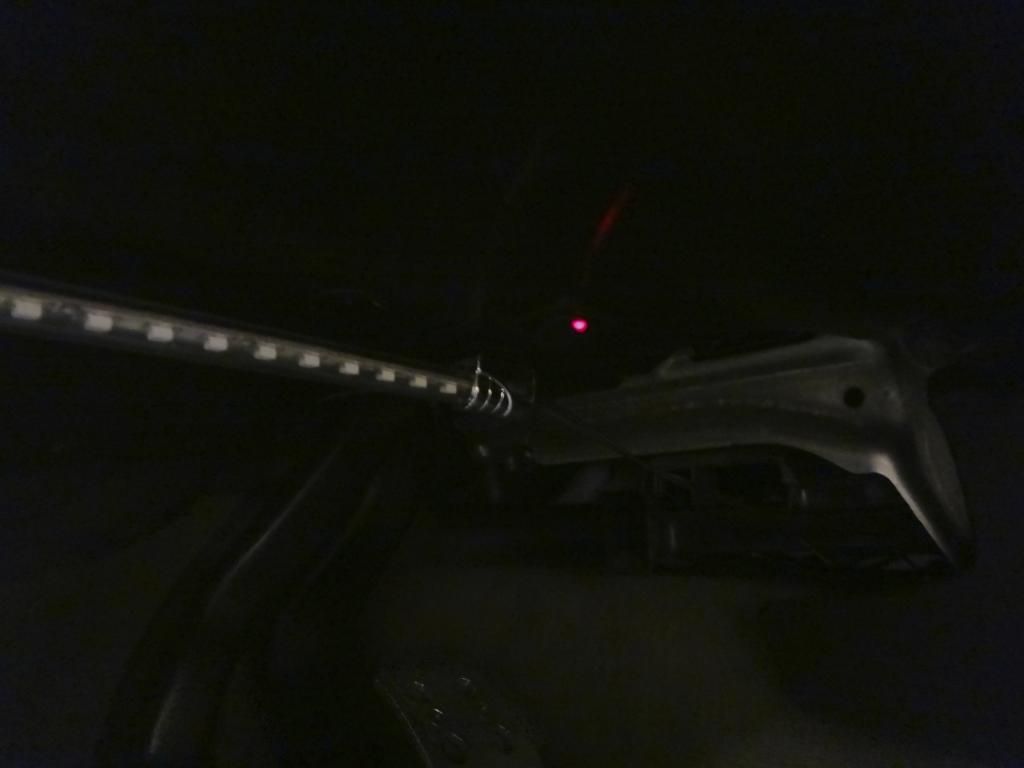
    I think this is the first picture I've posted of the LED light bars I use under the dash and seats. They're held on with velcro for ease of removing the bolster.


    The LED on the switch is super dim when activated. Whatever, don't really care.


    And here's the dash camera, mounted below the rear view mirror.

    | Update thread / Youtube Channel |

    97 A4 1.8TQM: Frankenturbo|TyrolSport SMIC|034 HFC|Borla catback|Carbonio/007 DV|Vogtland GT3|034 RSB|Apikol Bushings|034 SD motor/tranny/strut mounts|A8 brakes/SS lines|JHM trio|Meyle HD CA/TREs|
    01 S4 2.7T: Stock

  3. #283
    Veteran Member Four Rings BaseDrifter's Avatar
    Join Date
    May 18 2010
    AZ Member #
    59183
    Location
    Bay Area, CA

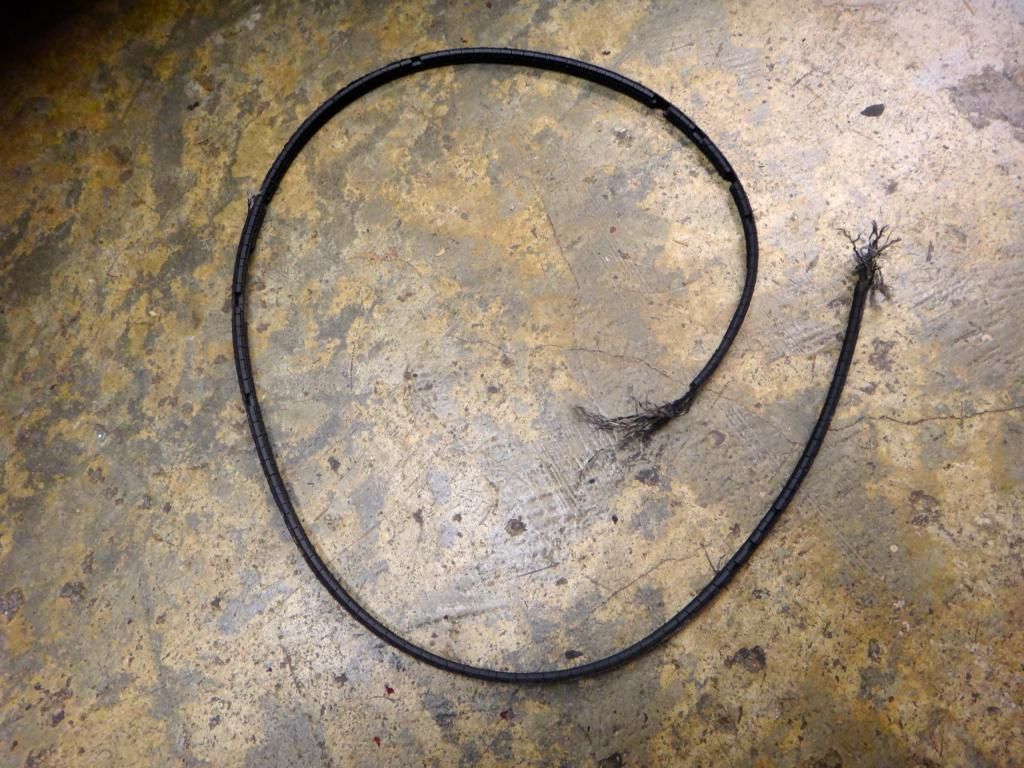
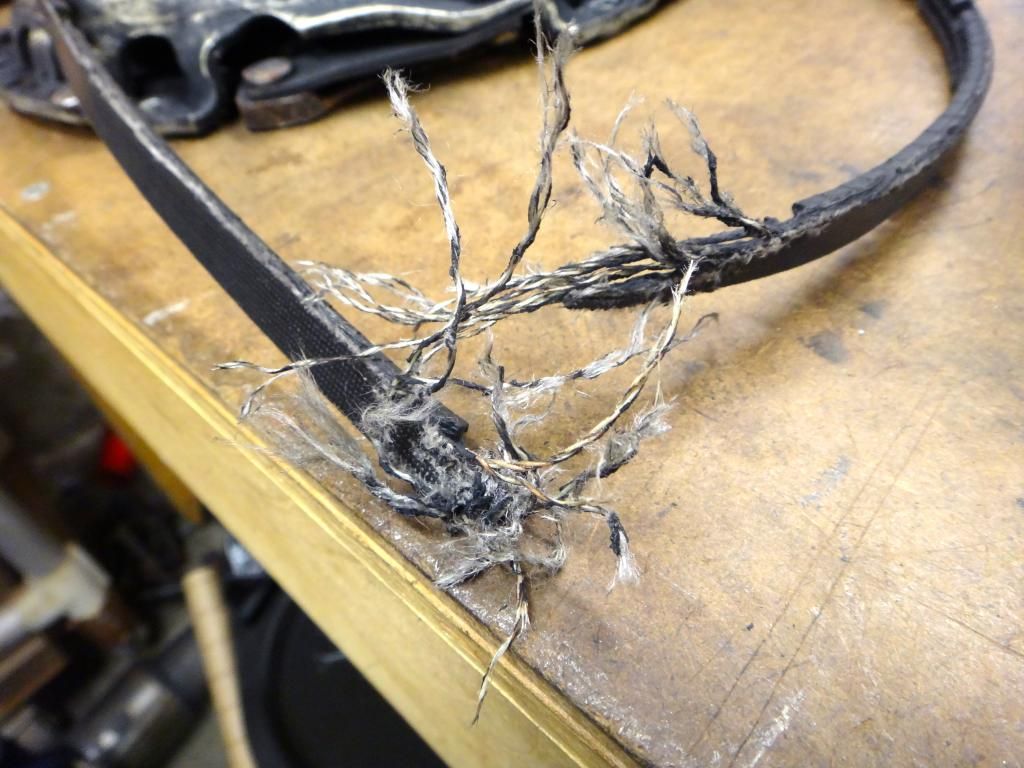
    I just finished a major maintenance service on my dad's B5. He was driving to work a few weeks ago when his battery light came on, he lost power steering, and the coolant temp started to rise. Turns out his serpentine belt snapped.

    I raced down to where his car broke down, he took my car to work, and I escorted his car back home on the tow truck.

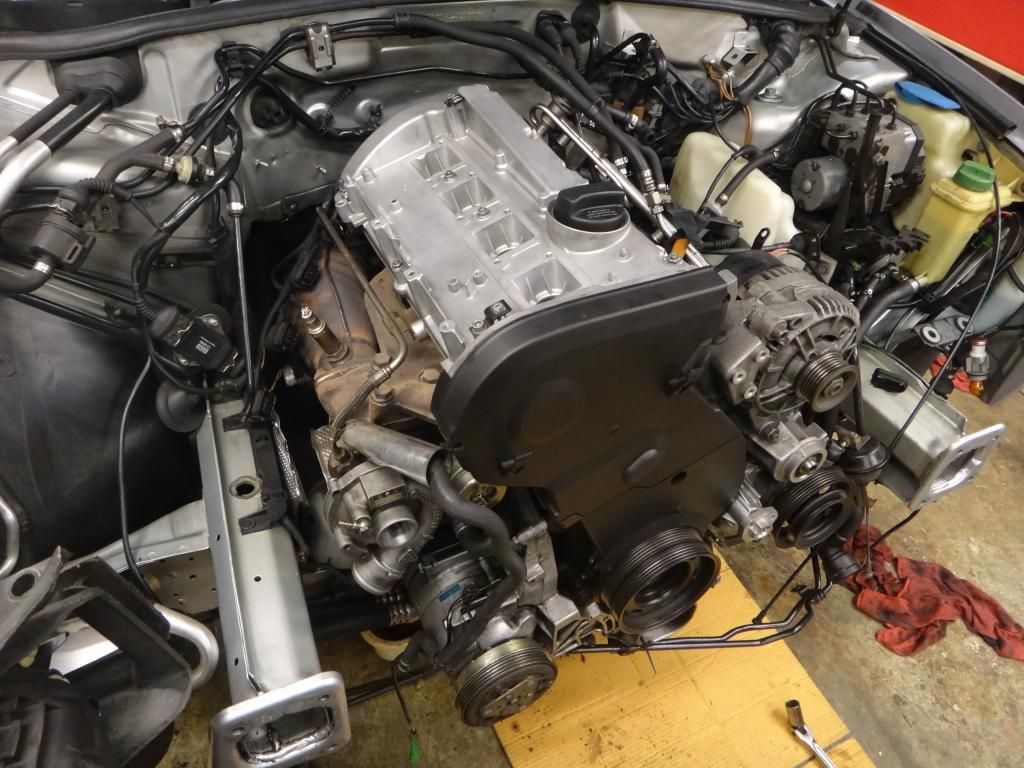
    I started ripping into the car and it snowballed from there. One thing led to another which led to another. A lot of "well, if we're gonna replace that we might as well replace this too."

    Here is a list of what was done or replaced.

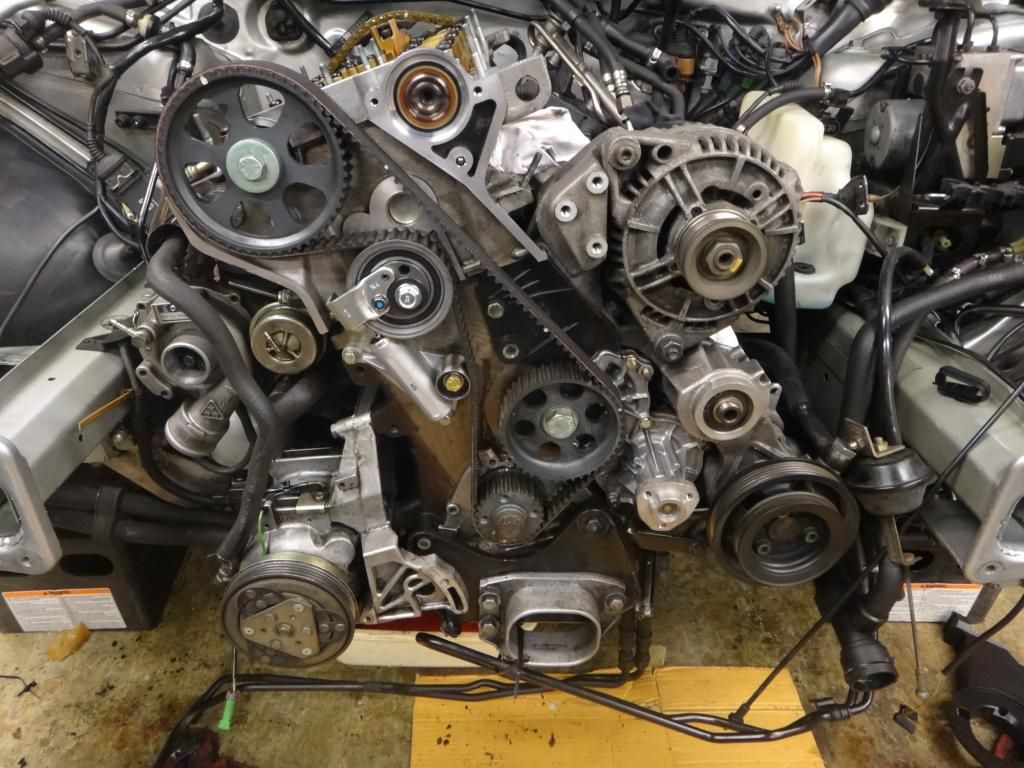
    Timing belt + tensioner, pulley, roller, and water pump
    Serpentine belt, water pump belt, AC belt
    Intermediate shaft seal and o-ring
    Both camshaft seals were leaking, replaced
    Turbo oil return line gasket replaced
    Cam chain tensioner seals and valve cover gasket replaced
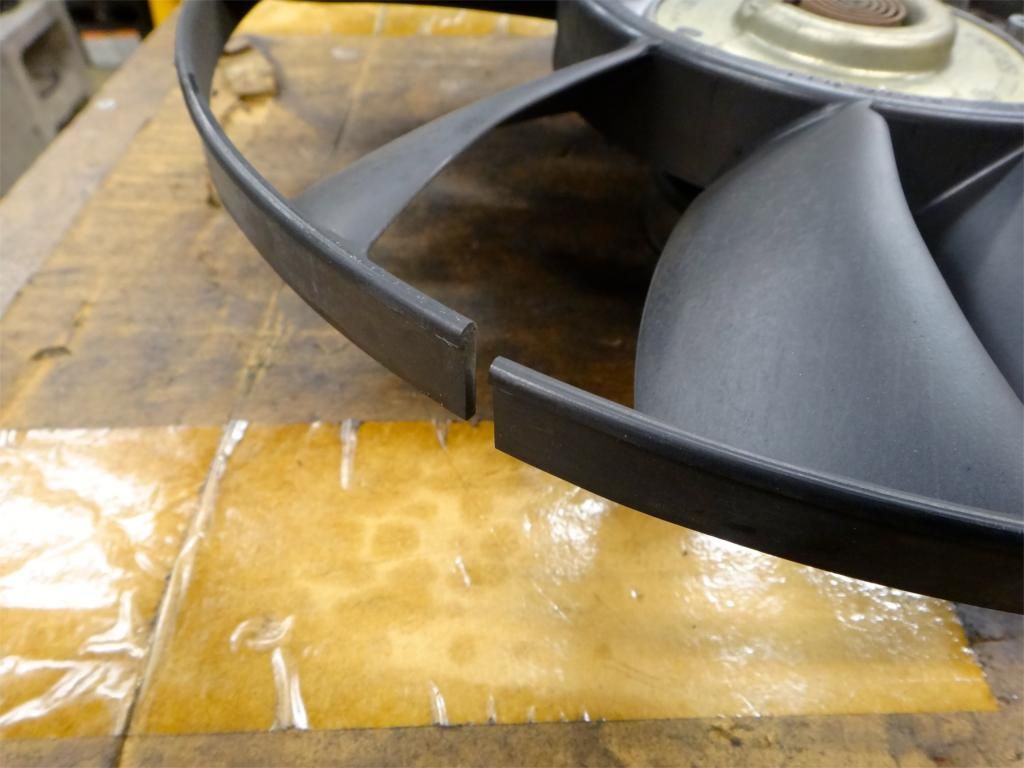
    Cracked fan blade replaced with fan blade from junkyard
    Intercooler removed and completely cleaned and washed out
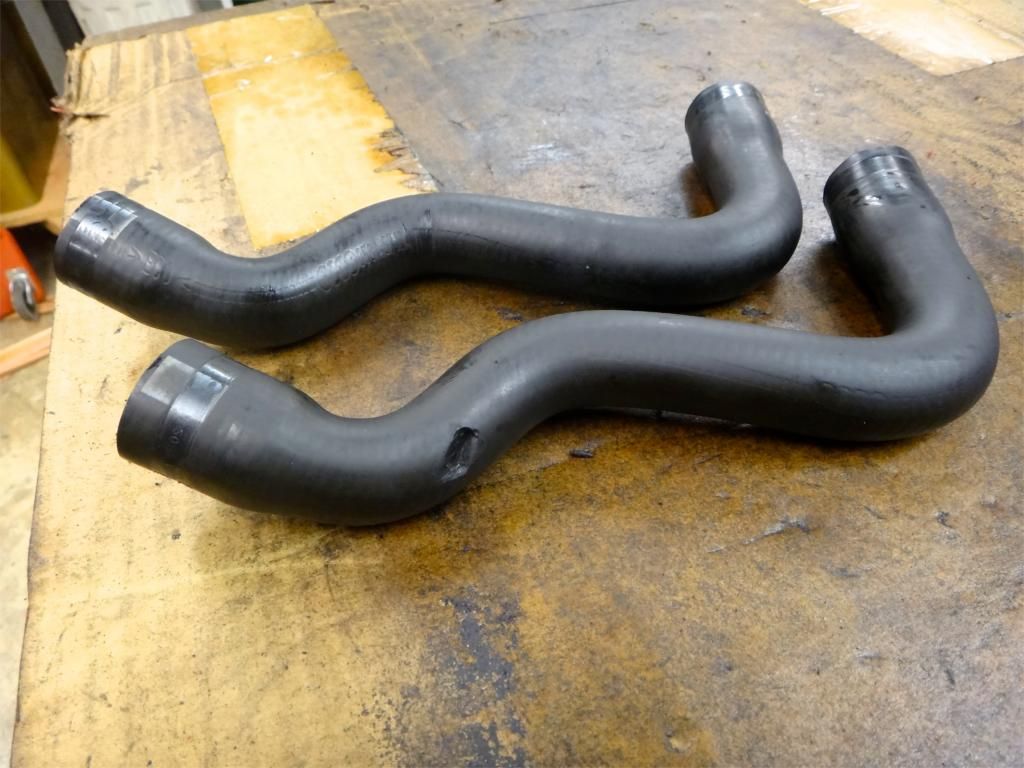
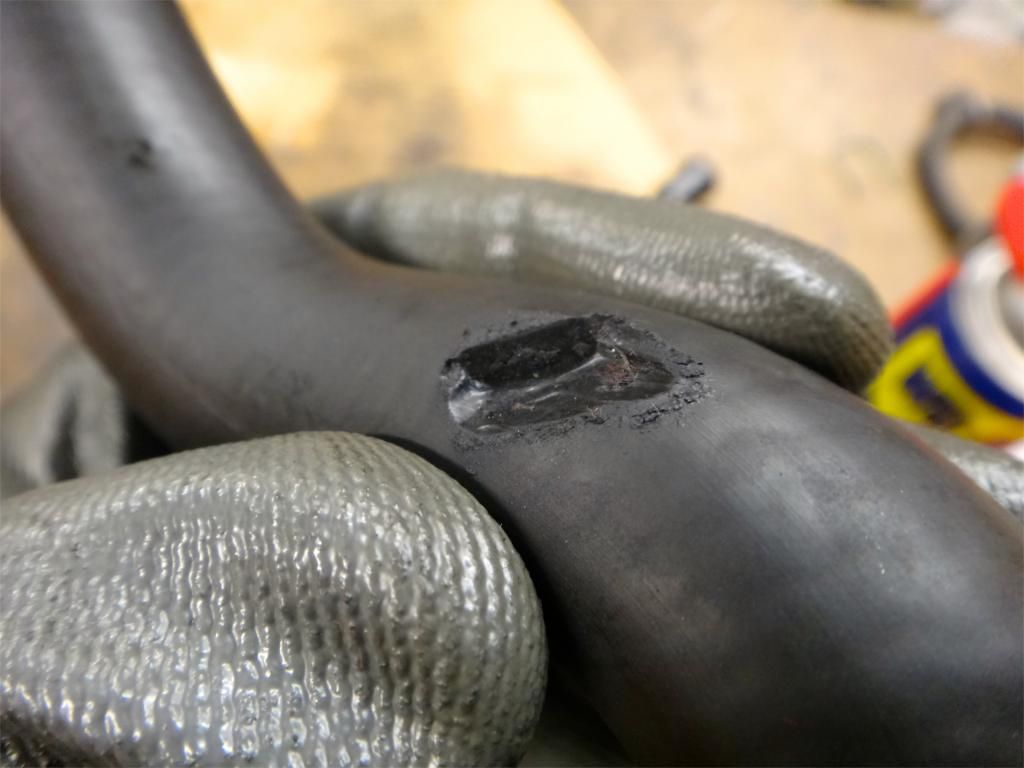
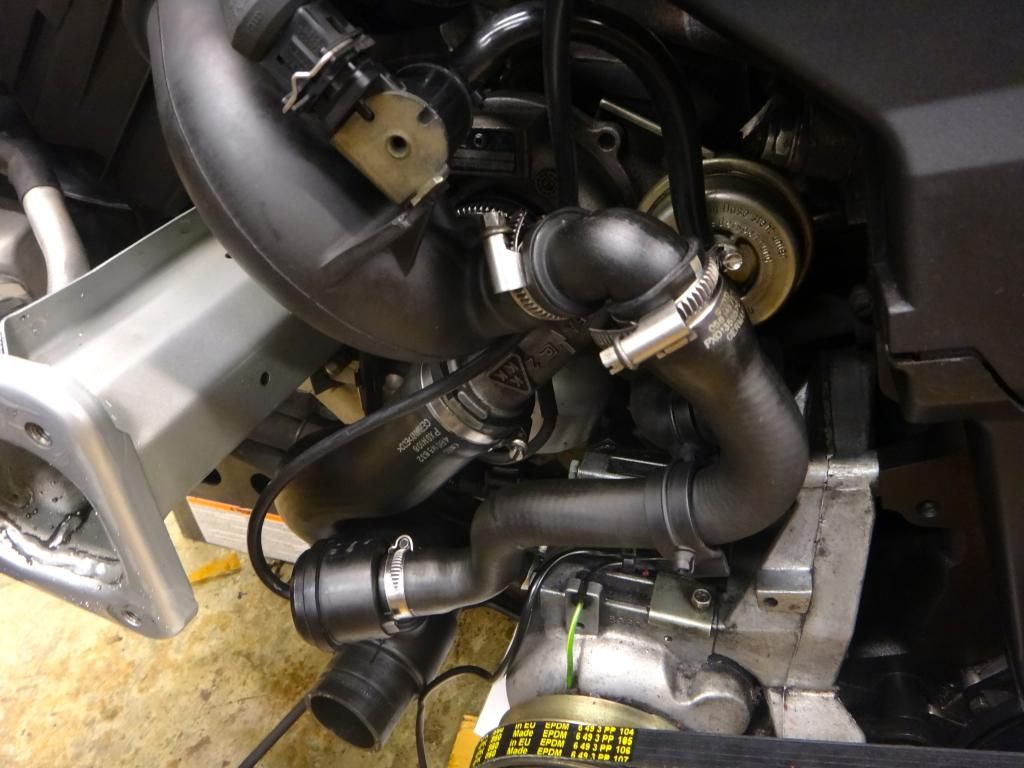
    All boost hoses cleaned inside and out, found the DV hose had a gash in it, replaced with a junkyard replacement
    Installed 710N DV and NGK BKR7E spark plugs in anticipation of chipping the car
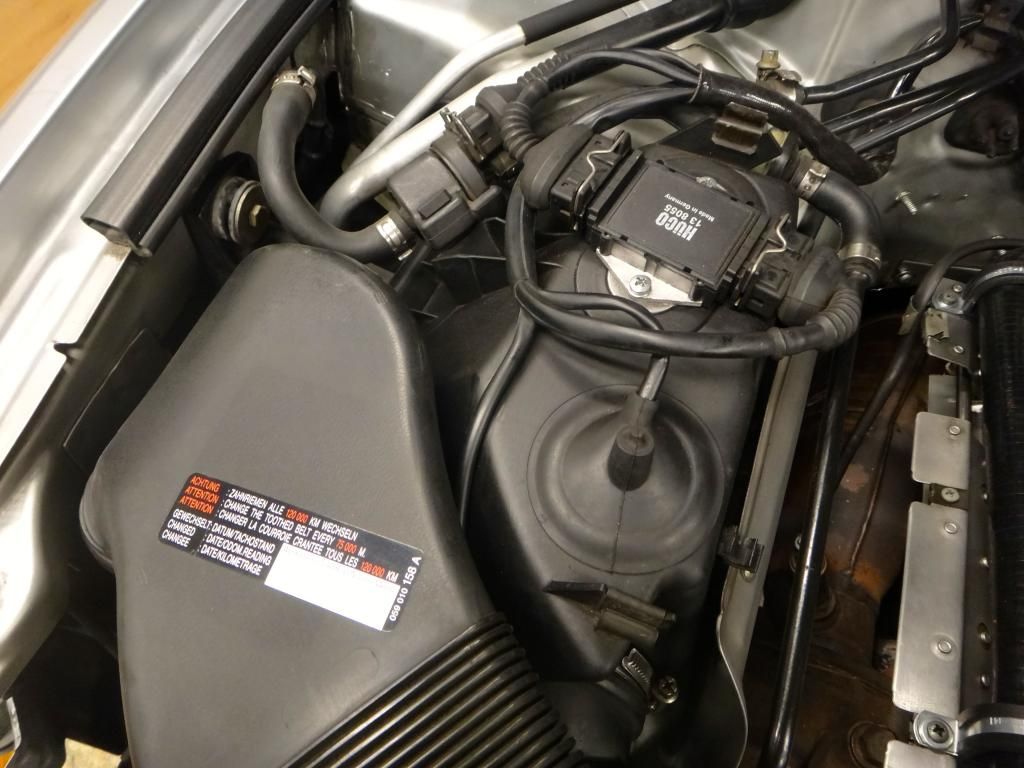
    Airbox removed and cleaned, filter cleaned
    Cabin air filter replaced
    Snub mount replaced (OEM)
    Oil filter replaced, new Rotella T6 5w40 oil
    Fresh coolant of course

    Then the intake manifold came off…

    Breather hose was cracked (it was fixed with OEM plastic parts 2 years ago), replaced with an 034 breather hose kit
    Turbo oil feed line replaced along with both crush washers beneath the adapters
    Fuel injectors cleaned and o-rings replaced
    Coolant flange replaced (OEM) and new o-rings
    Throttle body and intake manifold fully cleaned, intake manifold and throttle body gaskets replaced
    Oil cooler gasket replaced
    Oil cap gasket replaced
    All vacuum hoses replaced with Forge black silicone hose including turbo vacuum lines
    Removed the fender liner and fully tested the cruise control hardware, lack of cruise control isolated to an electrical problem. Remounted cruise control pump as it had come loose.

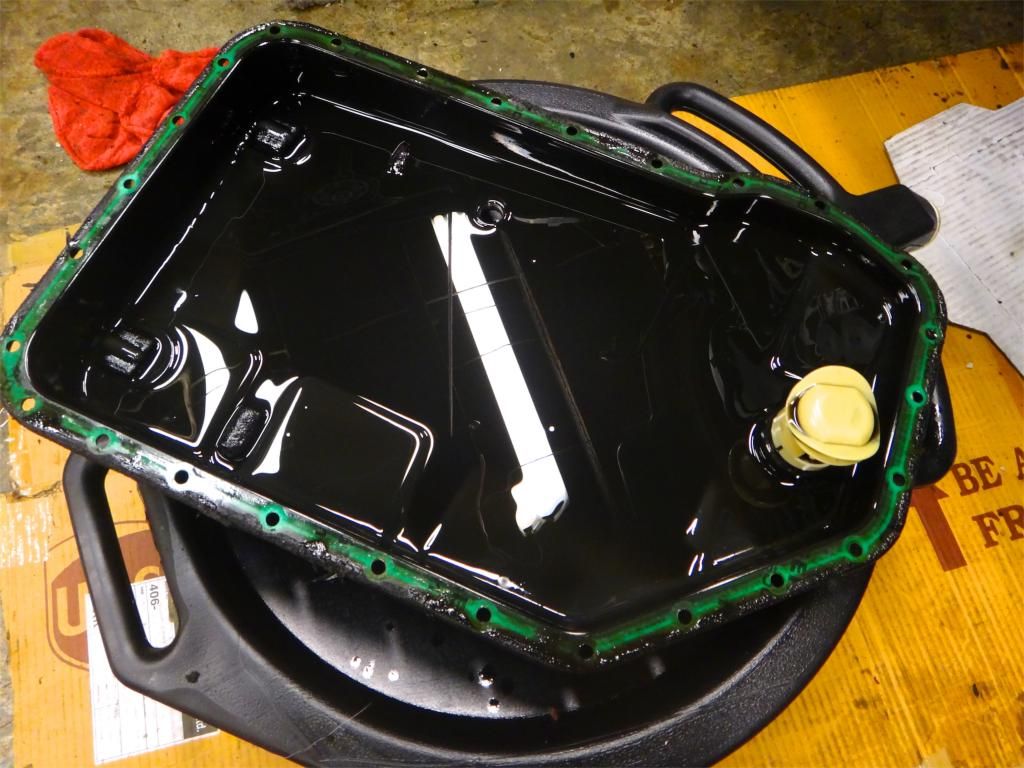
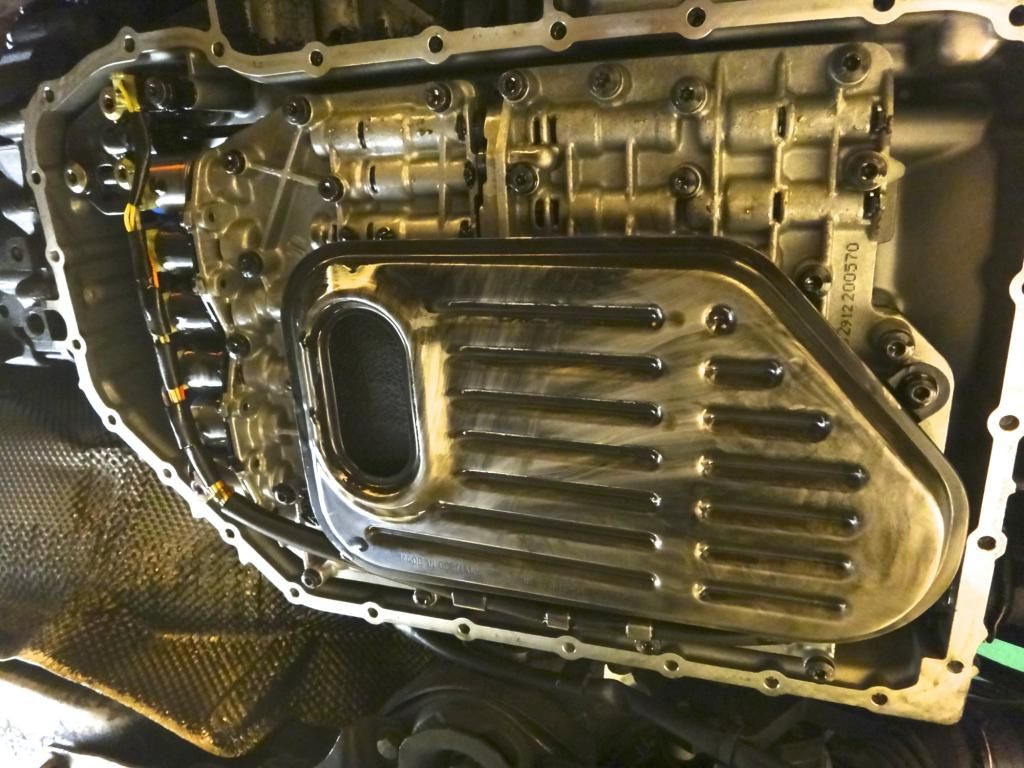
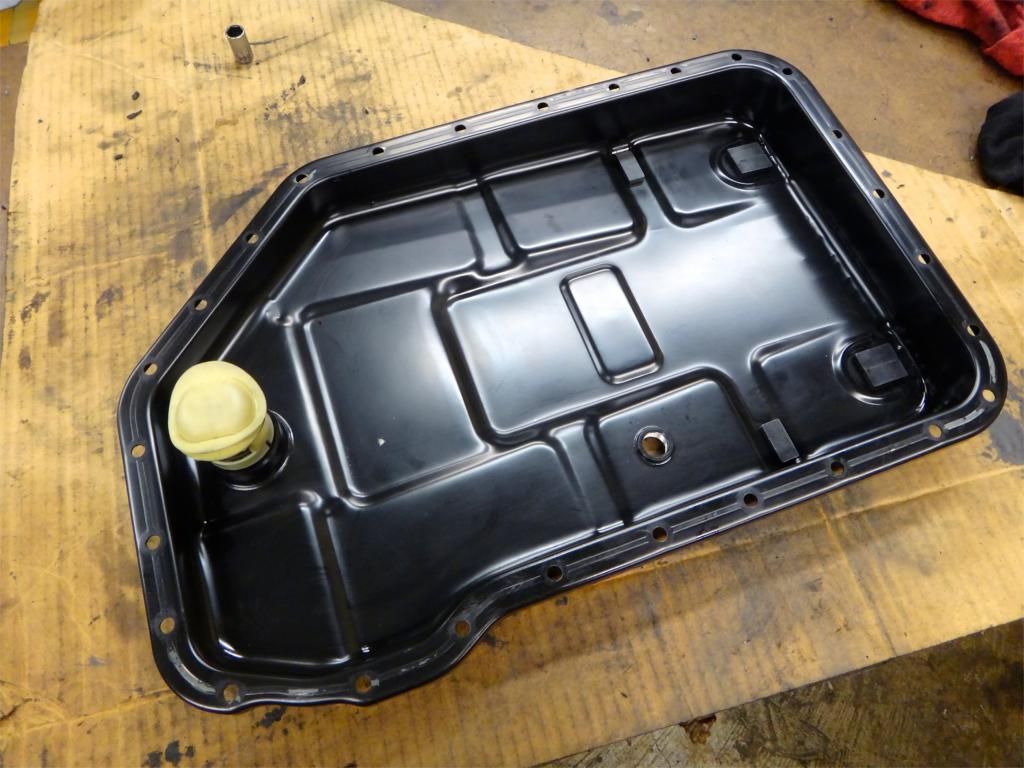
    Since this car is an automatic, to put the car in service position the auto tranny cooler hard lines must be disconnected from the lock carrier. After seeing the grey sludge "fluid" that came out from the lines coupled with a leaking tranny pan gasket, we decided to do a transmission service as well. Bought an auto tranny kit from Blauparts for $125 that came with a new filter, filter o-ring, tranny pan gasket, fill and drain plug o-rings, fluid, and a hand pump.


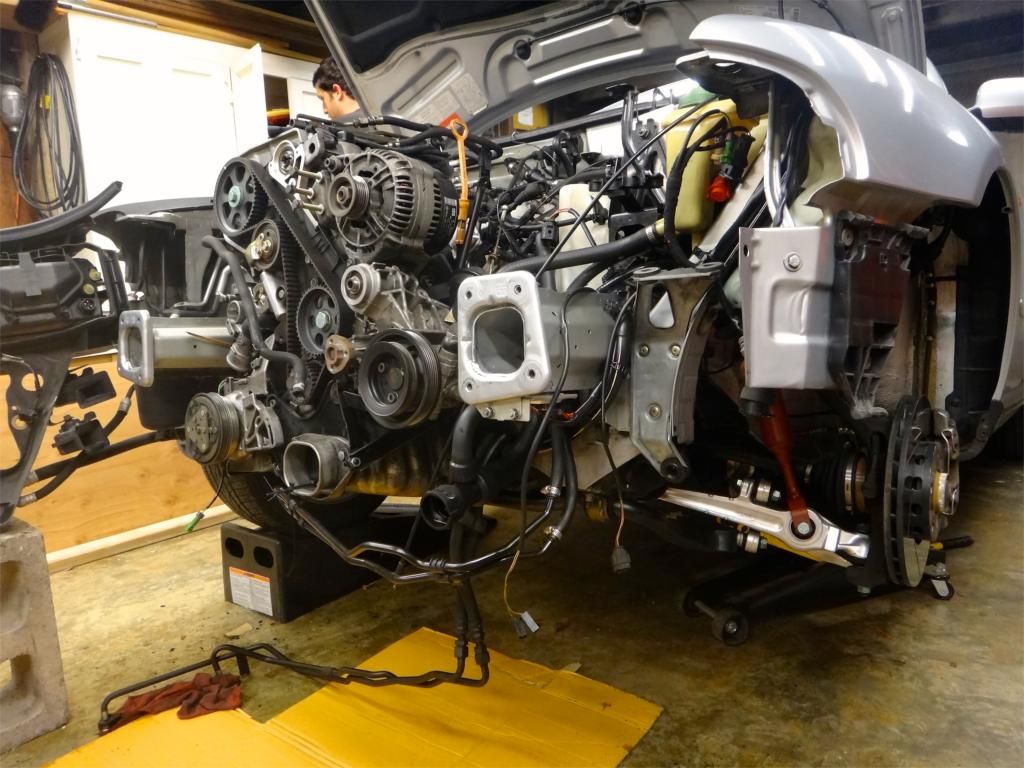
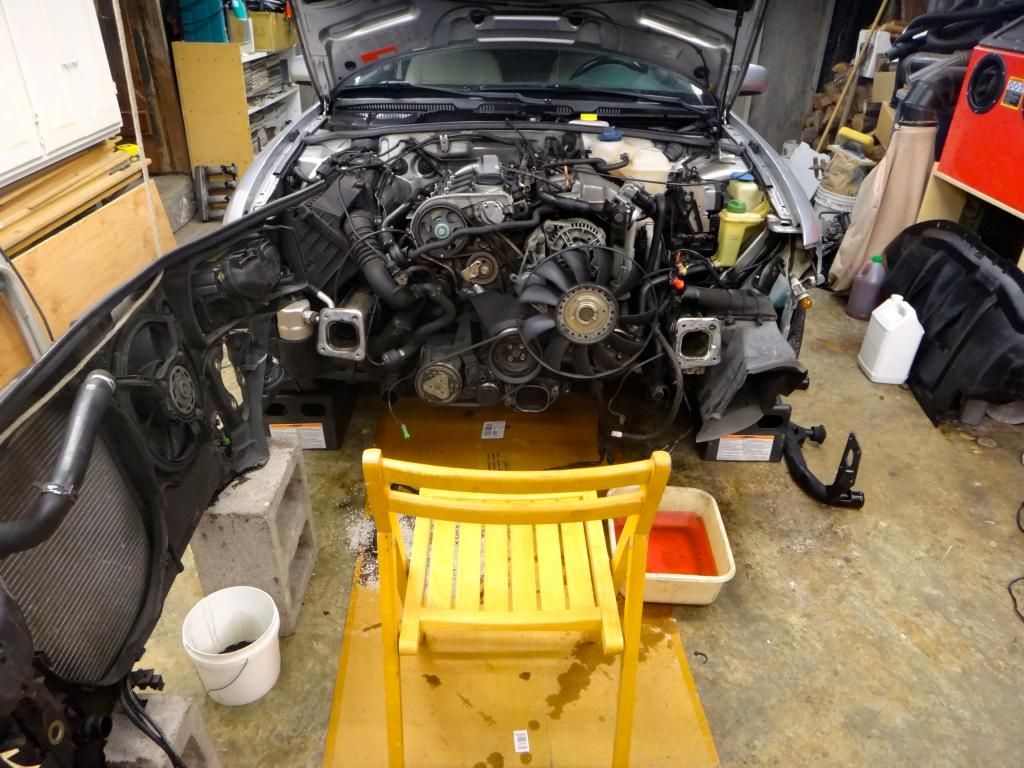
    He was due for a timing belt replacement and having one belt snap doesn't inspire confidence in the others, so into service position it went and I "assumed the position."


    Parts to be installed.


    The mess I started with.


    Pile-o-parts.


    Dirty ass intake manifold.


    More parts, clean intake manifold.


    Who says cleaning isn't fun? Look at that! Ready to throw it in a pan and fry it up!


    DV hose with a gash in it, nearly broke through. Replacement hose behind it.


    Cracked fan blade, replaced with junkyard blade.


    Dirty intercooler prior to cleaning.


    Frame rails cleaned.


    New timing components installed.


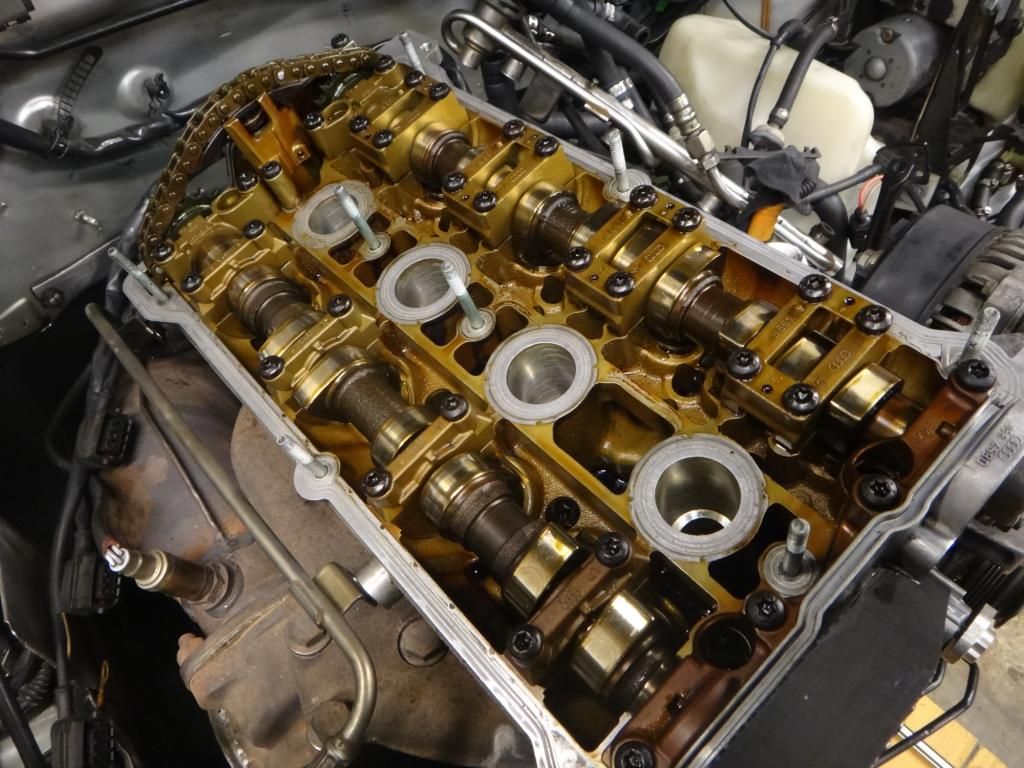
    Valvetrain.


    Top end buttoned back up.


    Nearly finished reinstalling everything.


    Looks a little bit better now right? And a whole lot easier to work on or take apart again if need be. No more glued together boost hoses.


    New timing belt sticker ready to fill out.

    Last edited by BaseDrifter; 10-03-2014 at 03:06 PM.
    | Update thread / Youtube Channel |

    97 A4 1.8TQM: Frankenturbo|TyrolSport SMIC|034 HFC|Borla catback|Carbonio/007 DV|Vogtland GT3|034 RSB|Apikol Bushings|034 SD motor/tranny/strut mounts|A8 brakes/SS lines|JHM trio|Meyle HD CA/TREs|
    01 S4 2.7T: Stock

  4. #284
    Veteran Member Four Rings BaseDrifter's Avatar
    Join Date
    May 18 2010
    AZ Member #
    59183
    Location
    Bay Area, CA

    Transmission pan dropped.


    Old nasty filter.


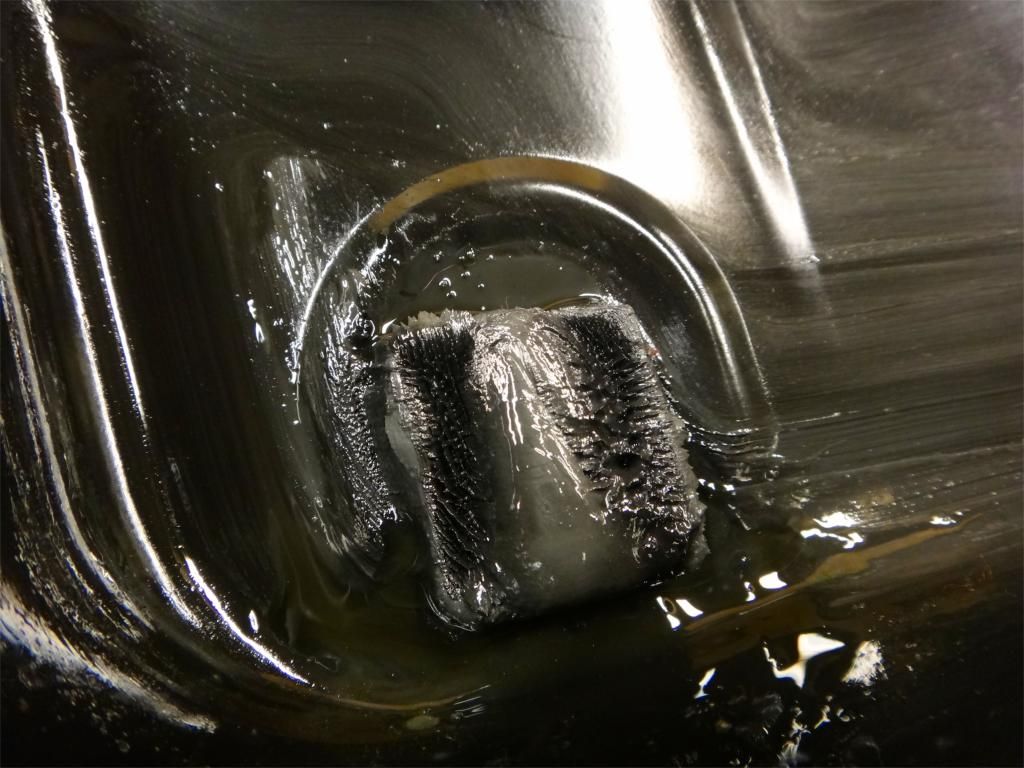
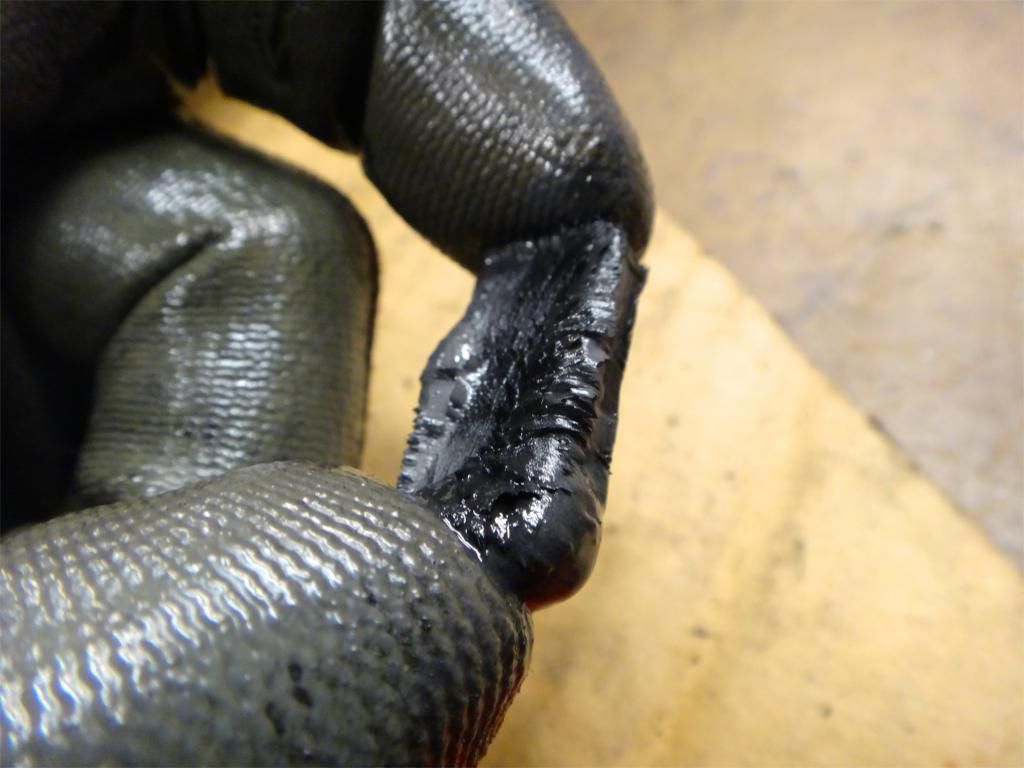
    Tranny pan magnets covered in metallic sludge.


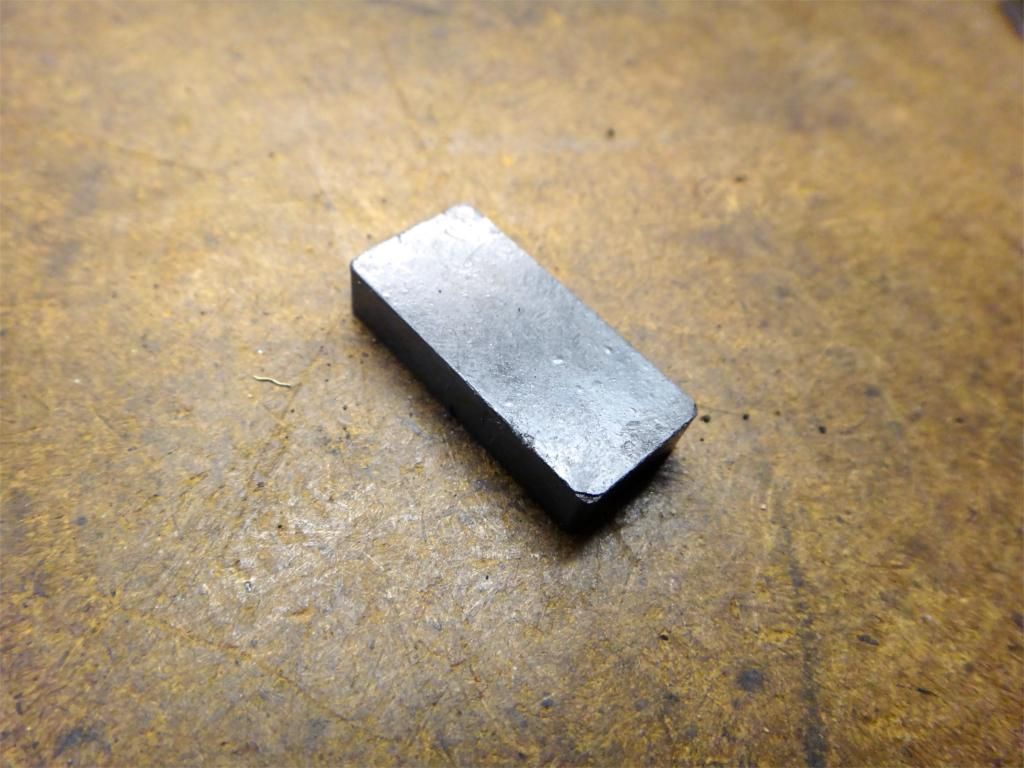
    Cleaned magnet.


    Cleaned pan.


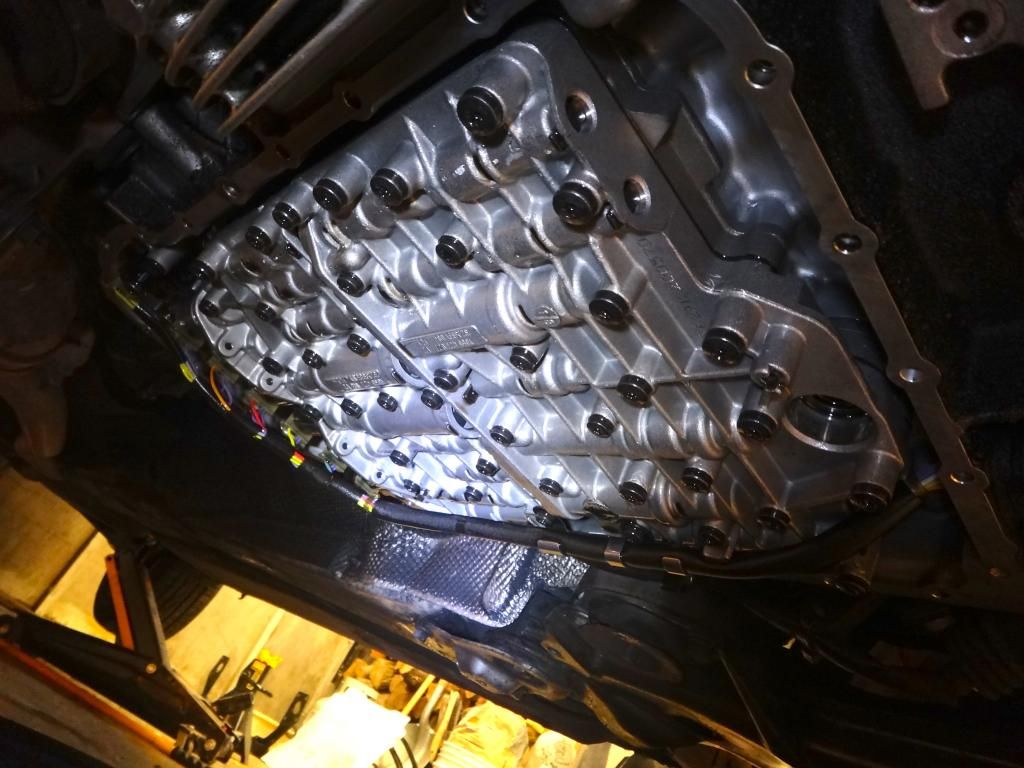
    Transmission valve body.


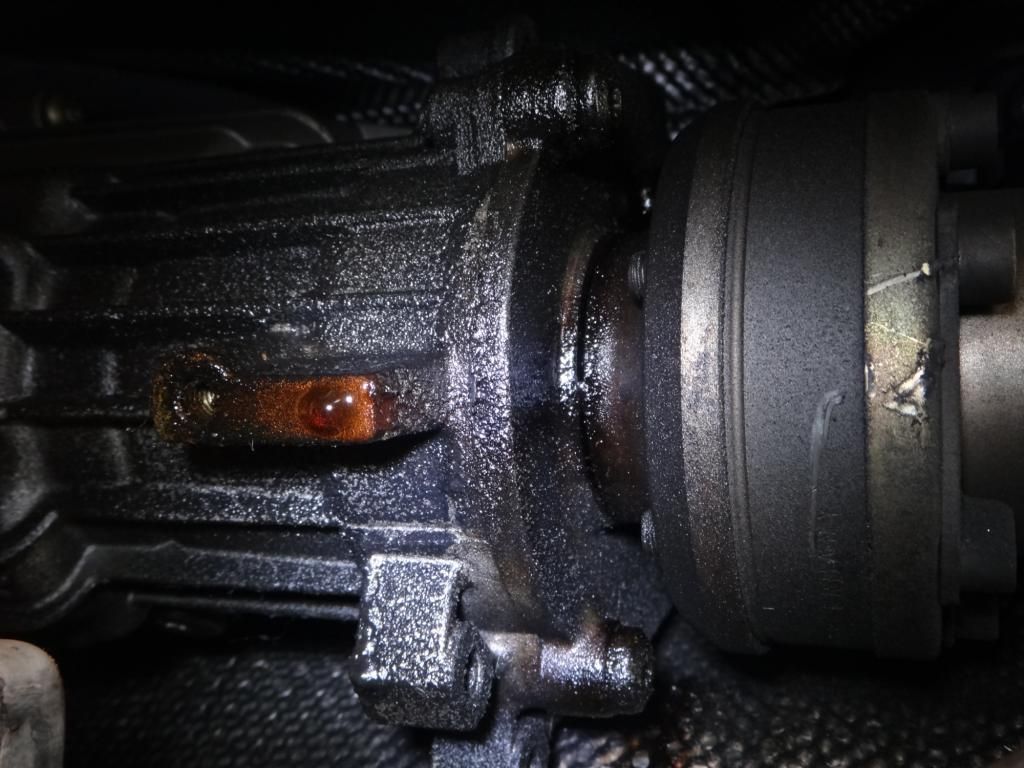
    As I was under there I noticed that the transmission output seal was leaking pretty bad. I picked up the seals to replace it and will tackle that job next month maybe. All the rear differential seals are leaking as well, so it'll be a full driveline service. I did replace the fluid in the center diff while I was there.


    Finished! …for now. Oh, and I did chip the car as well, what an improvement!

    | Update thread / Youtube Channel |

    97 A4 1.8TQM: Frankenturbo|TyrolSport SMIC|034 HFC|Borla catback|Carbonio/007 DV|Vogtland GT3|034 RSB|Apikol Bushings|034 SD motor/tranny/strut mounts|A8 brakes/SS lines|JHM trio|Meyle HD CA/TREs|
    01 S4 2.7T: Stock

  5. #285
    Veteran Member Four Rings BaseDrifter's Avatar
    Join Date
    May 18 2010
    AZ Member #
    59183
    Location
    Bay Area, CA

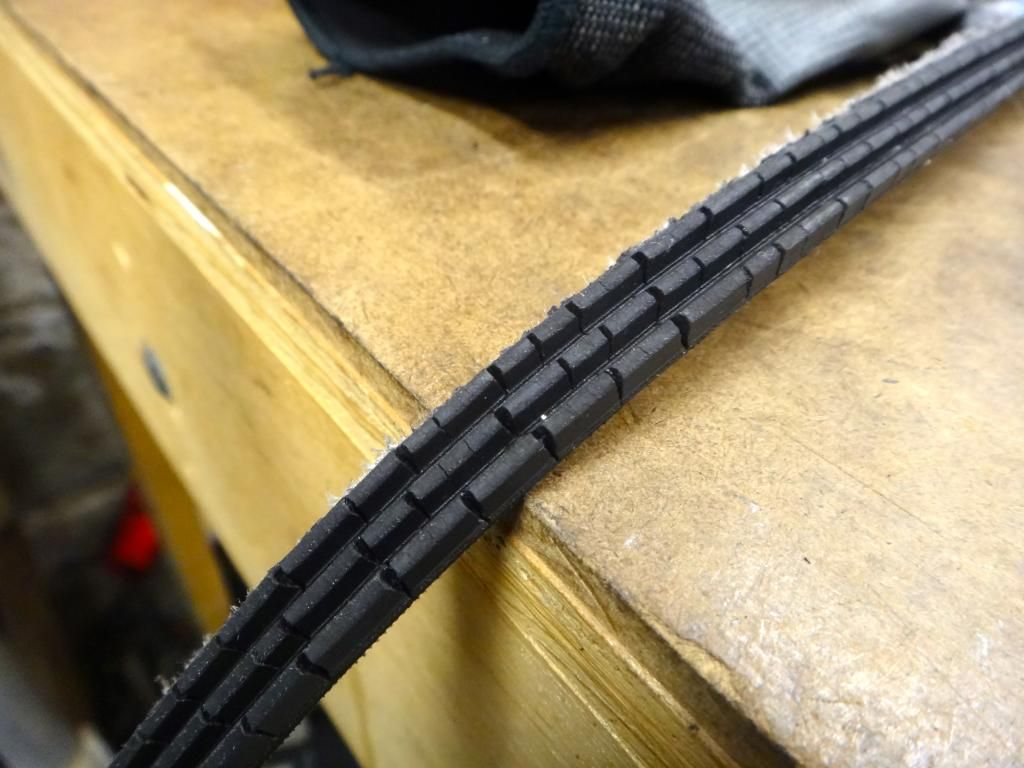
    I forgot to mention, after getting it all put back together and firing it up, I noticed the serpentine belt tensioner was moving around excessively. I believe the busted tensioner plus the worn belt is what caused the failure. I pulled an OEM tensioner off a car at the junkyard and it is solid with no movement now.


    Also, I made a little video of the valve action. Spark plug 1 was not tightened down which is why you only hear three "breathes."

    | Update thread / Youtube Channel |

    97 A4 1.8TQM: Frankenturbo|TyrolSport SMIC|034 HFC|Borla catback|Carbonio/007 DV|Vogtland GT3|034 RSB|Apikol Bushings|034 SD motor/tranny/strut mounts|A8 brakes/SS lines|JHM trio|Meyle HD CA/TREs|
    01 S4 2.7T: Stock

  6. #286
    Veteran Member Four Rings Cgoon009's Avatar
    Join Date
    Mar 02 2013
    AZ Member #
    110578
    My Garage
    I have a garage? Do tell...
    Location
    DC

    I absolutely love this sort of work. Good job man!
    Eurosport Tuning at it's Finest

  7. #287
    Veteran Member Four Rings BaseDrifter's Avatar
    Join Date
    May 18 2010
    AZ Member #
    59183
    Location
    Bay Area, CA

    Thanks Rich! Your Avant looks great by the way.

    I have to say though, doing the transmission service on your back sucks. Tightening the 27 tranny pan bolts in a circular pattern, going over all of them again to make sure I didn't miss one, then torquing them in a circle pattern, and again around the circle to make sure I didn't miss one, sucks!
    Last edited by BaseDrifter; 10-03-2014 at 04:44 PM.
    | Update thread / Youtube Channel |

    97 A4 1.8TQM: Frankenturbo|TyrolSport SMIC|034 HFC|Borla catback|Carbonio/007 DV|Vogtland GT3|034 RSB|Apikol Bushings|034 SD motor/tranny/strut mounts|A8 brakes/SS lines|JHM trio|Meyle HD CA/TREs|
    01 S4 2.7T: Stock

  8. #288
    Veteran Member Four Rings RENOxDECEPTION's Avatar
    Join Date
    Nov 04 2012
    AZ Member #
    103464
    My Garage
    2000 B5 A4 1.8TQM, 2000 B5 A4 1.8TQM
    Location
    Reno

    Yeah man, it's hard to even keep track of 12 bolts in a star pattern, 27 in a circular seems like a huge pain.

    2000 Audi A4 B5 1.8TQM AEB/06A
    1998 Audi A4 B5 4.2QM (Thread)
    2000 Audi A4 B5 1.8TQM K24 Turbo, AEB Wideband
  9. #289
    Veteran Member Four Rings coolgraymemo's Avatar
    Join Date
    Jun 10 2010
    AZ Member #
    60106
    Location
    ©

    I need you to do a similar service to my car.
    Santorin/Ebony '00 S4 6MT | K04/K16, Stasis LSD/4:1, Bilstein PSS9, Stoptech, SSR Comps, & more
    '01 S4 Avant 6MT | '00 1.8t Avant | '93 RS2'd S4 | '99.5 1.8t | '01 1.8t | '95.5 S6 Avant

  10. #290
    Veteran Member Four Rings BaseDrifter's Avatar
    Join Date
    May 18 2010
    AZ Member #
    59183
    Location
    Bay Area, CA

    Let me know if you want to work something out, can be done.

    Reno, going back over the bolts in a complete circle was necessary as I definitely missed a bolt here or there on the initial tightening. Fun stuff.
    | Update thread / Youtube Channel |

    97 A4 1.8TQM: Frankenturbo|TyrolSport SMIC|034 HFC|Borla catback|Carbonio/007 DV|Vogtland GT3|034 RSB|Apikol Bushings|034 SD motor/tranny/strut mounts|A8 brakes/SS lines|JHM trio|Meyle HD CA/TREs|
    01 S4 2.7T: Stock

  11. #291
    Veteran Member Four Rings BaseDrifter's Avatar
    Join Date
    May 18 2010
    AZ Member #
    59183
    Location
    Bay Area, CA

    Quick little update on my car.

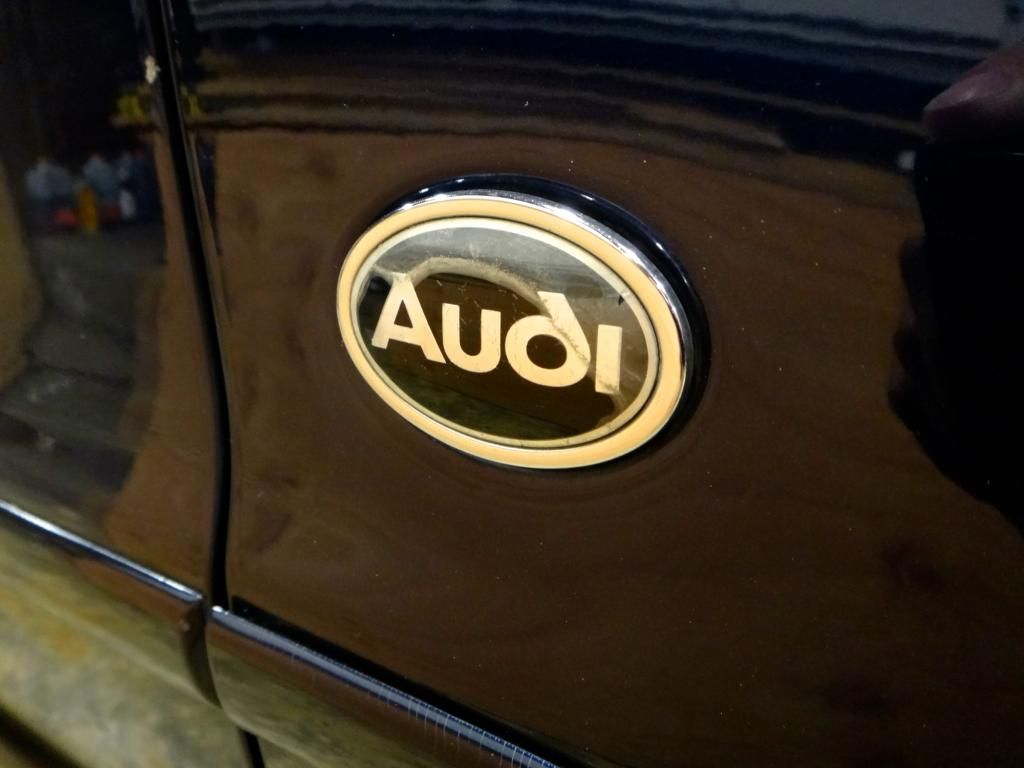
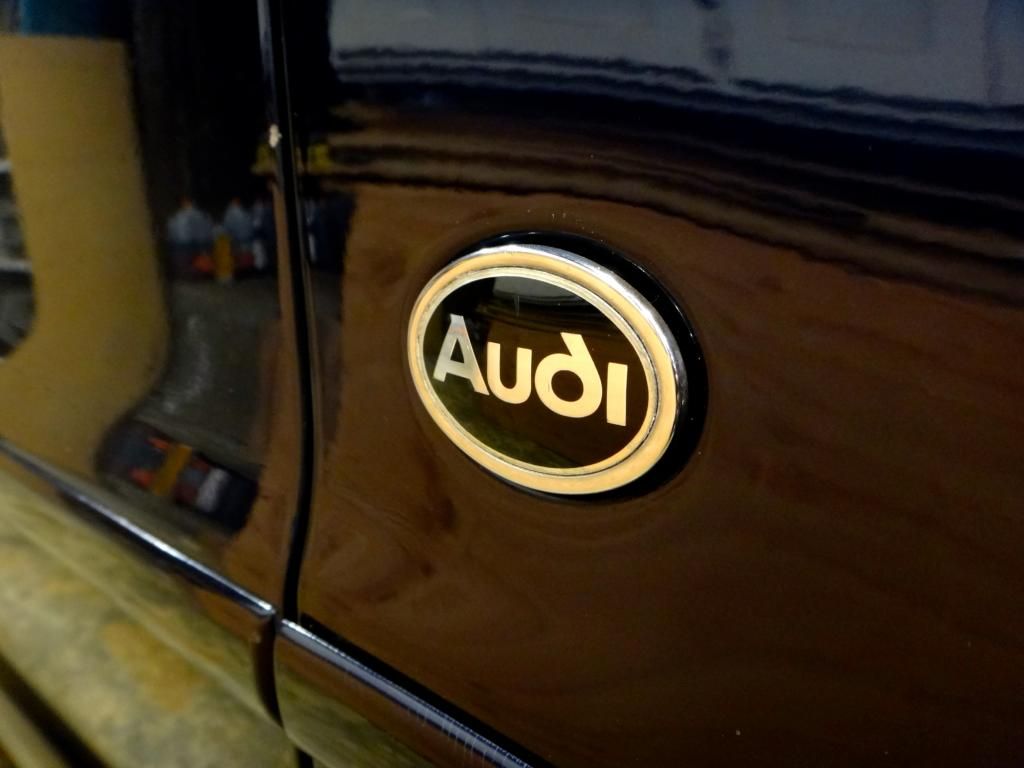
    I picked up a replacement Audi fender logo from a parts car today. The passenger side one on my car had the plastic finish peeling and looked like doo doo. The replacement isn't perfect, but it looks a helluva lot better.

    Old.


    New.


    There is also a 97 europa blue mica car that arrived at the pick n pull 30 miles away a few days ago. Sunday I'm planning to go up there and check it out. If the doors are good condition I'll be picking both the passenger side door skins to replace my keyed doors. Hopefully the paint is a close match! I asked them what they would charge for the door skins today and they said $35 each, sounds much better than the $800 it would cost to get both doors fixed and repainted.
    | Update thread / Youtube Channel |

    97 A4 1.8TQM: Frankenturbo|TyrolSport SMIC|034 HFC|Borla catback|Carbonio/007 DV|Vogtland GT3|034 RSB|Apikol Bushings|034 SD motor/tranny/strut mounts|A8 brakes/SS lines|JHM trio|Meyle HD CA/TREs|
    01 S4 2.7T: Stock
  12. #292
    Established Member Two Rings Pianege's Avatar
    Join Date
    Sep 25 2014
    AZ Member #
    284996
    Location
    San Clemente Ca

    Ok so I love this thread. Took me like 30 min to go through everything and I must say I am impressed sir! I picked up a B5 a few months back and would love to have the engine bay look half as good as yours. I must ask where is this magic PnP you find these 1.8's? I live in OC I hope it's closer.


    B5 A4 1.8t AWM

  13. #293
    Veteran Member Four Rings BaseDrifter's Avatar
    Join Date
    May 18 2010
    AZ Member #
    59183
    Location
    Bay Area, CA

    Thanks, I appreciate that. It has been a labor of love.

    Glad you enjoyed the thread, there are 45 more pages of earlier stuff here on AF if you didn't check out any of the early links in my table of contents.

    I'm quite lucky that there are 6 Pick n Pulls within 50 miles of me. There's almost always two or three B5s at each lot with a new one coming in every week or two.
    | Update thread / Youtube Channel |

    97 A4 1.8TQM: Frankenturbo|TyrolSport SMIC|034 HFC|Borla catback|Carbonio/007 DV|Vogtland GT3|034 RSB|Apikol Bushings|034 SD motor/tranny/strut mounts|A8 brakes/SS lines|JHM trio|Meyle HD CA/TREs|
    01 S4 2.7T: Stock
  14. #294
    Veteran Member Four Rings melomandn's Avatar
    Join Date
    Nov 08 2010
    AZ Member #
    66735
    My Garage
    958 CTT, 996 C4S, old motorcycles
    Location
    Upstate New York

    Your commitment to quality is awesome, keeping b5's alive

    Past:

    - B7 avant, 3.0t swapped
    - B8 S4, Stage 2+
    - B6 S4, not stock
    - B5 S4 Clone, built motor, 2871r

  15. #295
    Established Member Two Rings Pianege's Avatar
    Join Date
    Sep 25 2014
    AZ Member #
    284996
    Location
    San Clemente Ca

    What cities dude?


    B5 A4 1.8t AWM

  16. #296
    Veteran Member Four Rings BaseDrifter's Avatar
    Join Date
    May 18 2010
    AZ Member #
    59183
    Location
    Bay Area, CA

    Quote Originally Posted by melomandn View Post
    Your commitment to quality is awesome, keeping b5's alive
    Thanks meloman, it's a process of perfection and attention to detail. I hope to keep it going!

    Quote Originally Posted by Pianege View Post
    What cities dude?
    Oakland, Richmond, sometimes Fairfield or Newark.
    | Update thread / Youtube Channel |

    97 A4 1.8TQM: Frankenturbo|TyrolSport SMIC|034 HFC|Borla catback|Carbonio/007 DV|Vogtland GT3|034 RSB|Apikol Bushings|034 SD motor/tranny/strut mounts|A8 brakes/SS lines|JHM trio|Meyle HD CA/TREs|
    01 S4 2.7T: Stock
  17. #297
    Senior Member Three Rings
    Join Date
    May 21 2014
    AZ Member #
    234189
    My Garage
    83 Chevy C10 Custom Deluxe
    Location
    null

    So much better now that the grille is black and you removed that silly chrome edging..

  18. #298
    Veteran Member Four Rings BaseDrifter's Avatar
    Join Date
    May 18 2010
    AZ Member #
    59183
    Location
    Bay Area, CA

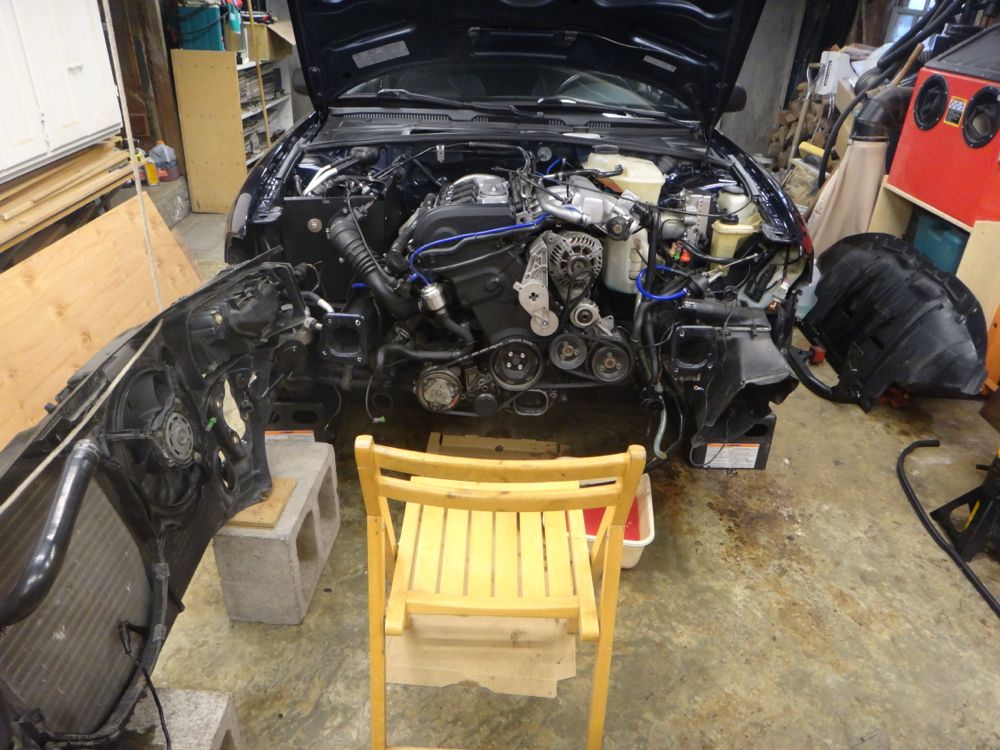
    Yesterday I saved my motor's life by going back into service position to replace the front crankcase gasket. I was setting the engine to TDC when I noticed that that timing belt was not tensioned as it should be. Turns out that the timing belt hydraulic tensioner failed and was completely blown out.


    NSFW warning on the 2nd video, foul language.


    I did a timing belt service last year with an enhanced TB kit from Blauparts. The tensioner I received in the kit was not an NTN brand as listed, but a TQ (Teile Qualitat) tensioner. I did not notice or pay attention to this at the time and it nearly cost my motor. Lesson learned. They mentioned that they may have switched part suppliers within the last year, but I did not get confirmation of this, so it's still unclear as to whether they shipped an incorrect part or not.

    I got in contact with Blauparts today and they are warrantying the timing belt kit and sending me a new INA brand timing belt kit with proper NTN brand (or Lintens…which is apparently also OE, but I really hope it's an NTN) tensioner. They are also shipping it overnight priority which means it should be here monday morning. I was quite disappointed at first when I found the failure, but I'm pleased with how Blauparts handled the issue. It's horrifying to think that I had the car wound up to 5500 rpm the other day with a loose timing belt. I'm counting my blessings that there was no engine damage and the timing was still spot on when I took it apart.

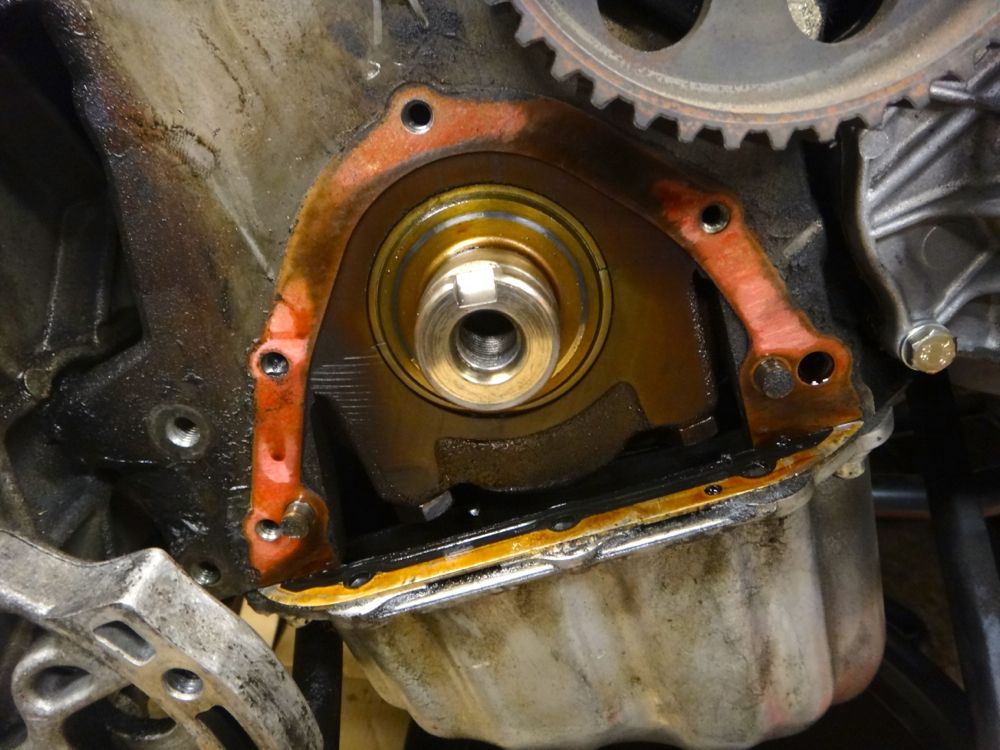
    What brought me into service position in the first place was this leak from my crank case cover that I noticed when I was doing the TB service last year but didn't get around to fixing.


    Can't have a post about service position without my classic picture "back into the position."


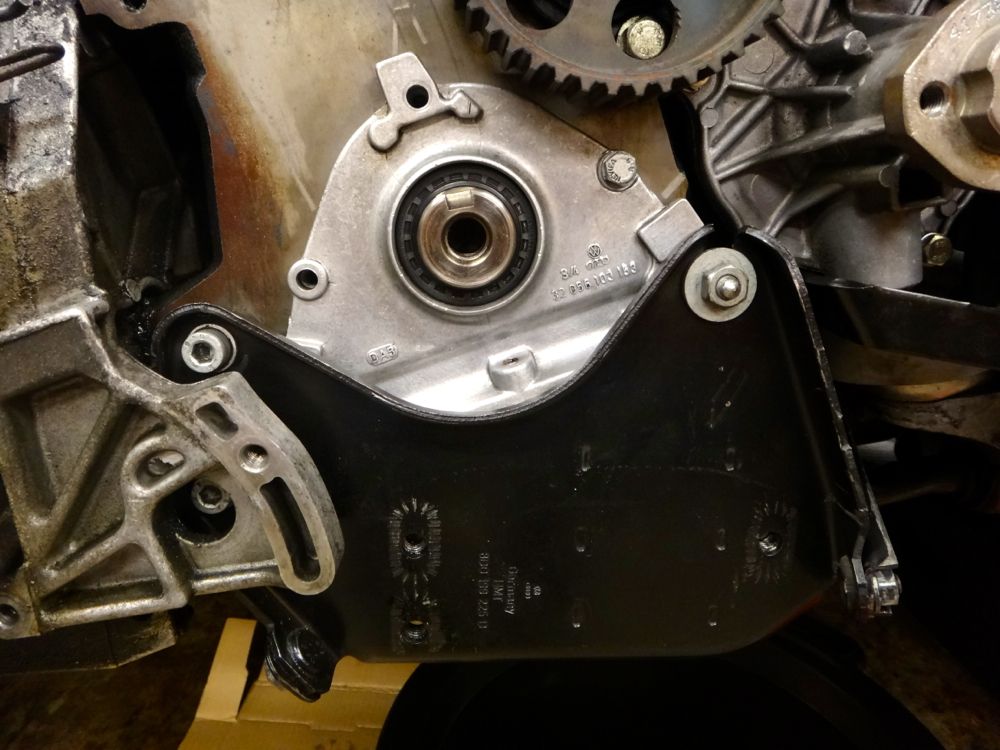
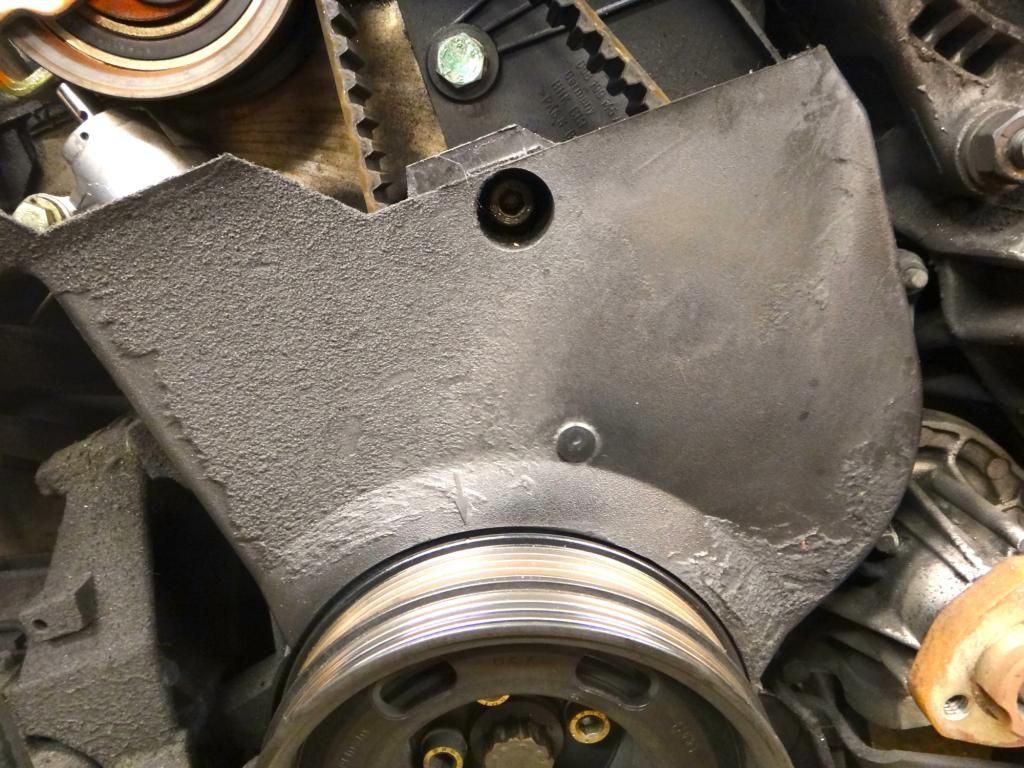
    And finally down to where I needed to go. Crank pulley and crank case cover removed.


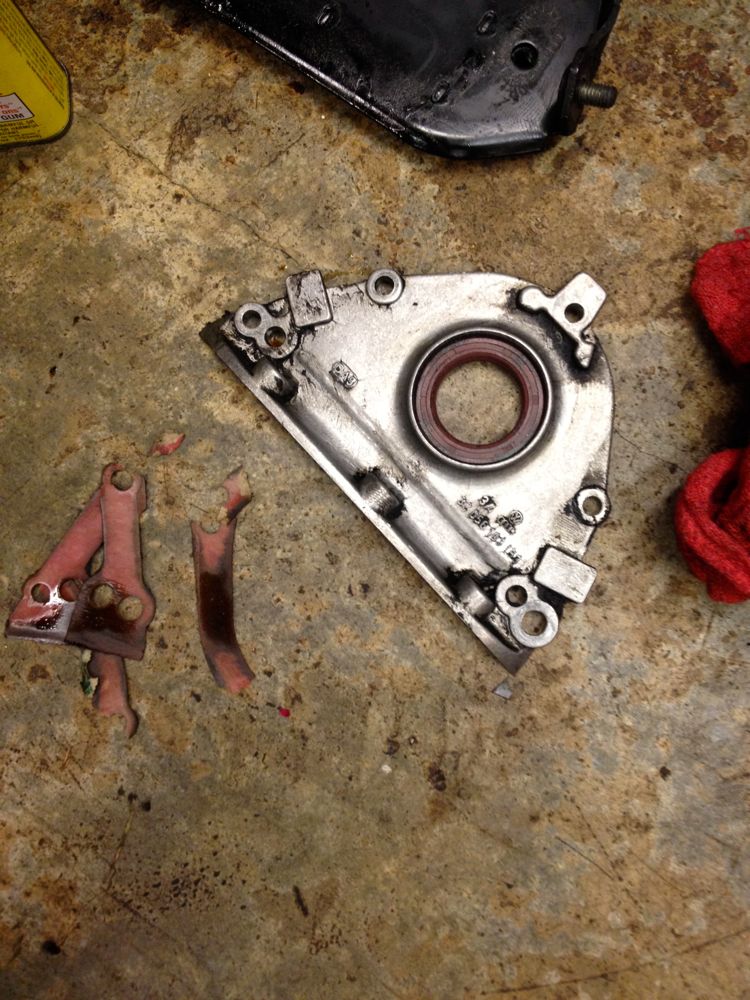
    Dirty cover ready to be cleaned and the old gasket debris.


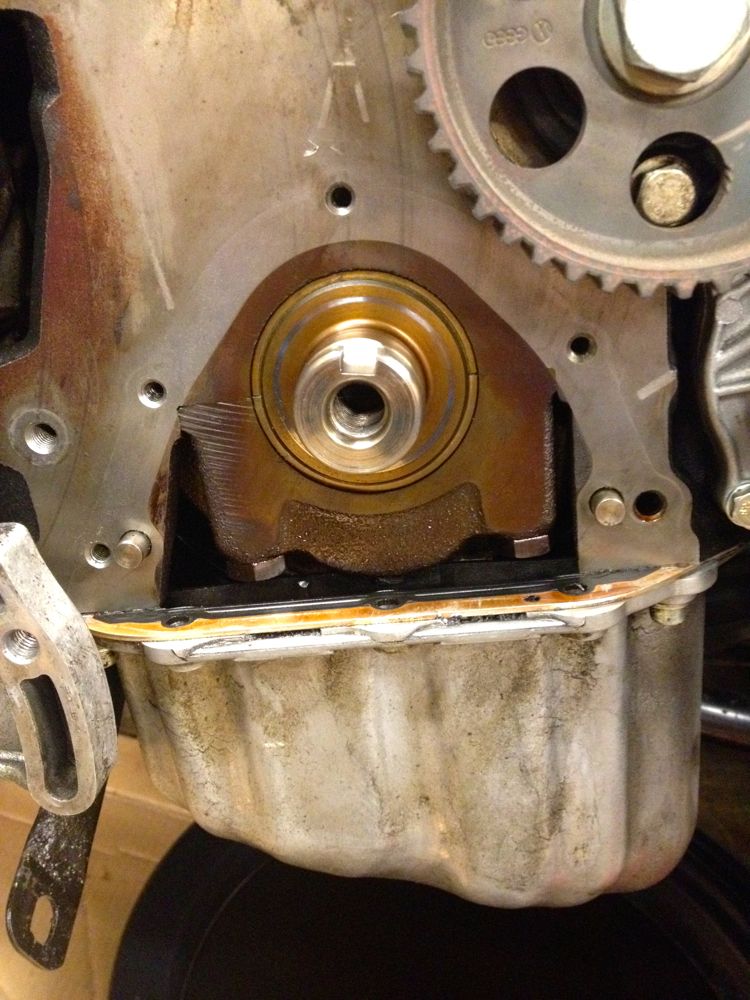
    Block cleaned and ready for the new gasket.

    | Update thread / Youtube Channel |

    97 A4 1.8TQM: Frankenturbo|TyrolSport SMIC|034 HFC|Borla catback|Carbonio/007 DV|Vogtland GT3|034 RSB|Apikol Bushings|034 SD motor/tranny/strut mounts|A8 brakes/SS lines|JHM trio|Meyle HD CA/TREs|
    01 S4 2.7T: Stock
  19. #299
    Veteran Member Three Rings
    Join Date
    Aug 30 2014
    AZ Member #
    279071
    Location
    United States

    Quote Originally Posted by BaseDrifter View Post
    I did a timing belt service last year with an enhanced TB kit from Blauparts. The tensioner I received in the kit was not an NTN brand as listed, but a TQ (Teile Qualitat) tensioner. I did not notice or pay attention to this at the time and it nearly cost my motor. Lesson learned. They mentioned that they may have switched part suppliers within the last year, but I did not get confirmation of this, so it's still unclear as to whether they shipped an incorrect part or not.

    I got in contact with Blauparts today and they are warrantying the timing belt kit and sending me a new INA brand timing belt kit with proper NTN brand (or Lintens…which is apparently also OE, but I really hope it's an NTN) tensioner. They are also shipping it overnight priority which means it should be here monday morning. I was quite disappointed at first when I found the failure, but I'm pleased with how Blauparts handled the issue. It's horrifying to think that I had the car wound up to 5500 rpm the other day with a loose timing belt. I'm counting my blessings that there was no engine damage and the timing was still spot on when I took it apart.
    If your engine code is AEB they should not be sending you a "Litens" tensioner but I hope it's just a miscomunication. I really hope they didn't mess things up again. The Litens tensioner is only for AWM so if they send you an AWM kit then there is going to be problems...

  20. #300
    Veteran Member Four Rings BaseDrifter's Avatar
    Join Date
    May 18 2010
    AZ Member #
    59183
    Location
    Bay Area, CA

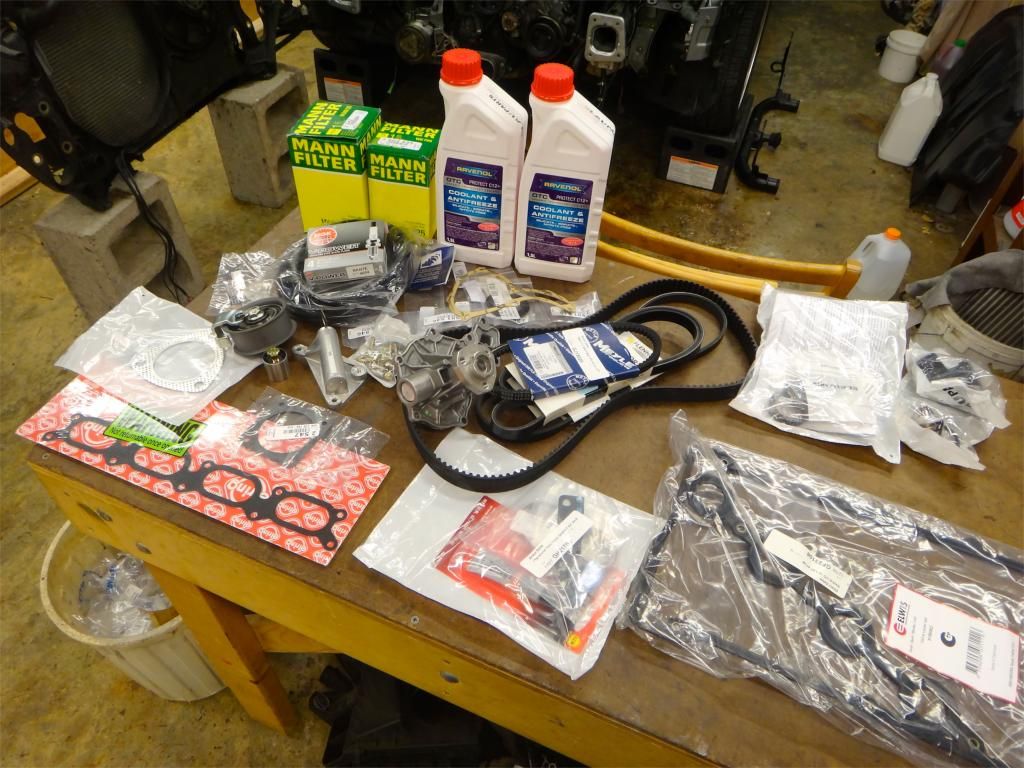
    Yes, I'm AEB. I also hope that was a miscommunication. I confirmed that the kit they are sending me is this one though, which is for AEBs. So hopefully all is well.
    | Update thread / Youtube Channel |

    97 A4 1.8TQM: Frankenturbo|TyrolSport SMIC|034 HFC|Borla catback|Carbonio/007 DV|Vogtland GT3|034 RSB|Apikol Bushings|034 SD motor/tranny/strut mounts|A8 brakes/SS lines|JHM trio|Meyle HD CA/TREs|
    01 S4 2.7T: Stock
  21. #301
    Veteran Member Four Rings fR3ZNO's Avatar
    Join Date
    Feb 09 2013
    AZ Member #
    109199
    Location
    WNY

    Glad to hear that Blau came through and are sending you a new TB kit (with the right components, haha). But it's weird that they sent you a TQ tensioner, I thought all of their TB kits used a NTN tensioner? So I'm confused as to why they were using them or had them in stock (unless that was a result of their supplier change).
    "If one does not fail at times, then one has not challenged himself." - Ferdinand Porsche

  22. #302
    Veteran Member Four Rings BaseDrifter's Avatar
    Join Date
    May 18 2010
    AZ Member #
    59183
    Location
    Bay Area, CA

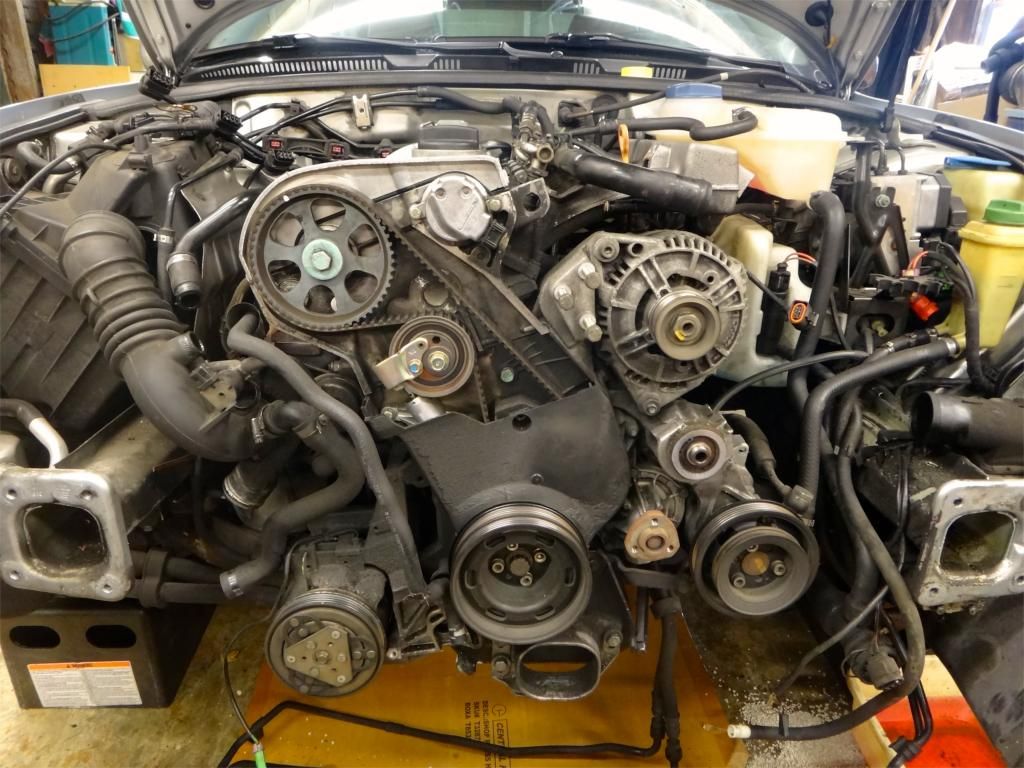
    That was my understanding as well, I'll try to get some clarification on whether there was a part change or not after the new kit arrives. I've started work on my crank pulley locking tool as well, should have it done tomorrow.

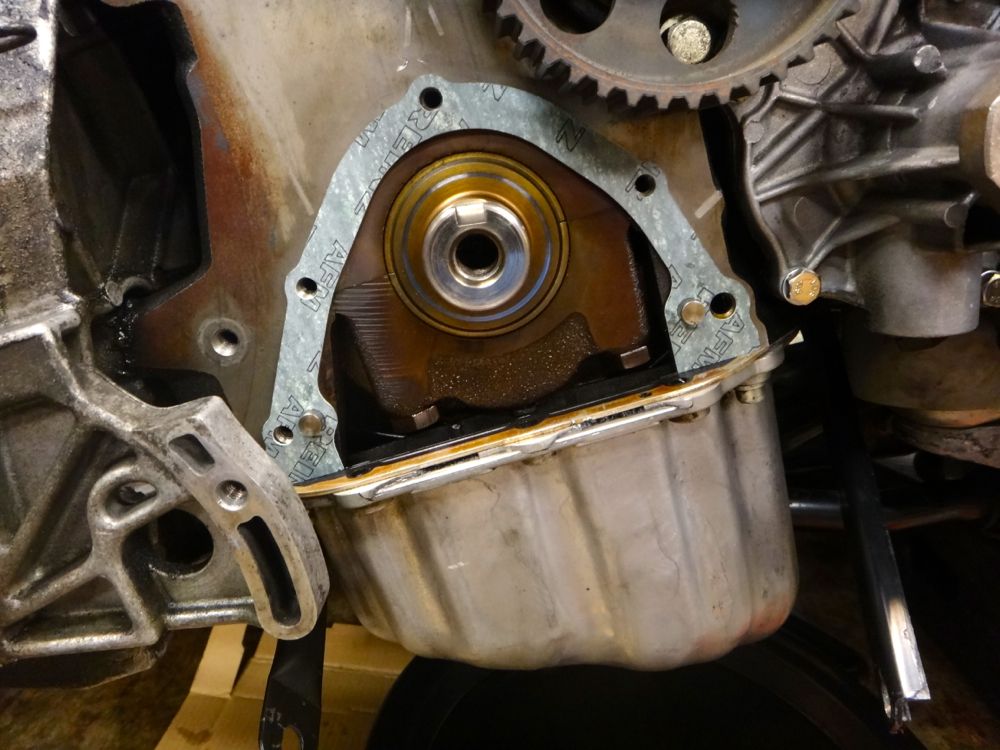
    New gasket in place (and oil pan cleaned.)


    Crank case cover installed, new crank seal in place, and snub mount bracket bolted on. This Victor-Reinz PTFE crank seal I got actually came with the installation ring. Made installing the new seal super easy. Without the tool it's next to impossible to get the inner lip seated correctly without messing it up or having it fold over. I learned that the last time around.


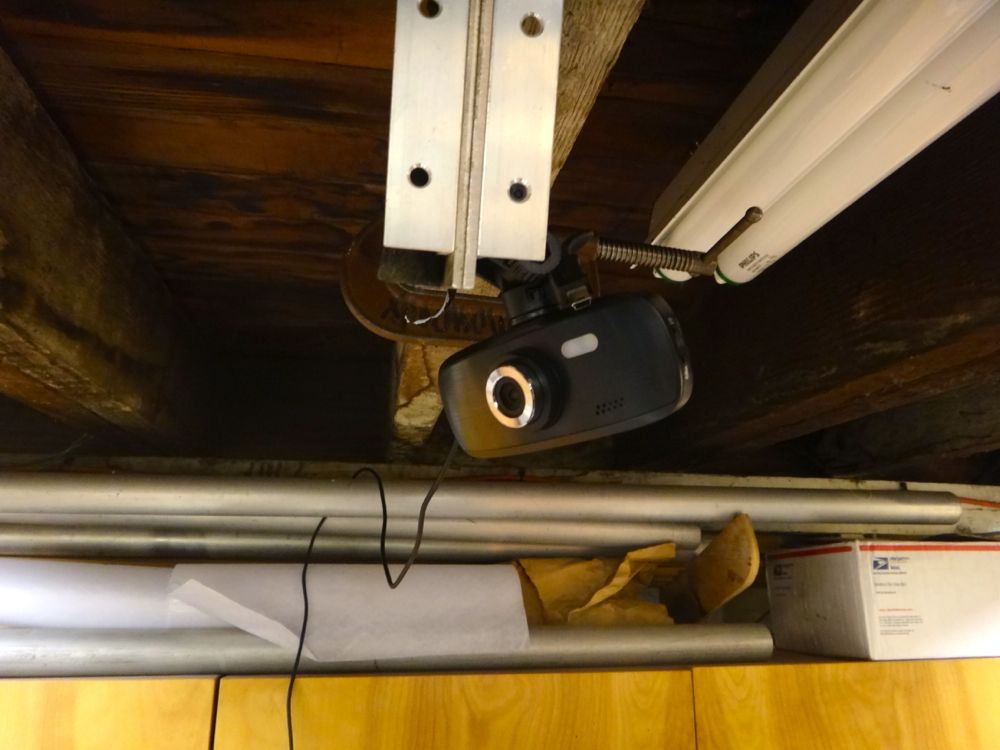
    I also set up my dash camera on the ceiling of my garage and have been recording this whole service which I'll make into a time-lapse when I'm done.

    | Update thread / Youtube Channel |

    97 A4 1.8TQM: Frankenturbo|TyrolSport SMIC|034 HFC|Borla catback|Carbonio/007 DV|Vogtland GT3|034 RSB|Apikol Bushings|034 SD motor/tranny/strut mounts|A8 brakes/SS lines|JHM trio|Meyle HD CA/TREs|
    01 S4 2.7T: Stock
  23. #303
    Veteran Member Four Rings BaseDrifter's Avatar
    Join Date
    May 18 2010
    AZ Member #
    59183
    Location
    Bay Area, CA

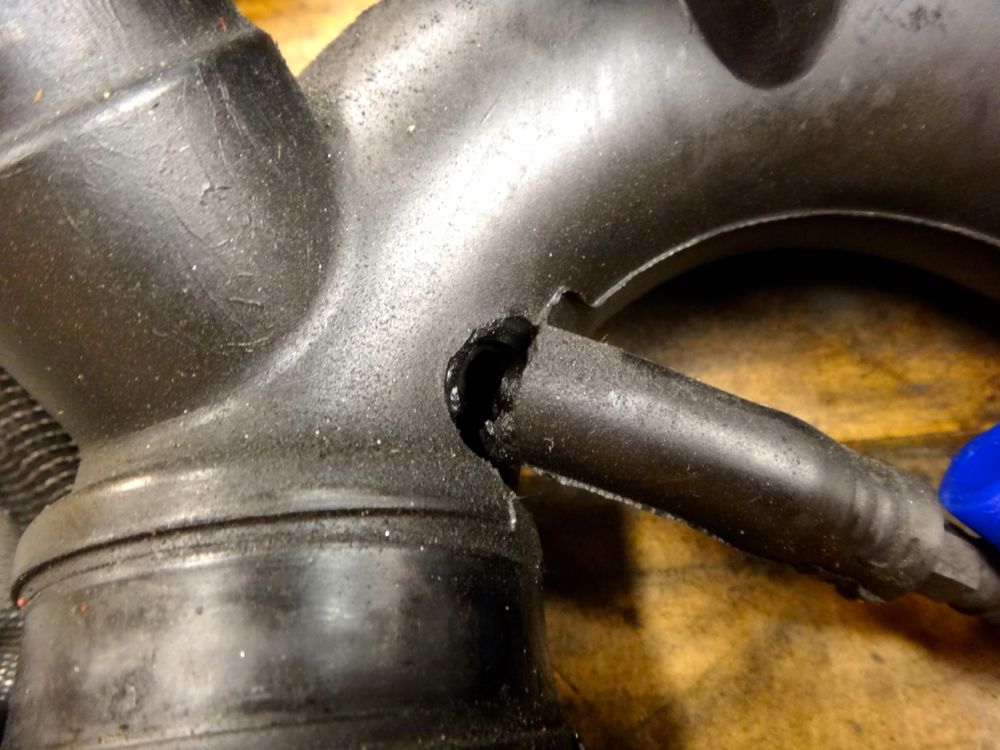
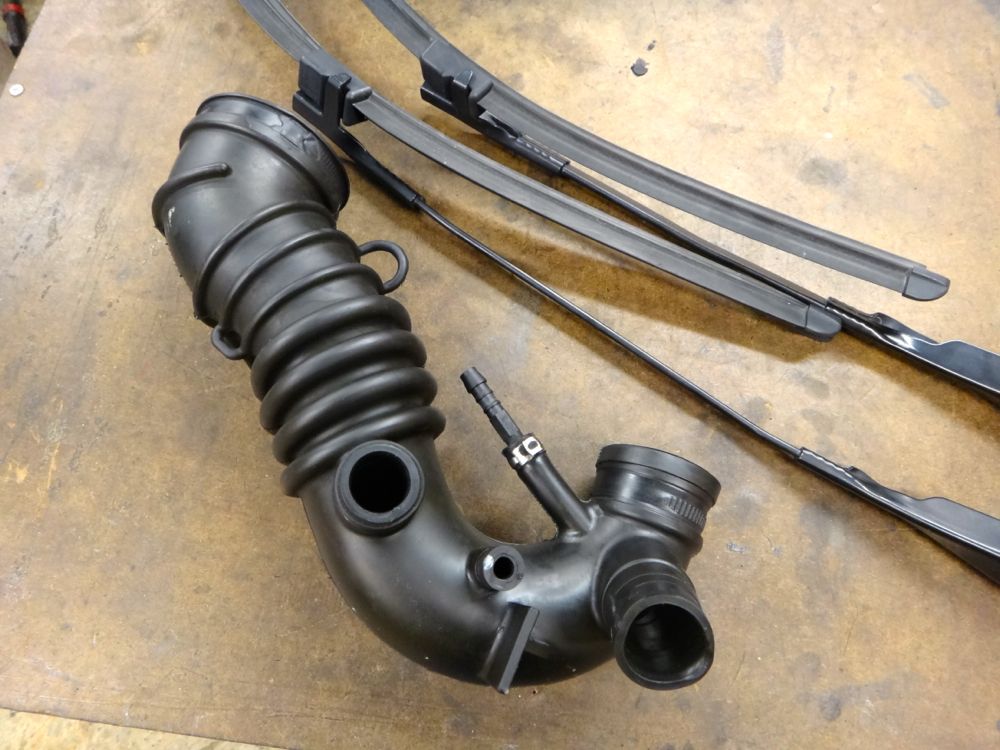
    As I was cleaning parts last night I discovered that my TIP had a massive rip in it. I have a feeling that I ripped it when I was removing it, but I don't know for sure. I wasn't getting any lean codes.


    I wasn't planning on going to the junkyard this morning, but sometimes life throws little wrenches in your plans. I was starting to get worried after seeing 2.8 after 2.8, probably 8 of them before I found a passat with a 1.8T that had an intact TIP. I also snagged another set of aero wiper arms (and blades) off a B5.5 passat. These arms are in better condition that the ones I pulled a couple weeks ago. I'll either put the old set on my dad's B5 or sell them.


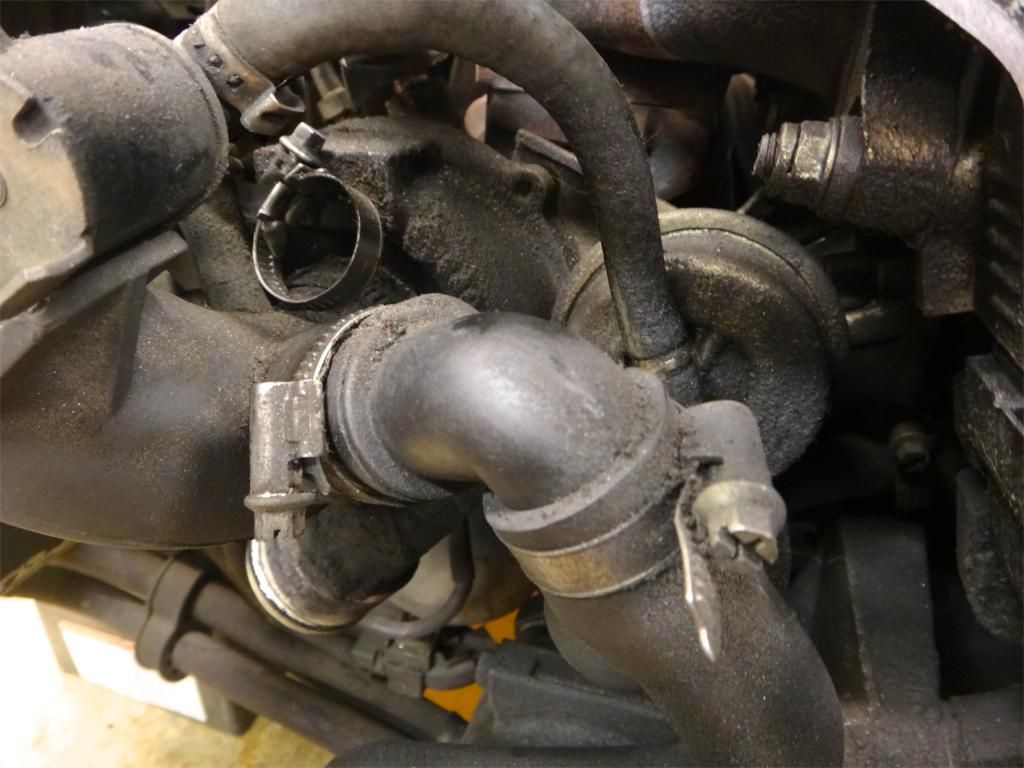
    The new timing belt kit arrived this morning from Blauparts with the proper NTN tensioner and INA components. Woot woot!

    I installed the new TB kit based off my reference marks from a year ago, however I don't believe those marks were actually correct. When I went into service position to install the HFC and new turbo earlier this year I posted a picture of my timing marks and it definitely looked off a tooth. I didn't change the timing as the car ran fine and I didn't want to deal with it.

    With the cam aligned to TDC, the crank was advanced and did not line up with the factory TDC mark on the lower TB cover and dampener. I marked the crank pulley for TDC based on the dowel in cylinder #1 method, however I think I missed the mark on it. I double checked the accuracy of the factory crank TDC mark and it lined up with the dowel method. With the crank at TDC the camshaft pulley was retarded by nearly a tooth.

    What I ended up doing was leaving the crank at TDC, pulling the belt off the cam pulley and advancing it one tooth. After re-tensioning the belt and checking everything it looks to be spot on now. Cam mark, crank mark, and dowel pin all point to TDC at the same point. We'll see if I notice any difference in performance. I kind of doubt I'll notice anything though.

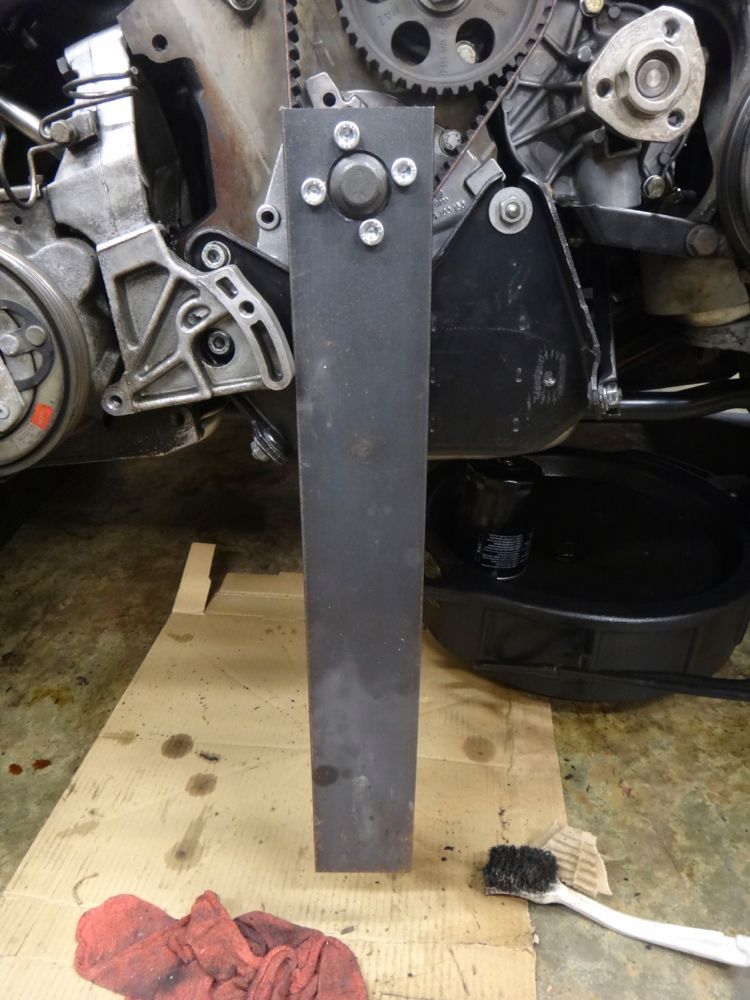
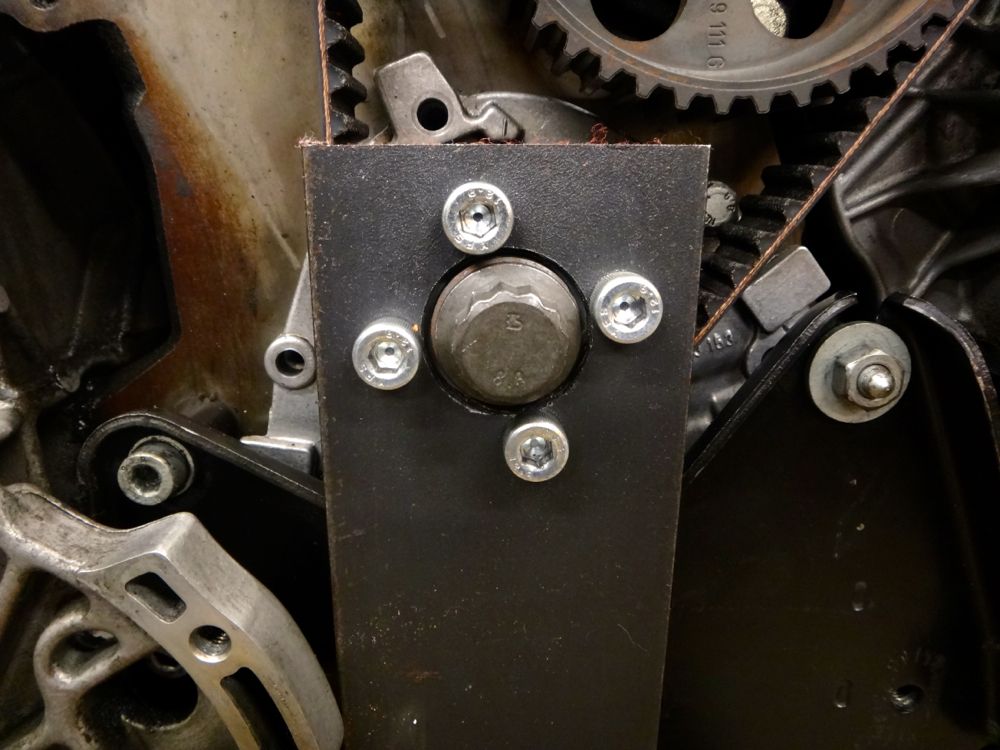
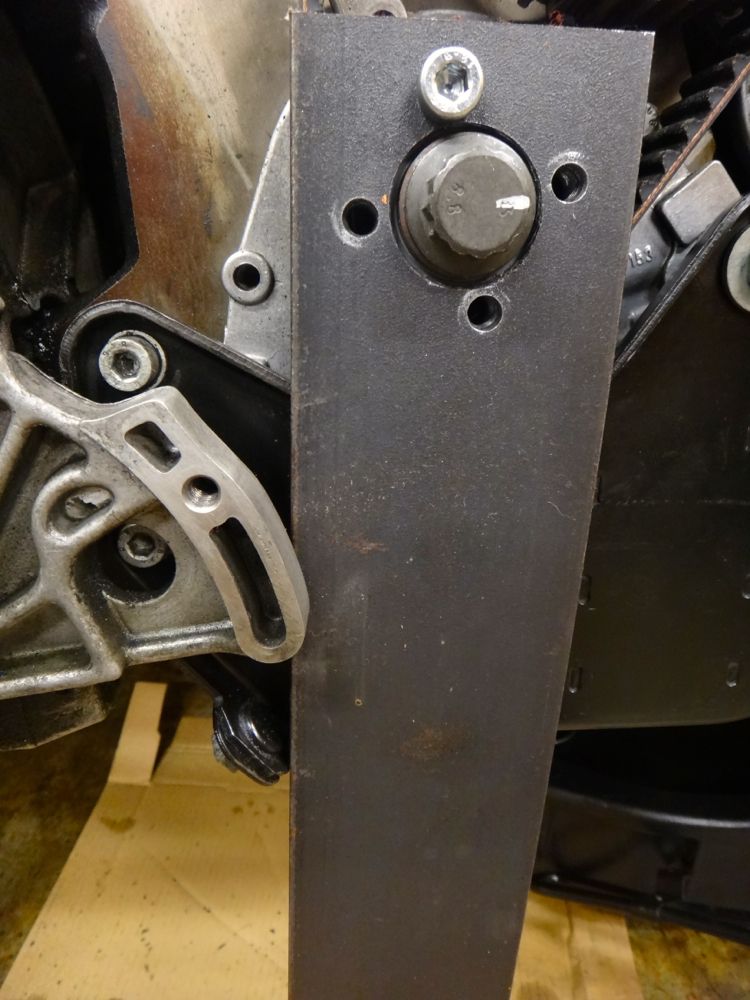
    With the timing finally set I torqued and stretched the new crank bolt using the crank pulley tool I made. It ain't pretty, but it definitely got the job done. I used a 3" wide piece of 3/8" thick steel and drilled the proper holes. I used a boring bar in my drill press to open up the middle hole to the proper size. In it's current form it can only be used with the snub mount cage removed, but that's fine. It doesn't require a 2nd set of hands to hold it either as it gets wedged against the left edge of the snub mount plate and rests just behind the AC compressor bracket locking it in place. I had my buddy look for any deflection in the plate when torquing it and didn't see any.

    Torqued to 66ft lbs + 90 degrees. Paint mark on the bolt was to indicate the 90 degree rotation.


    I ran into a new problem when I was replacing the spark plugs. Two of the crush washers decided to stay embedded in the head instead of coming out with their respective plugs. I'm baffled on why that would happen twice on the same set of plugs when I've never had it happen before. All the plugs were anti-siezed up and torqued to spec. I was able to use a long pick to get in there and pop them free, but it was not particularly easy. Hopefully it doesn't happen with the new set of plugs…

    Finished progress for the day. Should have it running tomorrow. Oh yeah, forgot to mention, I also replaced the crush washer for the turbo oil feed line adapter as I saw some weeping in that area.


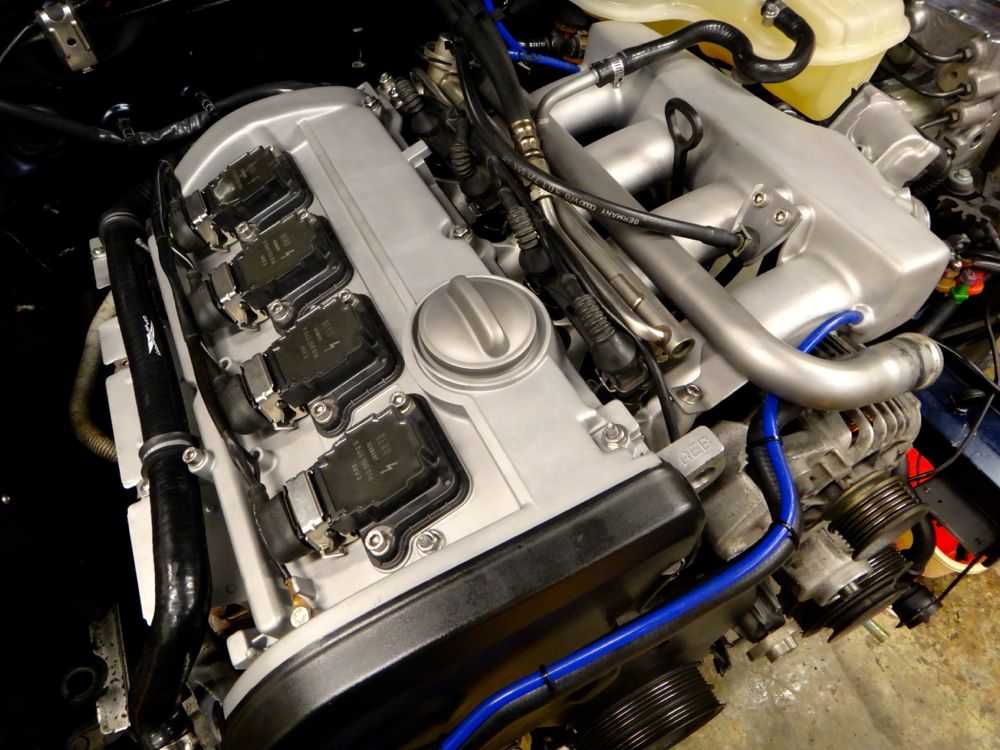
    Obligatory glamour shot with the VC re-bead blasted and clear coated. Should be a lot easier to keep clean now.

    | Update thread / Youtube Channel |

    97 A4 1.8TQM: Frankenturbo|TyrolSport SMIC|034 HFC|Borla catback|Carbonio/007 DV|Vogtland GT3|034 RSB|Apikol Bushings|034 SD motor/tranny/strut mounts|A8 brakes/SS lines|JHM trio|Meyle HD CA/TREs|
    01 S4 2.7T: Stock
  24. #304
    Veteran Member Four Rings bhusted's Avatar
    Join Date
    Sep 11 2011
    AZ Member #
    81119
    My Garage
    B5 A4 4.2L V8
    Location
    Kirkland, WA

    You'll love the aero wipers. They are so much better than the stock ones. Second greatest thing I've done to my car.
    | B5 4.2L V8 Quattro | Tein S-Tech | O.Z. Ultraleggera 18x8 | Stabila Course 22mm rear swaybar | Agency Power WRX swaybar links | S4 front brakes | A8 rear brakes | FX-R HID projector retrofit | Fog projector retrofit | RS4 Grill |Aero wipers |

  25. #305
    Veteran Member Four Rings BaseDrifter's Avatar
    Join Date
    May 18 2010
    AZ Member #
    59183
    Location
    Bay Area, CA

    Sweet, do they function better in addition to looking better? Now I'm curious, what was the single best thing you did to your car? (The 4.2 swap?)

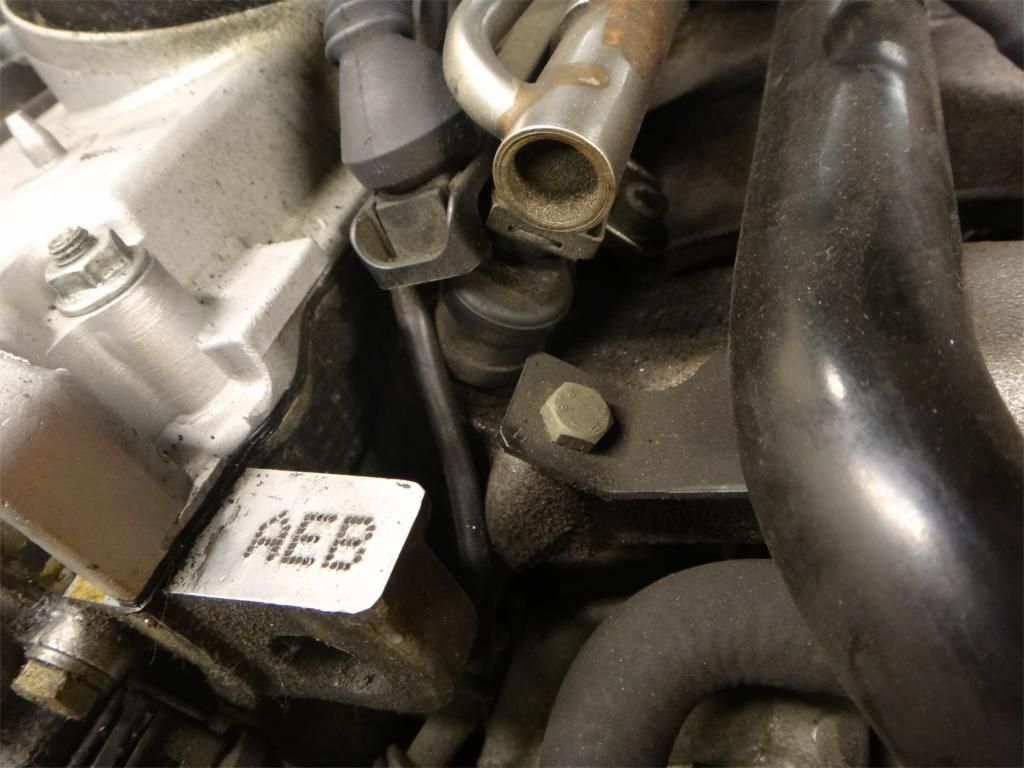
    Buttoned everything up and about ready to swing the lock carrier back into position.

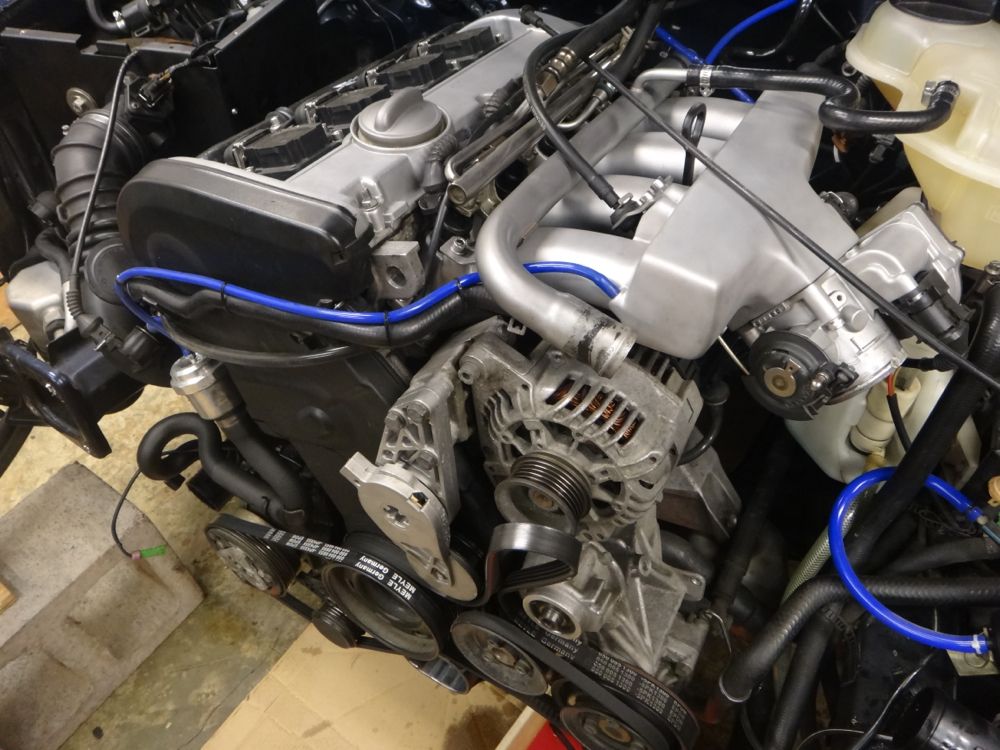
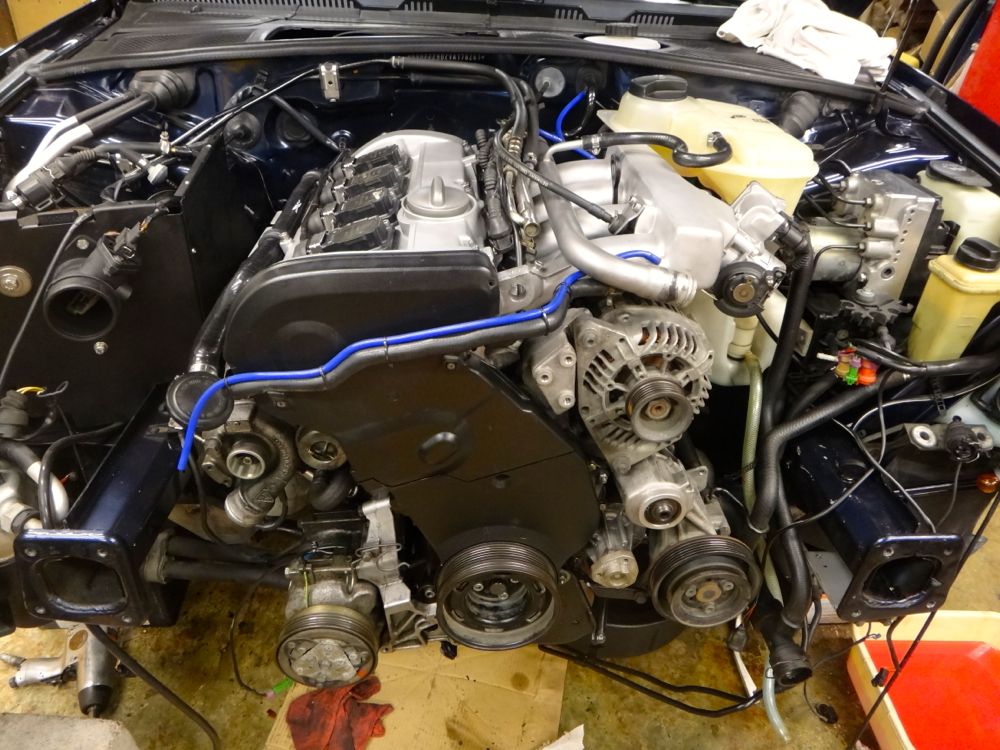
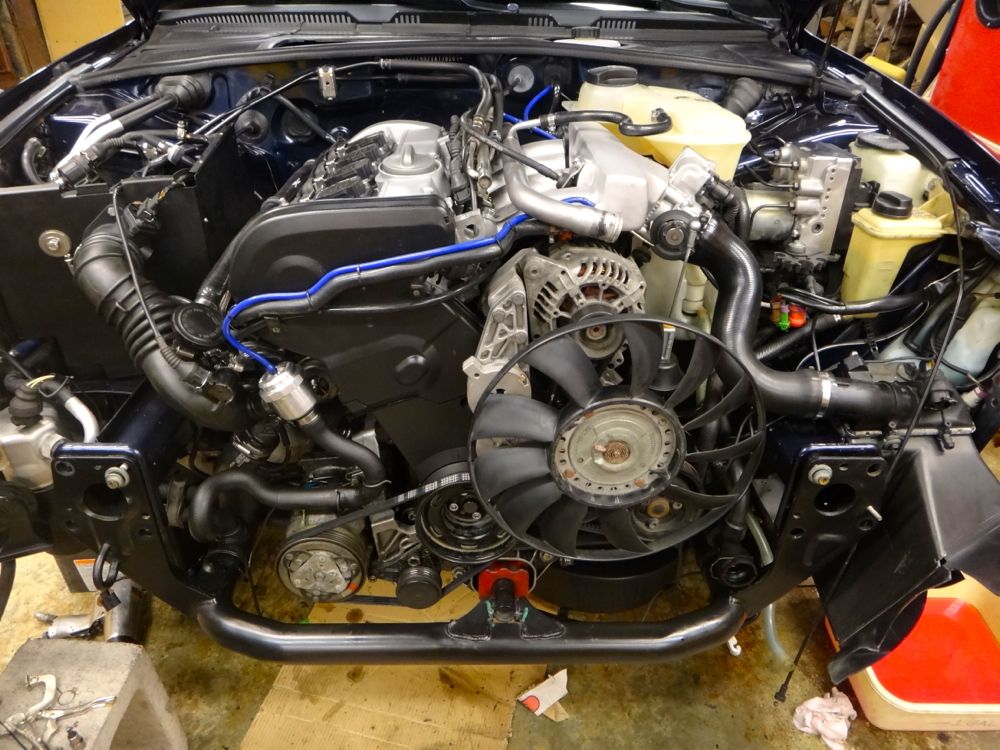
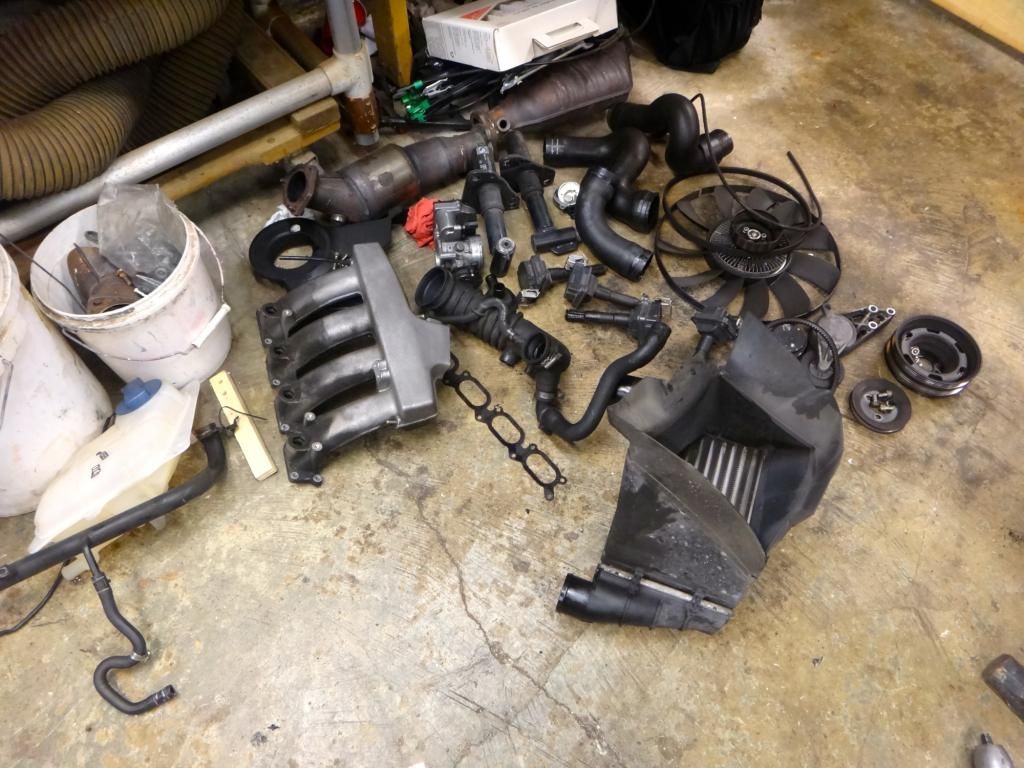
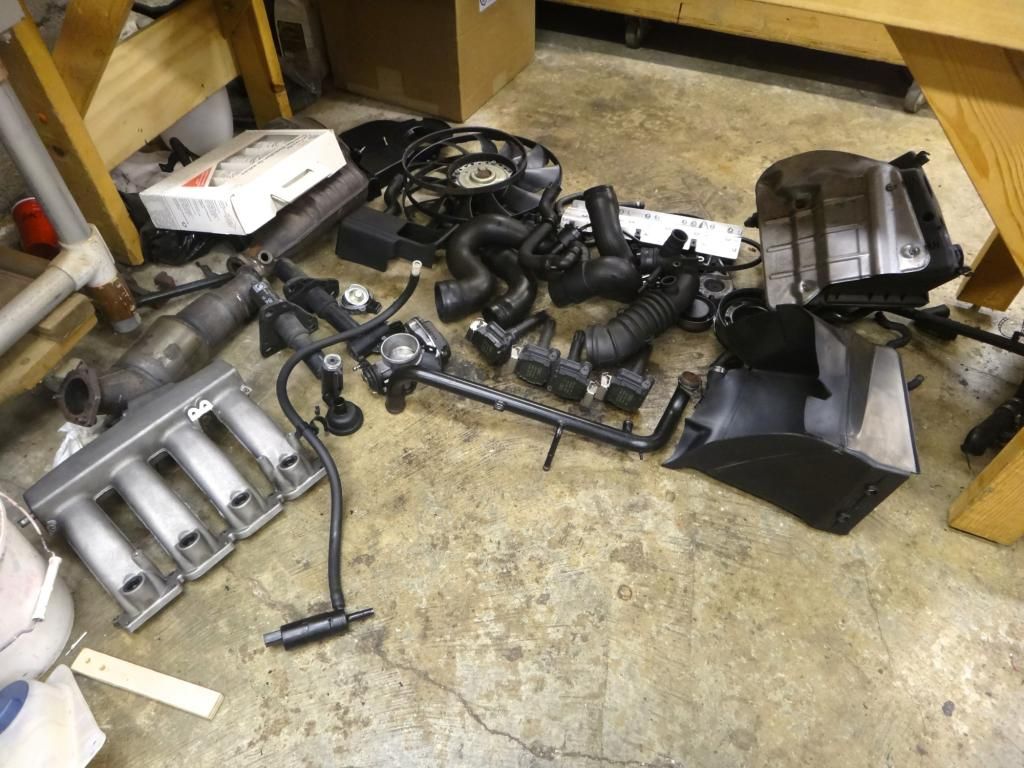
    Replaced all the turbo vacuum lines and vac lines under the intake manifold with black hose, cleaned and serviced the diverter valve, cleaned the intercooler and straightened any bent fins, and did a boost leak test (no leaks.)

    | Update thread / Youtube Channel |

    97 A4 1.8TQM: Frankenturbo|TyrolSport SMIC|034 HFC|Borla catback|Carbonio/007 DV|Vogtland GT3|034 RSB|Apikol Bushings|034 SD motor/tranny/strut mounts|A8 brakes/SS lines|JHM trio|Meyle HD CA/TREs|
    01 S4 2.7T: Stock
  26. #306
    Veteran Member Four Rings bhusted's Avatar
    Join Date
    Sep 11 2011
    AZ Member #
    81119
    My Garage
    B5 A4 4.2L V8
    Location
    Kirkland, WA

    Quote Originally Posted by BaseDrifter View Post
    Sweet, do they function better in addition to looking better? Now I'm curious, what was the single best thing you did to your car? (The 4.2 swap?)
    We get a lot of rain here and the aero wipers work great. The thing you will notice immediately is that when you sit in the car, you'll barely be able to see them. The best mod was probably the independent fog lights....or the V8.

    Your car is looking good and I'm glad you got that tensioner sorted out before it became a BIG problem.
    | B5 4.2L V8 Quattro | Tein S-Tech | O.Z. Ultraleggera 18x8 | Stabila Course 22mm rear swaybar | Agency Power WRX swaybar links | S4 front brakes | A8 rear brakes | FX-R HID projector retrofit | Fog projector retrofit | RS4 Grill |Aero wipers |

  27. #307
    Veteran Member Four Rings BaseDrifter's Avatar
    Join Date
    May 18 2010
    AZ Member #
    59183
    Location
    Bay Area, CA

    Those are some stealthy wiper arms. I installed them today and they're great (well the blades on them suck, but that can be fixed.) I love how low they sit, barely noticeable now.

    And thanks, got the car up and running yesterday. It's hard to say if the small timing change made any difference, it feels smoother, but it could all be in my head. Definitely dodged a bullet on this one.

    I pulled the upper timing cover and checked the components on my dad's B5 today and his car has the proper NTN tensioner and INA components, so luckily I don't have to re-do his car as well.
    | Update thread / Youtube Channel |

    97 A4 1.8TQM: Frankenturbo|TyrolSport SMIC|034 HFC|Borla catback|Carbonio/007 DV|Vogtland GT3|034 RSB|Apikol Bushings|034 SD motor/tranny/strut mounts|A8 brakes/SS lines|JHM trio|Meyle HD CA/TREs|
    01 S4 2.7T: Stock
  28. #308
    Established Member Two Rings
    Join Date
    Aug 31 2013
    AZ Member #
    122237
    My Garage
    I don't even have a garage </3
    Location
    Southern California

    I like you're style. Cleaning stuff instead of just putting greasy grimey parts back in the bay (a huge pet peve of mine) I actually pay my little sister to clean all the grease off parts that are off the car. Man i need a bead blaster, i restored a pair of dirt bike pegs, they were stock, dull and the black paint was all but peeled off. Using a Dremmel i sharpened each little spike, then sand blasted them at my work, followed by a few lairs of clear coat.... Needless to say the transformation was incredible, It was like they were new. Love that sand blast finish it leaves on metal, just "clean" looking.

  29. #309
    Senior Member Three Rings
    Join Date
    May 21 2014
    AZ Member #
    234189
    My Garage
    83 Chevy C10 Custom Deluxe
    Location
    null

    Hey where did you get those colored braided vacuum lines?

  30. #310
    Veteran Member Four Rings BaseDrifter's Avatar
    Join Date
    May 18 2010
    AZ Member #
    59183
    Location
    Bay Area, CA

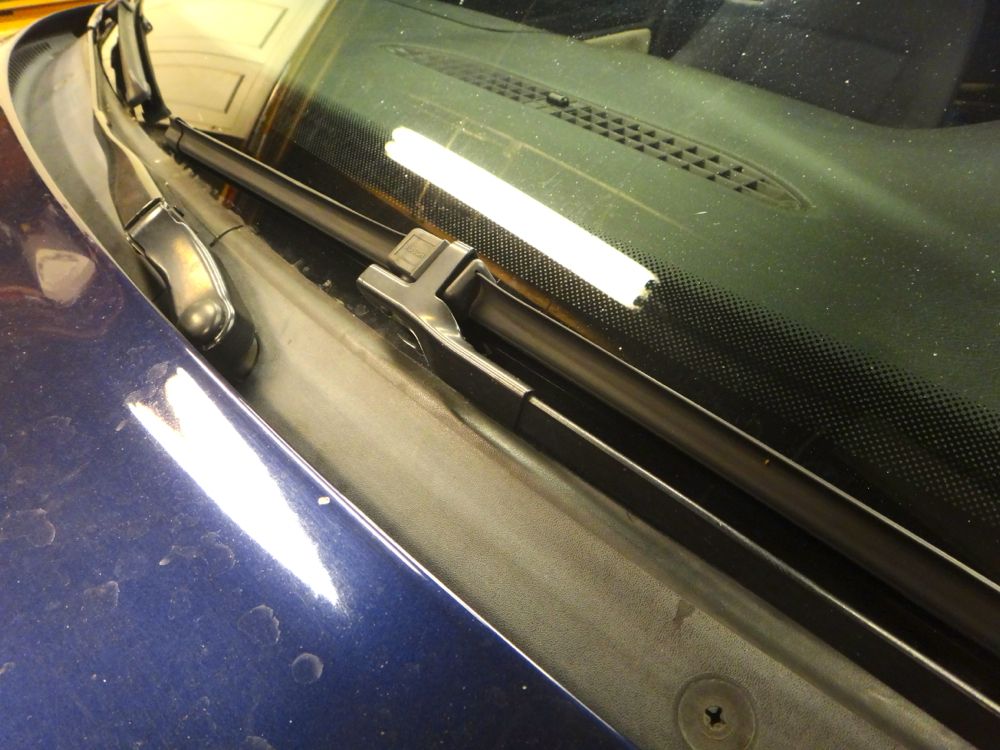
    Here's a couple pictures of the aero wipers installed. You'll have to excuse the dirty car, I left it outside when it rained the other day.


    Can barely see them!


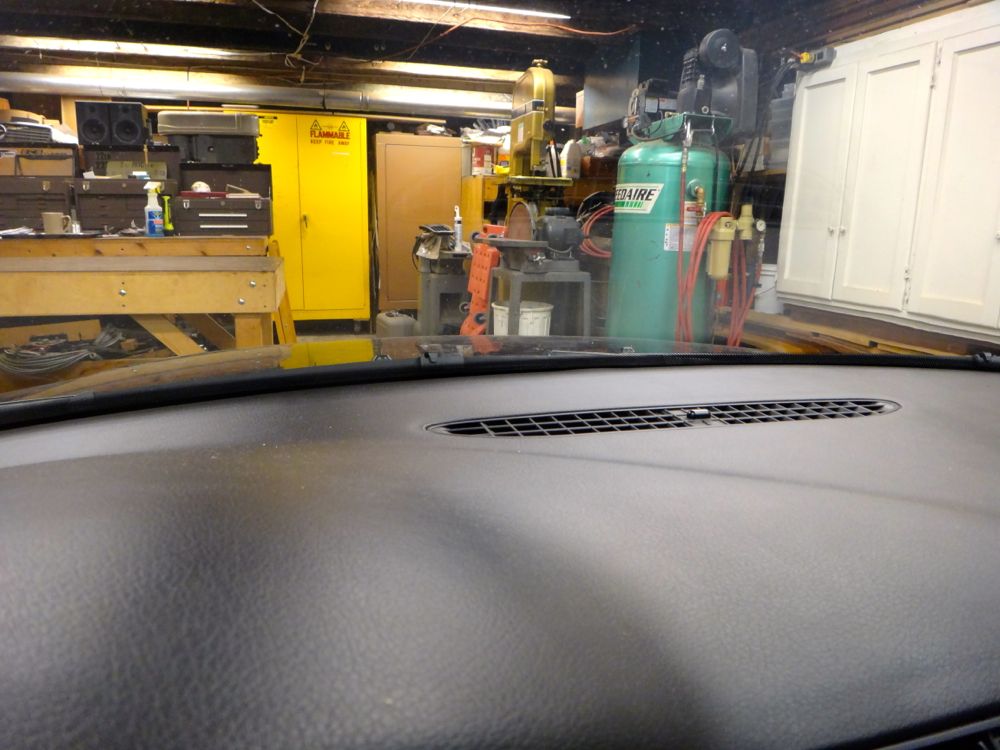
    I also got around to tucking my dash cam power wire inside the A pillar. Couldn't stand having it fall down out of place after leaving the car in sun, much better now.

    Quote Originally Posted by Audifurdasleben View Post
    I like you're style. Cleaning stuff instead of just putting greasy grimey parts back in the bay (a huge pet peve of mine) I actually pay my little sister to clean all the grease off parts that are off the car. Man i need a bead blaster, i restored a pair of dirt bike pegs, they were stock, dull and the black paint was all but peeled off. Using a Dremmel i sharpened each little spike, then sand blasted them at my work, followed by a few lairs of clear coat.... Needless to say the transformation was incredible, It was like they were new. Love that sand blast finish it leaves on metal, just "clean" looking.
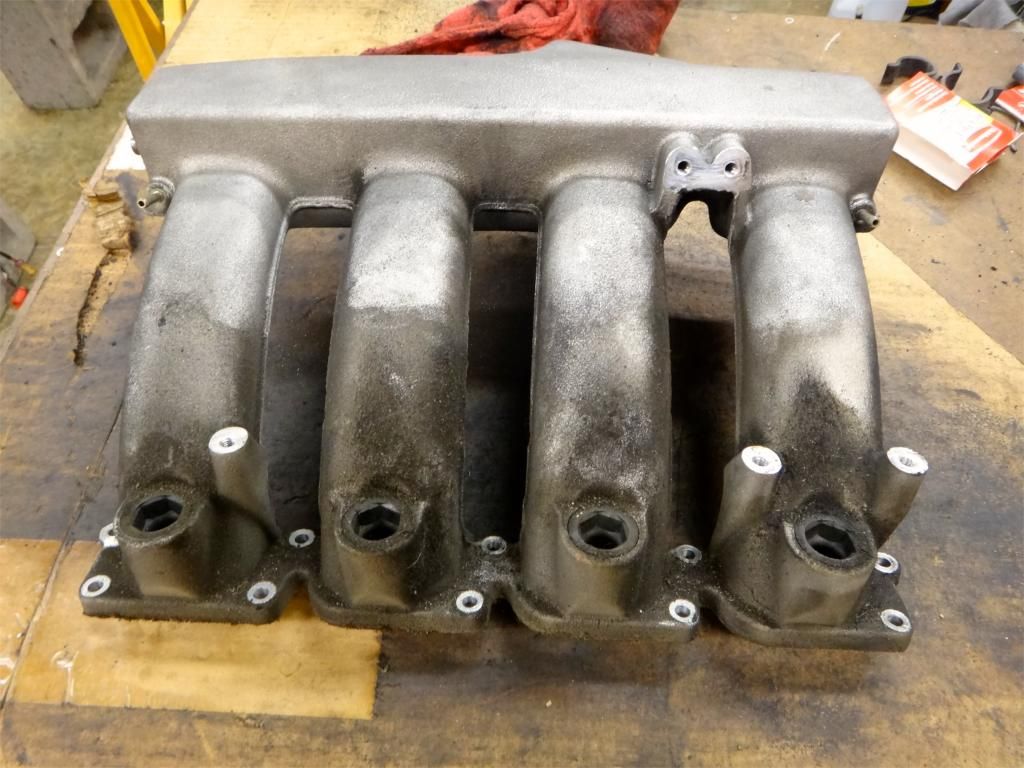
    Thanks, I unfortunately do not have a little sister to clean parts for me. Just a can of WD40 and a rag, or the bead blaster for the metal parts. Hard to beat the satin finish of the bead blaster. I wish I had clear coated my intake manifold the first time around. Only thing holding me back from blasting it again is having to go put it in a parts washer to clean it out.

    Quote Originally Posted by alexvanlewen View Post
    Hey where did you get those colored braided vacuum lines?
    I use Forge vacuum tubing, but none of it is braided.
    Last edited by BaseDrifter; 11-03-2014 at 02:10 PM.
    | Update thread / Youtube Channel |

    97 A4 1.8TQM: Frankenturbo|TyrolSport SMIC|034 HFC|Borla catback|Carbonio/007 DV|Vogtland GT3|034 RSB|Apikol Bushings|034 SD motor/tranny/strut mounts|A8 brakes/SS lines|JHM trio|Meyle HD CA/TREs|
    01 S4 2.7T: Stock
  31. #311
    Established Member Two Rings
    Join Date
    Aug 31 2013
    AZ Member #
    122237
    My Garage
    I don't even have a garage </3
    Location
    Southern California

    yea i wish she could be counted on to clean parts into the late of the night but, can guess how that ends up, so i usually do most of the parts haha but use her whenever i can via bribes or something. Siblings are fun... hahah

    as for WD-40 for degreaser it WORKS but not even close to as good as the CRC engine degreaser works. Seriously this stuff cuts through decades old 3" thick grease like its warm butter, I am a mechanic and have tested all kinds of different brands but hands down CRC is where its at. Walmart usually has it for -4$ a can. Thick tar grease just literally wipes off its nuts. One can cleaned my entire bay on my 98 pearl avant VRT project i had to scrap *tears up a little* (empty bay i mean)

  32. #312
    Senior Member Three Rings
    Join Date
    Aug 23 2011
    AZ Member #
    80246
    Location
    Erie

    Very clean!!

  33. #313
    Veteran Member Four Rings BaseDrifter's Avatar
    Join Date
    May 18 2010
    AZ Member #
    59183
    Location
    Bay Area, CA

    I finished editing together the time-lapse of my recent service the other night. 13 hours condensed down to 16 minutes at 400x acceleration. Check it out!

    Work completed:

    - New timing belt kit installed
    - New front crankshaft case seal and crankshaft seal
    - New VC gasket, spark plugs, oil change
    - Replaced turbo oil feed line crush washer
    - Serviced DV and cleaned intercooler
    - Replaced ripped turbo inlet pipe
    - Replaced vacuum hoses
    - Bead blasted and clear coated VC


    Quote Originally Posted by Audifurdasleben View Post
    yea i wish she could be counted on to clean parts into the late of the night but, can guess how that ends up, so i usually do most of the parts haha but use her whenever i can via bribes or something. Siblings are fun... hahah

    as for WD-40 for degreaser it WORKS but not even close to as good as the CRC engine degreaser works. Seriously this stuff cuts through decades old 3" thick grease like its warm butter, I am a mechanic and have tested all kinds of different brands but hands down CRC is where its at. Walmart usually has it for -4$ a can. Thick tar grease just literally wipes off its nuts. One can cleaned my entire bay on my 98 pearl avant VRT project i had to scrap *tears up a little* (empty bay i mean)
    I might have to check out the CRC stuff, but trusty old regular WD40 has never done me wrong.

    Quote Originally Posted by BlueBoostedAudi View Post
    Very clean!!
    Thank you!
    Last edited by BaseDrifter; 11-10-2014 at 01:00 AM.
    | Update thread / Youtube Channel |

    97 A4 1.8TQM: Frankenturbo|TyrolSport SMIC|034 HFC|Borla catback|Carbonio/007 DV|Vogtland GT3|034 RSB|Apikol Bushings|034 SD motor/tranny/strut mounts|A8 brakes/SS lines|JHM trio|Meyle HD CA/TREs|
    01 S4 2.7T: Stock
  34. #314
    Veteran Member Four Rings BaseDrifter's Avatar
    Join Date
    May 18 2010
    AZ Member #
    59183
    Location
    Bay Area, CA

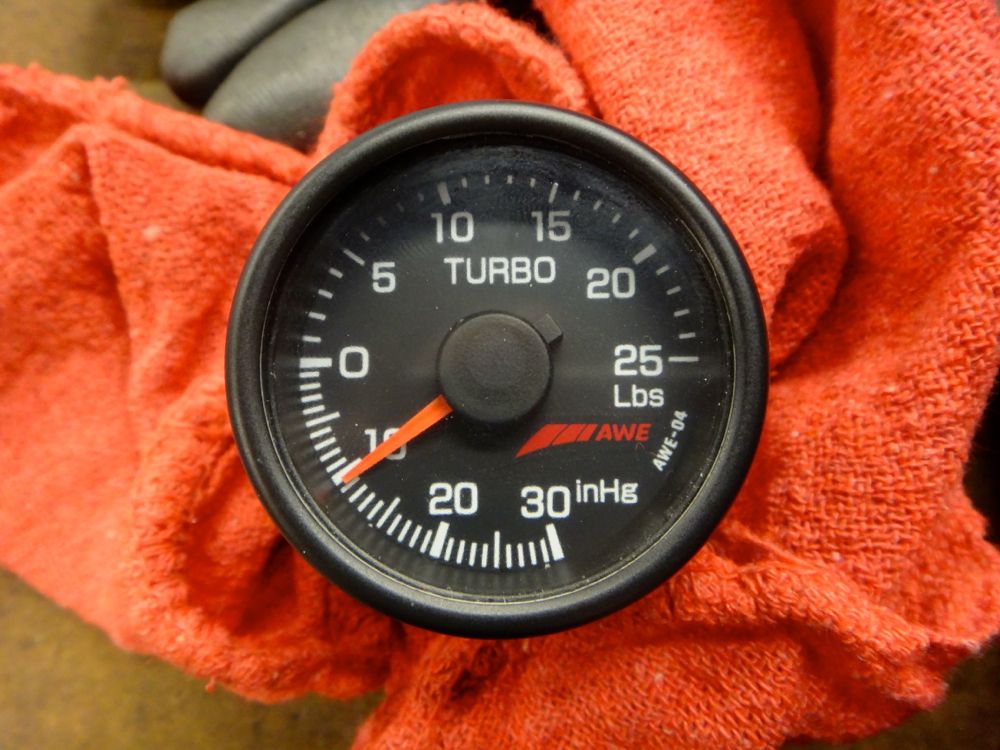
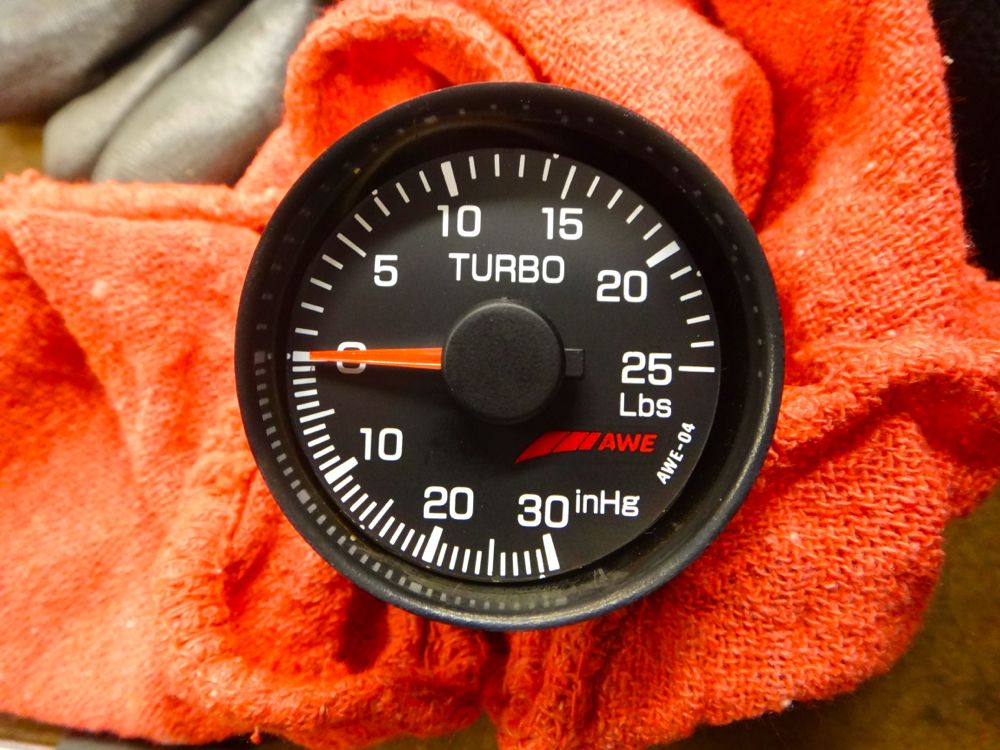
    Today I received an AWE boost gauge that I bought off Audifurdasleben. He said it was making a rattling noise and that AWE said it couldn't be fixed.

    Also talked to AWE some more and their gauges are sealed so the vibrating that its making under boost can't be fixed, sad but oh well.
    Can't be fixed…can't be fixed?? Well, I had to give it a shot, and I was successful. Took about an hour, but it works beautifully now.

    The gauge arrived with the needle pointing at 10inHg. After doing some extensive high quality testing (shaking it) I determined that the needle had come loose from the gauge's shaft.


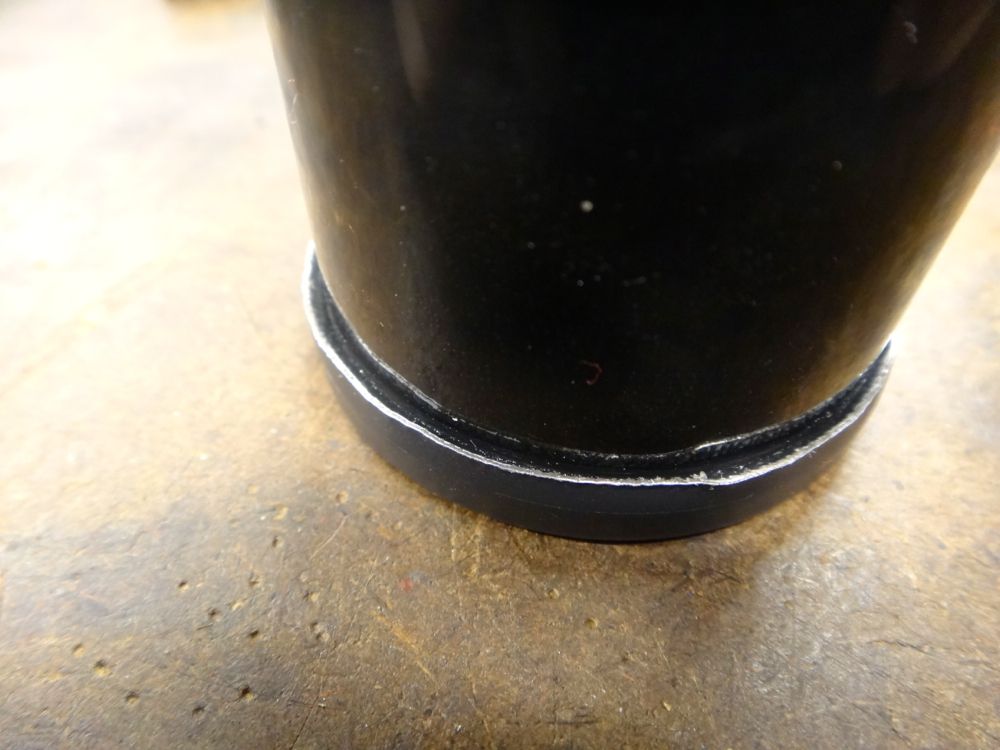
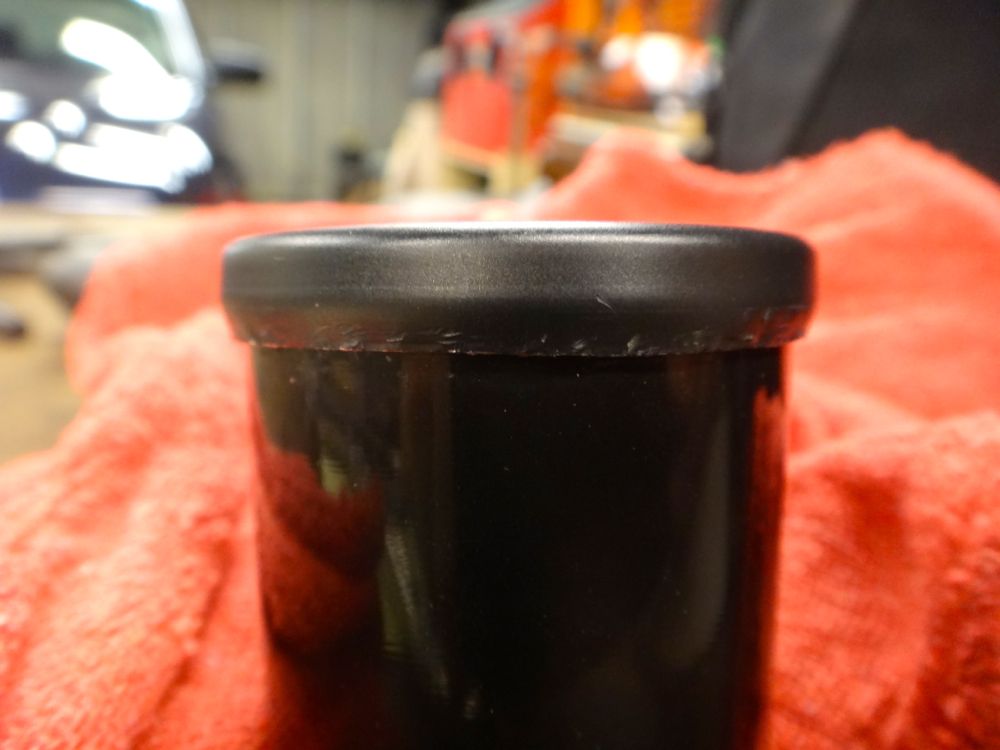
    So now the question was how to take it apart. After some more testing (trying to pull it apart) I figured out that the front cover bezel was crimped on over the metal housing of the gauge body. I was able to use a small flat blade screwdriver to carefully pry up the edge of the crimped bezel to free it. Thankfully it's made out of aluminum so this was not hard.


    Here you can see the raised lip on the gauge housing. The bezel has to slip over this rim.


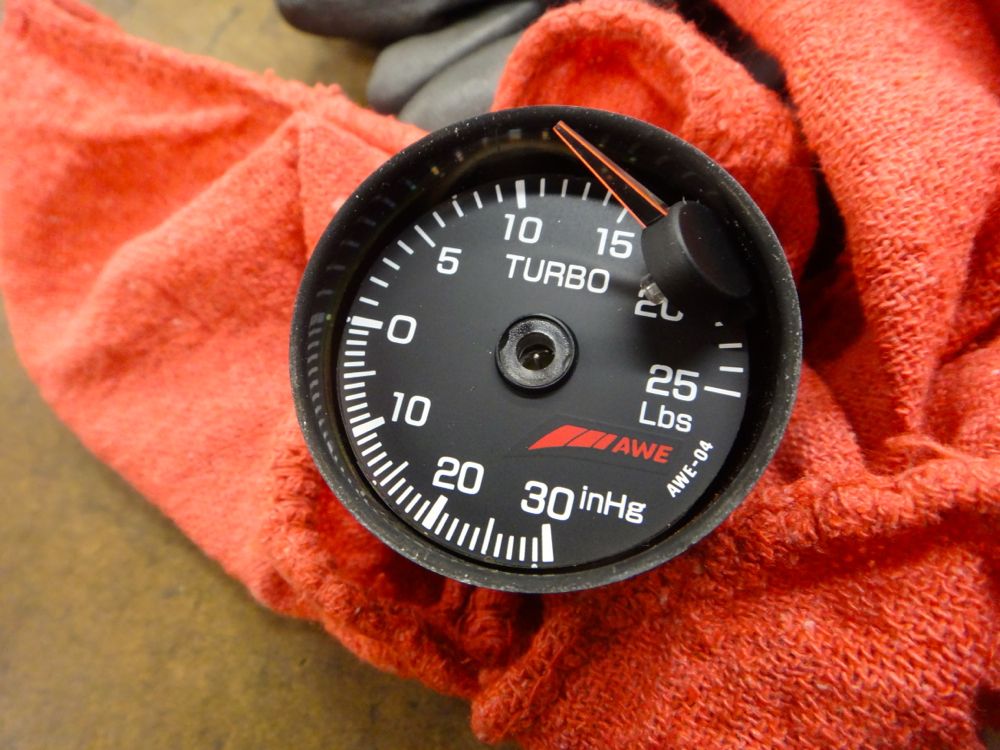
    And success! After popping the front cover off the needle immediately fell off to the side.


    The needle is a simple press fit and lacks any locating tabs, so I just put it at 0 and pushed it on. I then pulled the gauge from my car and tested it and it worked but the needle was very jumpy, not smooth. I pulled the needle off and pressed it back on but not quite as hard. Tested it again and it works beautifully.


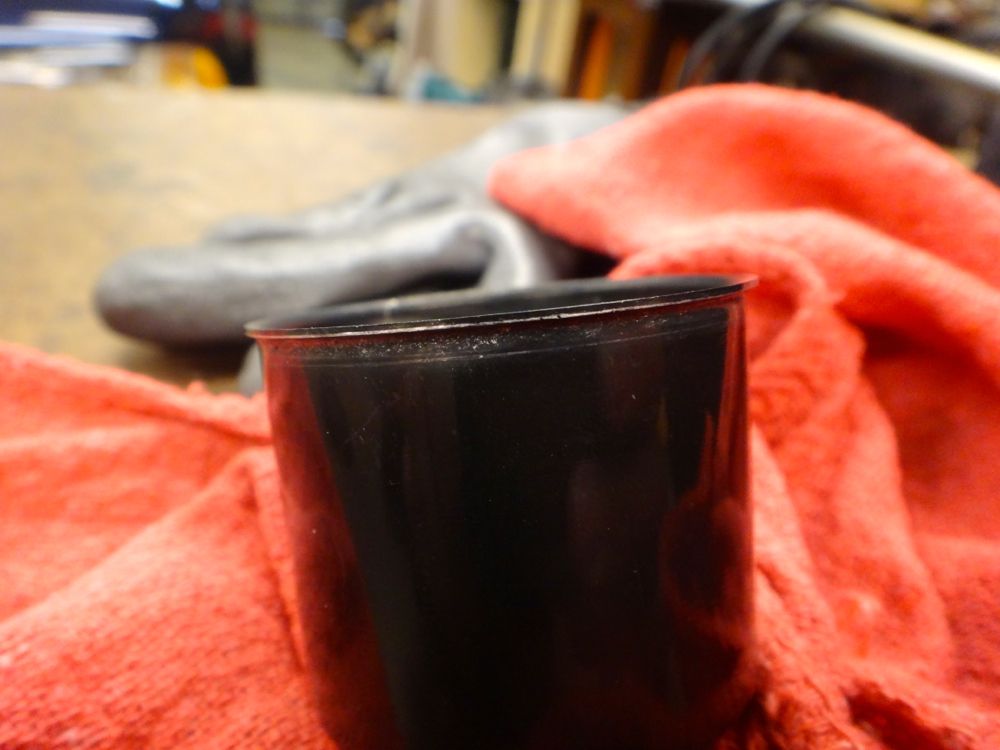
    I used the flat blade screwdriver to press the bezel's edge back into place. It's not nearly as tight as it came from the factory, but it will do just fine.


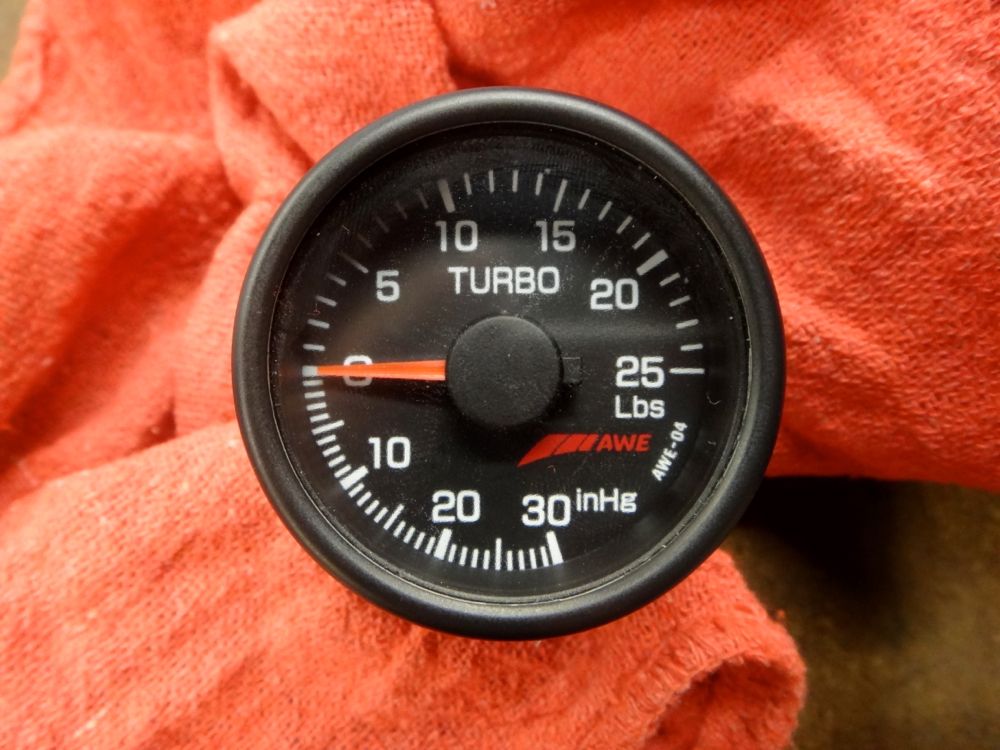
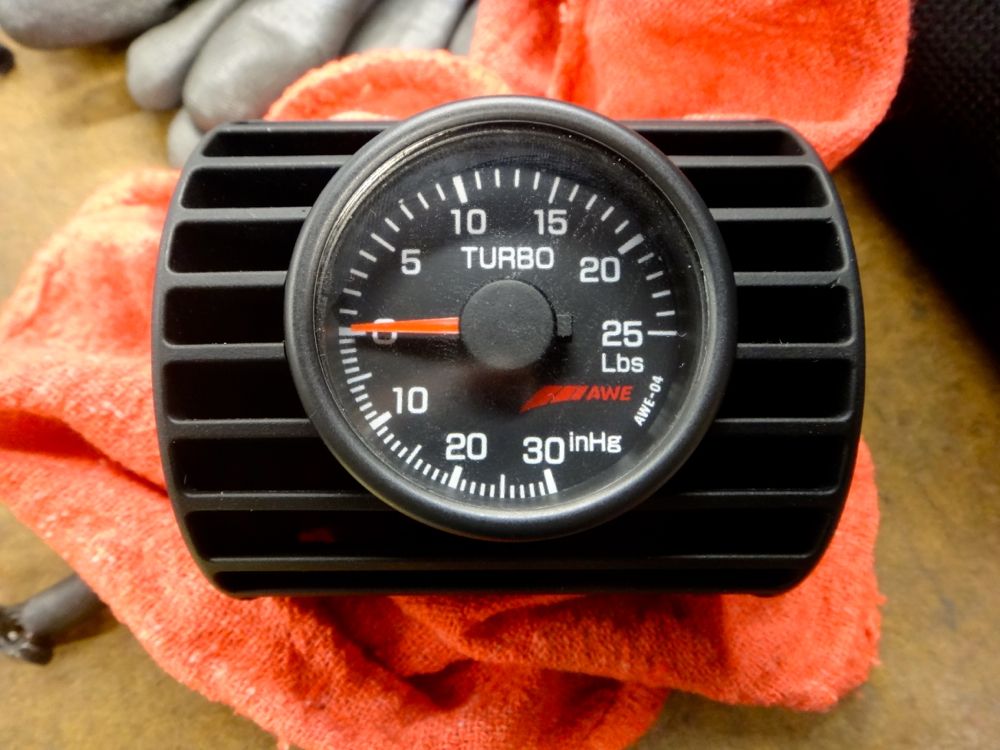
    Reassembled.


    What makes it even better is that the lower edge of the bezel sits inside the gauge housing, so you'll never see the marks from removing and installing it.


    I'll write up a DIY article for this later for anyone else who runs into this problem. I searched and wasn't able to find anyone else who had disassembled an AWE gauge before.
    Last edited by BaseDrifter; 04-14-2016 at 07:25 PM.
    | Update thread / Youtube Channel |

    97 A4 1.8TQM: Frankenturbo|TyrolSport SMIC|034 HFC|Borla catback|Carbonio/007 DV|Vogtland GT3|034 RSB|Apikol Bushings|034 SD motor/tranny/strut mounts|A8 brakes/SS lines|JHM trio|Meyle HD CA/TREs|
    01 S4 2.7T: Stock
  35. #315
    Veteran Member Four Rings BaseDrifter's Avatar
    Join Date
    May 18 2010
    AZ Member #
    59183
    Location
    Bay Area, CA

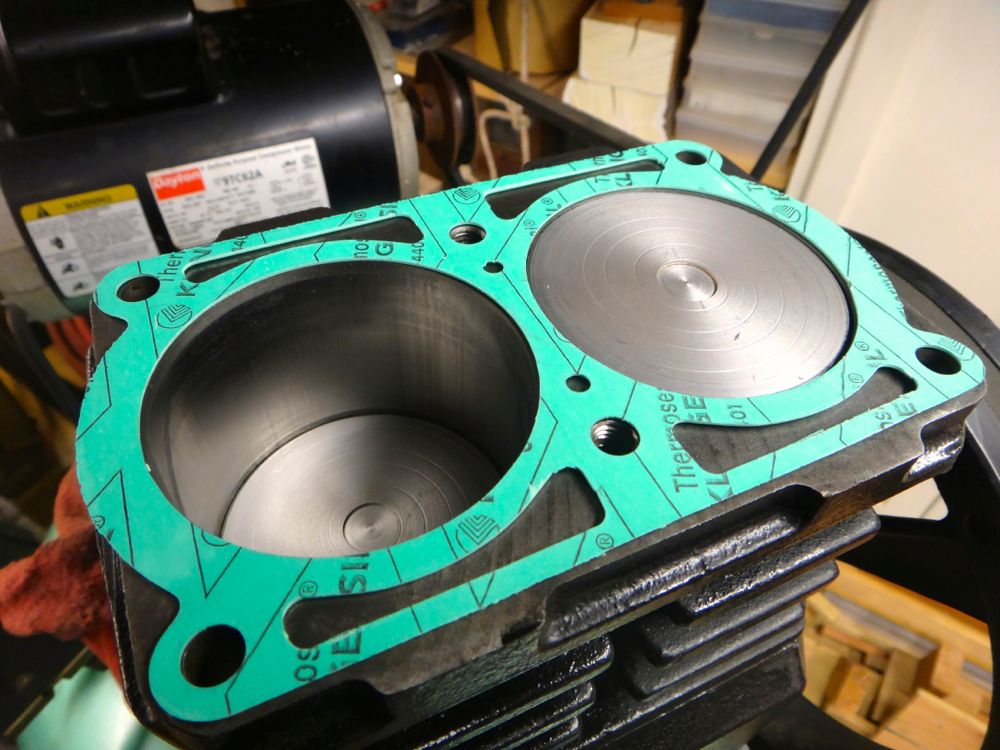
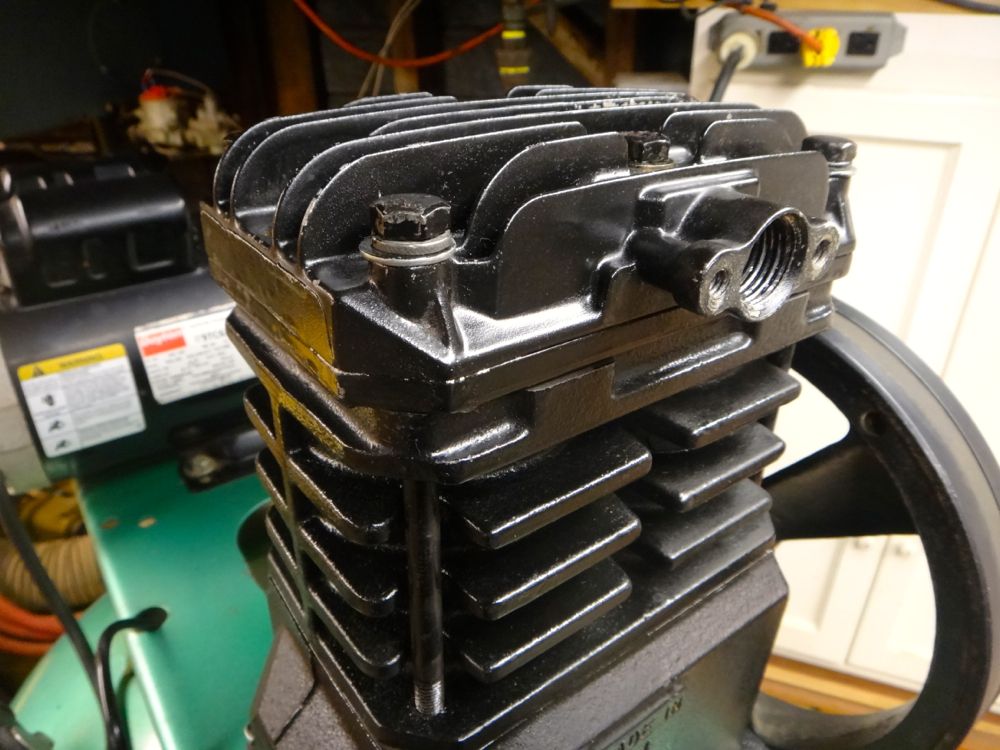
    Time for another update. A couple months ago my air compressor blew its head gasket. I could get the tank up to 100psi, but no more. I finally got around to rebuilding it and it runs better than ever now. Doing this very simple rebuild makes me want to build my actual motor even more.

    What I found when I pulled the head off.


    All clean!


    Rebuilding the air compressor was necessary before I started work on replacing the clutch in my brother's 2000 1.8T. More info about that job in his build thread here.


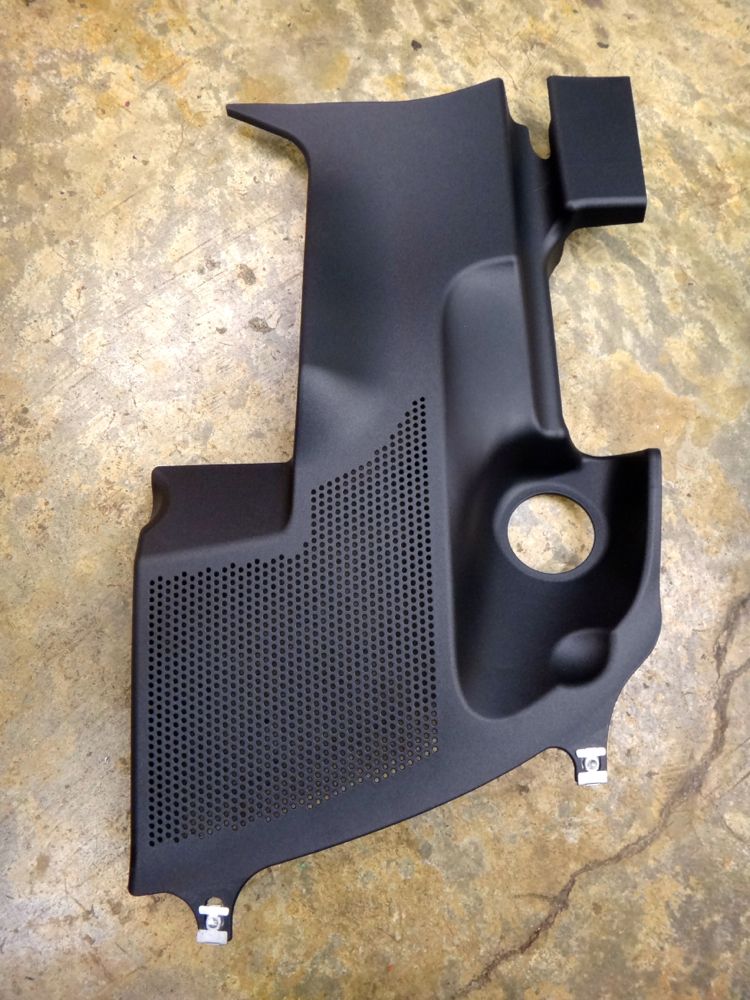
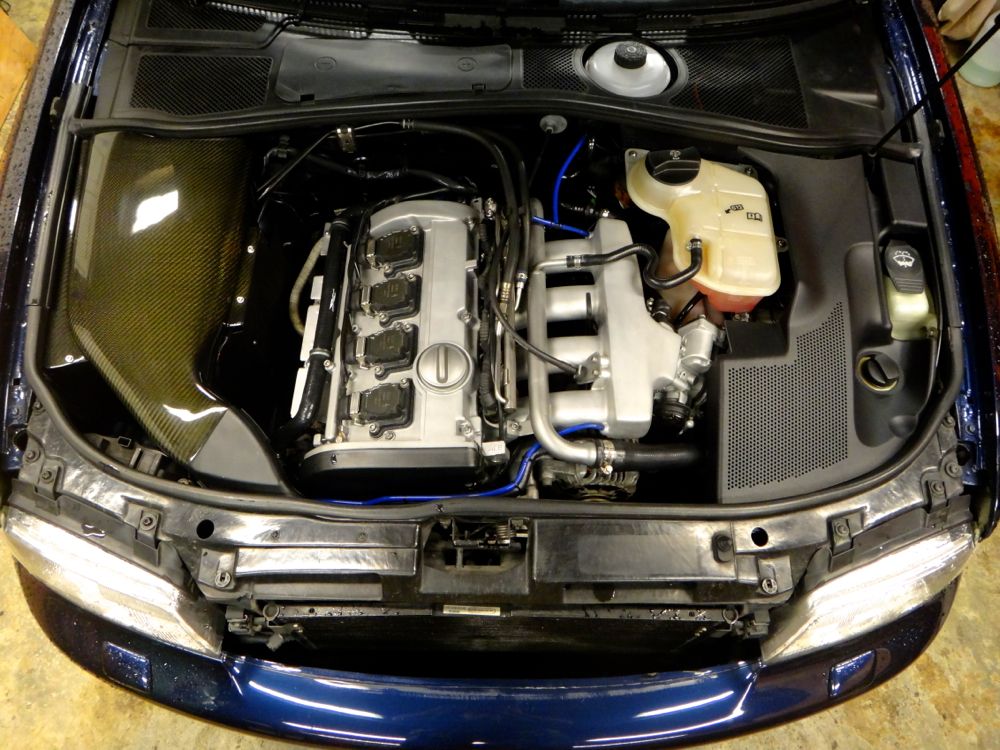
    In news more relevant to my own car, I'm very close to saying that "stage 1" of my engine bay is complete. One of the last pieces of the puzzle was getting a euro Passat driver side engine cover (part number 3B0 119 487C.)


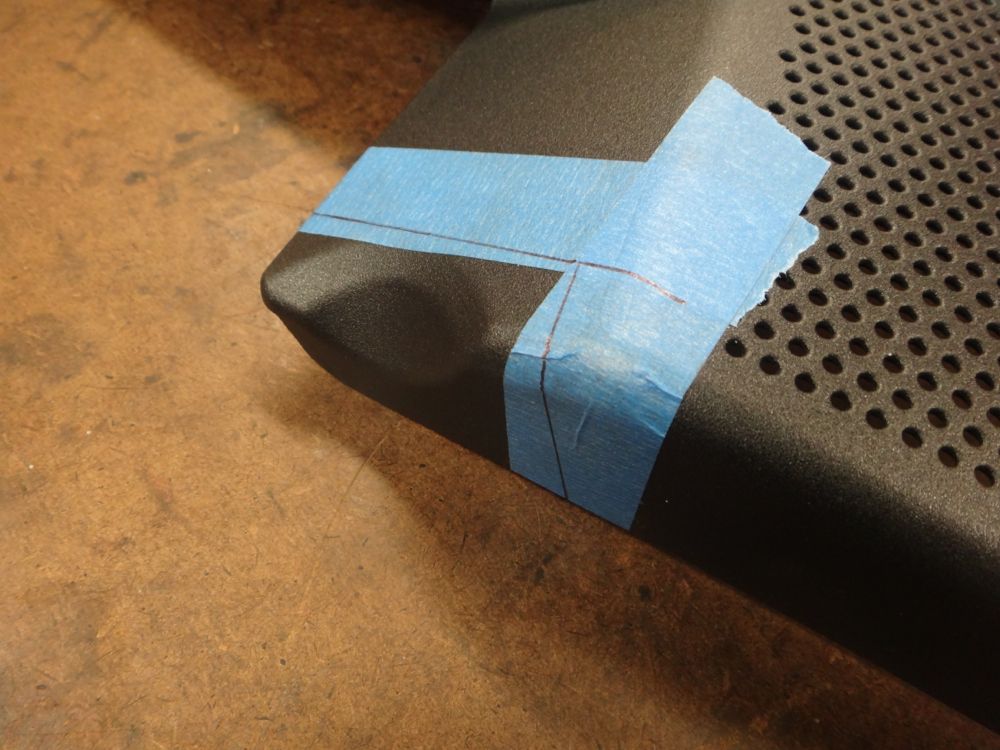
    The cover is not a drop in piece though. It took a bit of fitting and problem solving to get it to sit in place properly. I'm still fussing with it, but it's very close.

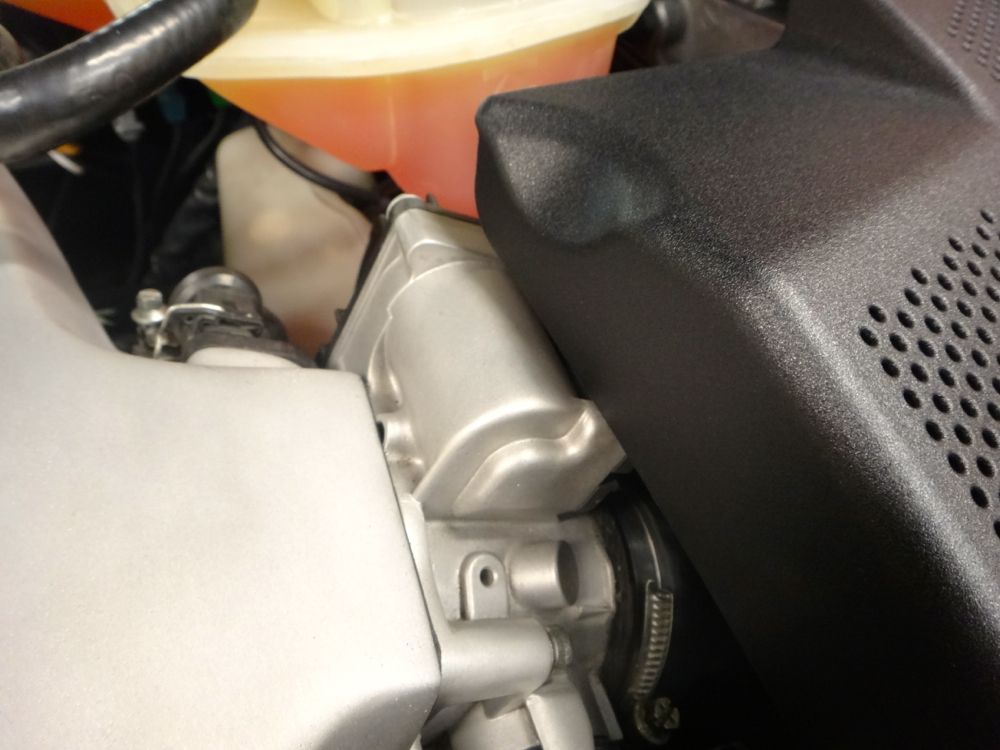
    The first thing that needs to be trimmed is where the cover contacts the throttle body.


    I cut out the corner with a jig saw, hand filed it smooth, and rounded the corner off.


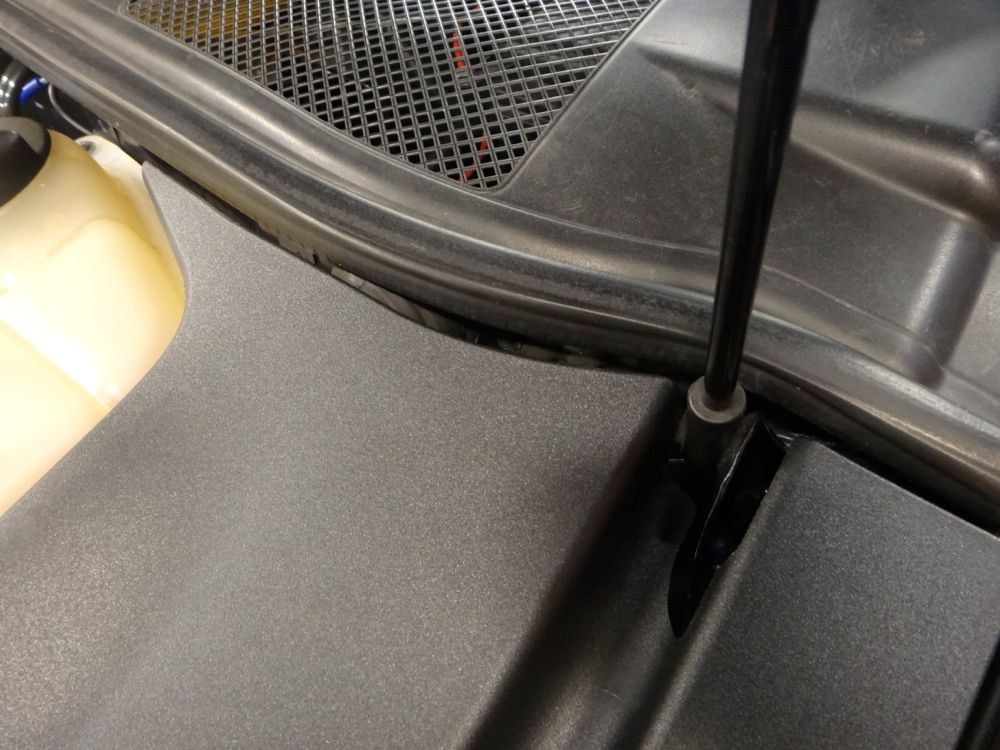
    A notch has to be cut near the upper radiator hose, and I was also getting some contact near the windshield washer tank. I cut a 2nd half moon near the windshield washer tank as well as shaved the lower circle of the washer cap down flat on the side. With the cover sitting properly at the bottom, it leaves a 3/4" gap near the firewall. This is not the end of the world, it's not very noticeable unless you're looking for it, but I'll probably try to fit a piece of weather stripping at the upper edge to seal it off.


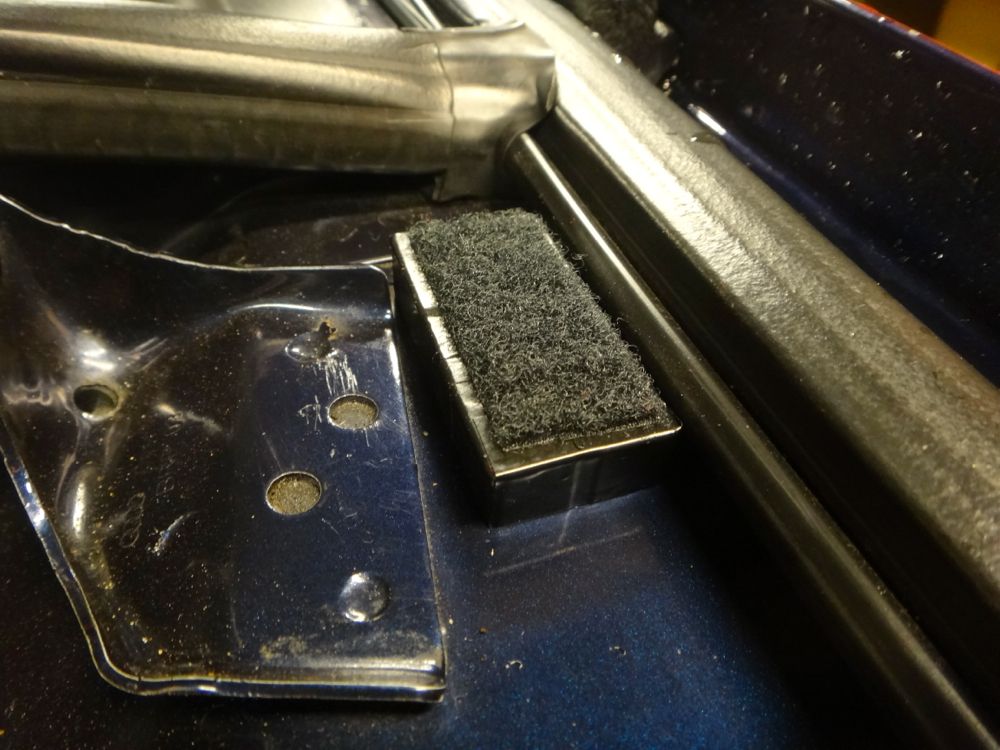
    The last problem was finding a way to make it sit flat. The middle of the cover hits the lower right corner of the ABS pump and acts as a pivot point. I didn't want to drill into the cover if I could avoid it, nor did I want to modify my car in some way that was not reversible. I wanted to be able to remove the cover easily as well. What I came up with was using two bar magnets wrapped in electrical tape and topped with a piece of velcro. The magnets are placed next to the hood shock and hold the top right corner of the cover down to the proper height so it's flush with the hood's weather stripping.


    The end result.


    | Update thread / Youtube Channel |

    97 A4 1.8TQM: Frankenturbo|TyrolSport SMIC|034 HFC|Borla catback|Carbonio/007 DV|Vogtland GT3|034 RSB|Apikol Bushings|034 SD motor/tranny/strut mounts|A8 brakes/SS lines|JHM trio|Meyle HD CA/TREs|
    01 S4 2.7T: Stock
  36. #316
    Veteran Member Four Rings BaseDrifter's Avatar
    Join Date
    May 18 2010
    AZ Member #
    59183
    Location
    Bay Area, CA

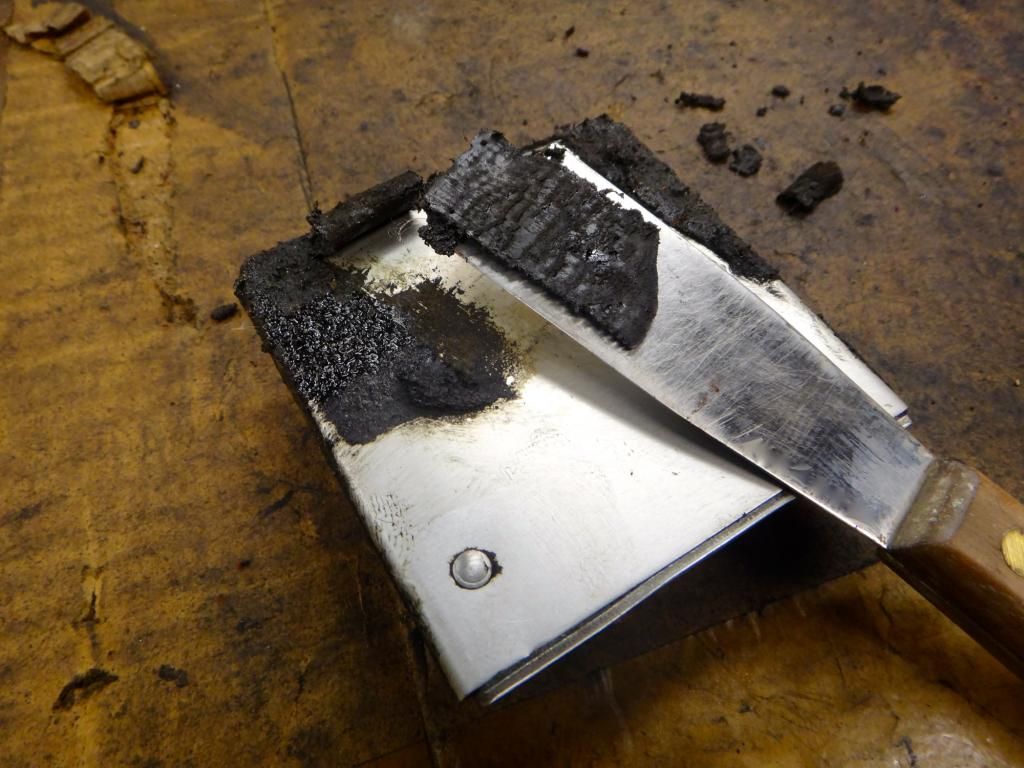
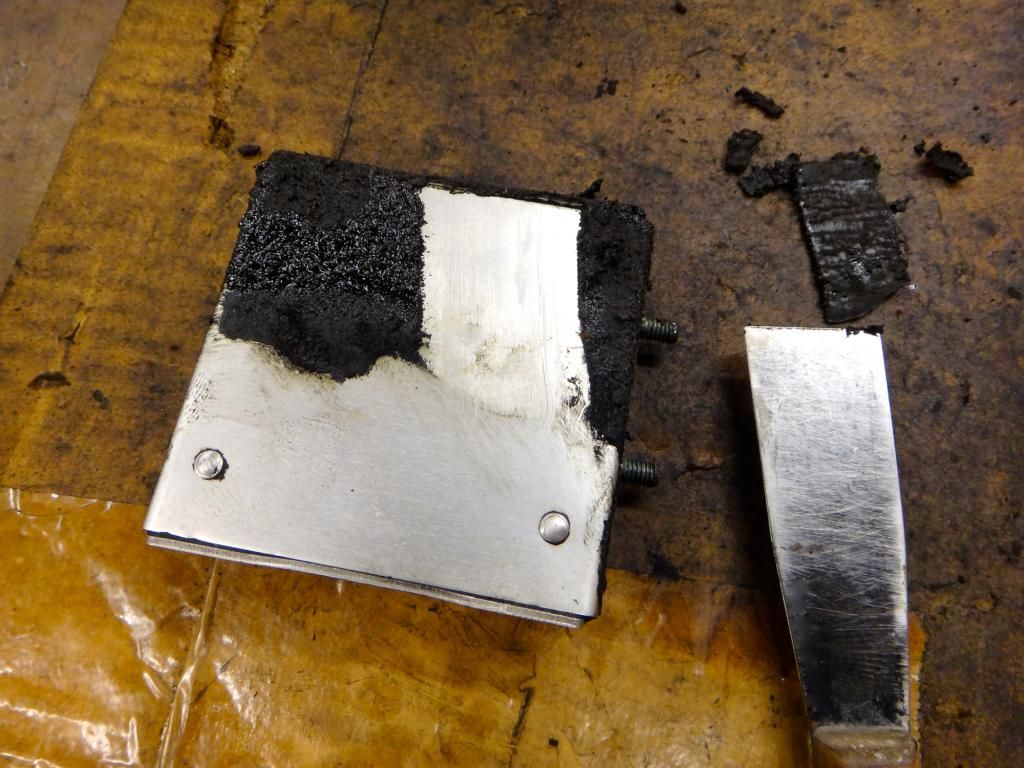
    Got a set of Apikol street rear differential carrier bushings. I was very surprised at how soft they are, without the metal insert in place they can be squished pretty easily. I expected them to be much stiffer but them being soft is not necessarily a bad thing since I'm a bit worried about excessive noise with these, but we'll find out when I get them installed. If they're too noisy I'll step down to 034 SD carrier bushings.

    Last edited by BaseDrifter; 04-04-2021 at 08:58 AM.
    | Update thread / Youtube Channel |

    97 A4 1.8TQM: Frankenturbo|TyrolSport SMIC|034 HFC|Borla catback|Carbonio/007 DV|Vogtland GT3|034 RSB|Apikol Bushings|034 SD motor/tranny/strut mounts|A8 brakes/SS lines|JHM trio|Meyle HD CA/TREs|
    01 S4 2.7T: Stock
  37. #317
    Senior Member Three Rings JJ.'s Avatar
    Join Date
    May 22 2012
    AZ Member #
    93920
    Location
    Netherlands

    BaseDrifter updates

    Haven't checked your thread in ages, but you've done some pretty awesome and neat jobs on the b5's! Before and after pics of greasy / clean parts are always awesome to look at

  38. #318
    Veteran Member Four Rings
    Join Date
    Sep 24 2010
    AZ Member #
    64817
    My Garage
    2001_Corvette_Z06
    Location
    Costa Mesa, SoCal

    Quote Originally Posted by BaseDrifter View Post
    Got a set of Apikol street rear differential carrier bushings. I was very surprised at how soft they are, without the metal insert in place they can be squished pretty easily. I expected them to be much stiffer but them being soft is not necessarily a bad thing since I'm a bit worried about excessive noise with these, but we'll find out when I get them installed. If they're too noisy I'll step down to 034 SD carrier bushings.

    I'm curious to read about how these work out for you. My car came with the Apikol Street (I think) rear diff mount, but as far as I know the carrier bushings are stock.
    2011 Audi A4 Avant Prestige S-Line : Motoza ECU+TCU Stage 1, 4M Q7 6-piston with SQ5 rotors, C7 S6 rear brakes
    2001 Corvette (C5) Z06

    Past: 2015 A3 2.0T, 2001.5 S4 Avant 6mt , 2004 A4 USP 6mt , 1998.5 A4 1.8TM , 2001.5 A4 1.8TQM [gone and missed]

  39. #319
    Senior Member Three Rings miro01's Avatar
    Join Date
    Mar 26 2012
    AZ Member #
    90639
    My Garage
    '97 B5 A4, '15 8V A3
    Location
    OC

    Really like all the work you've done. Everything is so clean.

    Checking your build thread always makes me think twice about parting with my car.

  40. #320
    Veteran Member Four Rings adam044's Avatar
    Join Date
    Oct 31 2014
    AZ Member #
    292167
    My Garage
    2024 Jeep Wrangler Unlimited
    Location
    NH

    Quote Originally Posted by BaseDrifter View Post
    Time for another update. A couple months ago my air compressor blew its head gasket. I could get the tank up to 100psi, but no more. I finally got around to rebuilding it and it runs better than ever now. Doing this very simple rebuild makes me want to build my actual motor even more.

    What I found when I pulled the head off.


    All clean!


    Rebuilding the air compressor was necessary before I started work on replacing the clutch in my brother's 2000 1.8T. More info about that job in his build thread here.


    In news more relevant to my own car, I'm very close to saying that "stage 1" of my engine bay is complete. One of the last pieces of the puzzle was getting a euro Passat driver side engine cover (part number 3B0 119 487C.)


    The cover is not a drop in piece though. It took a bit of fitting and problem solving to get it to sit in place properly. I'm still fussing with it, but it's very close.

    The first thing that needs to be trimmed is where the cover contacts the throttle body.


    I cut out the corner with a jig saw, hand filed it smooth, and rounded the corner off.


    A notch has to be cut near the upper radiator hose, and I was also getting some contact near the windshield washer tank. I cut a 2nd half moon near the windshield washer tank as well as shaved the lower circle of the washer cap down flat on the side. With the cover sitting properly at the bottom, it leaves a 3/4" gap near the firewall. This is not the end of the world, it's not very noticeable unless you're looking for it, but I'll probably try to fit a piece of weather stripping at the upper edge to seal it off.


    The last problem was finding a way to make it sit flat. The middle of the cover hits the lower right corner of the ABS pump and acts as a pivot point. I didn't want to drill into the cover if I could avoid it, nor did I want to modify my car in some way that was not reversible. I wanted to be able to remove the cover easily as well. What I came up with was using two bar magnets wrapped in electrical tape and topped with a piece of velcro. The magnets are placed next to the hood shock and hold the top right corner of the cover down to the proper height so it's flush with the hood's weather stripping.


    The end result.


    Now I know how to make my cover fit once I get it. Can't find it for less than $85 shipped. You?
    2019 Audi RS3 - Black Mythos Metallic

    2014 Audi S4 - 6MT
    2008 Audi A4 S-Line Titanium
    2000 Audi A4

Bookmarks

Posting Permissions

  • You may not post new threads
  • You may not post replies
  • You may not post attachments
  • You may not edit your posts
  •  


    © 2001-2025 Audizine, Audizine.com, and Driverzines.com
    Audizine is an independently owned and operated automotive enthusiast community and news website.
    Audi and the Audi logo(s) are copyright/trademark Audi AG. Audizine is not endorsed by or affiliated with Audi AG.