On to the review of the performance parts.
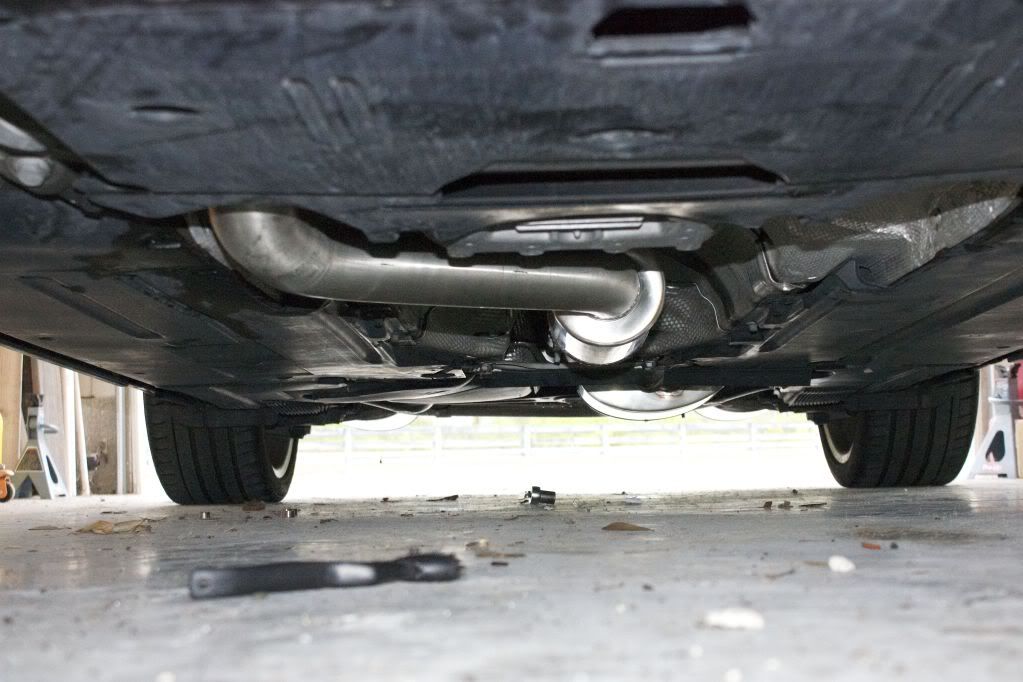
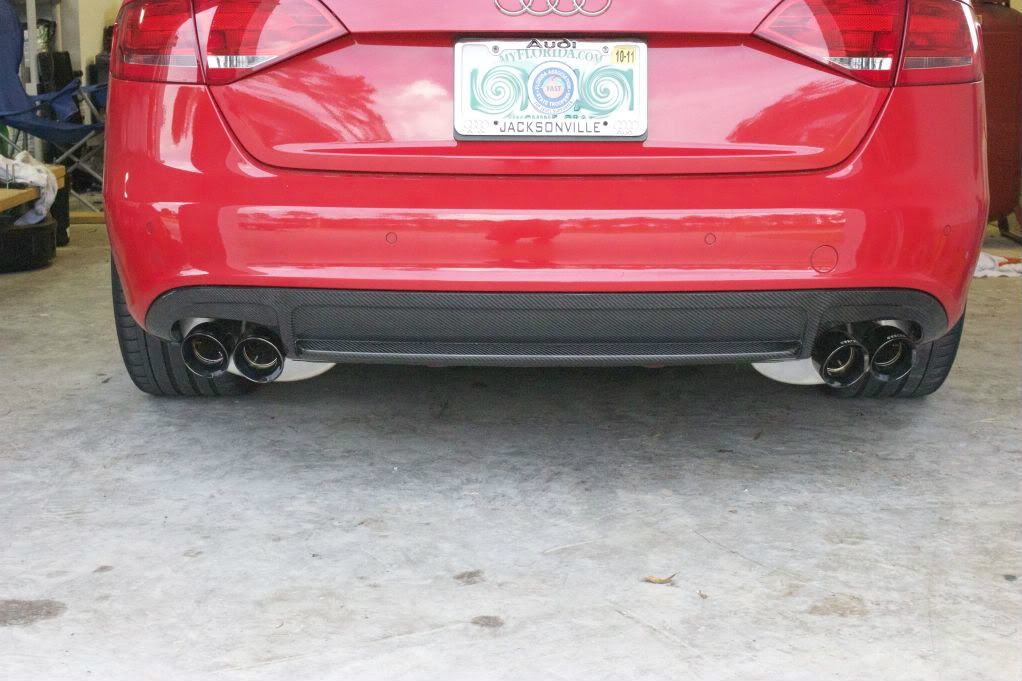
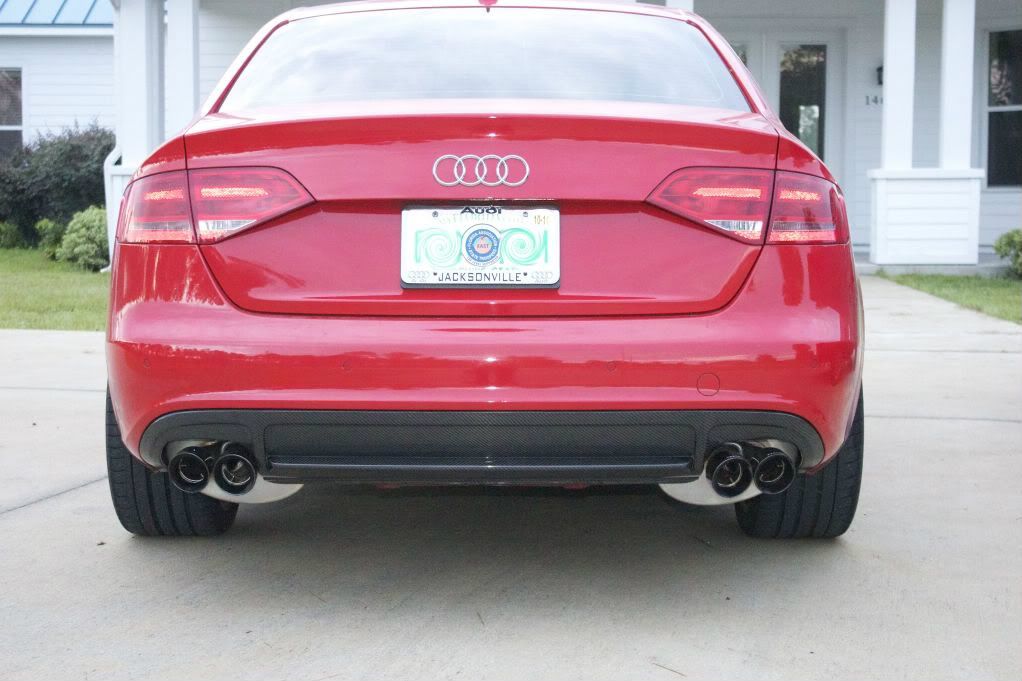
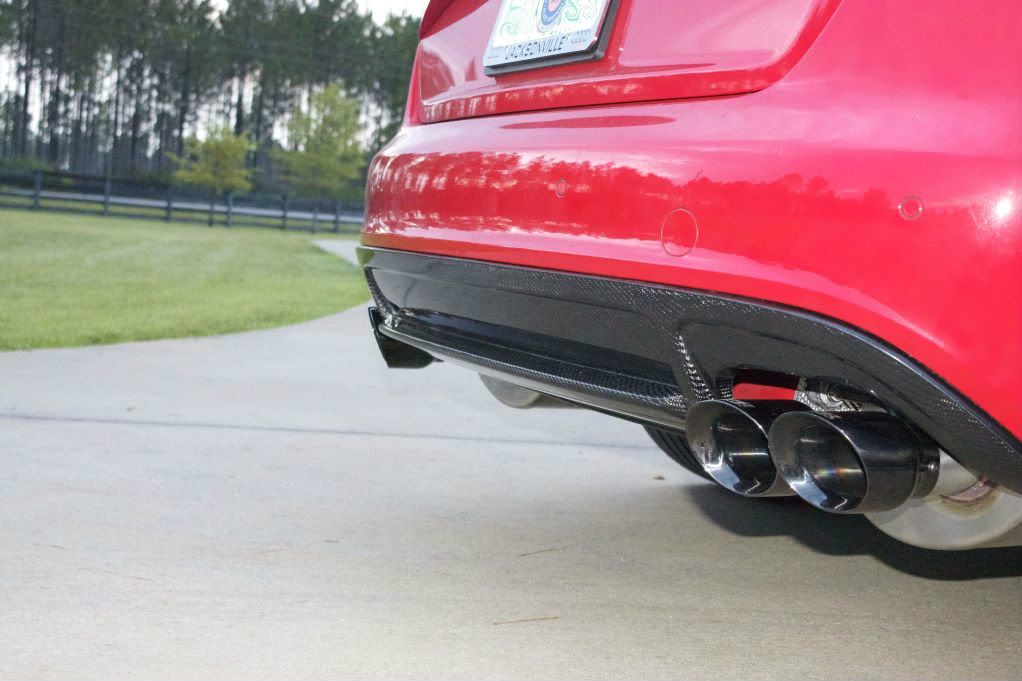
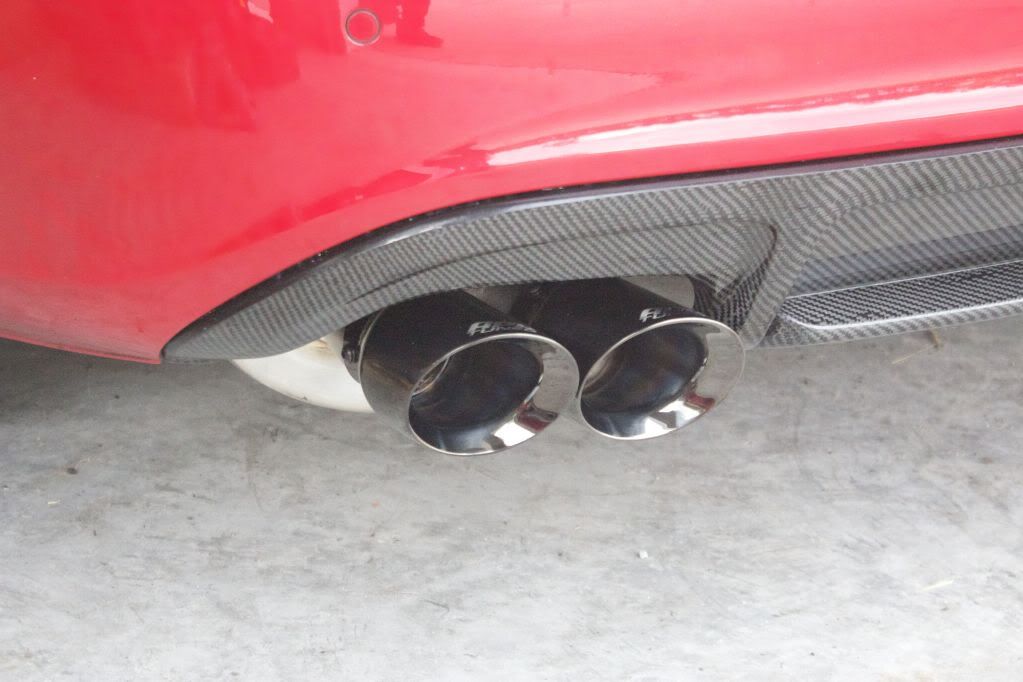
APR Quad Exhaust: The exhaust is impeccable. High quality, and EXCELLENT fitment. *****NOTE Since this thread is related to the build and I have not been able to open her up, I cannot attest to the sound yet.***** Install was very straight forward, however, the instructions were very generic. They were for the catback model and included parts I didn't need. Also, the directions left some room for error. By simply stating "torque per manufacturers recommendation" is kinda lame. At least look up the torque specs and include them in the manual. It is the simple things that turn a product from great into amazing. I would like to make it known that I am not complaining, just making simple observations. I am very happy with the exhaust so far. My one complaint is that it is not listed anywhere on their site that you need to purchase the heat shielding and exhaust hangar bracket separately from their kit. This can cost you days worth of downtime if you do not catch this in time and the parts go on order. In all honesty, this is my only real gripe. Lets be real here people, the cost is public for this exhaust and for 2300 dollars, it would be nice to get the damn heat shielding and hangar bracket. Easily overlooked...easily included by APR. One last note, the tips are individually keyed. I did not know this at first and thought APR gave me incorrect tips! lol. I finally figured it out and switched them around enough to get the slash cuts and laser etched name correct. I give this product a 10/10 for ease of installation, flawless quality and great aesthetics...even with the missing heat shield and hangar.
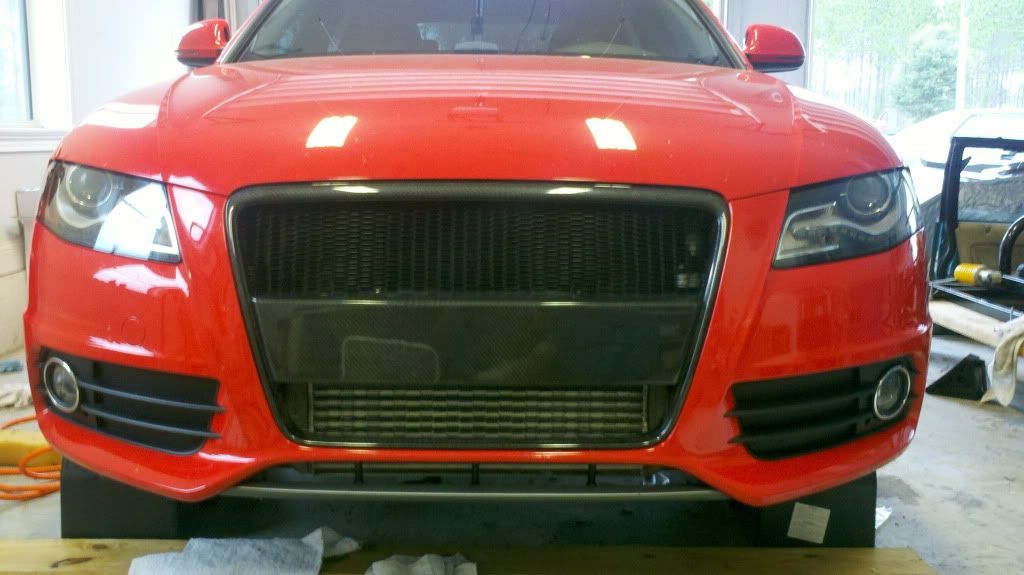
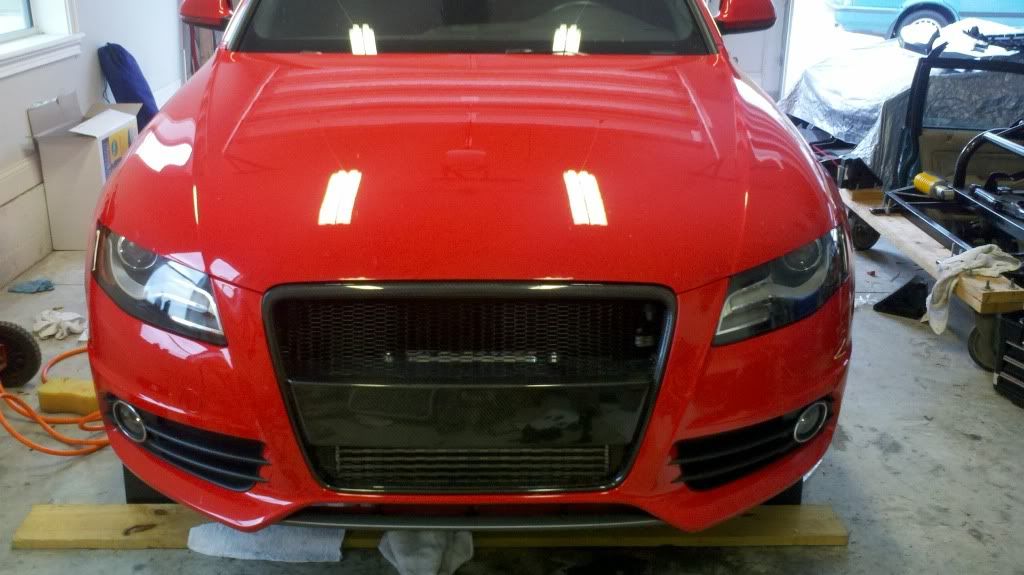
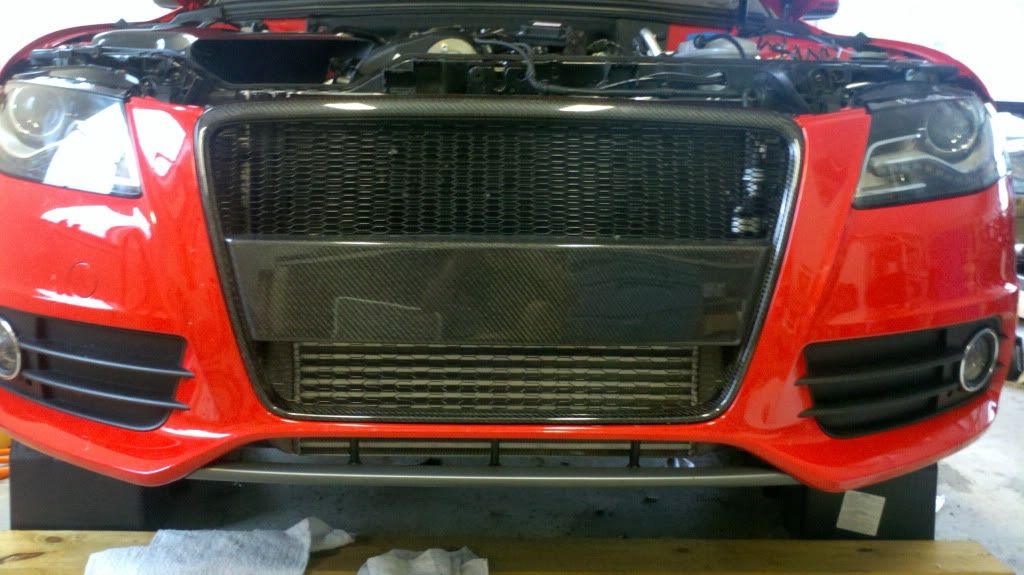
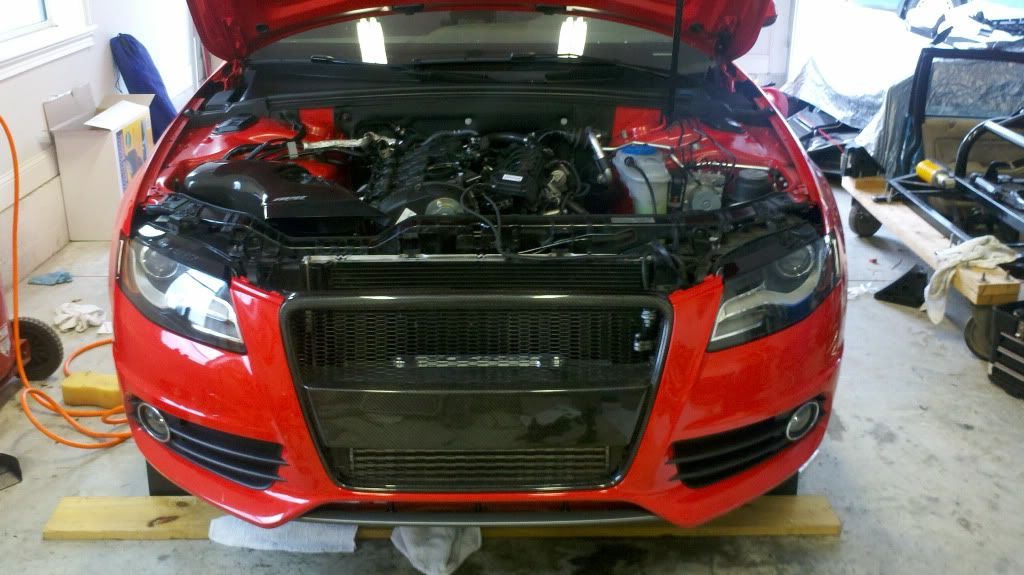
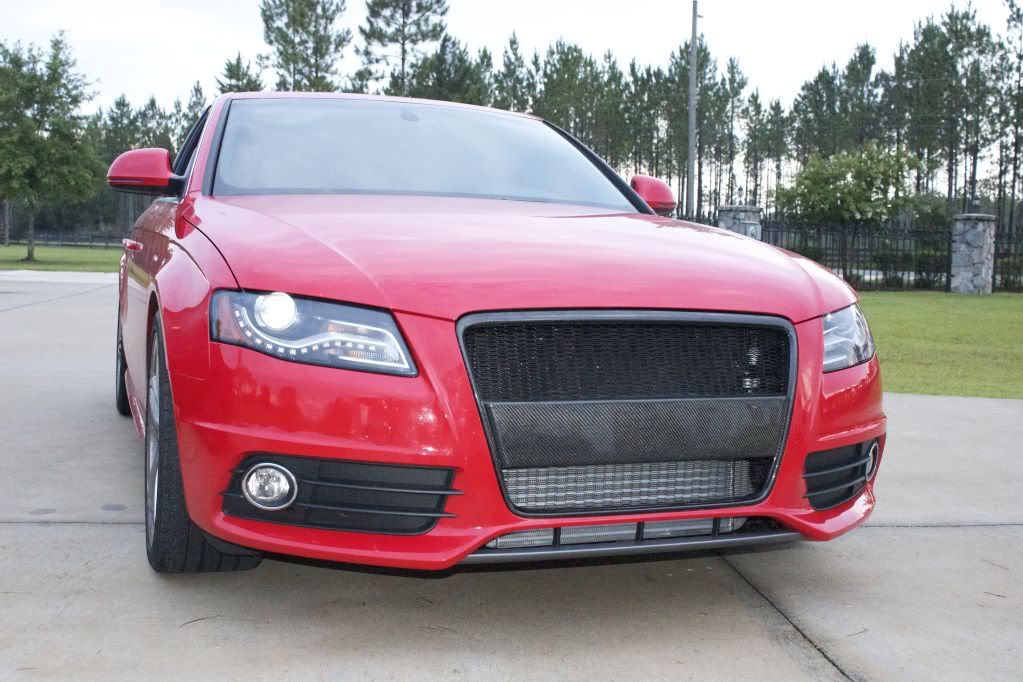
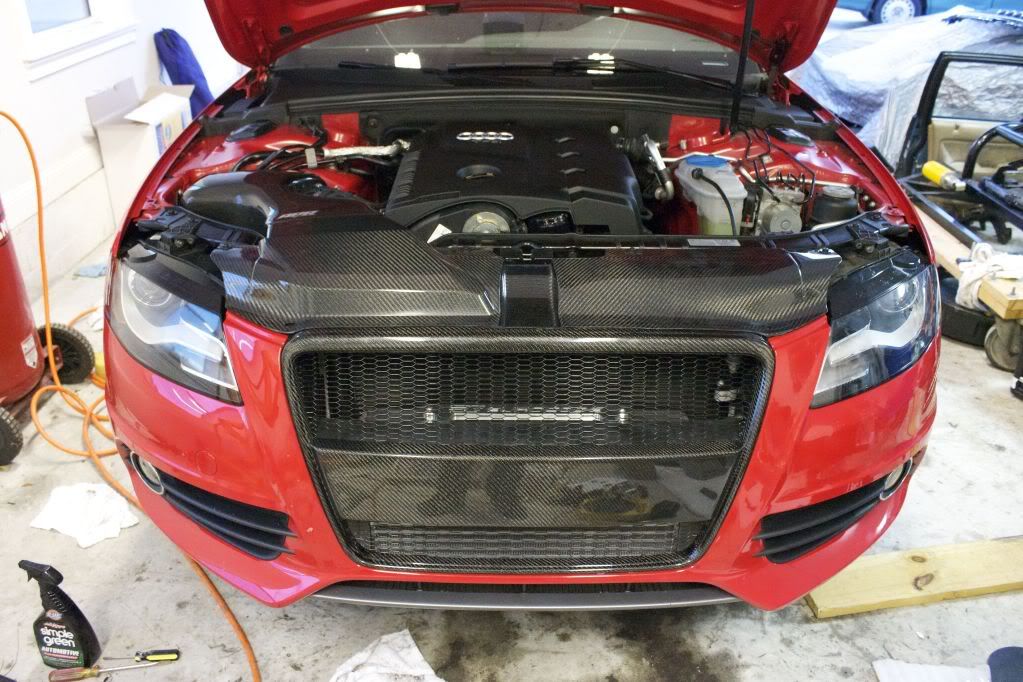
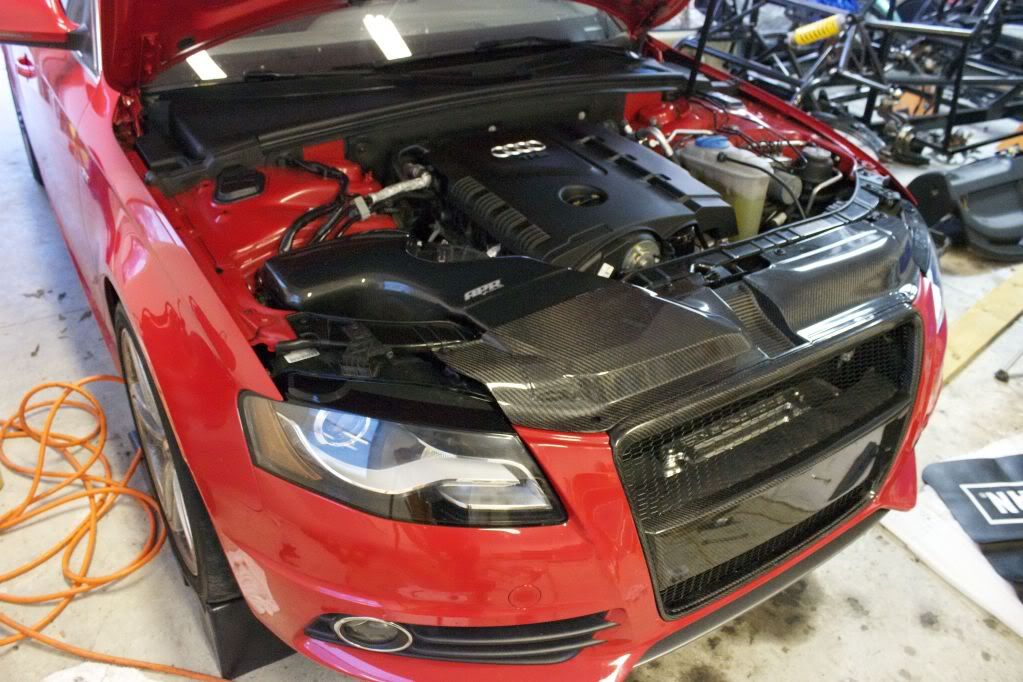
APR Carbonio: I like the product, but am not happy with the fitment. I can now see why people have to go to great lengths to get this thing lined up correctly with the radiator shroud. I am a perfectionist, so this is going to take some finesse when I can get a chance. The install was very easy. Instructions were spot on and made the install a breeze. I do think that a new turbo intake pipe should have been included with the kit. Engineering would not take ages and would be an excellent touch to really complete the product. I think for the price of this product, one such pipe could be included for a very small price increase. Depending on how well I can get this to fit, I might trade this product out for the Injen piece. I had not seen that intake prior to purchasing the APR piece and with its mismatched CF cover to the rest of my CF scheme...the fitment will need to be perfect or I will ditch it. So far, I am giving this product an 7/10. The CF aesthetics part of the intake doesn't mean shit if it isn't lining up correctly.
APR K04 upgrade: What can I say, this isn't as simple as an intake or exhaust install. You are flirting with major modification here and really need to know your way around an engine before you start pulling this PITA out. Since no company has produced an aftermarket repair manual, it makes doing this by yourself very risky. You could always access the erWin database if you need some technical data. Anyways, there is no instructions provided with the kit. After contacting APR, they sent me some illustrations and other data. It definitely was useful in prepping the turbo but not in removing it. Just prep on the turbo itself and torque specs on all parts on the turbo. Again, this was useful but deff not ideal. At one point in the manual, it asks to remove the passenger side engine mount. I would NOT recommend doing this.
I found (and this is from what I experienced so WARNING to anyone doing this, I am not a certified Audi mechanic and what I am about to explain is not the Audi method to remove the turbocharger assembly) that the easiest and best way to get the turbo out is actually very simple. Here is what I did, first I removed the airbox. Next, I removed the splash guard and undercarriage cover and disconnected the midpipe from the downpipe. After, I drained the coolant from the vehicle. The petcock is located on the coolant line (driver side) at the bottom of the radiator. Pulling down on the petcock releases the coolant. It is pretty difficult to pull down so don't worry. Then, I removed the manifold heatshield, and the 4 lines (oil supply, oil return, coolant supply, coolant return) and removed the 2 wiring harnesses on the underside of the turbocharger. Disconnect the crankcase vent line and vacuum line and remove the turbo support bracket (2 bolts). At this point, all lines should be disconnected from the turbo and the cat is still installed. The only thing holding the turbo in place is the nuts on the manifold assembly (5 top, 4 bottom). The 5 on top are the only thing holding the turbo to the head. The bottom nuts hold a retaining plate that the manifold slides into. The easiest way to remove this is to remove the 5 nuts and their corresponding studs. By doing this, the turbo can be slid up and becomes free. This made accessing the nuts for the cat (especially the one on the bottom side facing the block) easier to remove. I removed the cat and pulled the turbocharger free of the car. One last thing...if the turbocharger is still difficult to remove, unbolt the sensors on the top of the head by the coil packs and lay them on top of the engine. BTW, I have no freakin idea wtf these sensors are for and if someone knows, I would love to hear what they are.
To install, prep the new turbo with studs for the downpipe and install the vacuum line and new hose clamp provided by APR. Test fit all the lines in the car with the turbo before tightening anything. The coolant return line (line facing the exhaust manifold) is a cocksucker to access when installed in the car. Our K03 turbo makes placement of this line simple by giving us a threaded mounting hole for the bracket on the line, unfortunately, this mount is not present on the K04 which means it requires a test fit to make sure the line is routed correctly. After test fitting all the lines, I removed the turbo and oriented the coolant return line correctly and tightened it. Ensure you use new crush washers (supplied by APR) on each line and torque everything accordingly. You can acquire the torque spec sheets from APR or myself (PM me for them). Once the turbo has been test fit, I installed the downpipe with the turbo in the car, but with the diameter decrease on the cat and a swivel socket, this isn't totally necessary (meaning you can do this once the turbo is fully installed if you wish). After installing the cat, I slide the turbo into the retaining plates and ran the 2 coolant lines and the oil return line. I added a small amount of fresh oil to the oil supply port on the top of the turbo and connected the oil supply line. Ensure you are using the new gaskets provided by APR for the oil return line and crankcase vent line. Other than that, torque everything down and follow the reverse order of removal. MAKE SURE, you use the torque tightening sequence on the manifold nuts. Do not simply run down them one at a time and torque them down. It is done in stages and in a specific order. This ensures equal torque across all 5 nuts. Well...I am sure I missed a few things, but I covered the main items. This is a quick (ha!) write up. Overall, I give the product a 10/10 simply because this is considered a professionally installed product. The parts were great, everything fit right up and they provided all the expendables, which is nice.
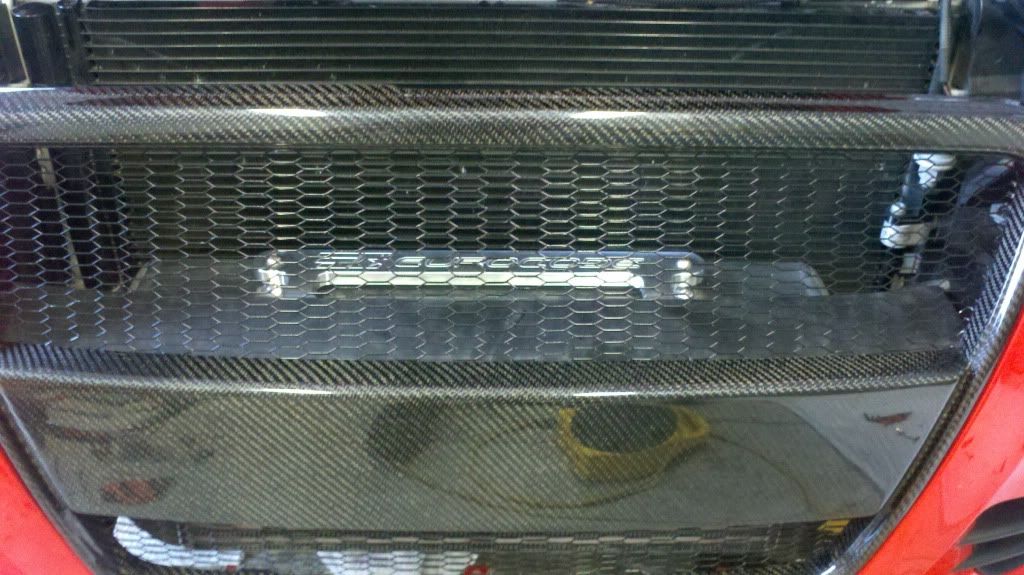
Eurocode FMIC: This thing is awesome. Perfect fitment, excellent finish, fantastic manual...a joy to install. A few of the barrel nut clamps were a PITA to get on. The one attaching the flex adapter from the turbo to the intercooler (might be different on a K03 install) required some real finesse. If you run into this problem, a nice lil trick I learned when working on aircraft is to use some safety wire and safety wire pliers. Route a strand or two from the top to the bottom of the clamp and join them between the two halves of the clamp and start spinning. It will draw the clamp in plenty enough to get the stud through to get a few threads for the self locking nut. Oh...one thing I noticed...The torque on the 6 fasteners attaching the bracket to the crash bar seemed kinda high. I never hit 18 ft-lbs as it felt a little squirrely to me. I torqued them to around 13 or so and applied a light bead of red loctite. My benchstock is getting low and I couldn't risk snapping any of the supplied fasteners. One note...the bracket is a damn work of art. Two thumbs up to the machine (and programmer who drew the cad drawing) creating that bracket, that thing is gorgeous. This product deff gets a 10/10. great job Eurocode.
Well folks...I am sure I am missing something but this is the quick and dirty. Car is being tuned in t-minues 14.5 hours, until then, enjoy my novel.


")
 Posting Permissions


 Reply With Quote
Bookmarks