Audizine - An Automotive Enthusiast Community

Page 1 of 7 123 ... LastLast
Results 1 to 40 of 278
  1. #1
    Senior Member Three Rings PluschakovP's Avatar
    Join Date
    Jul 05 2010
    AZ Member #
    61075
    Location
    NW Washington

    A6 2.7T Engine Rebuild

    Guest-only advertisement. Register or Log In now!
    First Start of the build: http://www.youtube.com/watch?v=gGqVtxVQCbg
    After New TB installed: http://www.youtube.com/watch?v=ZsY-VY5Biqk

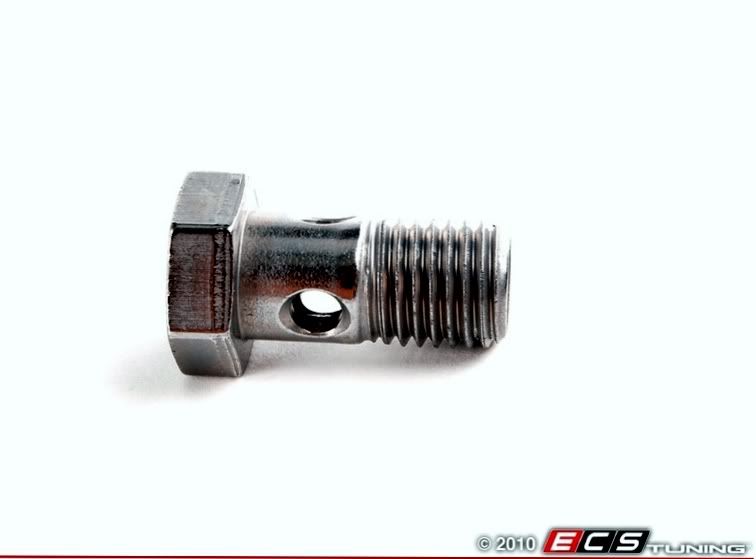
    I bought this A6 wrecked. Had undercarriage damage. Didn't think it was that bad, but previous owner ran car with no oil after he wrecked it. Found a rock lodged in oil feed tube to piston after I took everything apart. Rod bearings went bad. So I was forced with taking the engine out. This is after I fixed all the body damage. Enjoy.


    Fully put together, the fun may now begin.


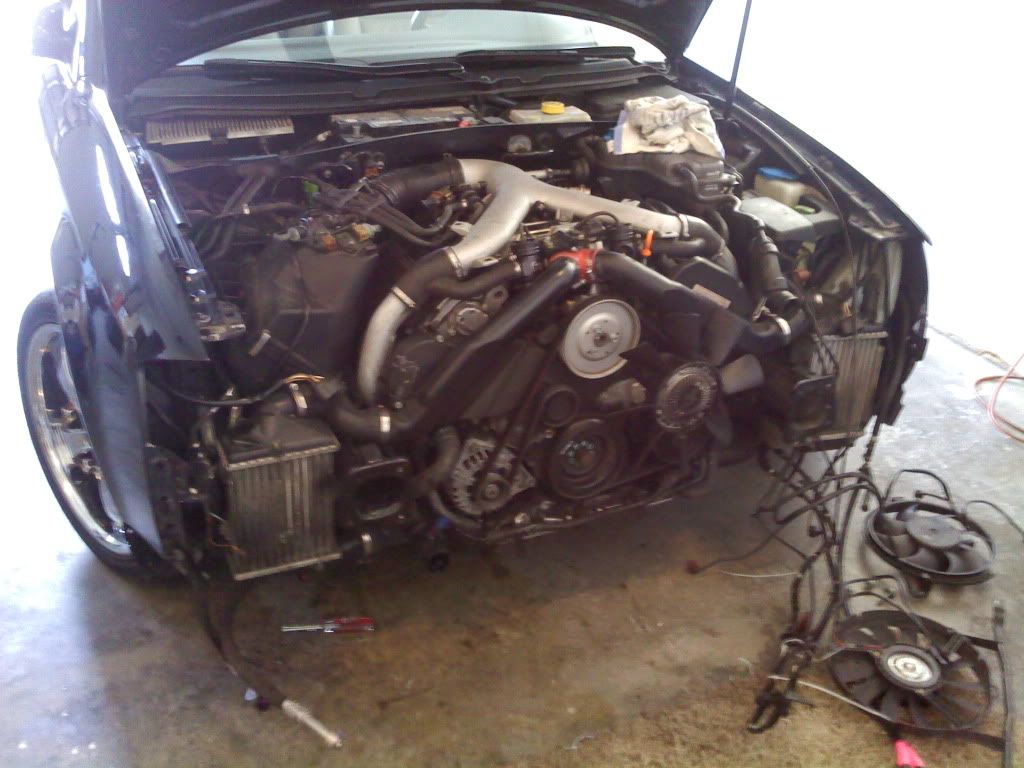
    After I took the radiator support off.


    Front, with bottom oil pan off.


    Air filter box and Air Distributor taken off. Also my fuel lines.


    Undercarriage unscrewed and all sensors. Ready to be pulled.


    All of this work was done when the temp outside was 94 degrees! But it was all fun and totally worth the experience! A lot of pictures I forgot to take so a lot of steps are skipped in between the photos posted.


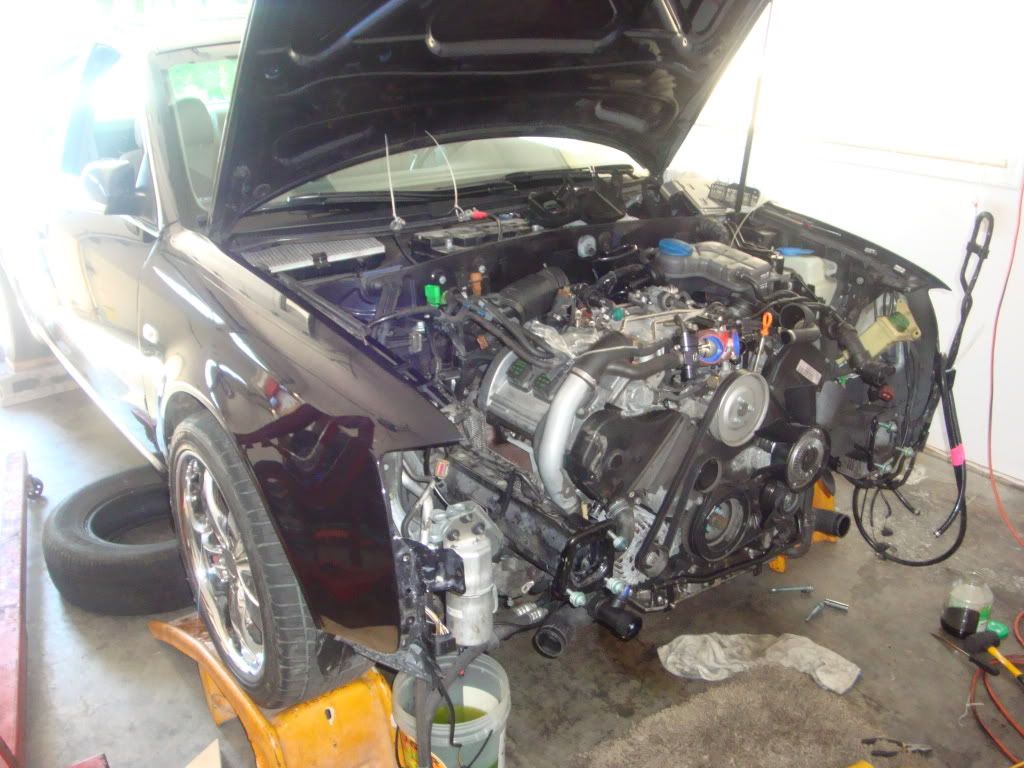
    The beginning of the day with the motor attached.


    Detaching sensors and turbo heat shields (didn't disconnect turbos anyways though)


    Next was to unbolt the drive line from the tranny. We decided it'd be easier this way. Also when you're down there, unbolt your exhaust system at the catalytics.


    Unbolting the shift linkage, on both sides of tranny. (2 sides b/c it's manual. Also my tranny mount was broken! )


    Unbolt both front axles from tranny.


    Strapping up the engine, to disconnect the motor mounts, to prevent it from squashing my face.


    This picture skips a lot of steps but basically, after you unbolt the main parts, the engine should slide out a little bit, giving you more room to work. At this point you will need to disconnect the 2 heater core pipes, clutch line, and some others. Make sure your ECU is disconnected from the box and just place all the ECU sensors on top of the engine, as shown in the next picture.


    Before pulling, make sure all mounts, sensors, exhaust, tranny/drive line, both axles, Shift Linkage (2 if manual), 3 Fuel Lines, A/C hoses, Battery (preferably taken out, freeing the Red Positive+ battery cable towards front of engine as it needs to be free to pull engine), ECU (and the sensors behind ECU inside the E-Box), Disconnect ground wires, Remove coolant line running under lower oil pan and unbolt other 2 behind oil pan.
    Most Important: While pulling engine, do so slowly and watch for any wires or pipes that may be connected! There are always some tricky ones you will miss.


    Engine, Tranny, Drive Line, Exhaust to Catalytics.


    She is out!


    (In this picture: 2 Shift Linkages, Sway bar, Crossmember, 2 Front Axles)


    Continued
    7.10.10


    The engine w/ exhaust, tranny, and drive line.


    Taking off exhaust from down pipes off turbos.


    Exhaust taken off both turbos.


    No exhaust, starting to take off tranny to make the engine bare so I can flip it over easily.


    Tranny, Exhaust, and Drive line taken off. Called it a day heh.

    September 2, 2010 - Finally started working on it again. Had a lot of other things to do besides work on my car.


    Just pulled out the crankshaft so I can send it to the shop.


    Here she is, all this time, this is what I have been trying to take out.


    Here is why it needs the shop. Look at the left how it's scratched, not good. The right one is good.


    I found an awesome guide to help with removing the engine as well. The website is:

    http://www.vaglinks.com/Docs/Audi/B5...ne_Removal.pdf.

    I'd skip page 12 and instead of unbolting the exhaust right at the turbos, it's easier to unbolt from the catalytics.

    I hope you all like this! If you have any questions, email me at: [email protected]
    Leave any questions or comments!

    -Paul
    Last edited by PluschakovP; 12-23-2010 at 11:29 AM.

  2. #2
    Veteran Member Four Rings awdjunkies's Avatar
    Join Date
    Dec 18 2005
    AZ Member #
    9274
    My Garage
    sedan, avant, truck/suv
    Location
    nevada

    very nice!!! Looks like you grabbed the bull by the horns. Gonna go check out that site.

  3. #3
    Veteran Member Four Rings
    Join Date
    Sep 11 2009
    AZ Member #
    47633
    Location
    NE

    This is something I am about to do myself. Tials 650s and rods in :)

  4. #4
    Senior Member Three Rings PluschakovP's Avatar
    Join Date
    Jul 05 2010
    AZ Member #
    61075
    Location
    NW Washington

    yeah the website is great for pulling the engine out. i did a lot of it by free hand and just kinda messin around in my garage for fun. good to hear someone else is doing this with their audi too :)
    as soon as i get the crank back from the shop i can hopefully! *Cross my fingers* hopefully... start putting it all back together. Might need help with the timing belt though. I ended up taking it off to get the crank off.

  5. #5
    Veteran Member Three Rings Aye6's Avatar
    Join Date
    Feb 28 2010
    AZ Member #
    55274
    My Garage
    2000 A6 2.7T
    Location
    Chicago (DP), IL

    Wow nice job man. If you can manage to do this then the TB should be a breeze. Did you use a cam lock bar when you took the belt off?

    Here's the DIY I followed when i did the TB: http://www.audiworld.com/tech/eng63.shtml


  6. #6
    Senior Member Three Rings PluschakovP's Avatar
    Join Date
    Jul 05 2010
    AZ Member #
    61075
    Location
    NW Washington

    oh cool thanks, that'll definitely help me when im putting the TB and serpentine belts back on.
    Last edited by PluschakovP; 09-07-2010 at 09:26 PM.

  7. #7
    Senior Member Three Rings PluschakovP's Avatar
    Join Date
    Jul 05 2010
    AZ Member #
    61075
    Location
    NW Washington


    Got my new, well used crankshaft today. The old crank had too deep of scratches and no one makes 0.50mm size rod bearings so, had to get a new one. Got a phenomenal deal though! College starts for me on Thursday so I'll try to get what I can done. I should be starting to put it all together though pretty soon so expect to see some work done.

  8. #8
    Veteran Member Four Rings
    Join Date
    Sep 11 2009
    AZ Member #
    47633
    Location
    NE

    Very cool. I did my own stage 3 install a year ago but going with bigger turbos this time around and will be installing rods... I hope I don't f.up the engine :)

  9. #9
    Veteran Member Four Rings TheBlueMartin's Avatar
    Join Date
    Jan 06 2005
    AZ Member #
    4755
    My Garage
    2006 A6 3.2, 2009 Q7 4.2 Prestige, 2014 Regal GS M/T
    Location
    Ann Arbor, MI

    ^ why would you want to go with new rods? The OEM ones are forged and can handle 600whp easy.
    "Mastering others is strength, mastering yourself makes you fearless" Lao Tzu


    2006 A6 3.2 Avant- Black.
    2009 Q7 4.2 Prestige - Lava.

  10. #10
    Senior Member Three Rings PluschakovP's Avatar
    Join Date
    Jul 05 2010
    AZ Member #
    61075
    Location
    NW Washington

    i got these rods off some guy that didnt need them for $50. perfectly good rods. i just needed to get one cuz the one i had got scratched so instead he threw all 6 in :)

  11. #11
    Veteran Member Three Rings chrisbostonusmc's Avatar
    Join Date
    Jan 12 2008
    AZ Member #
    24094
    Location
    Sarasota,Fl

    Quote Originally Posted by TheBlueMartin View Post
    ^ why would you want to go with new rods? The OEM ones are forged and can handle 600whp easy.
    More like 470ish..I know multiple people who have blown rods on too much boost on RS6 turbos
    Stage 3 SSP Tuned RS4 K04'd
    12.4 @ 115 on pump gas only
    425AWHP/467AWTQ
    ALL MY MODS DONT FIT IN SIG! DAMMNITTT!

    95 Toyota Supra T51R 800hp

  12. #12
    Veteran Member Four Rings Mantis's Avatar
    Join Date
    Aug 04 2007
    AZ Member #
    20072
    Location
    Canada

    Quote Originally Posted by TheBlueMartin View Post
    ^ why would you want to go with new rods? The OEM ones are forged and can handle 600whp easy.
    Common to do rods on anything greater than a mild tuned RS6, there isn't exactly a line when you can say they will fail, but getting near 500awhp is kind of the upper limit. Julex is right on the money with rods on his TIAL 650 kit, I helped build an S4 with that kit, it was a beast.
    I don't think I care anymore

  13. #13
    Senior Member Three Rings PluschakovP's Avatar
    Join Date
    Jul 05 2010
    AZ Member #
    61075
    Location
    NW Washington

    I'm looking to start putting the engine together soon but I need to get all the gaskets and bolts that need to be replaced. I know of a certain few but can someone give me the complete list of what needs to be replaced 100%?

  14. #14
    Senior Member Three Rings PluschakovP's Avatar
    Join Date
    Jul 05 2010
    AZ Member #
    61075
    Location
    NW Washington

    Here we go again.


    Cleaning my crank.


    Cleaning the mains and rod journals.


    Got my Main Bearings.


    Put the Main Bearings on, ready for crank. Don't worry I lubed the bearings, didn't get picture of that though.


    Crank's in, spins freely, everything is golden.

    Waiting for my Rod Bearings, Rear Main Seal, Silicone Sealant and should begin putting it all back together pretty darn soon.

  15. #15
    Veteran Member Three Rings in2thenightaudi's Avatar
    Join Date
    Apr 03 2008
    AZ Member #
    27253
    My Garage
    '03 A6 2.7T 6MT
    Location
    San Diego, CA

    wow, wish i had that kind of know-how. great work and good luck finishing it up.
    -Nick
    OEM + 03 A6 2.7T 6-spd APR, 2Bennett, ASP, JHM, Hotchkis, Southbend, Mangaflow, SuperSprint, VMR, and some home-brew goodies

  16. #16
    Veteran Member Four Rings
    Join Date
    Sep 11 2009
    AZ Member #
    47633
    Location
    NE

    sweet stuff. Regarding engine cradle/stand. is it Audi specific or any general type will do?

  17. #17
    Veteran Member Four Rings Mantis's Avatar
    Join Date
    Aug 04 2007
    AZ Member #
    20072
    Location
    Canada

    You can use a Princess Auto/ Harbor Freight engine stand, they do the trick quite easily. I picked up the mid weight range unit, the lightweight unit scared me
    I don't think I care anymore

  18. #18
    Senior Member Three Rings PluschakovP's Avatar
    Join Date
    Jul 05 2010
    AZ Member #
    61075
    Location
    NW Washington

    yeah i just bought a random 1000lb engine stand off craigslist. works great. as long as it has adjusting little arms so you can adjust where the tranny connections can connect to the engine stand. but yeah, if i could've, i woulda bought the harborfreight one. ive heard good things about them.

  19. #19
    Established Member Two Rings
    Join Date
    Nov 30 2008
    AZ Member #
    35836
    Location
    SE PA

    Thanks for taking the time to document your experience!!!!!
    ________________
    04 allroad (sold)

  20. #20
    Senior Member Three Rings MLFHNTR's Avatar
    Join Date
    May 29 2010
    AZ Member #
    59663
    My Garage
    '04 Allroad, '02 GTI
    Location
    Daytona Beach

    lots of good stuff in here. almost makes me want to take mine apart some day
    2 Hooker Limit...

    Embry-Riddle European Car Club President

  21. #21
    Senior Member Three Rings PluschakovP's Avatar
    Join Date
    Jul 05 2010
    AZ Member #
    61075
    Location
    NW Washington

    heh thanks guys, it's been a good experience for me also. i thought this could help a lot of people who want to tear their motors apart. i havent seen too many 2.7T motors worked on in depth.

  22. #22
    Senior Member Three Rings PluschakovP's Avatar
    Join Date
    Jul 05 2010
    AZ Member #
    61075
    Location
    NW Washington


    Got my parts I ordered from ECS Tuning :)


    Rod Bearings, Rear Main Seal Gasket, and Silicone Sealant for upper oil pan seal.

    I start work on the engine tomorrow, Friday the 8th. I discovered one of my pistons might have a bad ring on it so that might hinder my project, but at least I'm almost ready for all the work to put it back together.

    Pics will come of the whole rebuild of the motor.

    ANYONE EXCITED AS I AM FOR THIS?

  23. #23
    Veteran Member Three Rings pohsib's Avatar
    Join Date
    Jan 04 2009
    AZ Member #
    37045
    Location
    Vancouver, BC

    I am. I love seeing these types of threads with lots of pictures. Makes me less afraid to get my hands dirty.

  24. #24
    Veteran Member Four Rings awdjunkies's Avatar
    Join Date
    Dec 18 2005
    AZ Member #
    9274
    My Garage
    sedan, avant, truck/suv
    Location
    nevada

    Quote Originally Posted by PluschakovP View Post

    Got my parts I ordered from ECS Tuning :)


    Rod Bearings, Rear Main Seal Gasket, and Silicone Sealant for upper oil pan seal.

    I start work on the engine tomorrow, Friday the 8th. I discovered one of my pistons might have a bad ring on it so that might hinder my project, but at least I'm almost ready for all the work to put it back together.

    Pics will come of the whole rebuild of the motor.

    ANYONE EXCITED AS I AM FOR THIS?
    Hell yeah I am!! I wish I lived next door so I could come see it first hand
    Last edited by awdjunkies; 10-07-2010 at 02:35 PM. Reason: typing error

  25. #25
    Senior Member Three Rings PluschakovP's Avatar
    Join Date
    Jul 05 2010
    AZ Member #
    61075
    Location
    NW Washington

    This point forward will be engine assembly and more.

    Here we are. Finally I localized the problem, fixed the problem (Rod Bearings, Rods, Crank), and now begins the process of assembling the motor.


    Here it is on the engine stand, ready for rod bearing install.


    Putting on a new Rod Bearing. Don't they just look amazing when they're new?


    Torquing down the Rod Bolts.


    1 Down, 5 to go! :)


    All 6 Rods with new bearings in and torqued.


    Oil Pump getting put on. (Gotta clean it still)

    There you go guys, the project is underway again.
    I look forward to posting more pics for you all.
    Last edited by PluschakovP; 10-10-2010 at 09:14 AM.

  26. #26
    Senior Member Three Rings PluschakovP's Avatar
    Join Date
    Jul 05 2010
    AZ Member #
    61075
    Location
    NW Washington

    It's funny how it's so much easier to tear everything apart, then when it's time to put it back together it's so mind boggling

  27. #27
    Senior Member Three Rings PluschakovP's Avatar
    Join Date
    Jul 05 2010
    AZ Member #
    61075
    Location
    NW Washington

    Back at it again


    Cleaned Upper Oil Pan.


    Putting on Flange.


    Putting on Crank Pulley.


    Putting on Upper Oil Pan.


    Cleaned Lower Oil Pan.


    Put on Lower Oil Pan.


    Taking motor off stand, and putting it on cherry picker.


    Before cleaning up the rear flange gasket residue.


    After cleaning up the rear flange gasket residue.


    Cleaned up the rear flange.


    Rear Flange put on.


    Flywheel getting ready to get put on.


    Flywheel on.


    Pressure Plate on.


    Tranny getting ready to get put on.


    Yeah we used a chair to get the sucker lined up.


    Tranny on.


    So far this is where I'm at.

    Figured out how to put my TB on manually. I'll let you guys know if it works.
    Last edited by PluschakovP; 10-22-2010 at 09:36 AM.

  28. #28
    Senior Member Three Rings PluschakovP's Avatar
    Join Date
    Jul 05 2010
    AZ Member #
    61075
    Location
    NW Washington

    Sorry for the delay guys... had a little problem with a bolt


    Here's where I broke my bolt, on the compressor side where the oil feed line is.


    Stupid Banjo bolt, it's the only thing holding my project back because the dealership can't find the right bolt for me still.

  29. #29
    Veteran Member Three Rings in2thenightaudi's Avatar
    Join Date
    Apr 03 2008
    AZ Member #
    27253
    My Garage
    '03 A6 2.7T 6MT
    Location
    San Diego, CA

    great progress! sucks that one little bolt is holding up such a huge part. contact Pete@ecs, hell have the bolt to you quickly. I was missing a suspension bolt and sent him a PM and heard back the same day and the bolt was shipping that day as well. Did kind of suck paying about 8 bucks for shipping on a $2 bolt though haha.
    -Nick
    OEM + 03 A6 2.7T 6-spd APR, 2Bennett, ASP, JHM, Hotchkis, Southbend, Mangaflow, SuperSprint, VMR, and some home-brew goodies

  30. #30
    Senior Member Three Rings PluschakovP's Avatar
    Join Date
    Jul 05 2010
    AZ Member #
    61075
    Location
    NW Washington

    in2thenightaudi thanks, ill contact him and check if he has a bolt for me... im so such a bummer to not have it. i cant wait to finish this baby up tho haha

  31. #31
    Established Member Two Rings
    Join Date
    Nov 04 2010
    AZ Member #
    66585
    Location
    GA

    wow that is awesome dude!!!

  32. #32
    Veteran Member Three Rings in2thenightaudi's Avatar
    Join Date
    Apr 03 2008
    AZ Member #
    27253
    My Garage
    '03 A6 2.7T 6MT
    Location
    San Diego, CA

    Good luck, I'm sure they will be able to figure it out and get the bolt you. Just shows you how wonderful the stealerships are! Awesome to see someone diving into the motor full bore like this! Wish I had to know how to do this!
    -Nick
    OEM + 03 A6 2.7T 6-spd APR, 2Bennett, ASP, JHM, Hotchkis, Southbend, Mangaflow, SuperSprint, VMR, and some home-brew goodies

  33. #33
    Established Member Two Rings
    Join Date
    Nov 04 2010
    AZ Member #
    66585
    Location
    GA

    Can you tell me what u used to clean the oil pan? Its like nice very nice job

  34. #34
    Senior Member Two Rings SpooldYou's Avatar
    Join Date
    Jul 17 2007
    AZ Member #
    19623
    My Garage
    2005 s4 IMOLA 01 a6 2.7T (daily) Vespa Scooter w/ Jet Engine. (1.9 FATS)
    Location
    Boston

    wow Good work, Sucks you didnt even Gut the cats while it was out.....

  35. #35
    Senior Member Three Rings
    Join Date
    Jul 09 2007
    AZ Member #
    19411
    My Garage
    01 A6 4.2 QUATTRO
    Location
    Portland, OR

    hope you got that last chunk of gasket off, that WILL cause an oil leak, if not i would fix it now, would be a shame to get it back in the car and have it leaking oil.

  36. #36
    Senior Member Three Rings PluschakovP's Avatar
    Join Date
    Jul 05 2010
    AZ Member #
    61075
    Location
    NW Washington

    Quote Originally Posted by Asmir02 View Post
    Can you tell me what u used to clean the oil pan? Its like nice very nice job
    I actually used break cleaner and gasoline! Worked like a charm.

  37. #37
    Senior Member Three Rings PluschakovP's Avatar
    Join Date
    Jul 05 2010
    AZ Member #
    61075
    Location
    NW Washington

    Quote Originally Posted by SpooldYou View Post
    wow Good work, Sucks you didnt even Gut the cats while it was out.....
    Well i did cat back on it already, i dont want to cat delete. it'd be too loud.

  38. #38
    Senior Member Three Rings PluschakovP's Avatar
    Join Date
    Jul 05 2010
    AZ Member #
    61075
    Location
    NW Washington

    Quote Originally Posted by brewmastr View Post
    hope you got that last chunk of gasket off, that WILL cause an oil leak, if not i would fix it now, would be a shame to get it back in the car and have it leaking oil.
    Ha oh yeah, i cleaned it all up. Some of these pictures aren't when the job is fully done. Thanks for the good eye though :) I noticed that too when I was posting the pic, was hoping no one would notice lol

  39. #39
    Veteran Member Four Rings FrankA6's Avatar
    Join Date
    Mar 30 2008
    AZ Member #
    27087
    My Garage
    2004 A6 2.7T, 2012 Volvo S60 R-Design
    Location
    Pittsburgh

    Great work, man!
    2004 Audi A6 2.7T
    2012 Volvo S60 R-Design

  40. #40
    Senior Member Three Rings PluschakovP's Avatar
    Join Date
    Jul 05 2010
    AZ Member #
    61075
    Location
    NW Washington

    Ordering the bolt

    Talked to [email protected] and he got me hooked up with a diagram that the dealership has. So I ordered. Can't wait to get it.


    Turbo Diagram for Audi 2.7T.


    Here's the bolt. Hopefully the thread is 8mm, head 13mm... I'd be pretty happy.

Tags for this Thread

Bookmarks

Posting Permissions

  • You may not post new threads
  • You may not post replies
  • You may not post attachments
  • You may not edit your posts
  •  


    © 2001-2025 Audizine, Audizine.com, and Driverzines.com
    Audizine is an independently owned and operated automotive enthusiast community and news website.
    Audi and the Audi logo(s) are copyright/trademark Audi AG. Audizine is not endorsed by or affiliated with Audi AG.