


I contacted Nemesis to place my order for the ABT H.A.S since they provide so much support for this community and personally use this setup. Amazingly, they were able to get the suspension to me, direct from Germany, within days of placing the order despite shipping being slow for everything else and entire countries shut down. Martin (Jimminez@ Nemesis) was really helpful answering all my pre-install questions. Thanks guys!
The ABT H.A.S. is a complete package and includes everything needed for an OEM+ install.

Even though the ABT H.A.S. comes with install instructions, its specific to installing the ABT components. The instructions do not detail the entire spring install process. In addition, I didnt see any DIY suspension installs for the B9 A/S/RS5 or write-ups detailing how to install springs on an RS5 with DRC. So, after collecting tips from other forum members, I decided to document my install and do a full write-up.
Once the car settles and Ive had some more seat time, Ill update this thread with a more detailed review of the ABT H.A.S. setup. But my initial impressions are that this is the perfect setup for the car. In Comfort, the suspension is not harsh or bouncy. Its slightly stiffer than stock, but hardly noticeable. If anything, it handles bumps and road imperfections better than the stock springs (which tended to feel a little floaty). In Auto and Dynamic, the suspension feels slightly stiffer and more sporty than stock. But again, it seems to handle the bumps better without any harshness. Overall, I think the ABT H.A.S. springs are a much better match for the damping than the stock springs. Not to mention, you can set the ride height for the perfect stance!
Now, for the DIY install write-up. Since the ABT H.A.S. comes with new bump-stops for the front and rear, the install is a little more involved than a non-adjustable spring install would be. So I broke out the ABT H.A.S. specific sections for both the front and rear.
Front Suspension Steps
1) Jack up the car, put the front on jack stands, chock the rear wheels, and remove wheels.
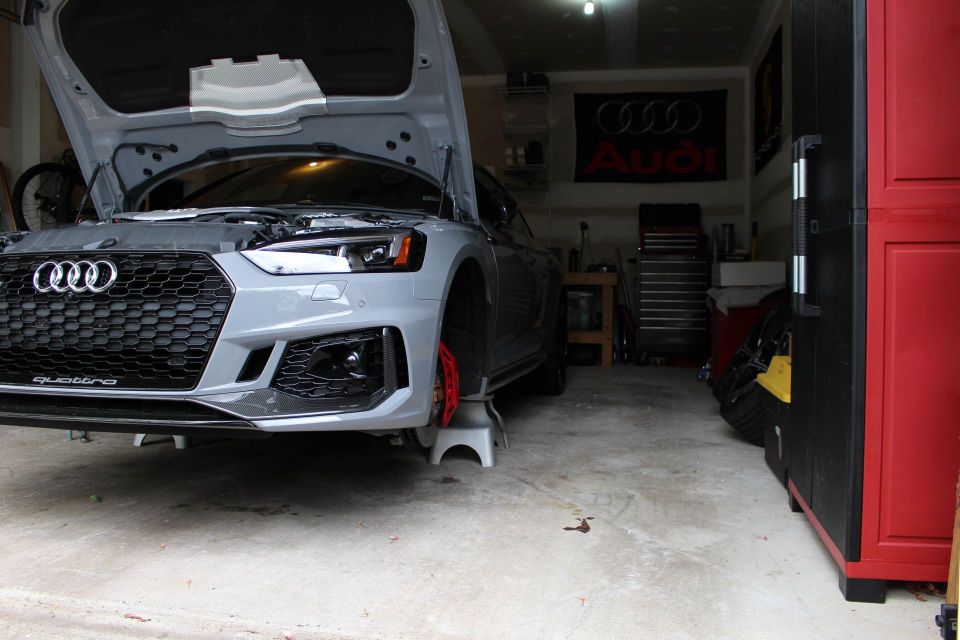
Side note: I highly recommend Jackpoint jack stands for the B9. I picked up a pair for this install since the RS5 does not have any ideal locations for jack stands when you jack from the pinch weld. The Jackpoint stands allow you to jack up the car and put it on stands in the same location. Plus they are super wide and really solid, giving me more peace of mind when hanging out under the car.
2) Pop off the black cap on top of the damper and remove/unplug the sensor. To do this, pull up on grey portion lightly to unlock it. Then wiggle and pull up on the sensor to remove it. Be careful as it may be very tight.

3) Loosen, but dont remove, the 3 13mm bolts on top of damper. The bolt near/under the strut tower brace requires a box wrench to loosen. You dont need to remove the strut tower bolt.

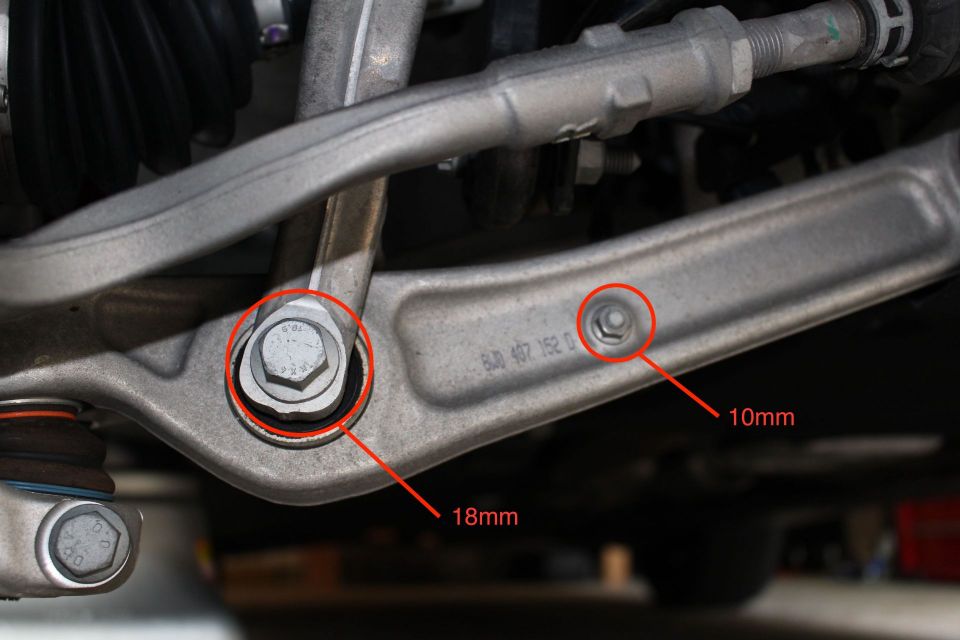
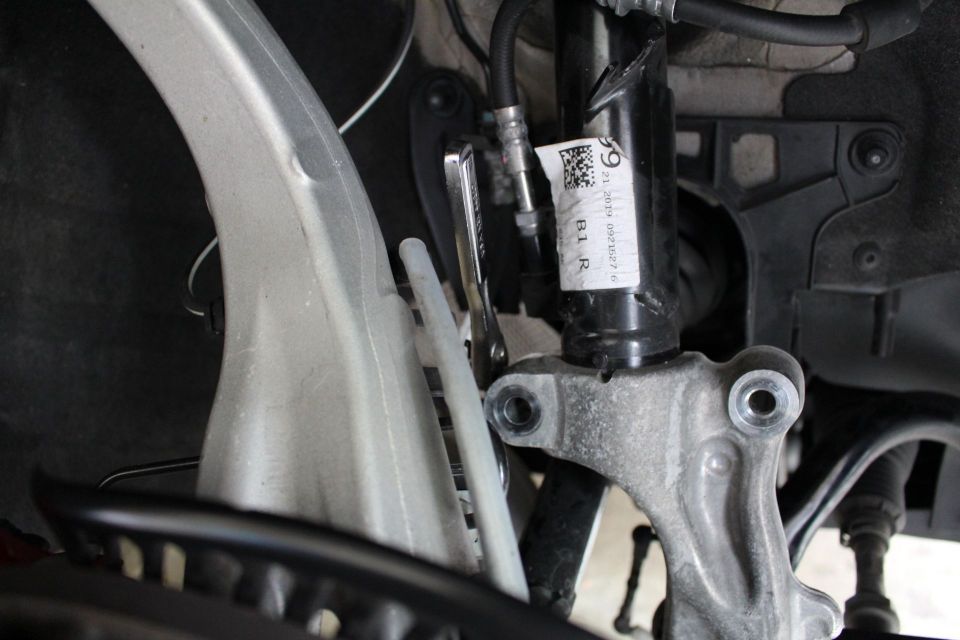
4) Now move to the wheel well. Remove the 10mm nut for the leveling sensor.
5) Then Remove the bolt that attaches the damper to the lower control arm. (18mm for both the bolt and nut)
6) Loosen, but dont remove, the lower bolt for the sway bar end-link (need to do this in order to manipulate the end-link). Completely remove the top bolt for the sway bar end-link bolt. (16mm and 16mm triple square).

7) If you have DRC, remove the DRC hose clip (flat blade screw driver). Remove the hose by pulling down and out. This will provide more slack in the DRC line when the damper is removed.

8) Remove the 16mm bolt on the bottom of damper.

9) Support the lower control arm with a jack. Remove the 16mm bolt/nut holding the upper control arms to the upright.

10) Use a ¼ ratchet to open sleeve that attaches to the lower part of the damper. To do this, just insert the ratchet into the slot where the bolt pinches the damper. Turn the ratchet 45 degrees and it will open the slot enough to release the damper.
11) Completely remove the 3 13mm top-mount bolts. You may need to lower jack (which will drop the strut assembly down) as you remove the bolt closest to the strut-brace since clearance is an issue with that one.

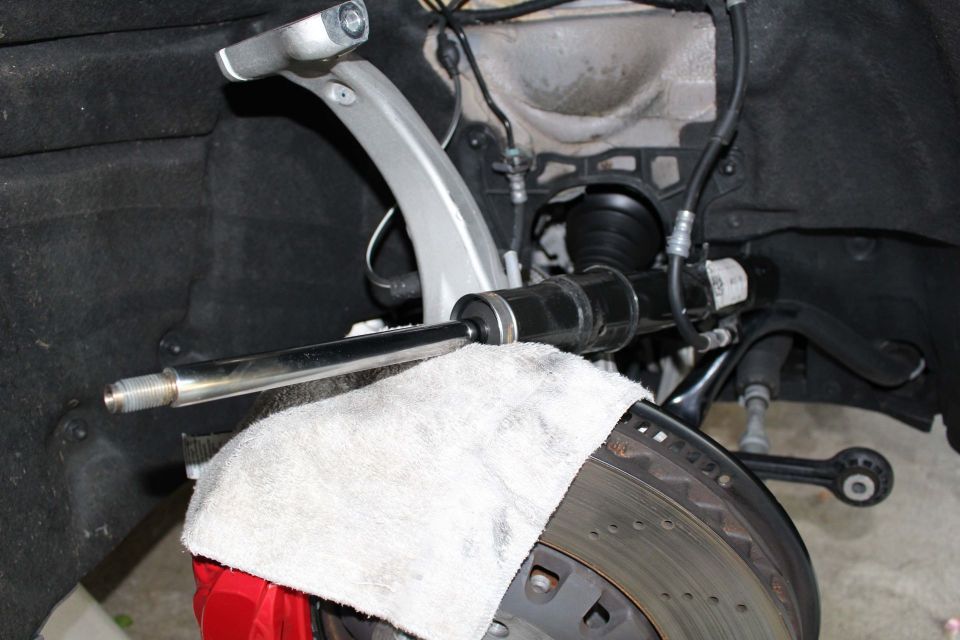
12) Lower the jack, drop the strut assembly down, remove damper from the sleeve; leave DRC attached, and rest the strut assembly on a towel on the rotor to prevent cosmetic damage.
13) Remove the black plastic cover on top of the strut.

14) Carefully compress the spring with a spring compressor.
15) Remove top nut on the strut assembly with a 21mm socket, vice grips, and M9 extended triple square.

16) Remove the top mount, which includes the bump stop and swap the springs.
ABT front spring install
17) Remove the OEM dust cover (which you will reuse) and the OEM lower spring perch from the damper.
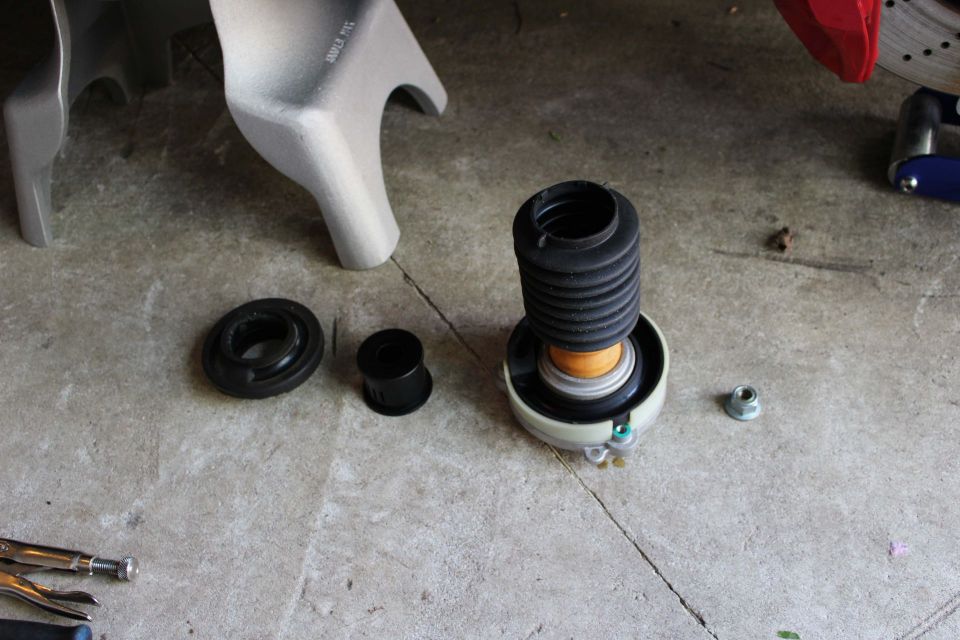
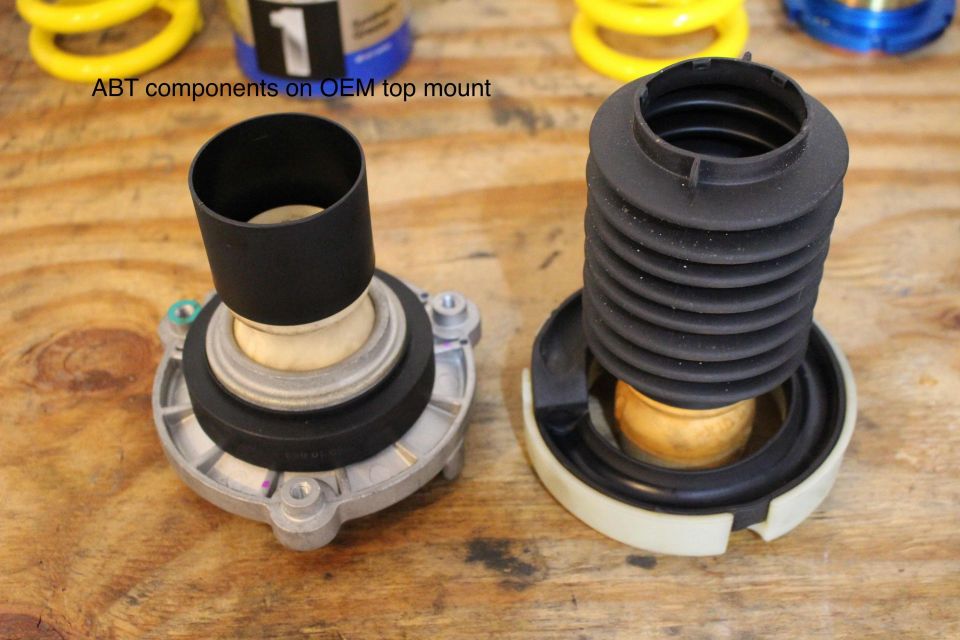
18) Remove all the OEM parts from top mount and replace with ABT supplied ring, bump-stop/rubber boot. Lube (w/ silicon spray or other light lube) the inside of bump-stop where damper shaft goes through. This will help when sliding the top-mount assembly back on the damper shaft.
19) Grease the rubber O-ring inside the ABT spring perch sleeve. I also used T9 Boeshield on the outer threads to protect them from the elements and make adjustments easier.

20) Clean the damper shaft and damper body, because why not?
21) Install the ABT spring perch sleeve over the damper. Per the ABT install instructions, you may need to grind down a weld on the damper body to get the sleeve to fully seat. Reinstall the OEM dust cover.

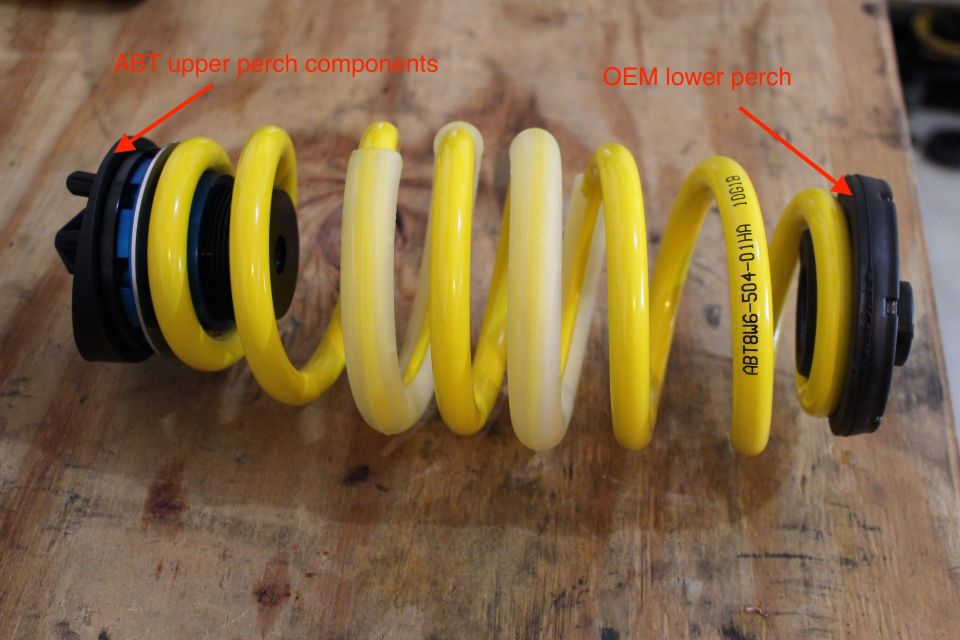
22) Install the ABT main spring; spring separator; helper spring; and then top-mount assembly. I tightened the top-mount nut to 37 ft/lbs, which is the B8.5 S4 torque spec.

Reinstallation tips
- Remember to reinstall the black plastic cap on the top mount before reinstalling the strut assembly. Align the nub on the top mount to the hole in the strut tower.

- Use anti-seize all over the upper control arm bolt when reinstalling. The design of this pinch bolt gives me PTSD from my B5S4 days where I vividly remember spending hours drilling out my seized upright pinch bolts.
- Loosely reinstall the sway-bar end link bolt/nut and lower damper pinch bolt before reinstalling the lower control arm/damper bolt and upper control arm pinch bolt. The extra slack will help with aligning and reinstalling these bolts.
- Torque the lower control arm bolt and sway bar end-link bolts with the car at ride height. I jacked up the suspension upright while the car was still on jack stands to the approximate ride height. Close enough.

Rear Suspension Steps
1) Jack up the car, the rear of the car on jack stands, chock the front wheels, and remove rear wheels.
2) Remove the plastic fairing attached to the lower control arm by pulling the center plastic pins out, pulling out plastic plugs, and then pulling the fairing towards the brake caliper/rotor and down.
3) Remove the 18mm bolt that attaches the damper to the lower control arm.

4) Mark the camber eccentric bolts w/ a sharpie or paint pen. I use 3 marks so the right/left marks are easy to identify. I also marked both sides of the eccentric bolt (towards the front of the car and rear of the car).
5) Support the lower control arm near inner camber adjustment w/ a jack and remove the inner lower control arm bolt. Be careful, the arm will pop down due to the spring pressure. The nut is an external torx. Im unsure of the size but its larger than a E24 (which I ordered but couldnt use since it was too small). I ended up using a 13/16th deep socket, which worked fine. But its always better to use the proper tool to prevent stripping. The bolt head on the other end is an 18mm.

6) Swap the springs. The ABT springs come new hardware for the upper spring perch (adjustable). Yes, its that easy if youre cutting, rather than replacing, the bump-stops.
ABT Suspension swapping the rear bump stops
7) Unclip the electrical connector on top of damper and then remove 2 16mm bolt that attached the top of the damper to the chassis.

8) Pull damper down into wheel well. To do this, push the lower control arm down, pull the lower part of damper up and out of control arm, and then push the bottom of damper in, towards center of the car. Leave the DRC lines attached.
9) Pull off the black plastic cap on top of the damper to expose the electrical connector. Note the orientation of the terminal wires.

10) Depin the electrical connector. This was probably the hardest part of the entire suspension install since there was no obvious way to remove the primary lock (the purple part inside the connector). Anyway, heres how to depin the connector:
a) Stick a small flat blade screwdriver between connector housing and the long end of purple lock and push down. The purple lock will click down. You may need to squeeze the sides of the purple lock to help it click down.

b) Pull out the purple lock with needle nose pliers.


c) Depin the terminal using a terminal tool (I used the ECS VW/Audi terminal tool set, which worked perfect).
d) Remove the wires from the plastic housing and pull the rubber boot off the wires.

e) I recommend buying two new purple locks since they are very easy to break. As you can see from the pictures, I mangled mine. I didnt have new ones and the mangled ones still worked. But they are pretty cheap so its worth buying new ones in advance. The part number appears to be: 1J6973803
11) Use an 18mm and an 9mm box wrench to remove the top nut on the damper. Remove the top-mount.

12) Remove the OEM bump-stop and boot and clean the damper. Install the ABT bump-stop, rubber boot, and rubber washer-looking thing. Reinstall the top-mount. I torqued the top mount nut to 26 ft/lbs (B8.5 S4 torque spec).


Enjoy a beer

Reinstall tips
- The inner lower control arm camber adjustment bolt can be difficult to reinstall. Use a jack to align bolt hole. Set the camber alignment to your marked specs.
- Torque while at ride height.

Other observations
- I initially set the front spring perches to 8 threads visible from the bottom of the sleeve. The rear I set to 2 turns from the lowest setting. After a little settling, this resulted in a front ride height of ~26 fender to ground in the front and 26.25 fender to ground in the rear. This was a little too low for me, so Ive since raised it.
- One complete turn on the front spring perches adjusts the car ~1/16 in fender to ground height. Although you usually have to do 2 complete turns to actually get a change in height (then its 1/8).
- One complete turn on the rear spring perches adjusts the car ~1/8 in fender to ground height.
- The front spring perches can be easily adjusted by hand (aside from the locking set screw) with the wheels on.
- Adjusting the rear spring perches requires removing the wheels and plastic fairing. To adjust, I used an M10 allen socket w/ extension on a ratchet, up through the bottom the control, through the center of the spring and into the adjustable perch. I used the ABT spanner wrench to hold the blue perch in place while I turned the threads using the ratchet. This was much easier than trying to adjust using only the spanner wrench.
- At ~26.25 fender to ground ride height in the front I rubbed my tires on the wheel well liner screw at the top of the fender. I removed this screw and the plastic clip and it doesn't rub anymore. This is with Michelin AS3+ (275/30R20) tires on the stock RS5 SB flag wheels (ET22) with 10mm spacers (ET12 effectively). The AS3+ tires run super wide, so stock tires might not rub even with spacers.
- At ~26.25 fender to ground in the rear, I slightly rubbed the felt wheel well liner with the side of the tire. Like the front, Im running a 10mm spacer in the rear with the 275/30R20 AS3+ on the stock RS5 SB flag wheels. Stock tires would likely be fine and could probably fit another 5mm of spacer.
- I have not aligned the car yet, but so far I havent noticed any need to refill the DRC or get an ACC/DAP alignment. My ACC and other drivers assistance functions appear to work perfectly fine without any faults or weirdness. After the car settles, I plan to only get a basic 4-wheel alignment at the dealer. I dont see a need to pay $700+ for the full ACC camera alignment at this point.
B8 A4/S4 TORQUE VALUES Suspension and Wheels
.................................................. .....Source "S"............... Source "A"
Front damper to upper mount ............ 37 ft-lbs ..........,.... (37 ft-lbs) 50NM
Front damper upper mount to body .....xx ft-lbs ..........,.... (30 ft-lbs) 40NM + 90deg
Front damper fork pinch bolt .......... .. 30 ft-lbs + 180º ......(30 ft-lbs) 40NM + 180deg
Front damper fork to lower link .......... 66 ft-lbs ............... (66 ft-lbs) 90NM + 90deg
Upper link pinch bolt ........................ 29 ft-lbs ................ (30 ft-lbs) 40NM
Rear damper to upper mount ............ 26 ft-lbs ................. (26 ft-lbs) 35NM
Rear damper upper mount to body .... 37 ft-lbs ................. (37 ft-lbs) 50NM + 45deg
Rear sway bar link to sway bar ......... 30 ft-lbs
Rear sway bar mounts .................... 19 ft-lbs
Wheel lug bolts .............................. 90 ft-lbs

 Reply With Quote


Bookmarks