


In my D2 I only did the projectors versus the additional bulbs and ballast that I upgraded in the B6. (that might change as either my bulb or ballast is showing its age on the passenger side)
This applies in general to any application of the process of installing (any) aftermarket projectors that one would be interested in (once doing ones research that it actually fits the dimensions of the headlight housing).
I have done some measurements and online search and have settled on buying the projectors from www.theretrofitsource.com. I have bought from them before and love their products and customer service, plus they offer many of the Moritomo products at a cheaper price than www.morimotohid.com.
THE GOAL:
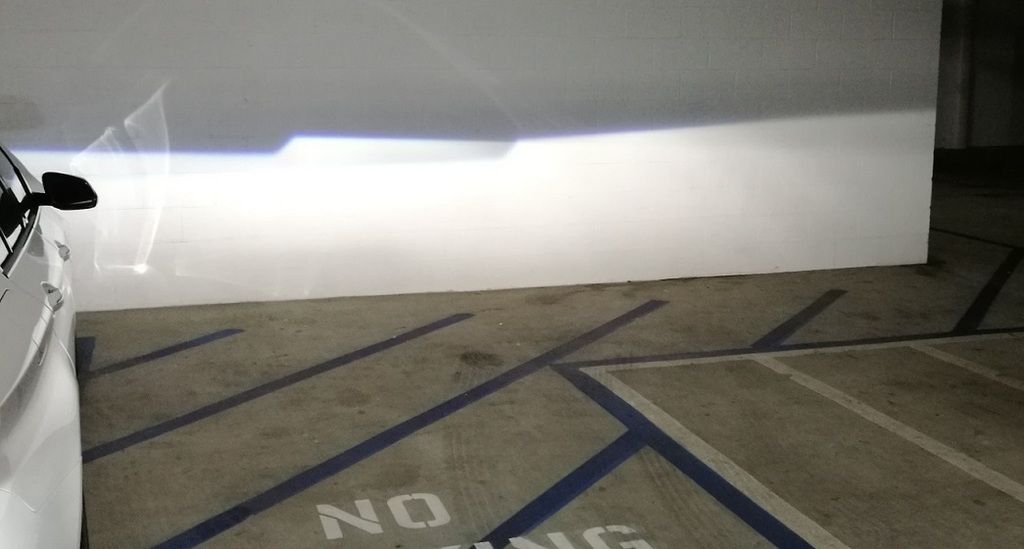
1. Update to a clearer glass and sharper cut off as well as getting the benefit of Bi-xenons.
2. Use the current section of the high beam housing as DRL
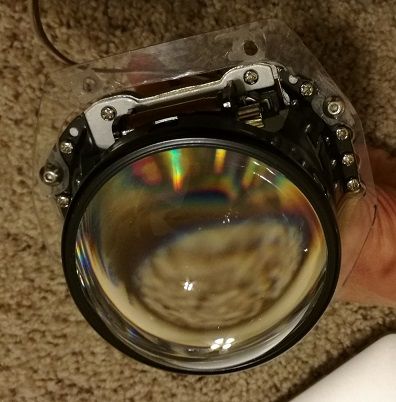
I settled on newest addition to the Morimoto line in the bixenon line-up, the - BI-XENON: MORIMOTO MINI D2S 4.0 - for both applications. It is a small projector considering it is a 3 inch bixenon one and it was ideal in all dimensions in comparison to other options on the site .
BONUS -both of my cars already ran D2S HID bulbs (the Audi D2 comes with D2S bulbs from the factory lucky me) so it was perfect.
My B6 already had the bi-xenon ecodes so this was almost a direct plug and play but the D2 did not offer bi-xenons (to my best knowledge).
My plan was to install the bi-xenon mini D2S 4.0 projector to act as both my low and high beam and converting the high beam H7 part of the housing to a DRL section and run these - H7: MORIMOTO 2STROKE to match my already installed fog light upgrade LEXUS: MORIMOTO XB LED
Or - TOYOTA (OVAL): MORIMOTO XB LED
THESE ARE THE SAME PART
YES THEY FIT!!!!
 (With small modification to the bumper housing and the fog lights themselves-see bottom of the page for pics)
However, after trying to install the H7: MORIMOTO 2STROKE in the high beam side of the housing on the D2 the idea was scratched due to the size of the heat sink hitting the headlight housing and they were returned as I did not want to cut into the housing and risk future moisture problems.
-------------------------------------------------------------------
So lets get back to the projector retrofit.
The headlights were removed and taken apart.
See this well documented link on how to do this HOW TO REMOVE HEADLIGHTS
And it is a perfect time to remove the amber reflective piece I must say taking the D2 headlight apart is 1000x easier than the B6 (what a nightmare that was)!!!!! but I did get to score a set of brand new halogen housings for my B6 and swapping in mint glass into my Ecodes!!!! ok Im digressing again.
Remove the clips first once of the car
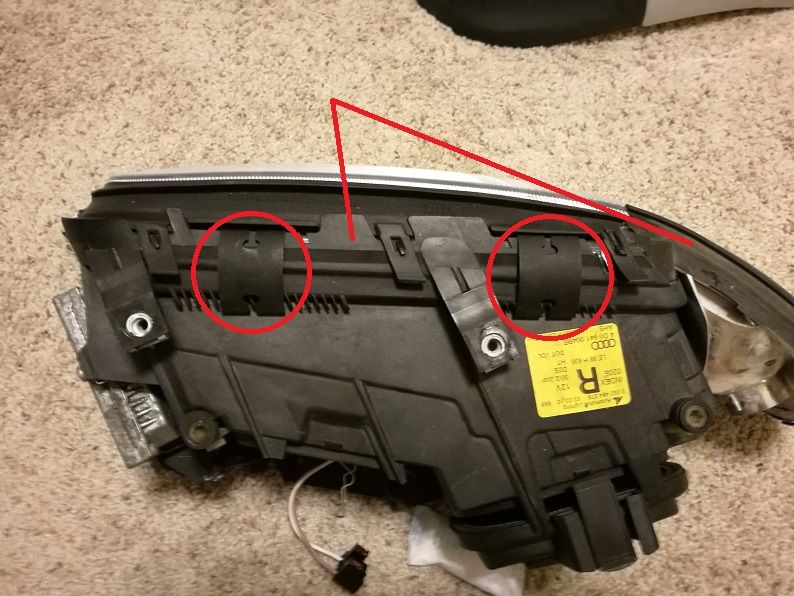
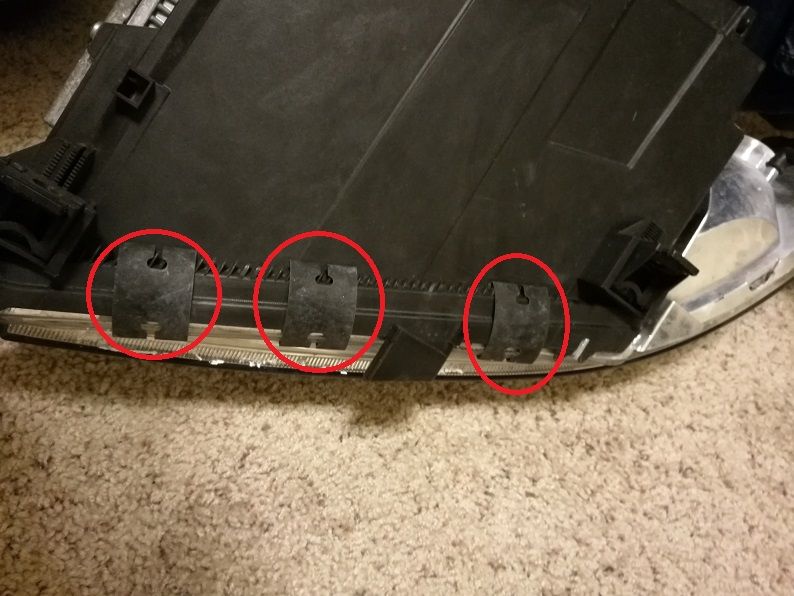
and pull apart - no butyl glue keeping it together
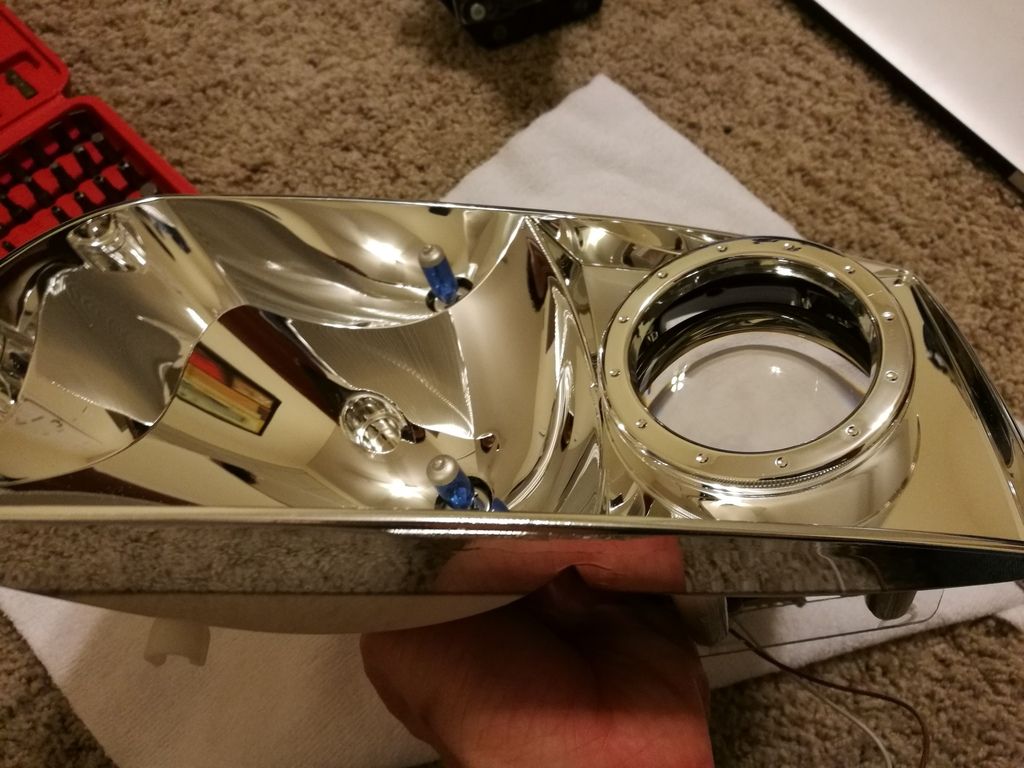
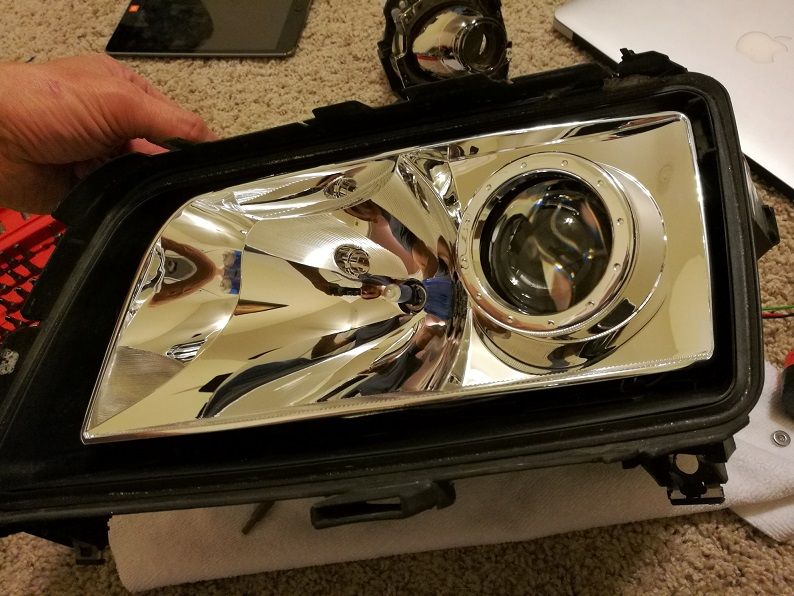
Once the glass section is off the main section of the housing (after removing the 8 metal clips), you should be left with this.

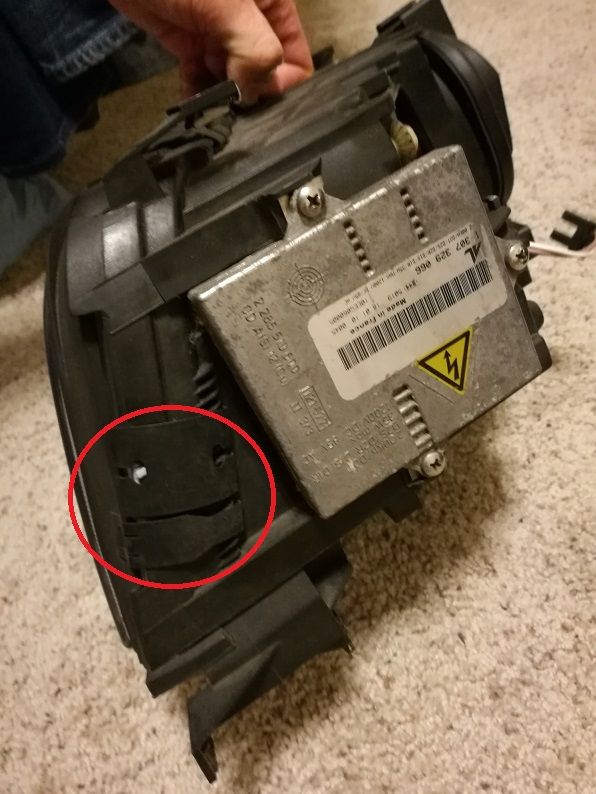
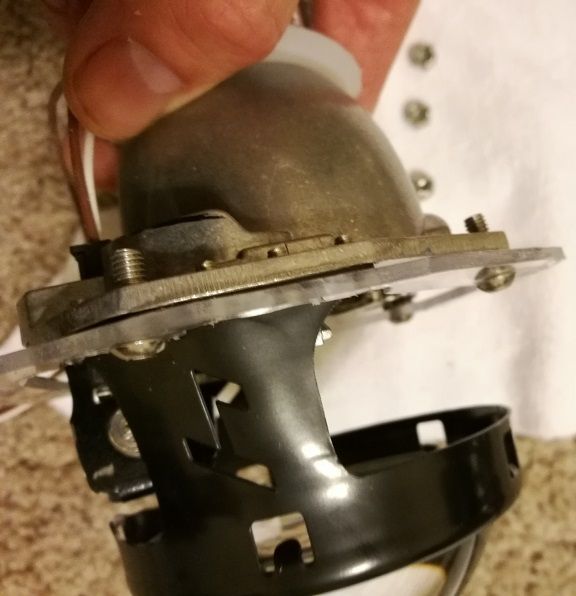
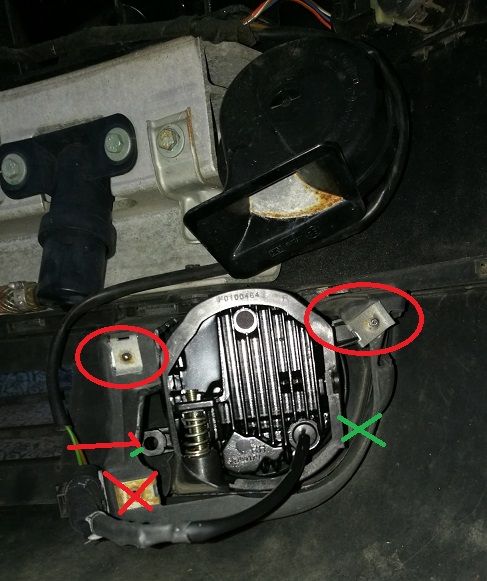
Now remove the rear covers and disconnect the D2S igniter connector from the HID bulb.
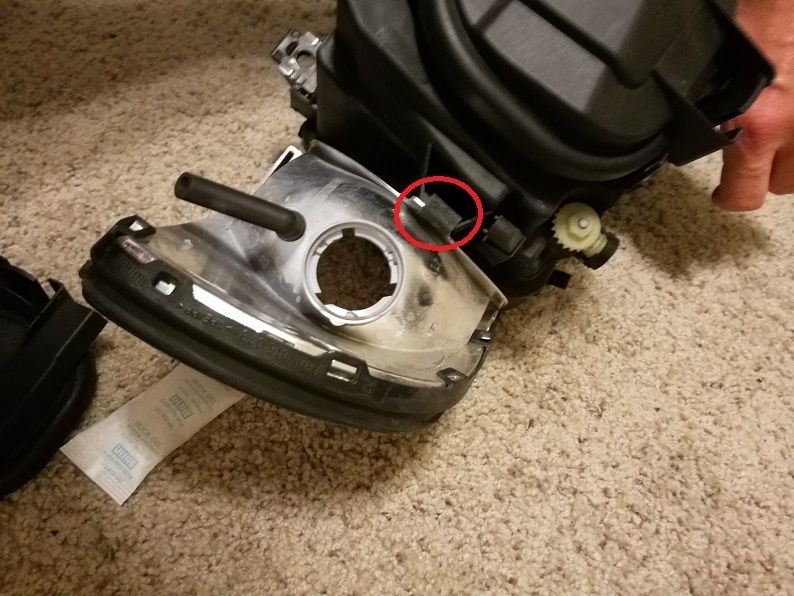
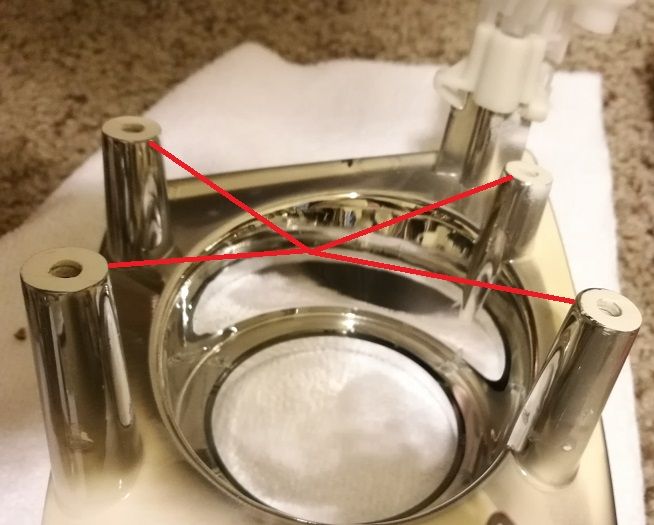
Turn both of the headlight adjustment control dials (see above pic) clockwise until the pin bolt completely unscrews from the white plastic track holders and carefully unclip the plastic clip from the automatic adjustment motor. (MAKE SURE YOU DONT BRAKE THOSE!!!)
Now you should be able to pull forward the reflector section. (I WOULD WEAR CLEAN GLOVES OR AT LEAST TAKE GREAT CARE NOT TO TOUCH THE REFLECTIVE SECTION OF THE HEADLIGHT WHEN YOU HANDLE IT FROM HERE ON OUT from the rear surface- THE D2 REFLECTIVE SURFACE IS SO MUCH NICER THAN THE B6 AND MORE DURABLE. I WAS ABLE TO USE A VERY CLEAN AND SOFT CLOTH TO WIPE OF ANY DUST OR FINGER PRINTS FROM IT NO SUCH LUCK ON THE B6 --- they just dont make them like they used to I guess).
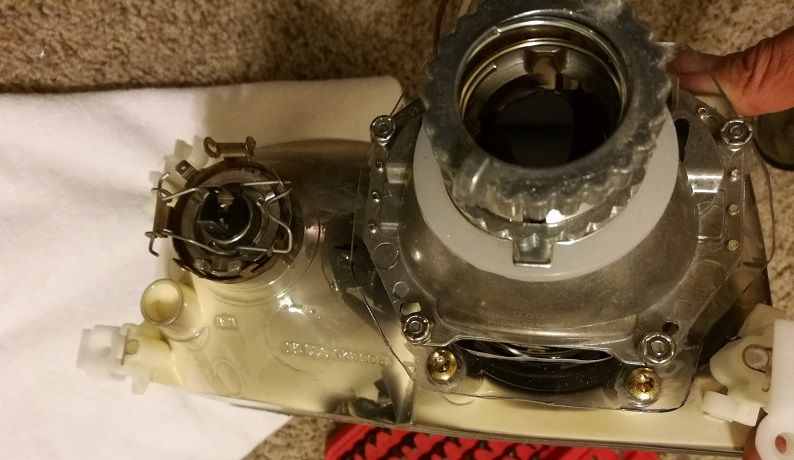
So now you will be left with this...
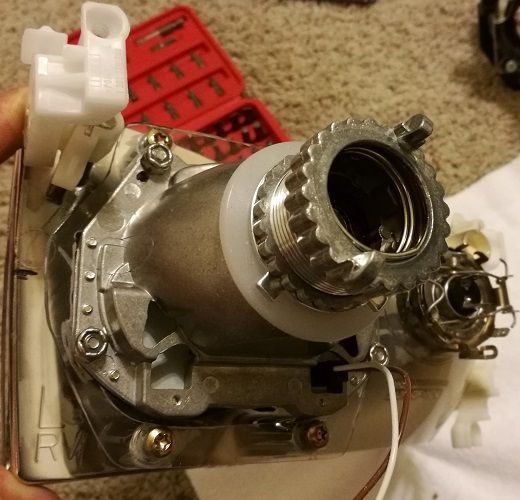
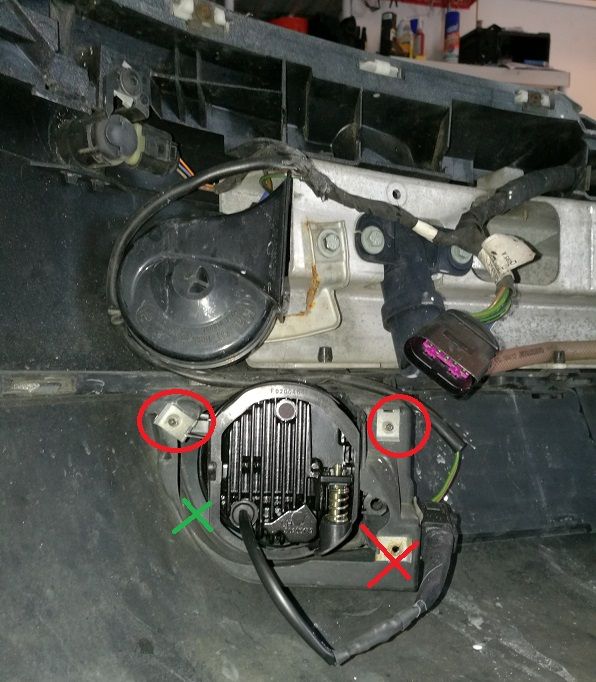
From the rear remove the 4 torx crews and remove the OEM reflector with the mount.
Next cut off the section (the little section that is indented-2-3mm) of the rear attachments from all 4 corners that the projector mount bolted to - This step is not necessary but it will bring the projector more forward this will probably be the most that one can shave off as the projector otherwise will hit the internal aspect of the housing and deflect- but you decide.
Pre-cut

Post-cut
Now it is time to make the jig for the new brackets that will mount to the projector and the housing.
Something like those Example of the A4 brackets
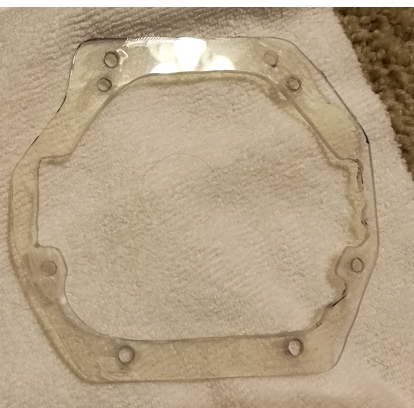
For this project I reused partially the template from the B6 project I did earlier this year to trace out the brackets to be used on the D2 only difference of course are the 4 holes that will mount the bracket to the back of the D2 reflective housing. For the final material I used Lexan Polycarbonate Sheet (from Home Depot) to cut the brackets out of.
Here is the final result.
This can be used on both sides just flip 180 on the vertical axis for mirror image for the other housing
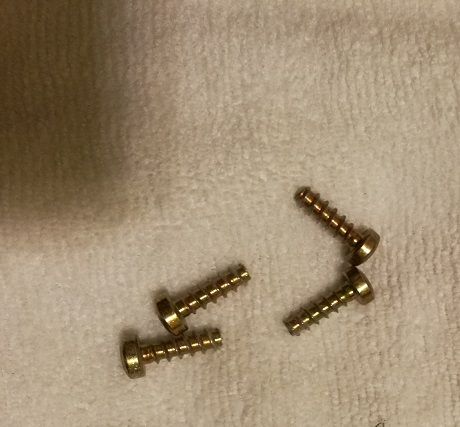
Mount them with new stainless steel bolts and self locking nuts,

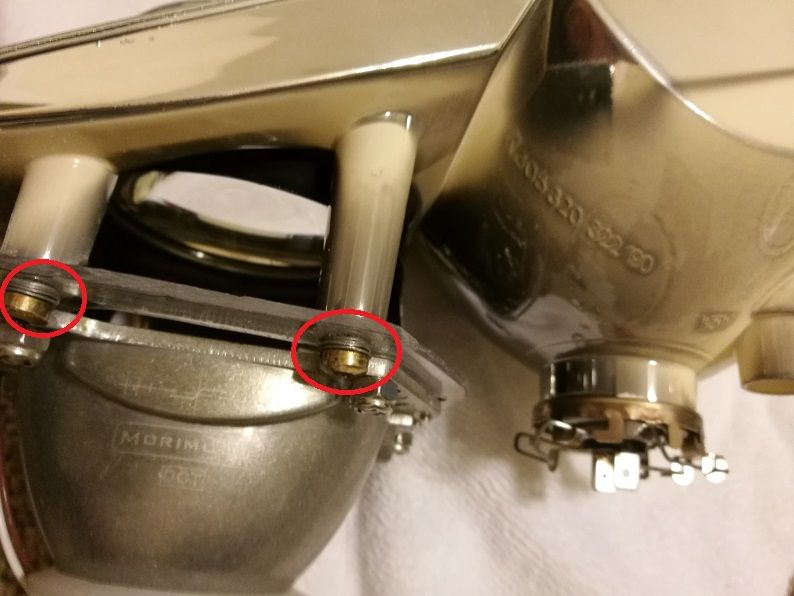
If you look at the front of the projector --it is not even because of the black bracket holding the lens...so use one washer per side on top to offset for the thickness of the bracket
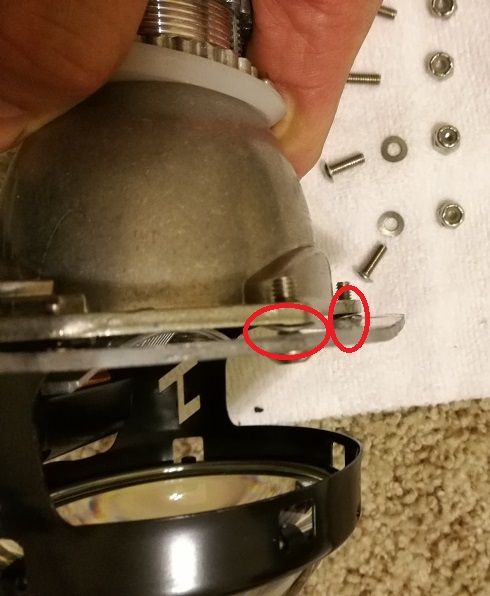
vs the bottom - no washer
-------
and then bolt that to the back of the chrome housing with the same 4 torx OEM bolts but use 3-4 washers to offset the depth if you like me decided to shave off the attachments.

You can see there is still a small gap even after shaving off those 3 mm from the back...but even the OEM projector is not flush with the housing. This will affect the width range of the beam

One solution is to use an 3 aftermarket shroud
SHROUDS
One needs to cut off about 1 cm of the OEM shroud and glue one one the ones from the link above
This will expose more of the projector glass and give you a wider beam of light and customize the look of your headlights as you can also add switchback LEDs or halos as part of the shroud around the projector.
At this time double check to make sure the projector is mounted upright and the cut off line is straight/leveled left to right.
Now it is time to reinstall everything back.
When you are putting the chrome bowl back in the main housing attach the plastic attachment to the motor first then align the top white plastic attachments with the tracks. It was probably the biggest pain of the project for me.
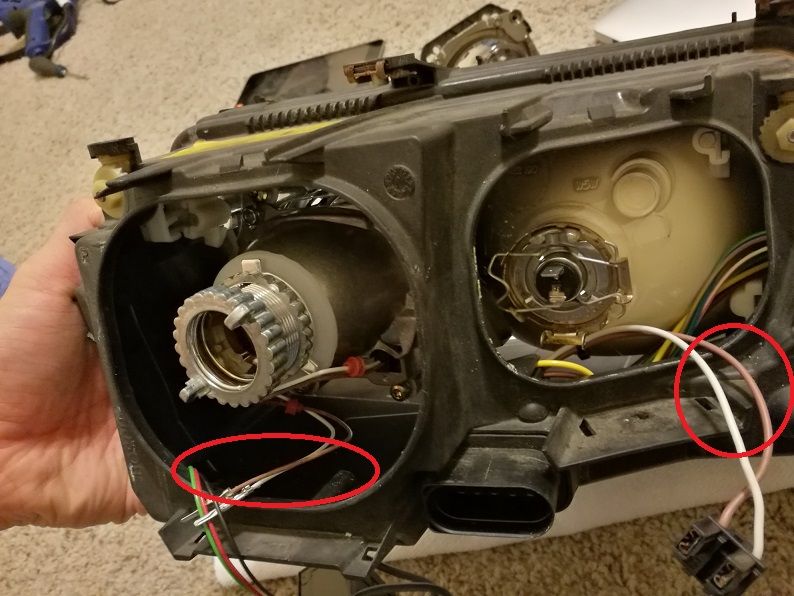
Now connect the power from the bi-xenon flap that activates when high beam is turned on to the wires that attach to the H7 bulb in the high beam section (sorry forgot to take a picture of the final...but brown goes to brown and the white/(other color) together. - you can solder them or use taps
Reinstall the rear covers and the lens with the rubber strips and 8 clips
Align your headlights- you can follow one of these DIY but you need a VAG cable
http://www.audizine.com/forum/showth...non-Headlights
https://www.audiworld.com/forums/q5-...tment-2774016/
This is what they look like presently with the OEM ballasts and bulbs...will be putting 5000K bulbs I have left over from another project to match better the LED fogs and parking lights that I installed with resistors to avoid the hyper blink
FINAL RESULT - sorry for the poor cell phone pics
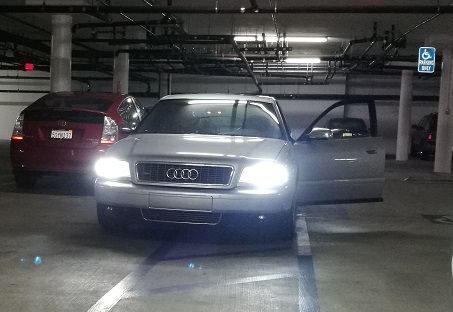
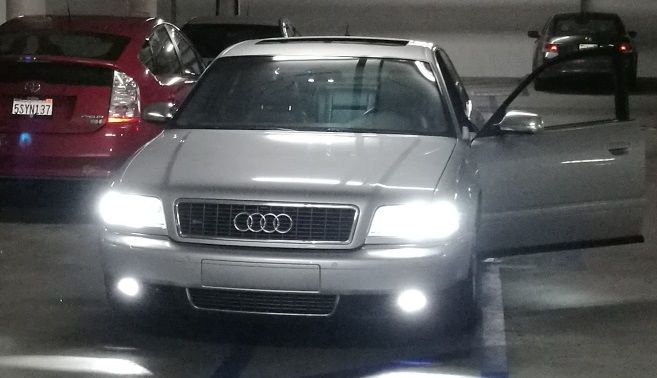
Did not do the best job on getting the passenger side parallel..might have to redo the bracket on that side


 Reply With Quote


Bookmarks