


After a ton of research and endless forum post reading, I recently performed this subwoofer upgrade. I went a slightly different route component-wise, but I'm pretty happy with the end result, which caters to my personal preferences with regard to the music I like to listen to. I tried to take as many pics of relevant/noteworthy items unique to this installation, and I'm happy to answer any questions! I'll try to avoid rambling, so here's the gear I used:
-Pioneer GM-D7500M Mono amp
-Planet Audio 2 Farad capacitor
-Audio Control LC2i line output converter (with optional ACR1 remote level control)
-Kicker 40CWD104 Comp D 10" sub
Items of interest:
-The 2 farad cap is admittedly huge overkill.....but at $28 I thought it might help to spare the car's electrical system when the stereo is cranked. Plus the digital voltage display is cool to look at:
https://www.audiworld.com/forums/att...e-img_0537.jpg
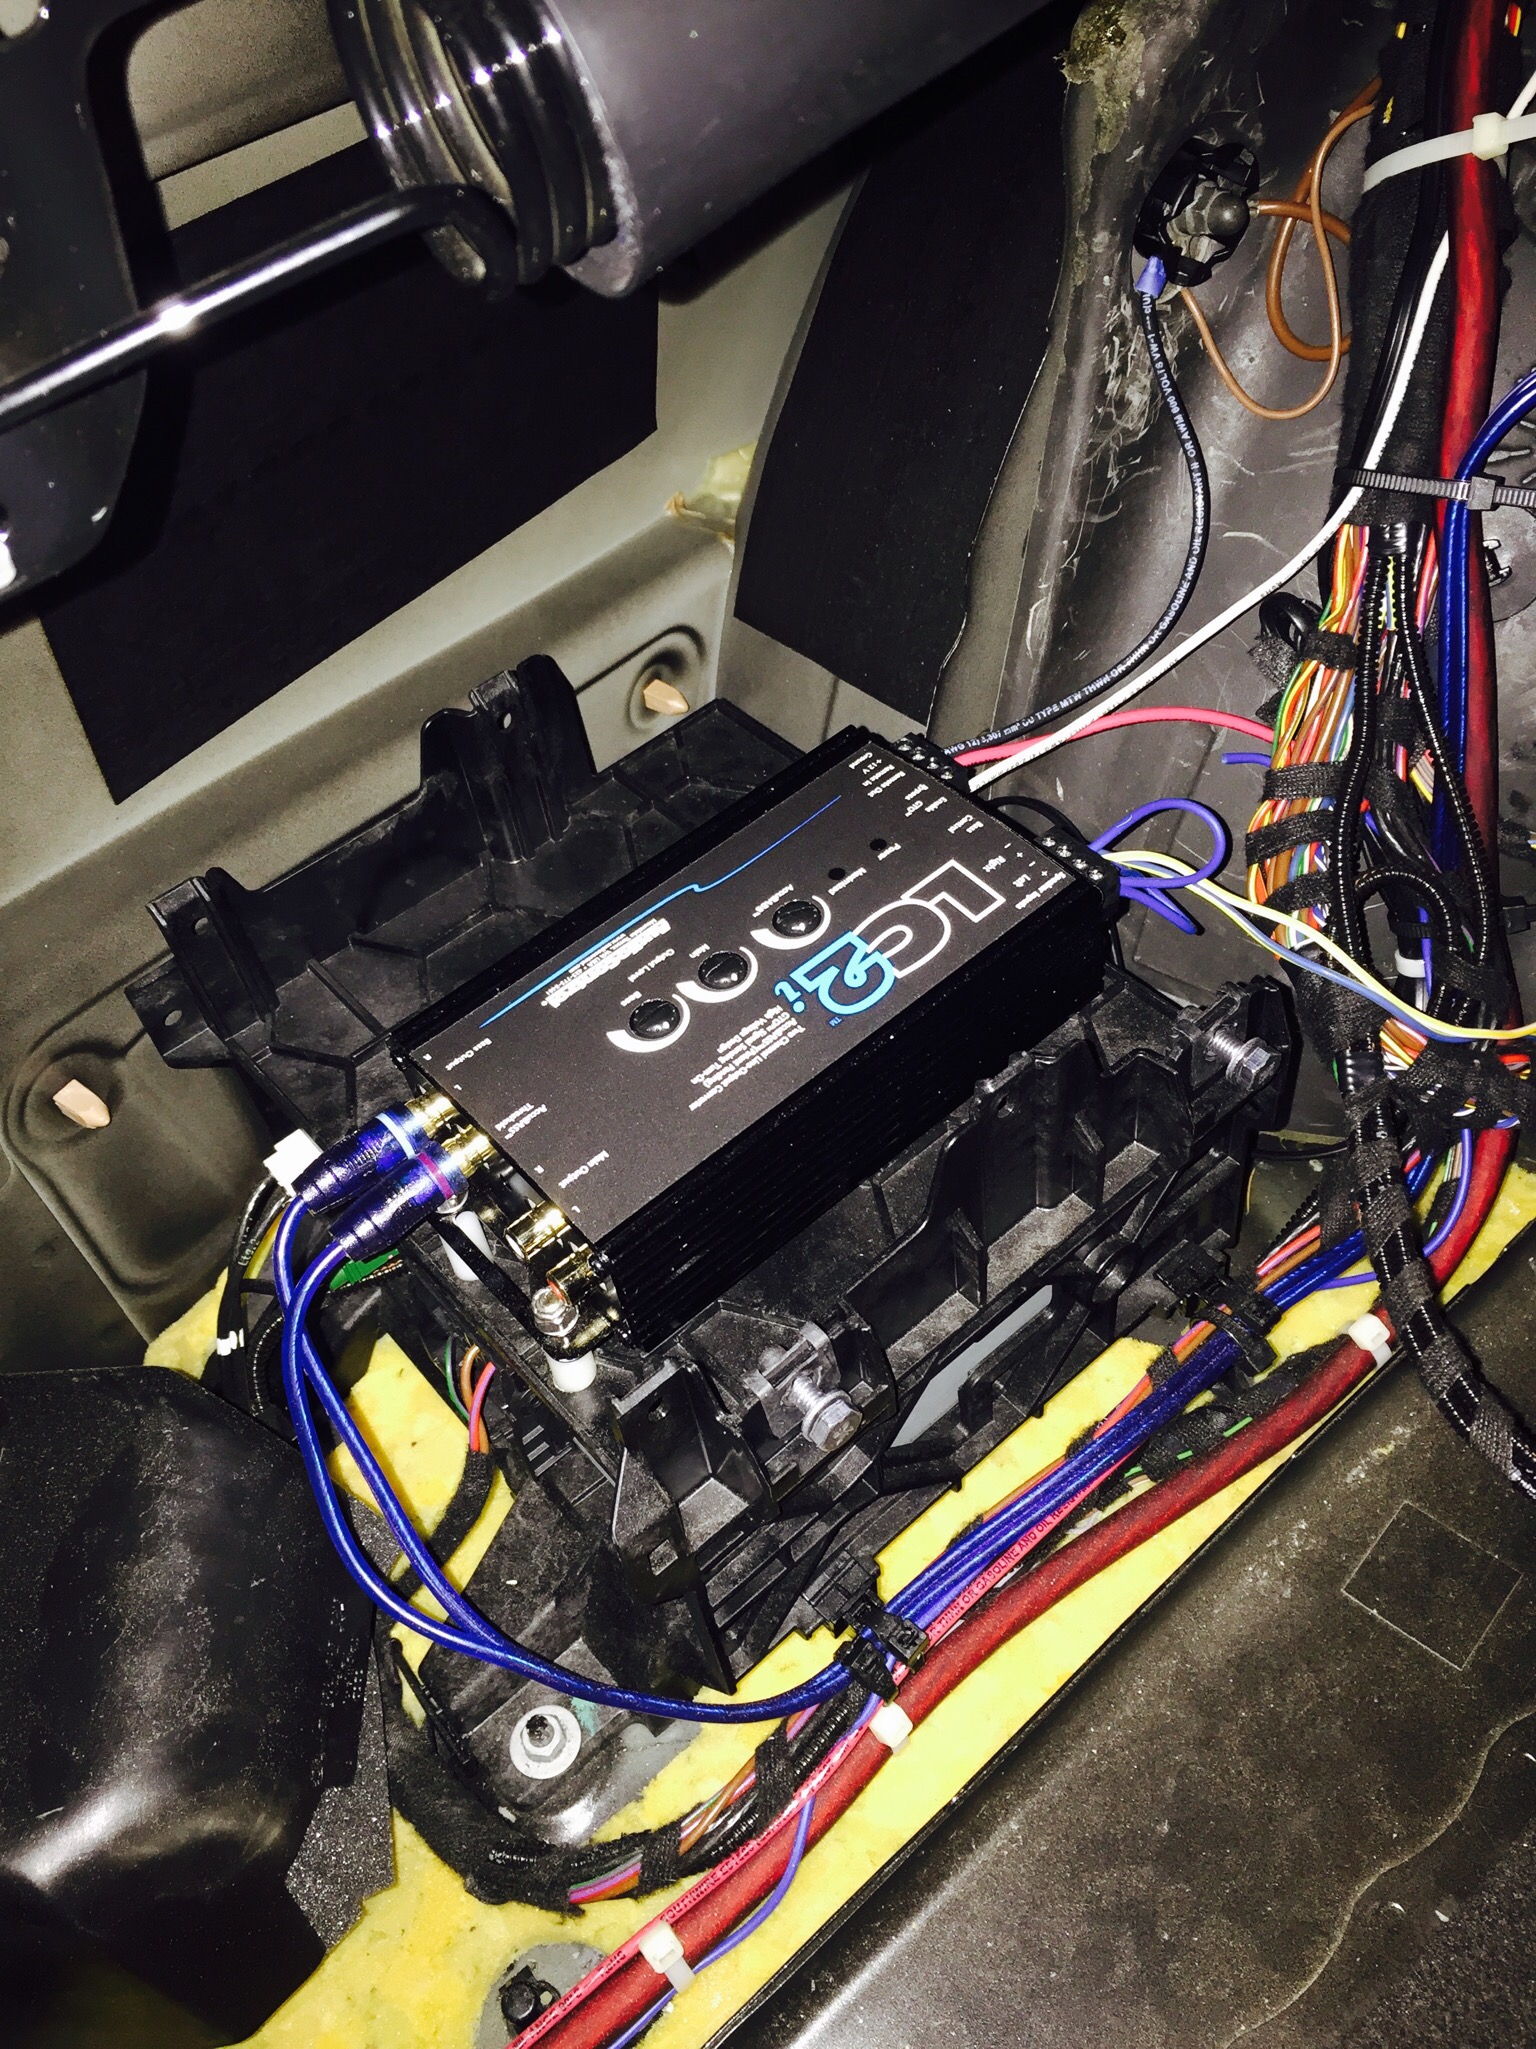
-I used the LC2i based on the overwhelmingly good reviews and features, especially the "GTO-Great Turn On" feature, which powers up the unit (and therefore the amp) when it senses an audio signal from the stereo. In theory this means I wouldn't need to find a +12vdc switched power wire since the unit should wake up the second the car is started. Well, it didn't work out that way. For whatever reason, that feature didn't work and I had to track down a switched +12vdc wire after all and run it to the LOC. I found some switched power at the fuse panel in the right (passenger) side of the trunk. Also, you might wonder why I used 1" spacers when mounting the LOC to the middle equipment rack in the left side of the trunk. It was done with cooling in mind. I wasn't sure how hot the LOC would get and I didn't want to melt the plastic tray:
https://www.audiworld.com/forums/att...e-img_0552.jpg
https://www.audiworld.com/forums/att...e-img_0553.jpg
https://www.audiworld.com/forums/att...e-img_0109.jpg
https://www.audiworld.com/forums/att...e-img_0579.jpg
-I made my own ground studs for the big 4AWG amp/capacitor cables. This meant I could keep the ground cable run short and had grounds dedicated to the amp to ensure there wouldn't be any interference. I wanted to avoid drilling holes in the car but made an exception for these studs:
https://www.audiworld.com/forums/att...e-img_0568.jpg
https://www.audiworld.com/forums/att...e-img_0571.jpg
In the end I'm pretty satisfied with how it turned out. Though not pictured, I bought a roll of 80 mil sound deadening matting which worked great in reducing rattles.....I found a 10-square foot roll for $21 on Amazon....much cheaper than Dynamat but did the job.
https://www.audiworld.com/forums/att...e-img_0532.jpg
https://www.audiworld.com/forums/att...e-img_0569.jpg
https://www.audiworld.com/forums/att...e-img_0574.jpg
More miscellaneous pics... the first one isn't great but shows where I mounted the remote sub level control knob which connects to the LC2i. The cable for that was the longest run I had to make for the entire project...
https://www.audiworld.com/forums/att...e-img_0744.jpg
https://www.audiworld.com/forums/att...e-img_0570.jpg
https://www.audiworld.com/forums/att...e-img_0538.jpg
https://www.audiworld.com/forums/att...e-img_0101.jpg

 Reply With Quote


Bookmarks