Audizine - An Automotive Enthusiast Community

Results 1 to 29 of 29
  1. #1
    Veteran Member Three Rings S4_SH1640's Avatar
    Join Date
    Mar 15 2012
    AZ Member #
    90014
    Location
    Fairfield County, CT

    Audi A4 B8 Axle Boot Replacement DIY

    Guest-only advertisement. Register or Log In now!
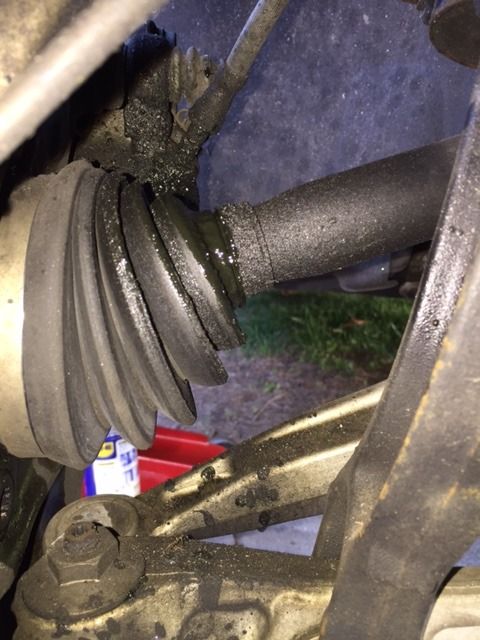
    So i noticed that my front passenger side axle boot is on its way out. I searched different websites to buy the boot kit, or the whole axle because i want to stay somewhat with oem quality parts.

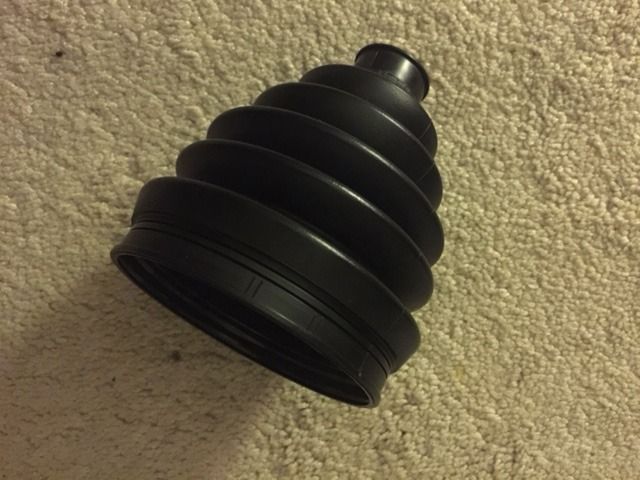
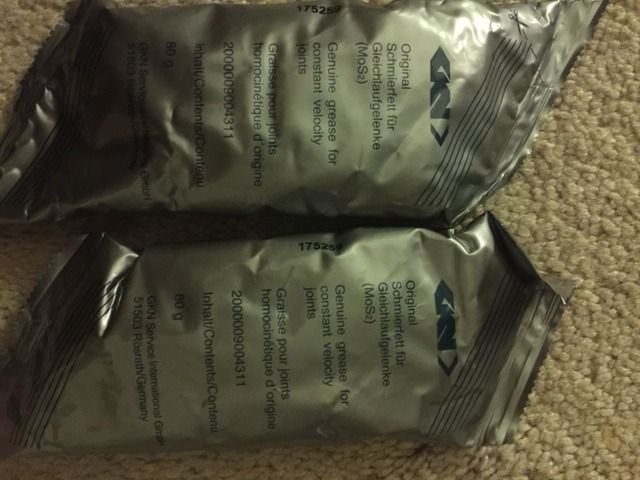
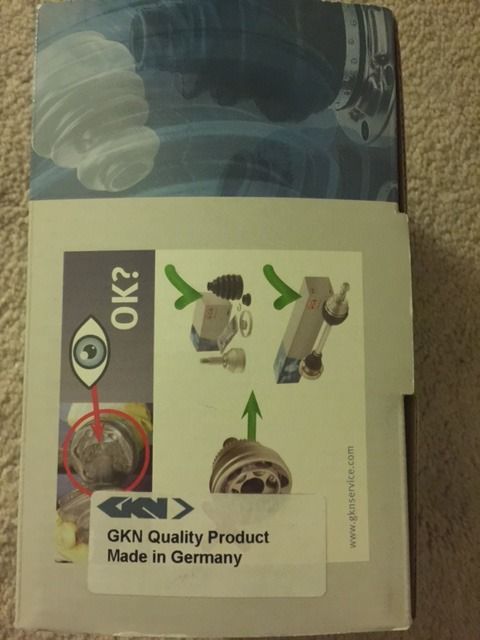
    I ended up going a different route and buying the boot kit from europaparts, they havent let me down yet. I ordered this GKN Quality Product that says "Made in Germany" and looking at the parts, everything looks good to me except the boot itself.

    The boot its made of PLASTIC, and not rubber. I have never seen this part made of plastic. I dont have much experience in the B8 axle so can anyone in their professional experience suggest me how to go about this?

    Im just hesitant to use this plastic boot, i cant imagine it would last long.


    Also looking for a DIY anywhere...
    Cant find one for the b8.

    This is probably pretty close:
    http://forums.vwvortex.com/showthread.php?3665476
    Garage:
    B5 S4 Santorin Blue Stage 2
    B8 A4 Premium Plus
    D4 S8 4.0T

  2. #2
    Veteran Member Three Rings S4_SH1640's Avatar
    Join Date
    Mar 15 2012
    AZ Member #
    90014
    Location
    Fairfield County, CT

    I replaced my CV boot this past weekend and i really could not find a DIY for the B8 A4, so i wanted to make one and share for whoever needs to do theirs.

    Note* I am not a mechanic and I will hold no responsibility for your actions, complete this job at your own risk. This is a DIY how "I" did it, therefore i am not responsible for your damage to the car or injury to anyone.

    Other than that This job is pretty straight forward, Its probably a couple of hours of work. It took me a little bit longer because I didnt have the tools and because it was my first time (for the b8) and stopping to take photos and stuff.

    I took as many photos as i could, and i recommend you do the same. It will help you put it back together.

    Grab yourself a good CV Boot Pliers, or else you will waste your time like i did with this crap, cheap, pliers.
    Get alot of paper towels or old towels.
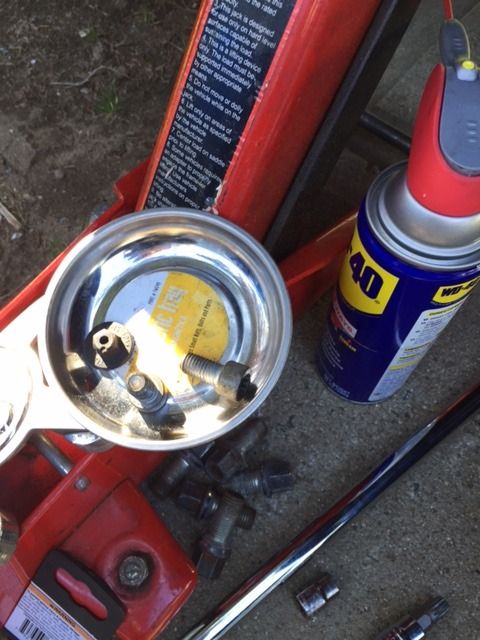
    WD-40 is a must and maybe a couple of cans of brake parts cleaner.
    Other tools show in photos below.


    So start off by Jacking up your car, Once you have properly and safely done that, then remove the wheel. (No steps for this part, if you cant get to this point without a DIY then stop right there and go to your mechanic.)


    Tip: Spray all the nuts, bolts and screws with WD40, dont be cheap with it. This thing works great, I love the product. Meanwhile, get up and get some paper towels, brake parts cleaner and a beer.


    Remove that cover, with two 10mm
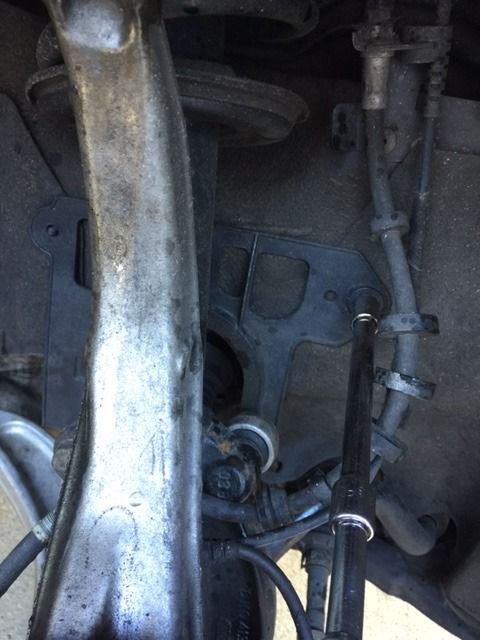


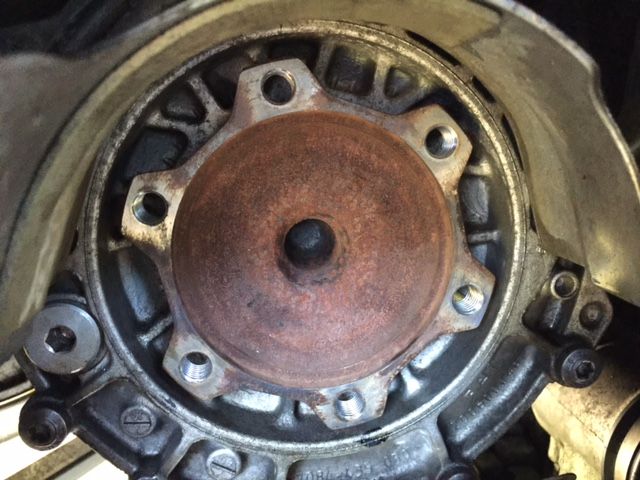
    Just loosen the axle nut, I didnt remove it completely just yet.


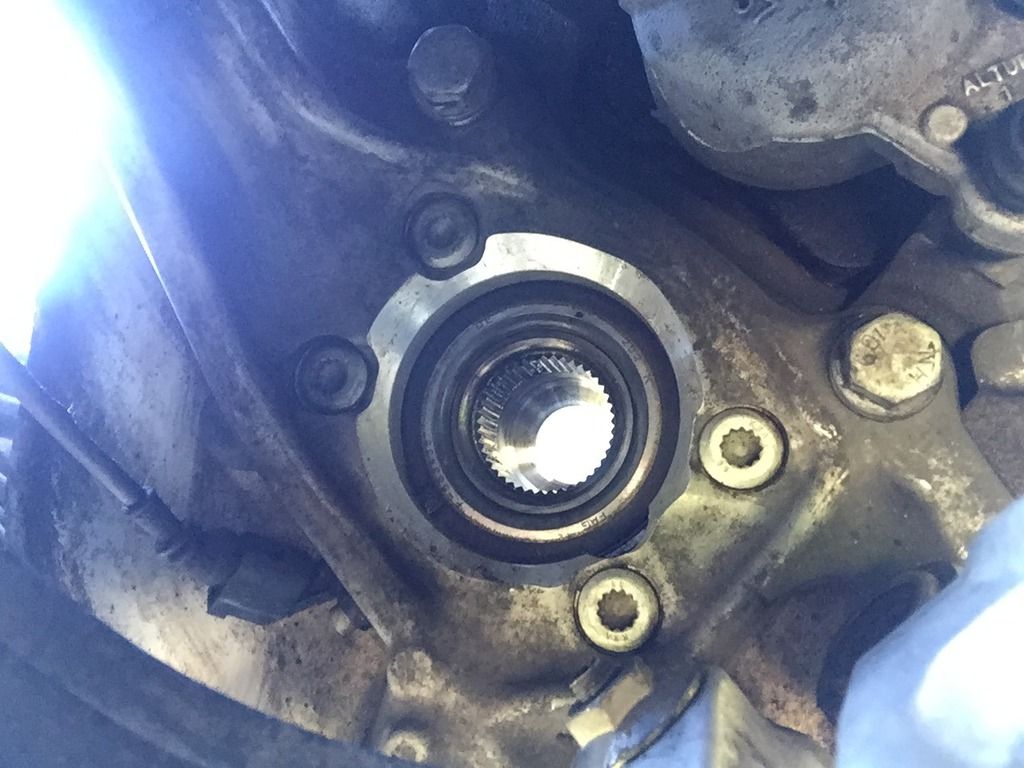
    Remove all the inner axle screws


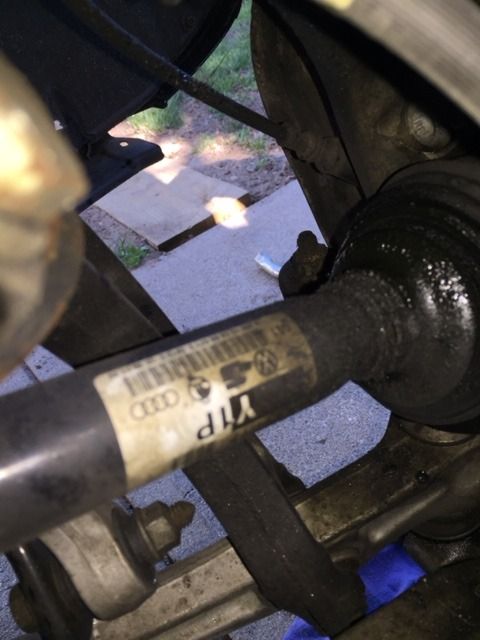
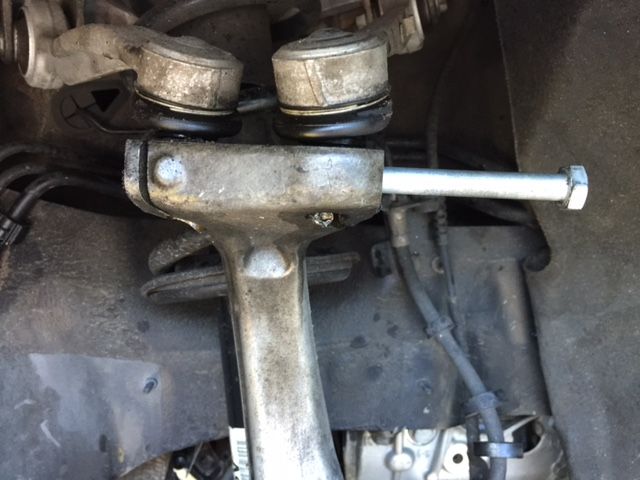
    Remove this long bolt that holds the upper control arms. Once that was out, and the axle nut, The axle came out so easy, I was surprised. It didnt fight me like my B5 does.
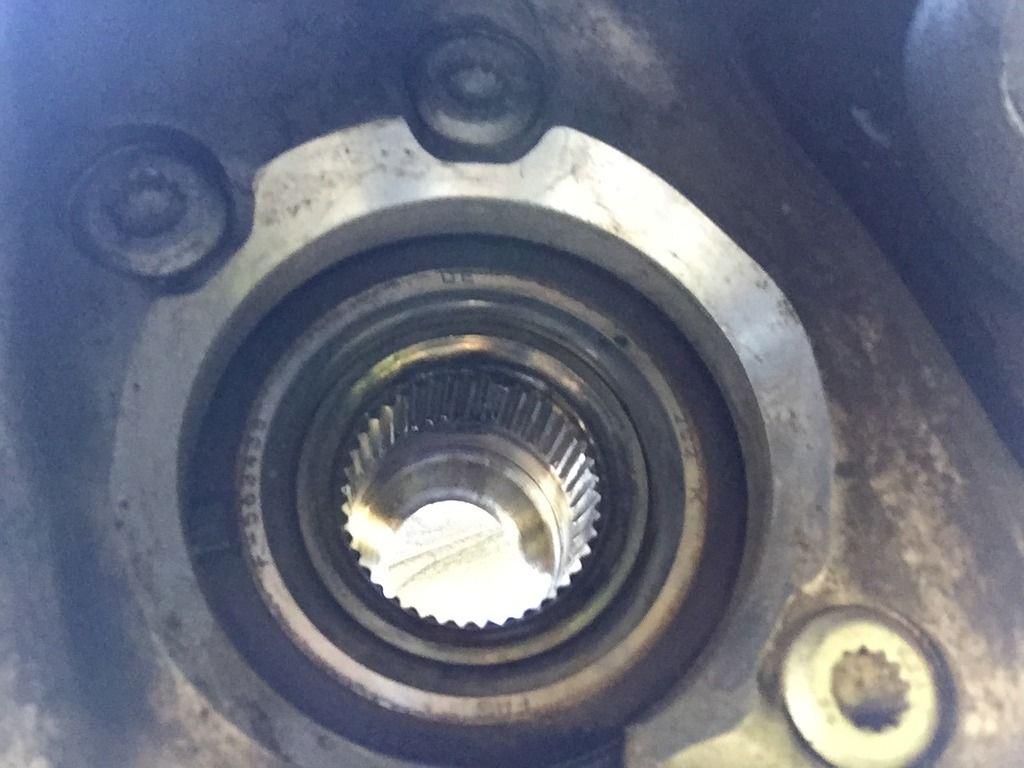


    Now get with the cleaning a little bit. Make it as clean as possible. Clean all the grease around the electrical connections. Including the abs sensor area where it meets the hub.
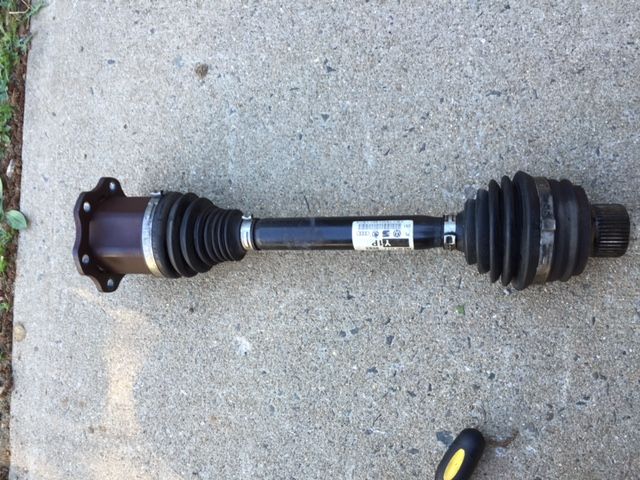


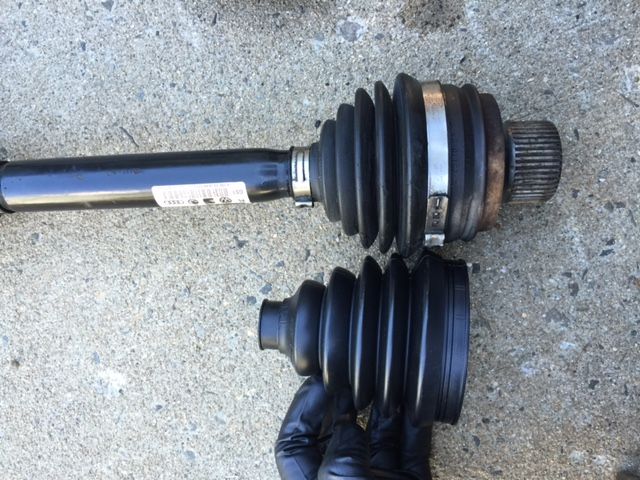
    The boot gave me a scare for a second because it looked much bigger than the old one, but it was the correct one. Thanks to Europaparts.

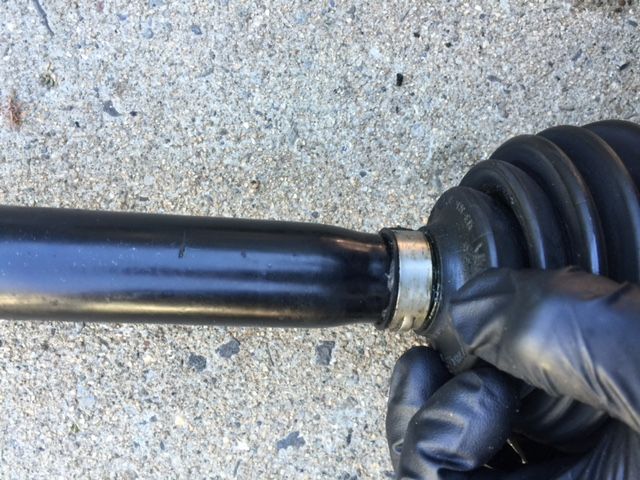
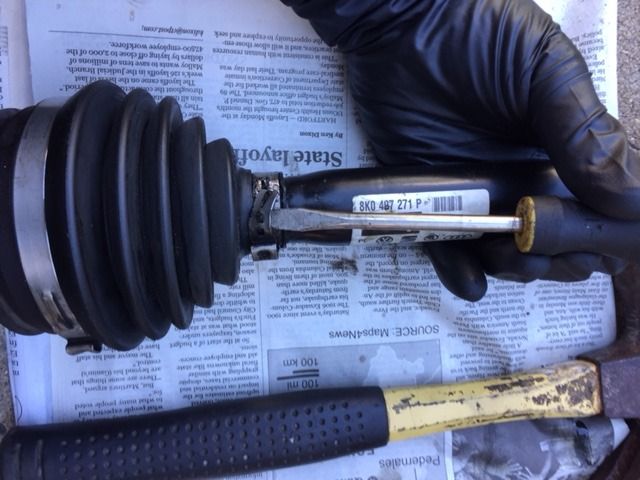


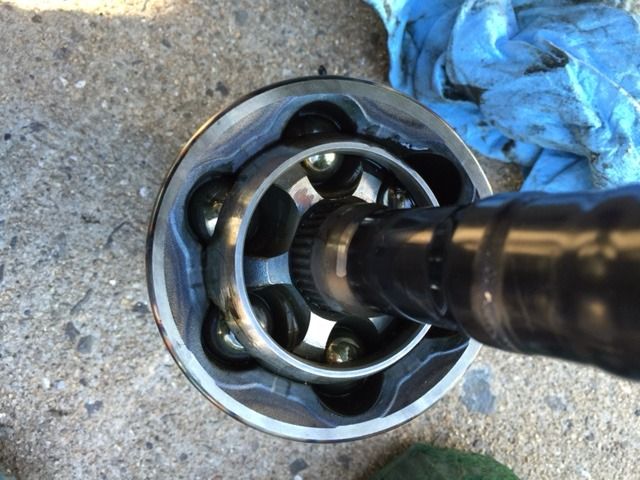
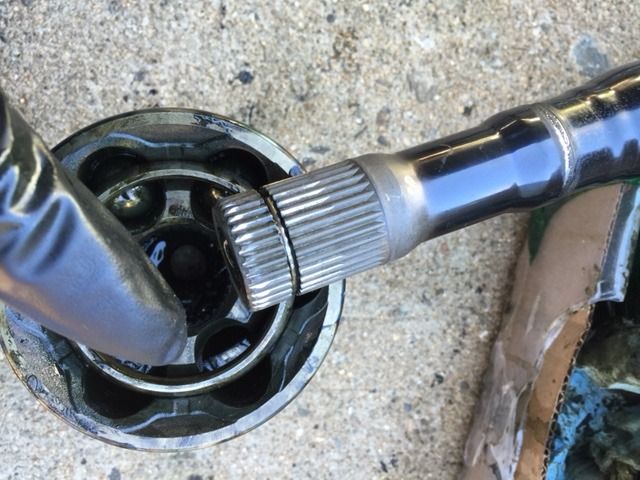


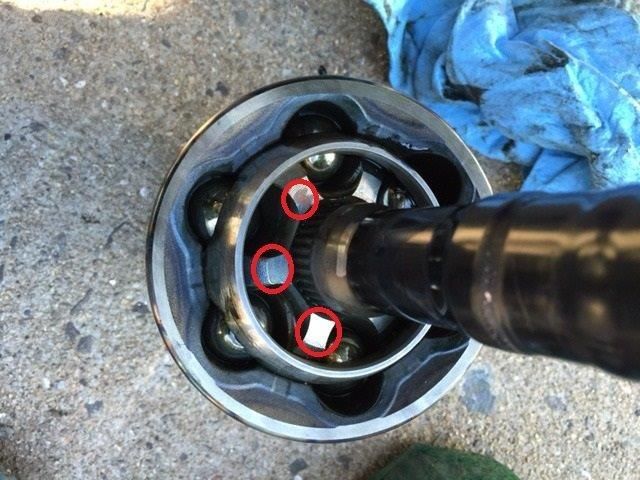
    You have to hit the axle where my finger is pointing so you can remove it from that round clip. Use your bigger hammer that you have, try it with less force and then keep trying until its out with more force.
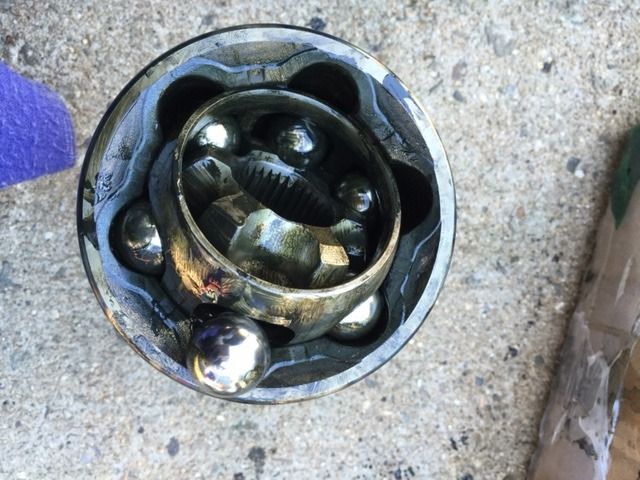


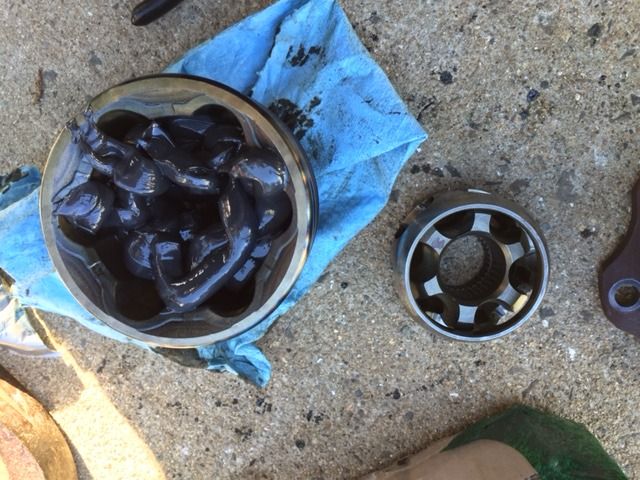
    You really dont have to remove all the balls and take everything out, But i did because maybe water or dirt got in there, so i wanted to do this right. (But just note that this is time consuming in trying to put it back together. A little PITA)


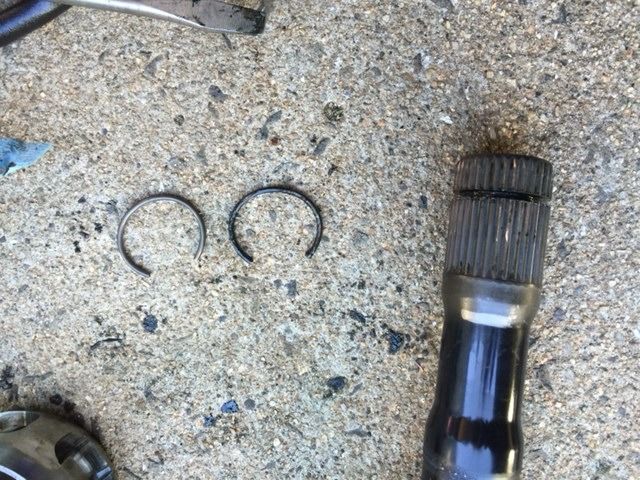
    Install new Clip


    The CV Boot Pliers sucked, This was the most frustrating part of this job. The local store didnt have a better one.
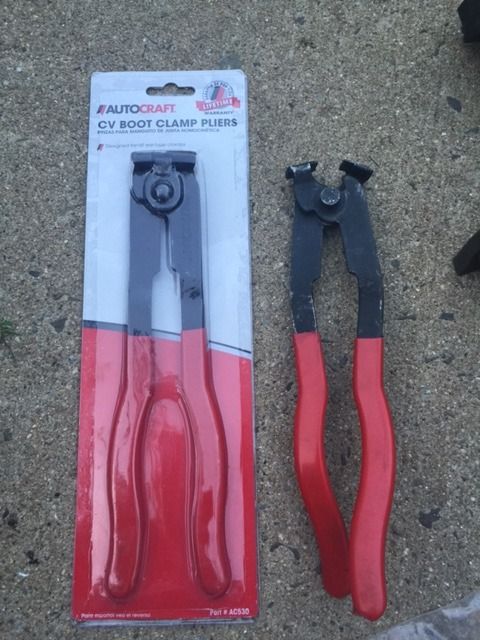


    The installation is the same as taking it out. Take your time with this, make sure everything is tight and installed correctly.

    At the end, the this job wasnt too bad. Only the clamps didnt do their job completely because of my cheap Boot Clamp Pliers. Its important that you get a good tight seal there or else you will do this job again in about 6 months.

    Take it around the block to make sure everything is good before you go full speed with it on main roads.

    Good luck! Hope this helps!!
    Garage:
    B5 S4 Santorin Blue Stage 2
    B8 A4 Premium Plus
    D4 S8 4.0T

  3. #3
    Veteran Member Three Rings S4_SH1640's Avatar
    Join Date
    Mar 15 2012
    AZ Member #
    90014
    Location
    Fairfield County, CT

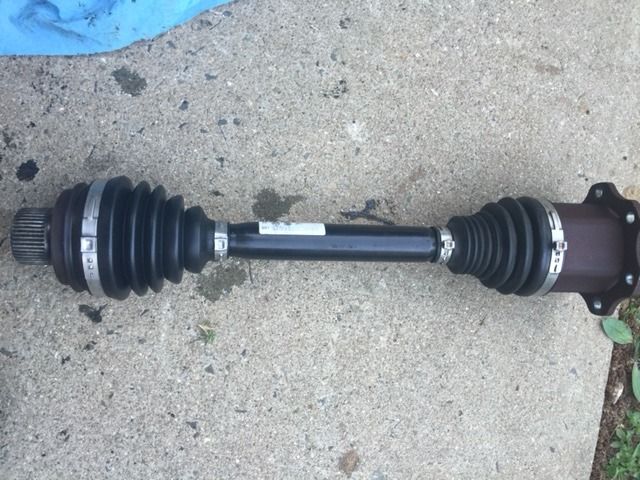
    And just to confirm with everyone, the boot on there was plastic. Why they switched form rubber to plastic i dont know but i guess they find it as better quality.

    Here is the finished axle.

    Garage:
    B5 S4 Santorin Blue Stage 2
    B8 A4 Premium Plus
    D4 S8 4.0T

  4. #4
    Veteran Member Four Rings jfo's Avatar
    Join Date
    Nov 17 2010
    AZ Member #
    67149
    Location
    Courtenay, BC, Canada

    Thanks for the well done DIY. Two questions...
    1. Did you separate the ball joints from the control arm or was it enough just to remove the bolt?
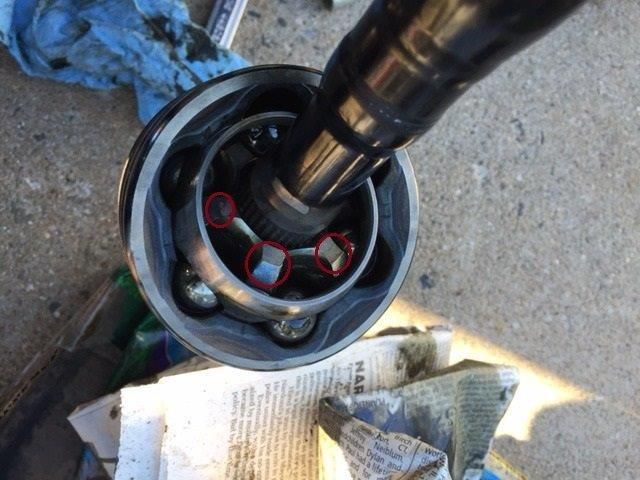
    2.Can you elaborate on where you had to tap the axle in order to release the circlip.
    2011 A4 Avant

  5. #5
    Veteran Member Three Rings S4_SH1640's Avatar
    Join Date
    Mar 15 2012
    AZ Member #
    90014
    Location
    Fairfield County, CT

    Quote Originally Posted by jfo View Post
    Thanks for the well done DIY. Two questions...
    1. Did you separate the ball joints from the control arm or was it enough just to remove the bolt?
    2.Can you elaborate on where you had to tap the axle in order to release the circlip.
    Thanks.
    1. Yes, the upper control arms need to be separated from the upright once you remove that long bolt.
    2. See photos. You have to hit it on the edges of that inner piece, are i circled in red. The circlip will eventually let go with a little bit of force.

    *****It is important when you put it back that circlip goes back to where it belongs, (so measure it or mark it so know for sure how much the end joint needs to be in the shaft). Or else the shaft will come loose when you drive down the road and make a turn.


    Garage:
    B5 S4 Santorin Blue Stage 2
    B8 A4 Premium Plus
    D4 S8 4.0T

  6. #6
    Active Member One Ring
    Join Date
    Jan 11 2015
    AZ Member #
    308855
    Location
    Laguna Niguel, CA

    Nice write up. To save some time and labor, it's not necessary to remove the control arm bolt - just turn the steering wheel full left/right depending on which axle you're working on and you can get it out/in with a little finesse. The passenger side is a little trickier with the heat shield in place but with a wobble extension it's not necessary to remove either.

  7. #7
    Veteran Member Three Rings
    Join Date
    Aug 30 2018
    AZ Member #
    425714
    Location
    USA

    I’ve used GKN on my old MB I just sold and they had 60k on the boots with no issues.

    It should be noted be extremely careful disassembling axle shafts. If you don’t put the ball bearings back in the exact place they come out of you can risk having vibrations and issues. Happens a lot on Subaru’s I have the same problem on my E350 - suddenly got a vibration right after doing the boot and a search confirmed others had similar issue...

  8. #8
    Veteran Member Three Rings
    Join Date
    Sep 03 2014
    AZ Member #
    279997
    My Garage
    2014 Audi Q7 Premium Plus, 2014 Audi A4 2.0T Quattro S-Line
    Location
    Ellicott City, MD

    I haven't replaced a boot on my B8.5 A4 yet, but I've done quite a few B5 Passats. There are a few things that will help with the task at hand that I'd like to share.

    1. Wear old clothes. The CV joint grease will stain whatever you are wearing and it gets all over everything. It's tenacious as hell and just won't come out.

    2. Get a brass drift for removing the star wheel from the axle shaft. Get a short-handled sledge weighing about three pounds or more. Secure the axle in a vice (I use a Black & Decker Workmate) with the CV joint pointing away from you. Place the drift at one of the points on the star wheel as shown in the photos while holding it as parallel to the axle as you can and give it a good hard whack with the sledge. The brass drift prevents any damage to the star wheel or the axle as it is a softer metal. One or two good whacks and the joint should pop right off. I would place a box in front of the CV joint on the ground and maybe put some old rags or a towel to cushion the fall when the joint pops off. Never try to use a regular hammer to remove the joint. You'll be beating the hell out of it all day and never get anywhere. You need to apply enough force to pop the star wheel off the circlip that retains the joint on the axle. It's designed to prevent the joint from slipping off the axle so it needs a lot of persuasion to get it off.

    3. Get several cans of brake cleaner and put down lots of newspapers. Just keep spraying the parts to get rid of all of the old grease and then wipe them off with clean rags or paper towels.

    4. Inspect the ball bearings and the inside of the ball cage and star wheel for any signs of wear. If it looks worn then you should replace the joint with a new one. If you need to use the car in the meantime then swap the joints between the two axles so the direction of rotation is opposite from before. That allows the bearings to ride on the portion of the joint that is not worn. A new CV joint should come with a new boot kit and grease packet so go ahead and use the boot you just bought to get you by until you have time to replace the joint.

    5. Don't waste your time or money buying remanufactured or aftermarket axles. Just replace the joints and/or boots yourself.

  9. #9
    Registered Member One Ring
    Join Date
    May 20 2019
    AZ Member #
    484856
    Location
    Pomona, CA

    I found this shop that sells complete new axles
    https://www.raxles.com/ordering.aspx

  10. #10
    Established Member Two Rings VAGguy's Avatar
    Join Date
    Apr 08 2008
    AZ Member #
    27446
    My Garage
    04 Passat Variant 1.8T Manual Swap
    Location
    Abingdon, MD

    Quote Originally Posted by Allroadman View Post
    I found this shop that sells complete new axles
    https://www.raxles.com/ordering.aspx
    Yes, highly regarded in the VW/Audi world. Always the go to recommendation on www.passatworld.com where I started my journey in the VAG family.

  11. #11
    Veteran Member Three Rings
    Join Date
    Sep 03 2014
    AZ Member #
    279997
    My Garage
    2014 Audi Q7 Premium Plus, 2014 Audi A4 2.0T Quattro S-Line
    Location
    Ellicott City, MD

    Quote Originally Posted by Allroadman View Post
    I found this shop that sells complete new axles
    https://www.raxles.com/ordering.aspx
    Those aren't new axles. Raxles only sells rebuilt axles. You will need a core replacement to send back or you will be charged extra. They will include a pre-paid shipping label to ship back the old axles. I've used axles from them before and they work fine, but eventually even they had to be replaced. I got to where I just replace the CV joint instead of the entire axle. Aside from the mess and a little extra work, it's much less expensive and you know that you'll have a brand new joint instead of one that may have only been inspected or reground. OTOH, if you must replace the entire axle then I would definitely go with one from Raxles over a cheap Chinese knock-off that most parts dealers sell.

  12. #12
    Veteran Member Three Rings
    Join Date
    Dec 03 2016
    AZ Member #
    387409
    Location
    nowhere

    Think you can just pull the cv out with the spindle turned full-lock. Unless they geometry doesn't allow it on the B8.
    HEAR
    APR stage 2

  13. #13
    Senior Member Three Rings
    Join Date
    Jan 05 2019
    AZ Member #
    439361
    Location
    Ft Collins, CO

    Bumping this thread as I'm about to do the same job. Can anyone confirm what size triple square I need for the axle bolts? I believe it's 10mm but I saw other write-ups referencing an 8mm...
    2014 allroad

  14. #14
    Senior Member Three Rings
    Join Date
    Jan 05 2019
    AZ Member #
    439361
    Location
    Ft Collins, CO

    Actually I just realized I'll likely need triple squares for additional work on the car later on. Buying a whole set is only marginally more expensive.
    2014 allroad

  15. #15
    Veteran Member Four Rings dalmation53's Avatar
    Join Date
    Aug 20 2013
    AZ Member #
    121389
    Location
    Miami

    Moderator should sticky the diy.
    Ivan

  16. #16
    Senior Member Three Rings
    Join Date
    Jan 05 2019
    AZ Member #
    439361
    Location
    Ft Collins, CO

    I got my triple squares in today, thanks to Amazon prime 1 day. My current roadblock is I'm having trouble locating the crimping tool locally. I should've bought one online last week, but I was hoping to find a loaner tool at an auto parts store since I don't anticipate using this again anytime soon.

    So far I've called Oreilly, Advanced, and Auto Zone and none of them had clamp crimpers as a loaner, and only Oreilly had some cheap crimper pliers to purchase. However those don't have the attachment to add a 1/2" breaker bar, which I'm considering necessary based on how strong the included clamps seem.
    2014 allroad

  17. #17
    Established Member Two Rings
    Join Date
    Apr 20 2019
    AZ Member #
    476140
    Location
    Coloarado

    If you are handy with a grinder and have a HF close you csn make a crimper. I took their 16" pinch cutter and made a tool out of it after I broke the $10 crimper and realized the plastic is tougher. Crimp was not ideal, but new clamp crimp had the same tiny gap as the old one.
    Since you are in CO you can borrow mine. PM if interested.

  18. #18
    Veteran Member Four Rings Theiceman's Avatar
    Join Date
    Feb 15 2016
    AZ Member #
    368804
    My Garage
    2006 A4Q, 1978 911 Targa, 2006 Jetta TDI
    Location
    Cambridge,Ontario

    Quote Originally Posted by dalmation53 View Post
    Moderator should sticky the diy.
    Not sticky it but move it to tech section under diy/ projects.

    Sent from my SM-G973W using Audizine mobile app
    2014 A4 2.0TQ Technik Manual
    2006 A4 2.0TQ Manual
    1978 Porsche 911SC Targa
    1976 Yamaha XS 360
    Note: PMs disabled, please keep requests for technical help on the forums to benefit everyone:

  19. #19
    Senior Member Three Rings
    Join Date
    Jan 05 2019
    AZ Member #
    439361
    Location
    Ft Collins, CO

    Just ordered this guy on Amazon:
    https://www.amazon.com/gp/product/B0...?ie=UTF8&psc=1

    Based on the reviews it should do the trick.


    Also FYI, here's some technical info on the clamps from Oetiker:

    https://cdn3.evostore.io/documents/fusion_us/fus_us_oet_catalog.pdf


    The following applies as a guideline: To determine the correct
    clamp diameter, push the hose onto the attaching material, (e.g.
    the nipple), and then measure the outer diameter of the hose.
    Select a clamp whose average value of the diameter range is
    slightly greater than the hose’s outer diameter. A clamp can only
    be considered adequately closed when the ear width (s) has been
    reduced by at least 40%, and the correct closing force was used
    for assembly
    2014 allroad

  20. #20
    Established Member Two Rings
    Join Date
    Apr 20 2019
    AZ Member #
    476140
    Location
    Coloarado

    Here is a tip. When I did the outer TT boot, It was impossible to slide the bastard past the end and onto the shaft. I used a small 2x4 inch baggie and wrapped it over the spline to shaft hump. (Walmart) Boot just jumped on. Make sure to find all the baggie pieces. Probably work with a ziplock too.

  21. #21
    Veteran Member Four Rings Theiceman's Avatar
    Join Date
    Feb 15 2016
    AZ Member #
    368804
    My Garage
    2006 A4Q, 1978 911 Targa, 2006 Jetta TDI
    Location
    Cambridge,Ontario

    Also a few more tips..
    1. Wd40 is not the best penetrant . There are specific products designed for this that are superior..Kroll, 3 in one..etc.
    2. As pointed out, wear clothes you can just throw away.
    3. Always wash parts in warm soapy water and let dry thoroughly. Traces of parts cleaners can break down your CV grease quickly..
    Tighten and loosen axle bolts with car on the ground with centre cap removed from wheels. Safety first.

    Op I was impressed with your removal.of the pinch bolt. I HATE THAT THING.

    Sent from my SM-G973W using Audizine mobile app
    Last edited by Theiceman; 05-22-2020 at 07:15 PM.
    2014 A4 2.0TQ Technik Manual
    2006 A4 2.0TQ Manual
    1978 Porsche 911SC Targa
    1976 Yamaha XS 360
    Note: PMs disabled, please keep requests for technical help on the forums to benefit everyone:

  22. #22
    Senior Member Three Rings
    Join Date
    Jan 05 2019
    AZ Member #
    439361
    Location
    Ft Collins, CO

    I found this video which seems to be a good walk through. It's for a 2011 A4, but I don't think much is changed for a B8.5. He does it in mostly real time in ~30 min. I however am budgeting basically an entire day.

    https://www.youtube.com/watch?v=3uk6N_sxw2g&t=1313s


    I also don't have a vise. I'm wondering if I can improvise using some screw down 1" pipe clamps, or if I'm better off getting a cheap one from Harbor Freight.


    Quote Originally Posted by FR_A4 View Post
    Here is a tip. When I did the outer TT boot, It was impossible to slide the bastard past the end and onto the shaft. I used a small 2x4 inch baggie and wrapped it over the spline to shaft hump. (Walmart) Boot just jumped on. Make sure to find all the baggie pieces. Probably work with a ziplock too.
    That's a good to know. I'll keep that in mind if I have issues.
    2014 allroad

  23. #23
    Senior Member Three Rings
    Join Date
    Jan 05 2019
    AZ Member #
    439361
    Location
    Ft Collins, CO

    Regarding torque specs, the axle bolt is 147 ft/lbs and then 180°.

    https://ricksfreeautorepairadvice.co...pecifications/

    For the the axle to trans bolts, I've seen a bunch of numbers ranging from 30-60 ft/lbs, but it seems the most common recommendation is 70NM or ~50 ft/lbs

    https://forums.quattroworld.com/a5/threads/1425.phtml
    2014 allroad

  24. #24
    Senior Member Three Rings
    Join Date
    Jan 05 2019
    AZ Member #
    439361
    Location
    Ft Collins, CO

    I completed this yesterday. Job took a few hours of total work time but if I do it again I'm pretty sure I could do it in around an hour or less. I wasted a good 45min trying to knock off the CV joint while it was held down with pipe clamps. Gave in and went to Home Depot to buy a vise, and that made the rest of the job much smoother.

    I didn't have issues removing any of the bolts, but I did let them soak them with PB blaster for almost an hour. I'd strongly recommend a few feet of a cheater pipe for the axle bolt. A standard breaker bar probably won't cut it on it's own. I put the car in neutral to let me rotate the axle to allow better access to the flange bolts. Those came off with a zero effort with the impact. Note: if you're using hand tools you'll either need someone to hit the brakes, or jam a screwdriver in the rotor vents to stop it from spinning. My allroad is on stock suspension, I was able to easily just pull the axle out. I got the whole assembly out in ~5min. I didn't have to remove the pinch bolt or even turn the wheels.

    I measured the distance of the clamps and splines before removing so I'd know it was reinstalled correctly.


    Hitting the clamp ear with a cut off wheel on a dremel gets them off under 10s.


    Old grease was pretty nasty, not sure if this is normal breakdown over 70k miles, or if there was some water contamination...


    Cleaned up nicely with some brake cleaner:


    I had an issue with the CV joint getting stuck on the circlip on reinstall but I read a tip to put a zip tie around it to hold it in place (then just cut off once the joint is past it). That worked great. I put the old axle bolt back in so I could hammer on that without marring the joint and risking damage to the splines.

    I ended up torquing the flange bolts to 45 ft/lbs with blue Loctite.


    Sockets:
    10mm triple square socket (flange bolts)
    19mm hex head socket (axle bolt)
    10mm standard socket (plastic cover)
    2014 allroad

  25. #25
    Veteran Member Four Rings eljay's Avatar
    Join Date
    Aug 13 2015
    AZ Member #
    348695
    Location
    NS

    I am in the middle of this job and noticed that the new circlip (Febi CV boot kit) is a tiny bit smaller and thinner than the original. Should I re-use the original to be safe?
    It is the correct kit and the boot and clamps are OK in sizing.
    Current: 2016 Audi A4 Allroad (in progress)
    Past: 2005 Audi A4 1.8T Quattro Avant / 6-speed / Ultrasport - SOLD

  26. #26
    Veteran Member Four Rings
    Join Date
    Jul 16 2018
    AZ Member #
    422473
    Location
    Atlanta

    4 - Locking Ring (on the outer CV joint end of the axle)
    ❑ Always replace if removed.
    ...
    2009 A4 Avant 2.0T quattro Prestige, 270k miles

  27. #27
    Veteran Member Four Rings eljay's Avatar
    Join Date
    Aug 13 2015
    AZ Member #
    348695
    Location
    NS

    Quote Originally Posted by Smac770 View Post
    4 - Locking Ring (on the outer CV joint end of the axle)
    ❑ Always replace if removed.
    ...
    Thanks.I used the new one as it's really there just to hold things together for assembly it seems.
    Now, I'm trying to muscle the axle back in and it won't go...I took it out by just turning wheel and it was tight, but it worked. Going back in is tougher. 2 hours at it so far.
    Current: 2016 Audi A4 Allroad (in progress)
    Past: 2005 Audi A4 1.8T Quattro Avant / 6-speed / Ultrasport - SOLD

  28. #28
    Veteran Member Four Rings eljay's Avatar
    Join Date
    Aug 13 2015
    AZ Member #
    348695
    Location
    NS

    Got the axle back in with a help from a friend. Next time, I will just fight with the pinch bolt and swing the upright down. It would have been much faster to remove and re-install axle this way. This was on the passenger side, BTW.
    Current: 2016 Audi A4 Allroad (in progress)
    Past: 2005 Audi A4 1.8T Quattro Avant / 6-speed / Ultrasport - SOLD

  29. #29
    Junior Member Two Rings
    Join Date
    Apr 11 2020
    AZ Member #
    544646
    Location
    Boulder, CO

    Just replaced front passenger outer CV boot last weekend & this guide was extremely useful. Took more time than I anticipated, but pretty confident I can get the job done much faster in the future. Glad I caught this early & didn't have to buy a new axle...

    Thanks for all of the advice in this thread!
    2013 allroad P+ (Glacier White/Chestnut, Sport, Nav+, B&O)
    Airlift 3P / Rotiform / APR HFC + Stage 2 E85 / Macan Brembos

Tags for this Thread

Bookmarks

Posting Permissions

  • You may not post new threads
  • You may not post replies
  • You may not post attachments
  • You may not edit your posts
  •  


    © 2001-2024 Audizine, Audizine.com, and Driverzines.com
    Audizine is an independently owned and operated automotive enthusiast community and news website.
    Audi and the Audi logo(s) are copyright/trademark Audi AG. Audizine is not endorsed by or affiliated with Audi AG.