Audizine - An Automotive Enthusiast Community

Page 1 of 4 123 ... LastLast
Results 1 to 40 of 149
  1. #1
    Senior Member Three Rings Arnie91's Avatar
    Join Date
    Oct 28 2015
    AZ Member #
    363679
    Location
    London

    Unhappy Aj's Repair Mission

    Guest-only advertisement. Register or Log In now!
    Hey all, after prolonged periods of problems with my Audi A4 B6 2004. I took it to be diagnosed by a professional AMD garage.


    I was surprised to find over 2,000 pounds worth of problems! The value of the car is problem 2,000 running and fine, which isn't worth getting it fixed by the mechanics and I'm weighing up getting an Audi TT instead.

    What do you reckon I should do with it? I'm no mechanic, and fixing the smallest problem in the winter has been a ball ache since it's so cold outside. Had I taken it to a reputable trustworthy garage in the first place I would have prevented all of this, just saddened that I didn't get their in time.


    Cambelt - Very bad
    A/C - no gas, possible leak
    Rocker cover and chain seal bad oil leak
    Injectors Leaking
    Breather Pipe missing
    Airbox not for the car, to close to the turbo.
    Alternator Belt badly worn
    Fuel line damage
    Bottom straight arm(?) play in ball joint
    Anti-roll bar, c links worn
    OS engine mount 100% damage
    Front engine mount missing
    OSF and 2 rear tyres close to legal limit
    Bottom breather pipe broken
    Thermostat + housing needed
    Power steering pump wrong, not for this car (supposed to be new from another mechanic, but they installed a used one)
    Water pump leak (Supposedly new)
    NS engine mount Split

    Codes:
    Evaporative Emmission EVAP canifster purge regulator value short circuit to ground P1424

    bANK 1 SENSOR 2, HEATER CIRCUIT SHORT TO GROUND P1117

    Secondary air injector pump relay short circuit to ground p1435

    secondary air injector solenoid valve short circuit to ground p1421

    turbocharger recirculation value short to ground p1289

    mass or volume air flow circa low input p0102

    bank 1 sensor 1, heater circuit short to ground p1115

    bank 1, sonde 2 internal resistance too high p1114

    Last edited by Arnie91; 03-09-2016 at 06:56 PM.

  2. #2
    Veteran Member Four Rings eljay's Avatar
    Join Date
    Aug 13 2015
    AZ Member #
    348695
    Location
    NS

    Quote Originally Posted by Arnie91 View Post
    Hey all, after prolonged periods of problems with my Audi A4 B6 2004. I took it to be diagnosed by a professional AMD garage.


    I was surprised to find over 2,000 pounds worth of problems! The value of the car is problem 2,000 running and fine, which isn't worth getting it fixed by the mechanics and I'm weighing up getting an Audi TT instead.

    What do you reckon I should do with it? I'm no mechanic, and fixing the smallest problem in the winter has been a ball ache since it's so cold outside. Had I taken it to a reputable trustworthy garage in the first place I would have prevented all of this, just saddened that I didn't get their in time.


    Cambelt - Very bad
    A/C - no gas, possible leak
    Rocker cover and chain seal bad oil leak
    Injectors Leaking
    Breather Pipe missing
    Airbox not for the car, to close to the turbo.
    Alternator Belt badly worn
    Fuel line damage
    Bottom straight arm(?) play in ball joint
    Anti-roll bar, c links worn
    OS engine mount 100% damage
    Front engine mount missing
    OSF and 2 rear tyres close to legal limit
    Bottom breather pipe broken
    Thermostat + housing needed
    Power steering pump wrong, not for this car (supposed to be new from another mechanic, but they installed a used one)
    Water pump leak (Supposedly new)
    NS engine mount Split

    Codes:
    Evaporative Emmission EVAP canifster purge regulator value short circuit to ground P1424

    bANK 1 SENSOR 2, HEATER CIRCUIT SHORT TO GROUND P1117

    Secondary air injector pump relay short circuit to ground p1435

    secondary air injector solenoid valve short circuit to ground p1421

    turbocharger recirculation value short to ground p1289

    mass or volume air flow circa low input p0102

    bank 1 sensor 1, heater circuit short to ground p1115

    bank 1, sonde 2 internal resistance too high p1114

    While this looks like a daunting list and the price tag is high, what you have listed are quite the typical items to replace on a B6 as part of maintenance. In other words, if you are looking at a used TT, unless the above items were already replaced on the candidate car, you will likely be fixing those on a TT (as well or any other car for that matter - although, this is a typical Audi list). And any car with these items replaced will likely command a higher price than one where this has been neglected.
    From this list, it looks like the maintenance on this car has been neglected. So, it's a question of: do you love the car and is the body good enough to keep it a while? If yes, fix these things and enjoy it.

  3. #3
    Senior Member Two Rings
    Join Date
    Dec 11 2015
    AZ Member #
    365692
    Location
    PA

    How many miles on it?

    If you have some tools you can do the following on your own.

    Injectors Leaking - replace them pretty straightforward - $200
    Airbox not for the car, to close to the turbo. - just get a new oem one. Join a FB page or look on CL for a part out and get an OEM one for maybe $50 and put it - $50
    Thermostat + housing needed & Alternator Belt badly worn - You can replace the thermostat is about an hour, even if you're not experienced. You need to take off the alternator (which believe me is easy, its like 5 total bolts). Swap the belt when you put it back on.- $55 (thermostat) + $20 Belt
    Bottom straight arm(?) play in ball joint - less than an hour to do on your own each side - New bottom control arms - $50 each side (do both)
    OSF and 2 rear tyres close to legal limit - not sure what OSF means, but tires is a ware and tear item...don't really see this as a "mechanical issue" - two rear tires $150


    Codes: Evaporative Emmission EVAP canifster purge regulator value short circuit to ground P1424 - sounds like you need new EVAP sensor or canister, again, you can do this on your own
    mass or volume air flow circa low input p0102 - New MAF, see above
    SAI (secondary air injector) - new SAI, see above

    *I'm now seeing many of these are faulted due to "short to circuit to ground"...I bet there is another alternative that will take care of all of these at once, seems unlikely that all would throw the same code

  4. #4
    Veteran Member Four Rings eljay's Avatar
    Join Date
    Aug 13 2015
    AZ Member #
    348695
    Location
    NS

    I'm sure we're talking about the 1.8T here, but please confirm that and the mileage.

    I would group the approach like this in the order of most critical to "when you get to it":

    0. Replace damaged fuel line to address:
    Fuel line damage
    I'm putting this at the top of the list depending on how bad this is. If the line is leaking, you obviously want to address that first as that's a safety issue. If it's bent/scraped, but not squished or pierced, perhaps it can go lower on the list.

    The following items, you should do immediately as it only involves checking wiring and connectors, which you should be able to check yourself:
    Inspect wiring to both O2 sensors and replace the wiring if needed to address these:
    - bANK 1 SENSOR 2, HEATER CIRCUIT SHORT TO GROUND P1117
    - bank 1 sensor 1, heater circuit short to ground p1115
    - bank 1, sonde 2 internal resistance too high p1114


    Inspect wiring to N249 valve to address:
    turbocharger recirculation value short to ground p1289

    Inspect the wiring and connector to MAF to address:
    mass or volume air flow circa low input p0102.
    This may be related to:
    Airbox not for the car, to close to the turbo.

    Check and replace Secondary Air Pump relay to address:
    Secondary air injector pump relay short circuit to ground p1435
    secondary air injector solenoid valve short circuit to ground p1421
    .
    It's possible that you may need a new N112 valve too.

    Then, these items are more involved, so you should likely take those in to the garage:

    1. Perform full timing belt service: replace belt, tensioner, idler, water pump, accessory belt. At the same time, replace thermostat, do coolant flush and replace both coolant temperature sensors. This will take care of these items and/or codes:
    Cambelt - Very bad
    Alternator Belt badly worn
    Thermostat + housing needed
    Water pump leak (Supposedly new)

    2. Inspect and replace all vacuum hoses. This will take care of:
    Breather Pipe missing
    Bottom breather pipe broken
    Evaporative Emmission EVAP canifster purge regulator value short circuit to ground P1424


    3. Replace all engine mounts to address:
    OS engine mount 100% damage
    Front engine mount missing
    NS engine mount Split


    4. Replace valve cover and cam chain tensioner gaskets to address:
    Rocker cover and chain seal bad oil leak

    5. Replace front control arms and sway bar end links and perform alignment to address:
    Bottom straight arm(?) play in ball joint
    Anti-roll bar, c links worn


    6. Replace tires to address:
    OSF and 2 rear tyres close to legal limit
    Note: I would not install new tires until your suspension is refreshed and alignment performed per #5. Otherwise, they will wear quickly and unevenly.

    Replace injector seals to address:
    Injectors Leaking

    Inspect A/C pump and piping to address:
    A/C - no gas, possible leak

    Unless the pump is leaking, you may be fine to leave this as is:
    Power steering pump wrong, not for this car (supposed to be new from another mechanic, but they installed a used one)

    And, as suggested above, find a good used airbox and install it in place of whatever you have there now to avoid further issues.

    For future reference for codes: http://www.bentleypublishers.com/tec....dtc.table.htm

    Good luck!

  5. #5
    Senior Member Three Rings Arnie91's Avatar
    Join Date
    Oct 28 2015
    AZ Member #
    363679
    Location
    London

    121k Miles on a 1.8t

    Thanks for all the advice so far.

  6. #6
    Veteran Member Four Rings
    Join Date
    Aug 19 2013
    AZ Member #
    121375
    Location
    minnesota

    Put full coverage on it and crash it! If you want to get it back on track first do oil pressure test, cylinder compression test, vacuum test, sludge check, check the turbo for play or damage. Then go from there. If the turbo, sludge, compression or oil pressure test fail I would think of getting rid if it.

    Sent from my SM-G920V using Tapatalk
    APR exhaust, HFC, 225 injectors, APR II program, KO4, South Bend II endurance clutch and SMFW, Forge Tip+piping, Apikol SMIC, Stern motor+trans mounts, Stern Snub, 034 street density arms, Hotchkis sway bars, Lemforter links, Bilstein B8, B7 S4 calipers, powerstop braided lines, Centric drilled rotors, PowerStop Carbon Fiber pads, Timken bearings, Gates racing timing belt, DENSO IQ01-27 plugs, R8 coils, Motul Xcess 5w40, MANN 950/4 filter, gear300, CHF202, Motul RBF 660.

  7. #7
    Veteran Member Four Rings eljay's Avatar
    Join Date
    Aug 13 2015
    AZ Member #
    348695
    Location
    NS

    Quote Originally Posted by jacobsen View Post
    Put full coverage on it and crash it! If you want to get it back on track first do oil pressure test, cylinder compression test, vacuum test, sludge check, check the turbo for play or damage. Then go from there. If the turbo, sludge, compression or oil pressure test fail I would think of getting rid if it.

    Sent from my SM-G920V using Tapatalk
    LOL

    This is actually good advice: the compression and leakdown tests and turbo check parts. Not the crashing portion! :)

    These tests will tell you if it's worth putting money into this engine/car.
    Current: 2016 Audi A4 Allroad (in progress)
    Past: 2005 Audi A4 1.8T Quattro Avant / 6-speed / Ultrasport - SOLD

  8. #8
    Senior Member Three Rings Arnie91's Avatar
    Join Date
    Oct 28 2015
    AZ Member #
    363679
    Location
    London

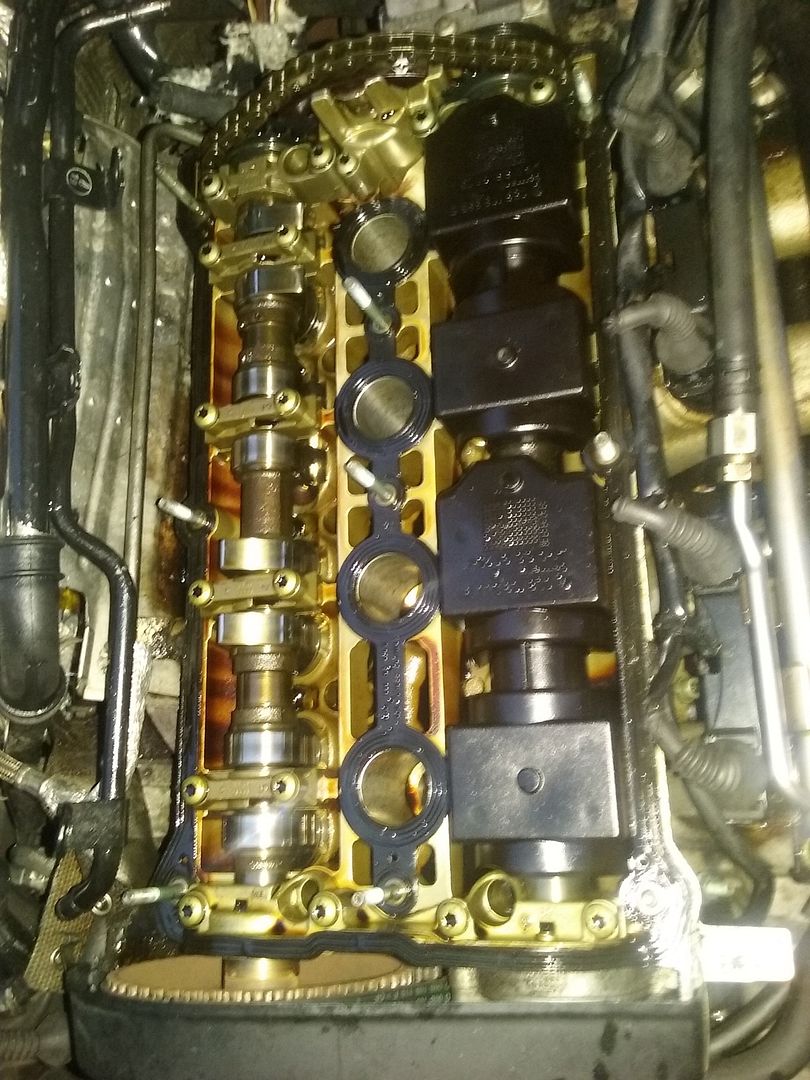
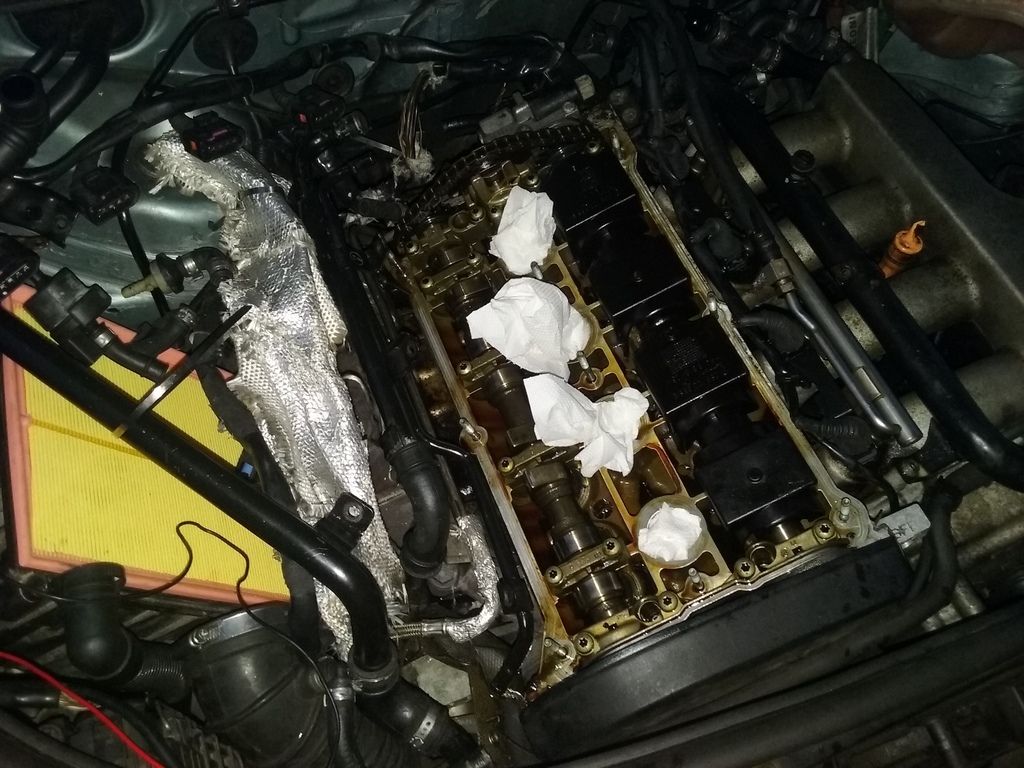
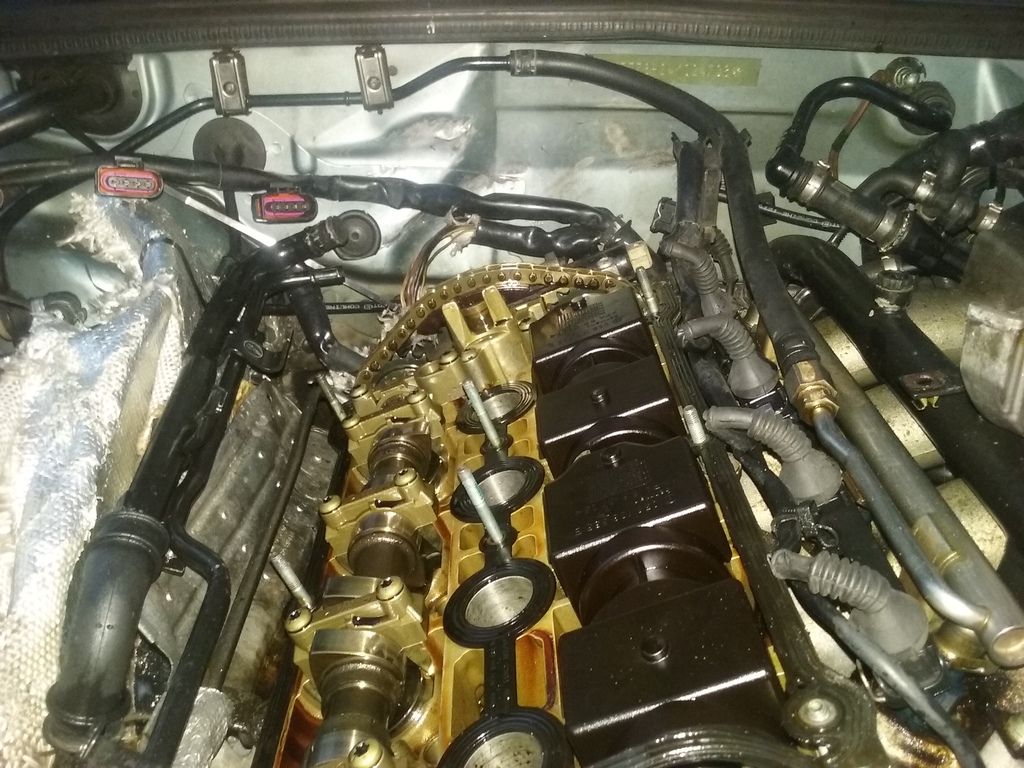
    So i've started to get to work with repairing the rocker cover gasket and thermostat. A few annoying hoses and clips but quite happy how far i've gotten in a couple of hours.

    A few questions.

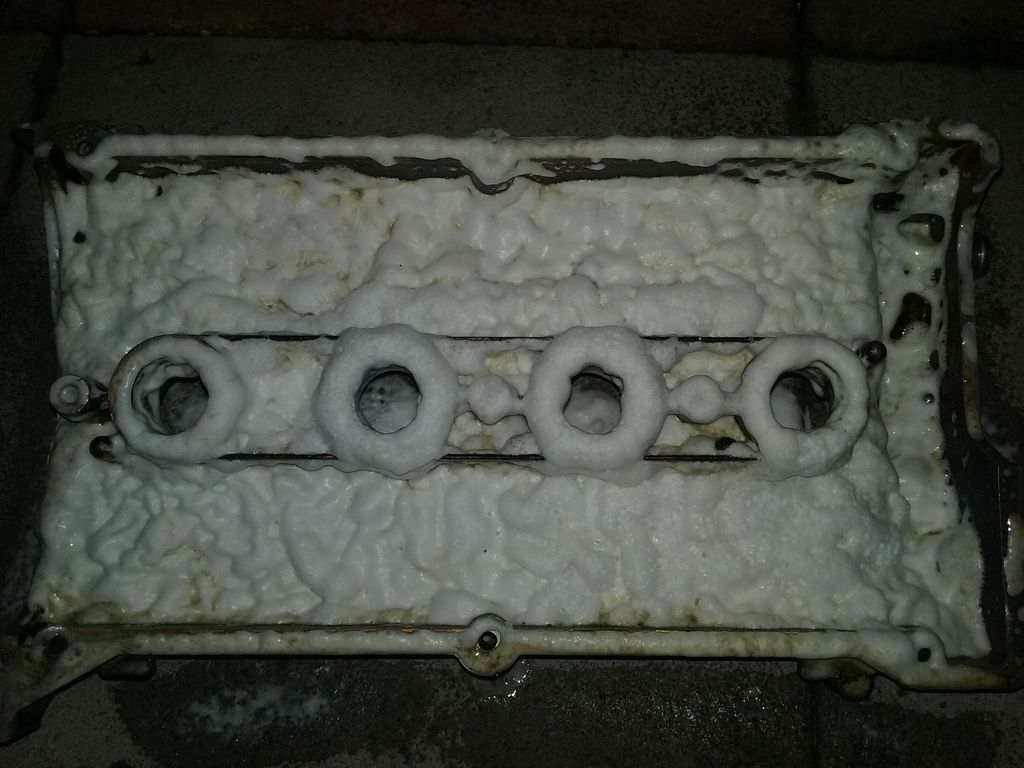
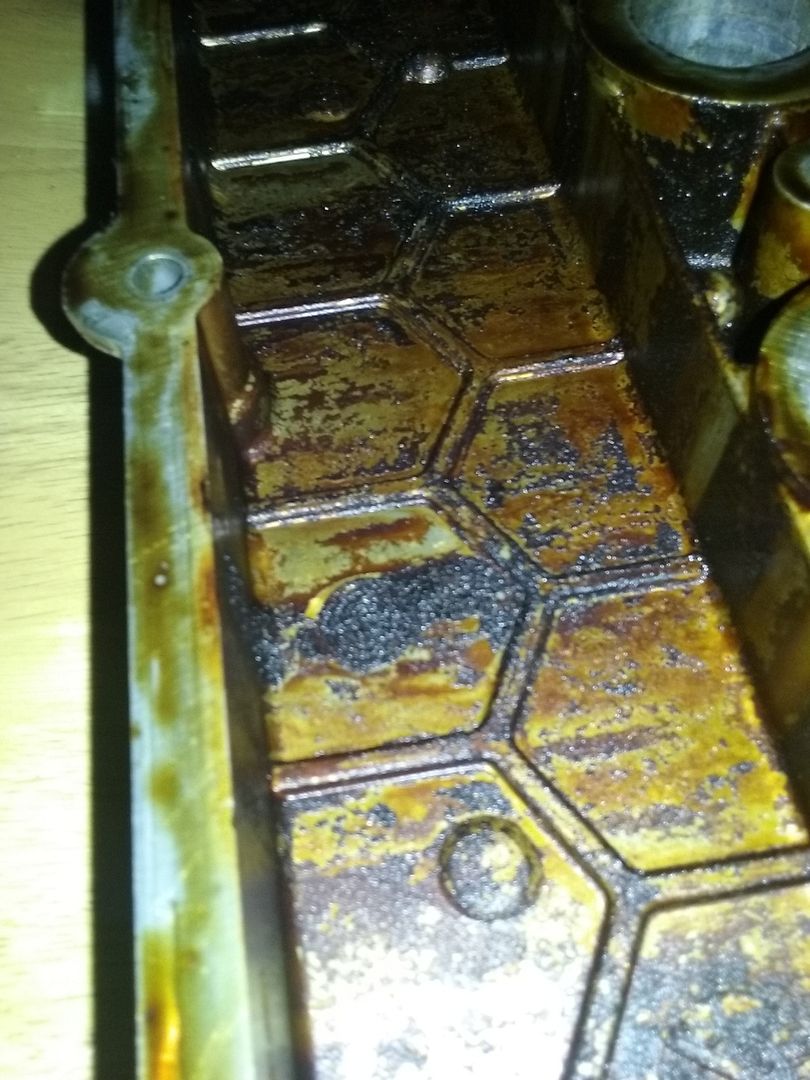
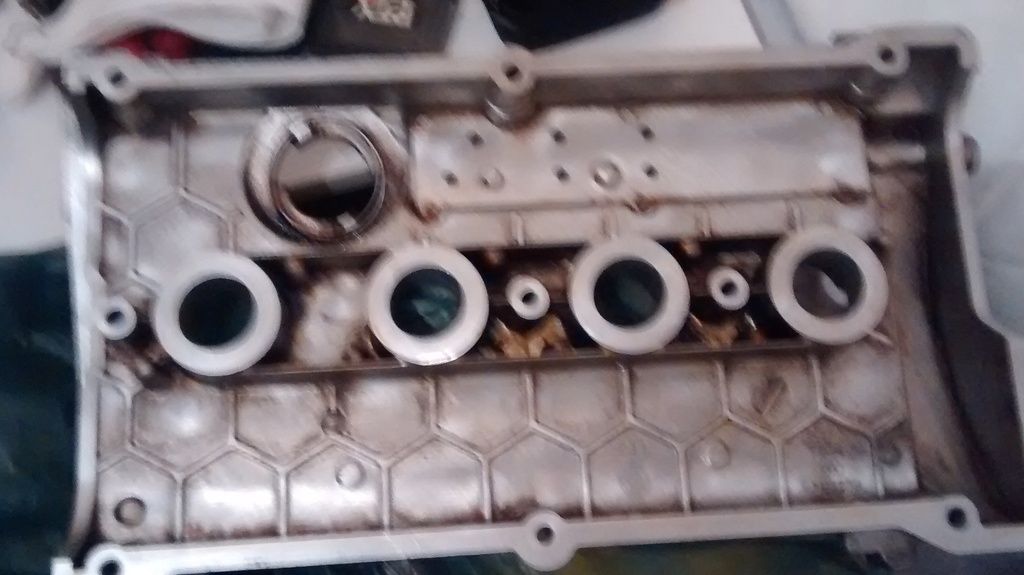
    The rocker cover is covered in dark grease or grit by the looks of it. I'm using a foam engine degreaser, and i've been using a wire brush to scrub it off. Just wanted to check that using a wire brush would be okay?

    Seeing as the cover is off, is there an opportunity to clean around the camshafts, or should I leave this alone?
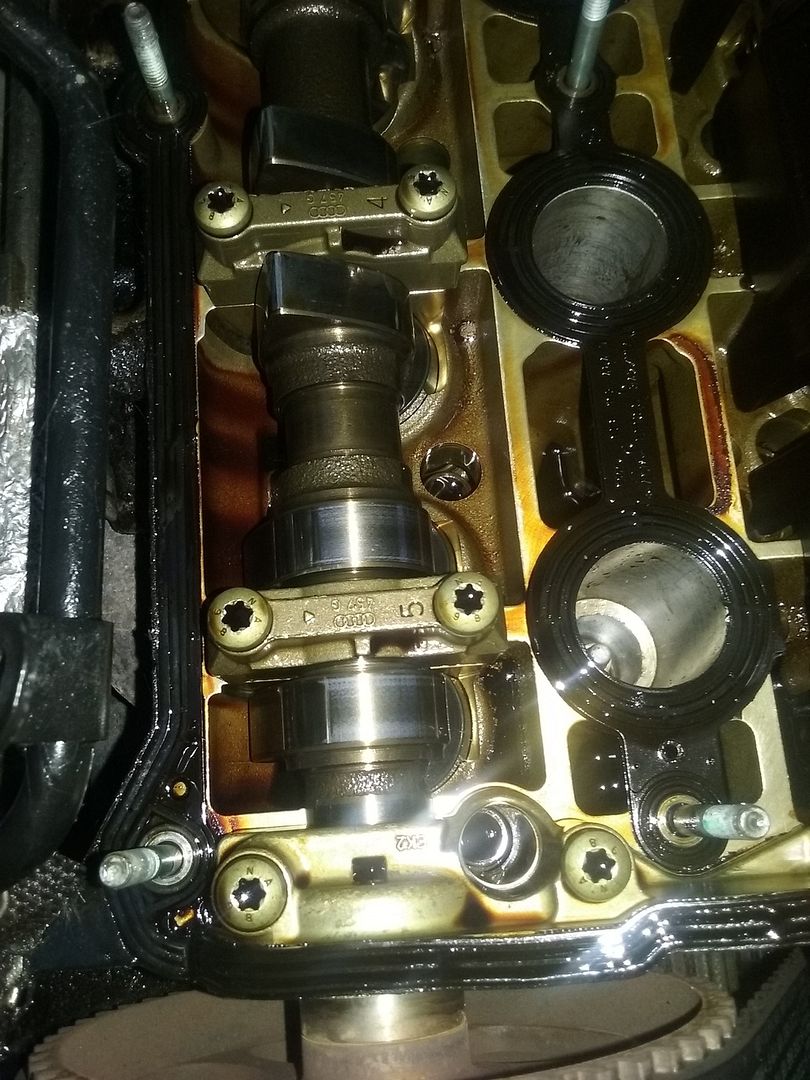
    Something I've just noticed which seems to be odd is that the right camshaft caps are completely loose and can be picked up easily. Surely those should be secured?

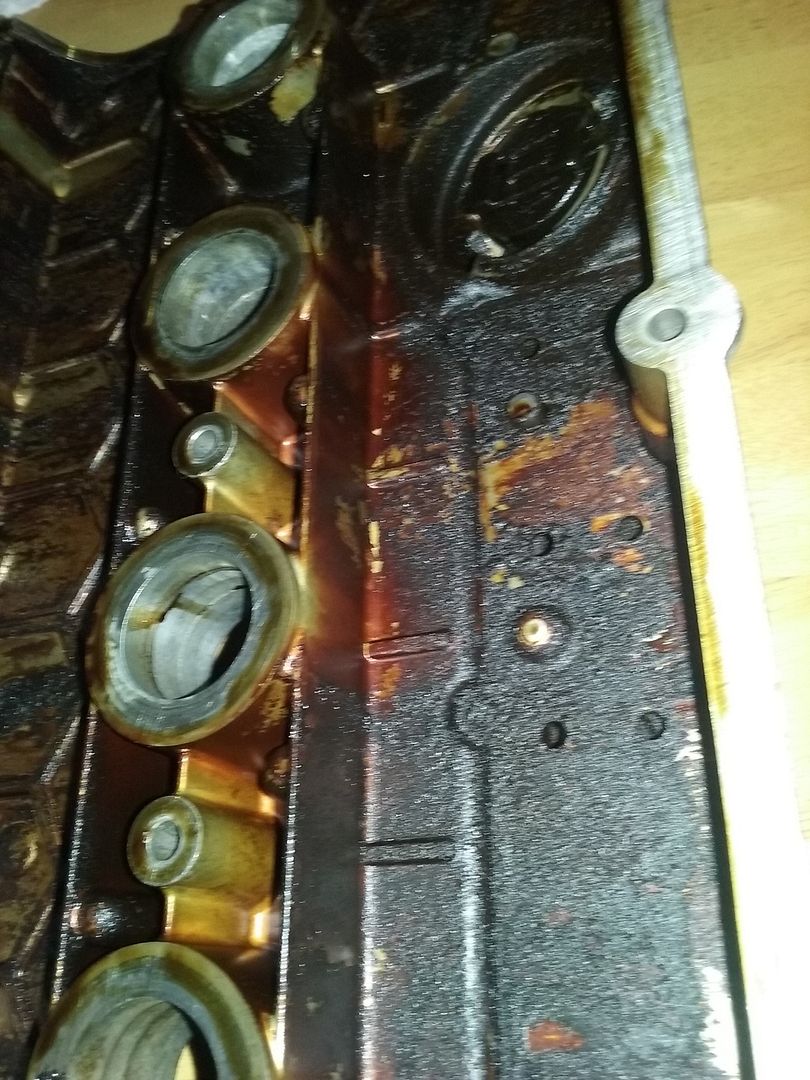
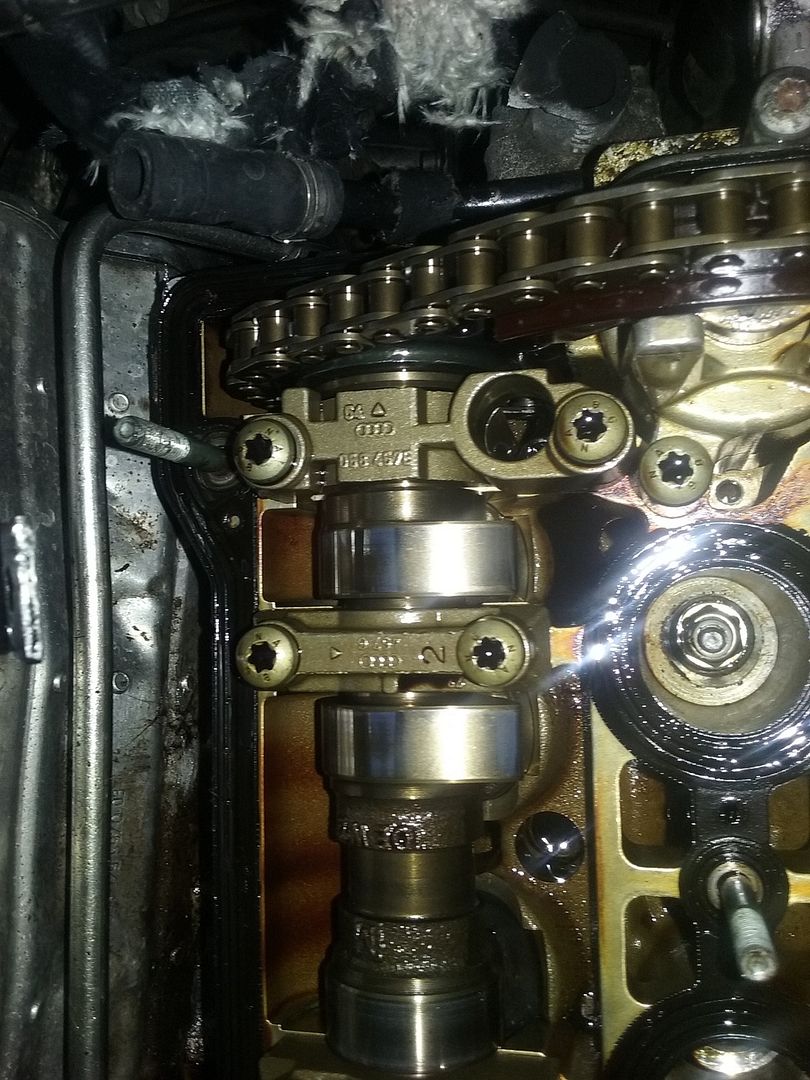
    I couldn't really see anything wrong with the rocker cover gasket, there were no broken pieces around the seal and it looked ok, there was oil seaping out of the seal, including oil residing in the seal itself. I guess the sign that the seal has gone wrong? Im worried that there might be a bigger problem. There was also oil in the bottom of the coil packs, so the seals around the coils were bad also.
    Which leads me to say, I think the left side of my engine has collapsed down. The engine is definitely angled to the left and that is were most of the oil has been leaking for the past few months. It's concentrated on the left side of the engine but not exclusively.
    I do know that the N/S engine mount has split and the O/S engine mount has 100% damage. I just didn't think that would lead to the engine being slanted so much. Im going to try to get some pictures up, but the attachment function seems to have disappeared.

    I've got a thermostat ready to go in after I lock the accessory pulley and slip the belt off the alternator tomorrow.

    As for a couple of other problems. It looks like my vacuum system errors could be caused by a blown 43 fuse. I'm actually currently piggybacking off fuse 43 which powers an LED emblem at the front, but this problem came about before, when a shitty mechanic that was drinking on the job seemed to have damaged some wires above the crankcase breather.

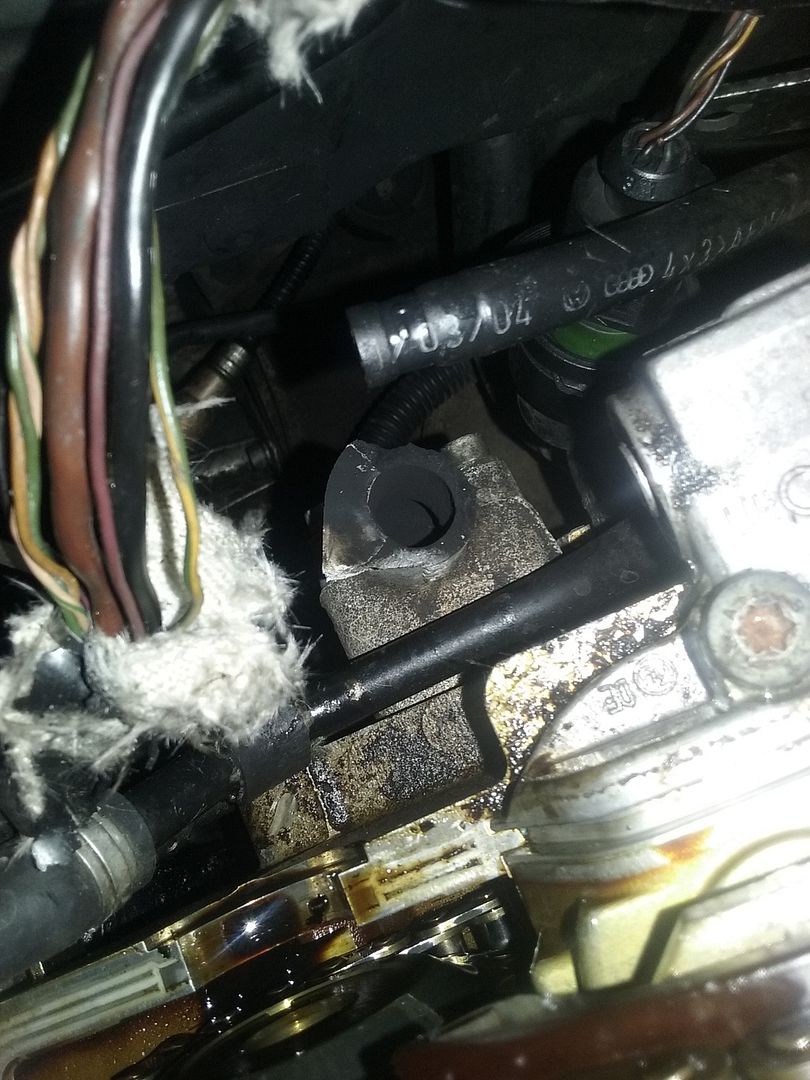
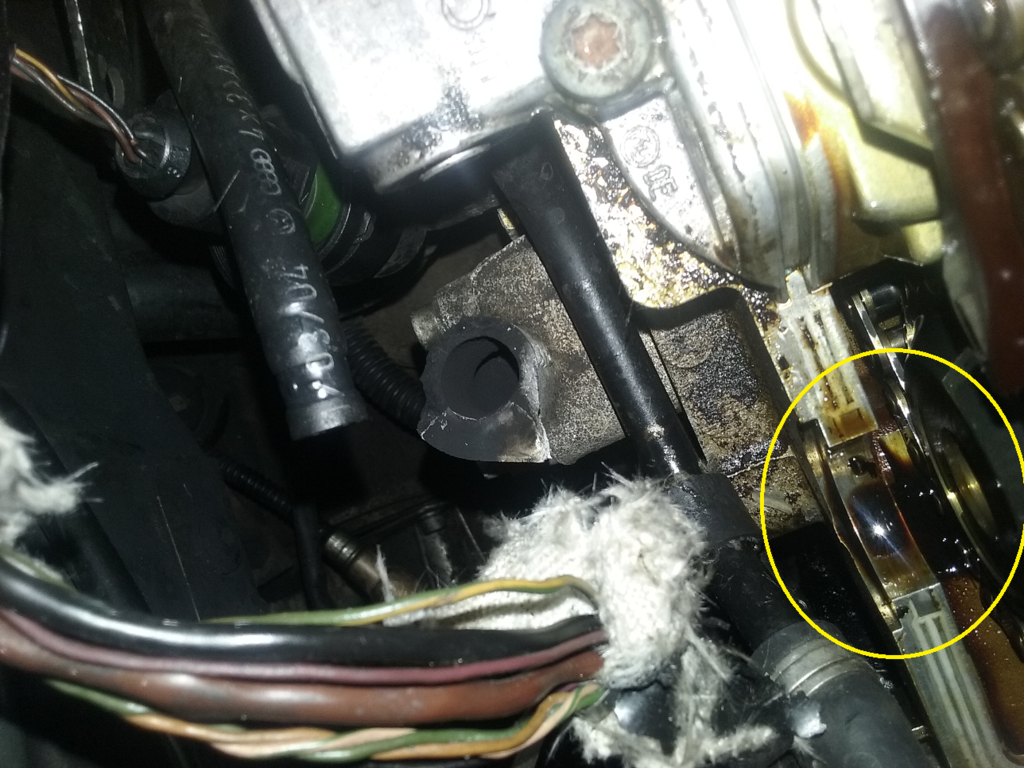
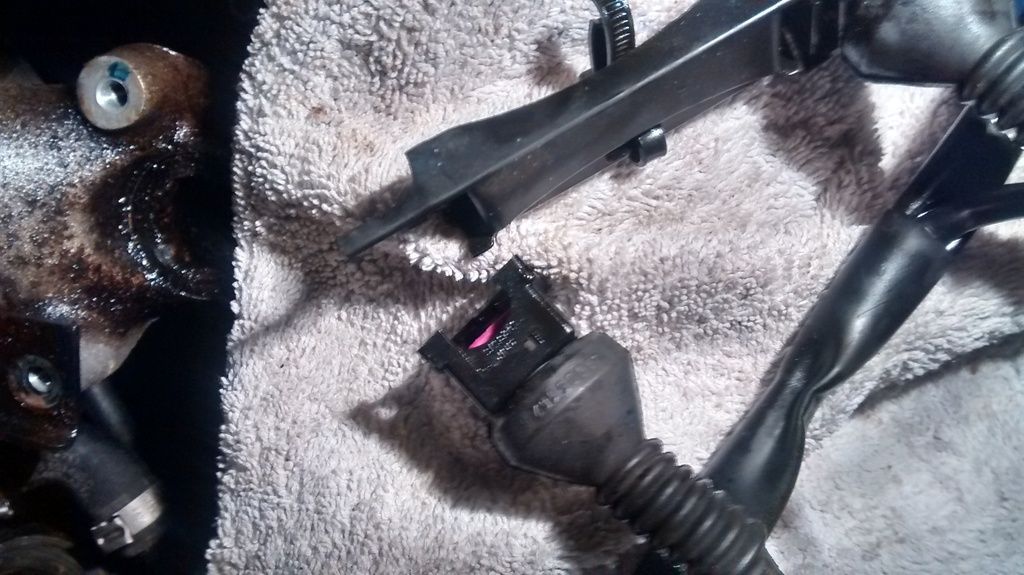
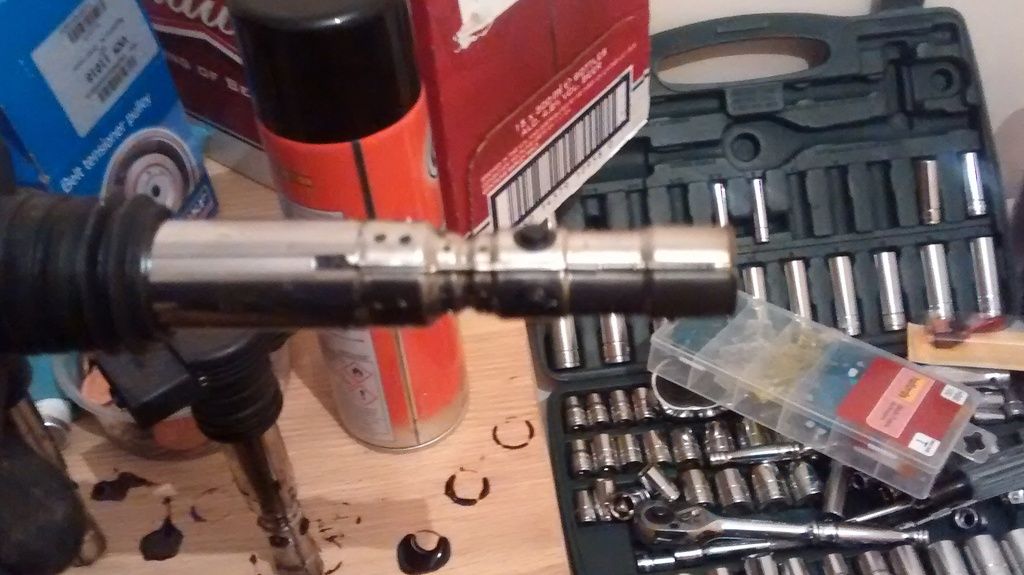
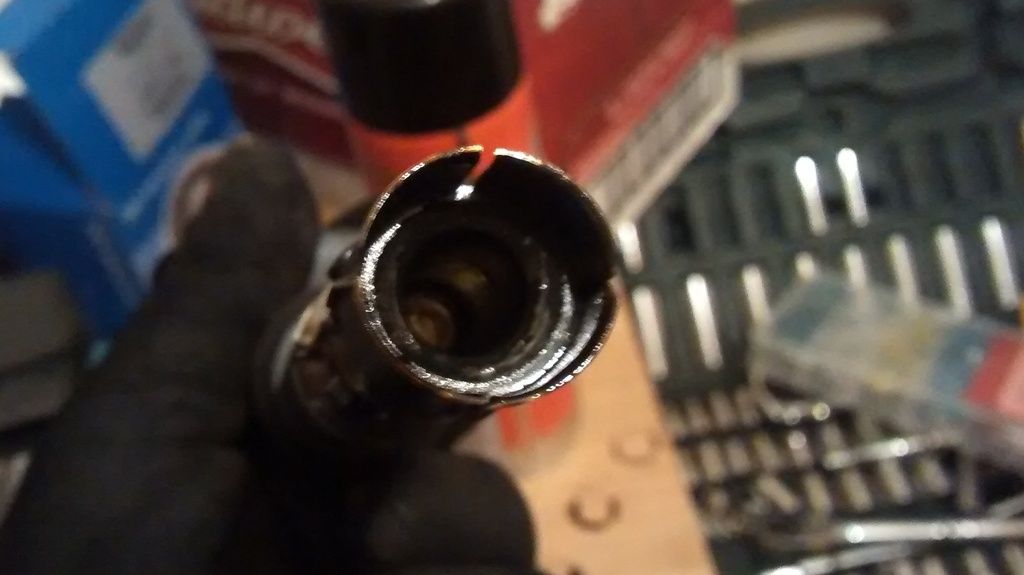
    Ive also found that the metal breather at the back of the engine has broken off which I suspected two months ago when the car started sounding like a truck. Mostly caused by the engine being thrown up when throttling and slamming back down because the mounts are fucked.


    Cleaning the rocker cover


    Broken metal breather at the back of the engine?


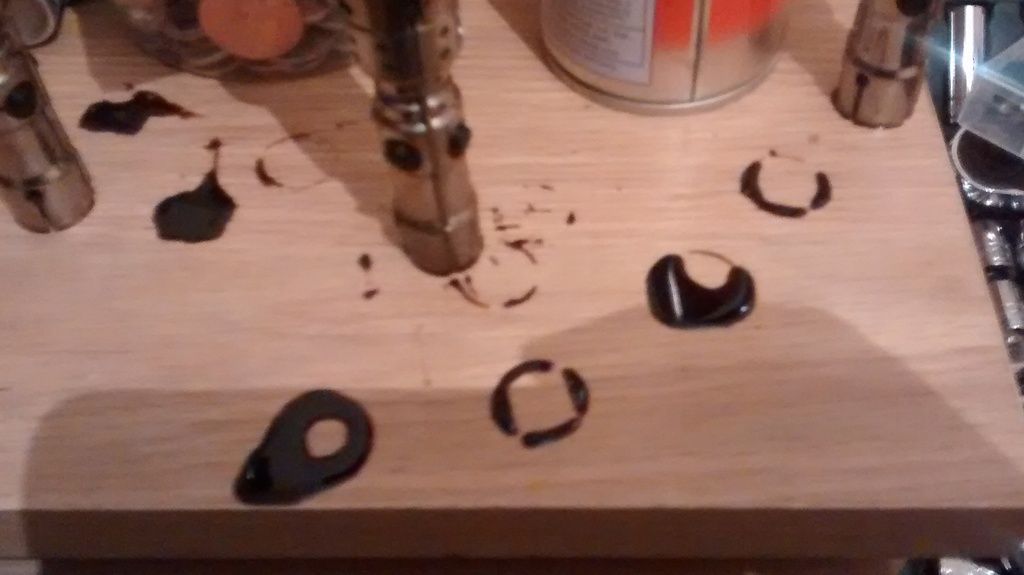
    Old Seal


    Engine Tilting?
    Last edited by Arnie91; 02-22-2016 at 01:25 PM.

  9. #9
    Veteran Member Four Rings
    Join Date
    Aug 19 2013
    AZ Member #
    121375
    Location
    minnesota

    It's normal for the motor to be slanted a little bit on the passenger side, maybe not that much... If your cam shaft bearing caps are not bolted down? I can't tell if you have a leaking metal pipe on the back of the head, the picture is not good enough. It may just be leaking from work to next to the rubber hose. Are you using Mobil 1 motor oil?

    Sent from my SM-G920V using Tapatalk
    APR exhaust, HFC, 225 injectors, APR II program, KO4, South Bend II endurance clutch and SMFW, Forge Tip+piping, Apikol SMIC, Stern motor+trans mounts, Stern Snub, 034 street density arms, Hotchkis sway bars, Lemforter links, Bilstein B8, B7 S4 calipers, powerstop braided lines, Centric drilled rotors, PowerStop Carbon Fiber pads, Timken bearings, Gates racing timing belt, DENSO IQ01-27 plugs, R8 coils, Motul Xcess 5w40, MANN 950/4 filter, gear300, CHF202, Motul RBF 660.

  10. #10
    Veteran Member Four Rings
    Join Date
    Aug 19 2013
    AZ Member #
    121375
    Location
    minnesota

    Zep purple degreaser is just about the best degreaser you can use, if you use it straight you almost don't have to wipe or scrub crusty deposits. It will discolor the aluminum however and you cant leave it on for long on critical parts. A wire brush is fine but I find toothbrushes are more dexterous

    Sent from my SM-G920V using Tapatalk
    APR exhaust, HFC, 225 injectors, APR II program, KO4, South Bend II endurance clutch and SMFW, Forge Tip+piping, Apikol SMIC, Stern motor+trans mounts, Stern Snub, 034 street density arms, Hotchkis sway bars, Lemforter links, Bilstein B8, B7 S4 calipers, powerstop braided lines, Centric drilled rotors, PowerStop Carbon Fiber pads, Timken bearings, Gates racing timing belt, DENSO IQ01-27 plugs, R8 coils, Motul Xcess 5w40, MANN 950/4 filter, gear300, CHF202, Motul RBF 660.

  11. #11
    Senior Member Three Rings Arnie91's Avatar
    Join Date
    Oct 28 2015
    AZ Member #
    363679
    Location
    London

    Quote Originally Posted by jacobsen View Post
    It's normal for the motor to be slanted a little bit on the passenger side, maybe not that much... If your cam shaft bearing caps are not bolted down? I can't tell if you have a leaking metal pipe on the back of the head, the picture is not good enough. It may just be leaking from work to next to the rubber hose. Are you using Mobil 1 motor oil?

    Sent from my SM-G920V using Tapatalk

    Which picture can you see it in? I think it's this one, im not sure what pipe was in here originally. It might of been empty :/


    Im not sure which part is the cam shaft bearing caps, but its the big black square caps on the right shaft which are loose. I think this may be normal.

    Seeing as the combi valve has snapped and im having so many issues with the SAI system. I've just ordered an Integrated Engineering SAI block off plate, going to so an SAI removal while I'm at it.

  12. #12
    Veteran Member Four Rings
    Join Date
    Aug 19 2013
    AZ Member #
    121375
    Location
    minnesota

    Quote Originally Posted by Arnie91 View Post
    Which picture can you see it in? I think it's this one, im not sure what pipe was in here originally. It might of been empty :/


    Im not sure which part is the cam shaft bearing caps, but its the big black square caps on the right shaft which are loose. I think this may be normal.

    Seeing as the combi valve has snapped and im having so many issues with the SAI system. I've just ordered an Integrated Engineering SAI block off plate, going to so an SAI removal while I'm at it.
    That black thing is a cover to prevent oil from splashing into your PCV system. Don't remove it unless you're cleaning your motor, always put it back. If any of those houses in the back of your motor are disconnected and explain that oil leak. I would not run without a combi valve, it's part of your PCV system. Your motor has yellow varnish, like you've been using mobile one motor oil?

    Sent from my SM-G920V using Tapatalk
    APR exhaust, HFC, 225 injectors, APR II program, KO4, South Bend II endurance clutch and SMFW, Forge Tip+piping, Apikol SMIC, Stern motor+trans mounts, Stern Snub, 034 street density arms, Hotchkis sway bars, Lemforter links, Bilstein B8, B7 S4 calipers, powerstop braided lines, Centric drilled rotors, PowerStop Carbon Fiber pads, Timken bearings, Gates racing timing belt, DENSO IQ01-27 plugs, R8 coils, Motul Xcess 5w40, MANN 950/4 filter, gear300, CHF202, Motul RBF 660.

  13. #13
    Veteran Member Four Rings walky_talky20's Avatar
    Join Date
    Jun 30 2008
    AZ Member #
    30427
    Location
    Erie, Pennsylvania

    Wow, never seen a combi valve busted clean off like that. Somebody must have been mad!

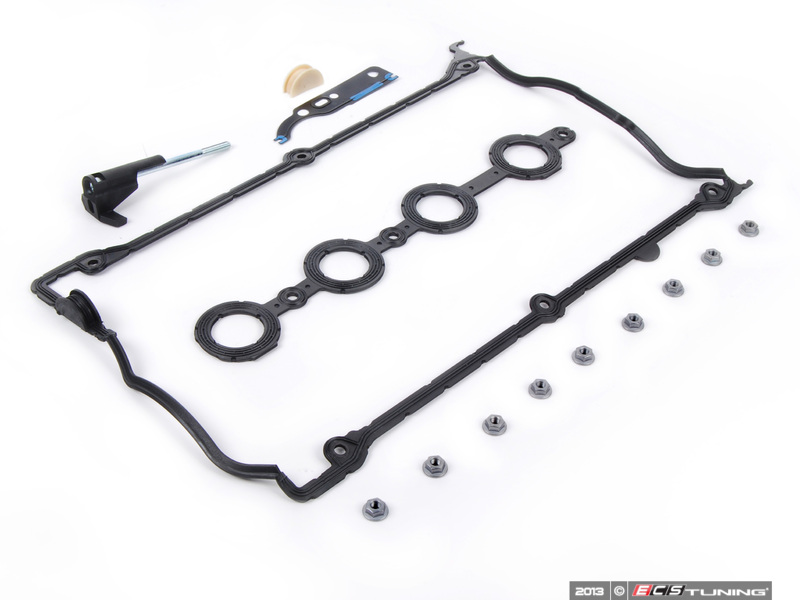
    Now is a good time to do the rear "cam chain tensioner gasket" and "half moon" seal. It's a smidge bit involved - usually accounting for at least 1 hour of labor past the valve cover gasket - maybe 2. But is best done 'while you're in there' as you need to remove the VC to do it. It's not hyper critical to the car running, it will just leak some oil. Valve cover grime is pretty typical. Scrub it up the best you can. She'll be ok.

    The engine does look like it's tilted a little more than normal, doesn't it? Hard to tell, but you did say one of the motor mounts was damaged and the snub (front) mount isn't even there.

    What's the story on the timing belt? That's more important than SAI and some oil leaks.

    BIG NOTE: All your codes point to probably just 1 single blown fuse. Specifically fuse #34. Don't got chasing a bunch of stuff for that.
    Last edited by walky_talky20; 02-22-2016 at 03:50 PM.
    ^Don't listen to this guy, he's not even a mechanic.
    2001 Laser Red A4 1.8TQM, 5-Speed Swapped, 4.11 Final Drive, APR 93, 2.5" Exhaust, ST Coilovers, 034 RSB, A8 Brakes Front & Rear
    2006 Passion Red Volvo V50 T5 AWD 6MT
    2000 Satin Silver Passat 1.8T FWD Wagon, Slippy Tiptronic, 15" Hubcaps
    2001 Aluminum Silver Metallic A4 Avant 1.8TQM (winter sled)

  14. #14
    Veteran Member Four Rings
    Join Date
    Aug 19 2013
    AZ Member #
    121375
    Location
    minnesota

    I would recommend a new cam tensioner and a chain, new seals on that, new timing belt and tensioner, new combi valve, the coolant flange would be easy to do since the valve cover is off, the Coolant coupler that attaches to it as well, inspect the PCV and clean or replace. Take some measurements of the cam lobes while you're there. New spark plugs. And most importantly inspect the turbo compressor for axial play. Check compression in all cylinders properly. Perform a leak down test. Do a vacuum test flush the cooling system several times with distilled water.

    Sent from my SM-G920V using Tapatalk
    APR exhaust, HFC, 225 injectors, APR II program, KO4, South Bend II endurance clutch and SMFW, Forge Tip+piping, Apikol SMIC, Stern motor+trans mounts, Stern Snub, 034 street density arms, Hotchkis sway bars, Lemforter links, Bilstein B8, B7 S4 calipers, powerstop braided lines, Centric drilled rotors, PowerStop Carbon Fiber pads, Timken bearings, Gates racing timing belt, DENSO IQ01-27 plugs, R8 coils, Motul Xcess 5w40, MANN 950/4 filter, gear300, CHF202, Motul RBF 660.

  15. #15
    Senior Member Three Rings Arnie91's Avatar
    Join Date
    Oct 28 2015
    AZ Member #
    363679
    Location
    London

    Quote Originally Posted by walky_talky20 View Post
    Wow, never seen a combi valve busted clean off like that. Somebody must have been mad!

    Now is a good time to do the rear "cam chain tensioner gasket" and "half moon" seal. It's a smidge bit involved - usually accounting for at least 1 hour of labor past the valve cover gasket - maybe 2. But is best done 'while you're in there' as you need to remove the VC to do it. It's not hyper critical to the car running, it will just leak some oil. Valve cover grime is pretty typical. Scrub it up the best you can. She'll be ok.

    The engine does look like it's tilted a little more than normal, doesn't it? Hard to tell, but you did say one of the motor mounts was damaged and the snub (front) mount isn't even there.

    What's the story on the timing belt? That's more important than SAI and some oil leaks.

    BIG NOTE: All your codes point to probably just 1 single blown fuse. Specifically fuse #34. Don't got chasing a bunch of stuff for that.

    I think the combi valve snapped off due to the engine raising and dropping down on throttle. Yeah it's crazy.

    I've got a cam chain tensioner gasket, half moon seal and the chain tensioner holding tool on the way.

    I think im due to visit Nollywood for the engine mount change so hopefully we can see what's going on with the engine mounts.

    Timing belt was supposedly done at 70k, I've had a peak and it looks alright. The Serpentine belt, pulleys, tensioners ect all need to be stripped out. The belt is about the shred and the tensioner is knocking. :( Im probably going to have to take the front bumper off, but i've had a massive problem with the headlights not coming out.

    Quote Originally Posted by jacobsen View Post
    I would recommend a new cam tensioner and a chain, new seals on that, new timing belt and tensioner, new combi valve, the coolant flange would be easy to do since the valve cover is off, the Coolant coupler that attaches to it as well, inspect the PCV and clean or replace. Take some measurements of the cam lobes while you're there. New spark plugs. And most importantly inspect the turbo compressor for axial play. Check compression in all cylinders properly. Perform a leak down test. Do a vacuum test flush the cooling system several times with distilled water.

    Sent from my SM-G920V using Tapatalk
    Coolant Flange, Crankcase and surrounding pipes are new
    How hard is performing a compression test for the cylinders and a leak down test? I know the vacuum system has got holes all over the place so changing over to silicone while I've got the engine open makes sense.

    Quote Originally Posted by jacobsen View Post
    That black thing is a cover to prevent oil from splashing into your PCV system. Don't remove it unless you're cleaning your motor, always put it back. If any of those houses in the back of your motor are disconnected and explain that oil leak. I would not run without a combi valve, it's part of your PCV system. Your motor has yellow varnish, like you've been using mobile one motor oil?

    Sent from my SM-G920V using Tapatalk

    It may have had a top up with semi-synthetic Mobile One, as it was recommended by a couple people and the manual? I'll need to double check what Oil's been in.

  16. #16
    Veteran Member Four Rings walky_talky20's Avatar
    Join Date
    Jun 30 2008
    AZ Member #
    30427
    Location
    Erie, Pennsylvania

    I think the yellow varnish is pretty minimal and the top end looks quite clean for those miles. Much better than the brown-to-black color most of them get to be. No worries, there.
    ^Don't listen to this guy, he's not even a mechanic.
    2001 Laser Red A4 1.8TQM, 5-Speed Swapped, 4.11 Final Drive, APR 93, 2.5" Exhaust, ST Coilovers, 034 RSB, A8 Brakes Front & Rear
    2006 Passion Red Volvo V50 T5 AWD 6MT
    2000 Satin Silver Passat 1.8T FWD Wagon, Slippy Tiptronic, 15" Hubcaps
    2001 Aluminum Silver Metallic A4 Avant 1.8TQM (winter sled)

  17. #17
    Veteran Member Four Rings
    Join Date
    Aug 19 2013
    AZ Member #
    121375
    Location
    minnesota

    I would replace the tensioner come on you don't want to but that whole thing back together to get 20000 miles down the road I'd have to tear it all apart again. A leak down test and compression test are very easy. A compression tester is very cheap. 30-50 bucks.

    Sent from my SM-G920V using Tapatalk
    APR exhaust, HFC, 225 injectors, APR II program, KO4, South Bend II endurance clutch and SMFW, Forge Tip+piping, Apikol SMIC, Stern motor+trans mounts, Stern Snub, 034 street density arms, Hotchkis sway bars, Lemforter links, Bilstein B8, B7 S4 calipers, powerstop braided lines, Centric drilled rotors, PowerStop Carbon Fiber pads, Timken bearings, Gates racing timing belt, DENSO IQ01-27 plugs, R8 coils, Motul Xcess 5w40, MANN 950/4 filter, gear300, CHF202, Motul RBF 660.

  18. #18
    Senior Member Three Rings Arnie91's Avatar
    Join Date
    Oct 28 2015
    AZ Member #
    363679
    Location
    London

    Quote Originally Posted by jacobsen View Post
    I would replace the tensioner come on you don't want to but that whole thing back together to get 20000 miles down the road I'd have to tear it all apart again. A leak down test and compression test are very easy. A compression tester is very cheap. 30-50 bucks.

    Sent from my SM-G920V using Tapatalk
    I hear you, but im strapped for cash at the moment & I've never done anything with timings before. I'd rather fix the urgently broken things and come back to the tensioner now knowing how to take the rocker cover off.

    The half moon seal looks like it's missing which is odd.

    What does a yellow varnish in an engine indicate?

    I want to clean the engine with degreaser and water, but the only videos i've found suggest lifting up the car, removing the subframe, dropping the oil pan ect.

  19. #19
    Veteran Member Four Rings
    Join Date
    Aug 19 2013
    AZ Member #
    121375
    Location
    minnesota

    You don't have to clean the motor with degreaser. If you want you can run some diesel and transmission fluid periodically while you're working on it and it's not going anywhere. Get it into the galleries by letting it run for a minute or two and drain it out, you can feel the crankcase up real high with diesel and it will help dissolve the carbon buildup it sits above the normal oil level in the pan. I would approach that very carefully only if you needed it. Yellow varnish is a telltale sign of Mobil 1 synthetic. It's kind of the opposite of coke build up but it's still build up. If the half moon seal wasn't there when you took off the valve cover and you can't find it, it might have popped out. Which would account for your oil leak. You can get a Gates blue belt for like 20 bucks or you can just get a kit for relatively cheap. I pieced my own kit together with all the best components from online sources. Look up how to do a compression test, I Vacuum test and how to check for axial play in your turbo. The kind of time and money you're going to invest in this car from this point going forward won't be worth it if you have to replace things like turbo, piston rings, valves...

    Sent from my SM-G920V using Tapatalk
    APR exhaust, HFC, 225 injectors, APR II program, KO4, South Bend II endurance clutch and SMFW, Forge Tip+piping, Apikol SMIC, Stern motor+trans mounts, Stern Snub, 034 street density arms, Hotchkis sway bars, Lemforter links, Bilstein B8, B7 S4 calipers, powerstop braided lines, Centric drilled rotors, PowerStop Carbon Fiber pads, Timken bearings, Gates racing timing belt, DENSO IQ01-27 plugs, R8 coils, Motul Xcess 5w40, MANN 950/4 filter, gear300, CHF202, Motul RBF 660.

  20. #20
    Senior Member Three Rings Arnie91's Avatar
    Join Date
    Oct 28 2015
    AZ Member #
    363679
    Location
    London

    Quote Originally Posted by jacobsen View Post
    You don't have to clean the motor with degreaser. If you want you can run some diesel and transmission fluid periodically while you're working on it and it's not going anywhere. Get it into the galleries by letting it run for a minute or two and drain it out, you can feel the crankcase up real high with diesel and it will help dissolve the carbon buildup it sits above the normal oil level in the pan. I would approach that very carefully only if you needed it. Yellow varnish is a telltale sign of Mobil 1 synthetic. It's kind of the opposite of coke build up but it's still build up. If the half moon seal wasn't there when you took off the valve cover and you can't find it, it might have popped out. Which would account for your oil leak. You can get a Gates blue belt for like 20 bucks or you can just get a kit for relatively cheap. I pieced my own kit together with all the best components from online sources. Look up how to do a compression test, I Vacuum test and how to check for axial play in your turbo. The kind of time and money you're going to invest in this car from this point going forward won't be worth it if you have to replace things like turbo, piston rings, valves...

    Sent from my SM-G920V using Tapatalk

    If compression goes well, i'll defo pick up a gates timing belt. Any other pulleys and such you'd recommend while replacing the timing belt?


    I do have some new pistol rings in another Audi A4 1.8T which is a non-runner I picked up for parts so there's room for swapping out worn parts

  21. #21
    Senior Member Three Rings Arnie91's Avatar
    Join Date
    Oct 28 2015
    AZ Member #
    363679
    Location
    London

    Looking at a new set of the BKR7EiX NGK spark plugs. Do i need to worry about gaps ect?

  22. #22
    Veteran Member Four Rings eljay's Avatar
    Join Date
    Aug 13 2015
    AZ Member #
    348695
    Location
    NS

    Nice progress!
    Yes, definitely check those wires at the back carefully for any breakage. Then repair the cover of that harness to prevent further damage from heat etc.

  23. #23
    Veteran Member Four Rings
    Join Date
    Aug 19 2013
    AZ Member #
    121375
    Location
    minnesota

    Why not fix up the donor motor lol. Swap it in

    Sent from my SM-G920V using Tapatalk
    APR exhaust, HFC, 225 injectors, APR II program, KO4, South Bend II endurance clutch and SMFW, Forge Tip+piping, Apikol SMIC, Stern motor+trans mounts, Stern Snub, 034 street density arms, Hotchkis sway bars, Lemforter links, Bilstein B8, B7 S4 calipers, powerstop braided lines, Centric drilled rotors, PowerStop Carbon Fiber pads, Timken bearings, Gates racing timing belt, DENSO IQ01-27 plugs, R8 coils, Motul Xcess 5w40, MANN 950/4 filter, gear300, CHF202, Motul RBF 660.

  24. #24
    Veteran Member Four Rings diagnosticator's Avatar
    Join Date
    Aug 26 2005
    AZ Member #
    7741
    Location
    Seattle, WA

    Quote Originally Posted by Arnie91 View Post
    If compression goes well, i'll defo pick up a gates timing belt. Any other pulleys and such you'd recommend while replacing the timing belt?


    I do have some new pistol rings in another Audi A4 1.8T which is a non-runner I picked up for parts so there's room for swapping out worn parts
    Don't install used piston rings from another engine. The rings wear-in to fit the specific cylinders. Used rings from a different engine will not seal properly. If any cylinders have low compression, the valves could be leaking. It's not just the rings. If you apply low air pressure to each cylinder, with the piston at bottom dead center of the power stroke, all valves closed, cam lobes up, if you hear air leaking from the intake, or the exhaust pipe, then there are intake and or exhaust valves leaking. If that is the case you need to rebuild the cylinder head.

    BKR6EIX is the correct heat range and are factory gapped at .032" you don't need to do anything to the gaps, just install the new plugs. Make sure you torque the plugs to the torque value specified. 30 Nm.

    If the timing belt has any visible cracks on either or both sides, the belt is ready to fail. There is no time to put this off. The first priority is replacing the belt and any belt tensioner pulleys and idler pulleys, plus the coolant pump.

    I am reluctant to suggest you do your own work, since you don't have any/enough experience to know when something is assembled right or wrong. Mistakes will be time consuming and costly. Evaluating the overall condition of the engine based on the condition of the many subassemblies and parts, is really beyond the scope of the forum. There is a lot of good advise, but you need to be able to determine what is the best course of action for your situation. None of us can really do that remotely through this venue. A more experienced shop, will be more labor per hour, but a lot less chance the better qualified shop will waste time and money chasing their tail.

    To the posters on this thread, NS = Near side, OS = Off side. Relative the the drivers seat.
    Last edited by diagnosticator; 02-23-2016 at 05:43 AM.
    Vorsprung durch Technik

  25. #25
    Senior Member Three Rings Arnie91's Avatar
    Join Date
    Oct 28 2015
    AZ Member #
    363679
    Location
    London

    Quote Originally Posted by eljay View Post
    Nice progress!
    Yes, definitely check those wires at the back carefully for any breakage. Then repair the cover of that harness to prevent further damage from heat etc.
    What kind of wire do I need to repair them if they're broken? And i've tried to wrap them in heat-proof foil tape but it didn't stick at all.

    Quote Originally Posted by jacobsen View Post
    Why not fix up the donor motor lol. Swap it in

    Sent from my SM-G920V using Tapatalk
    It needs new camshafts and a whole load of other things. It's also not a Sports and Cab model like my daily.

    Quote Originally Posted by diagnosticator View Post
    Don't install used piston rings from another engine. The rings wear-in to fit the specific cylinders. Used rings from a different engine will not seal properly. If any cylinders have low compression, the valves could be leaking. It's not just the rings. If you apply low air pressure to each cylinder, with the piston at bottom dead center of the power stroke, all valves closed, cam lobes up, if you hear air leaking from the intake, or the exhaust pipe, then there are intake and or exhaust valves leaking. If that is the case you need to rebuild the cylinder head.

    BKR6EIX is the correct heat range and are factory gapped at .032" you don't need to do anything to the gaps, just install the new plugs. Make sure you torque the plugs to the torque value specified. 30 Nm.

    If the timing belt has any visible cracks on either or both sides, the belt is ready to fail. There is no time to put this off. The first priority is replacing the belt and any belt tensioner pulleys and idler pulleys, plus the coolant pump.

    I am reluctant to suggest you do your own work, since you don't have any/enough experience to know when something is assembled right or wrong. Mistakes will be time consuming and costly. Evaluating the overall condition of the engine based on the condition of the many subassemblies and parts, is really beyond the scope of the forum. There is a lot of good advise, but you need to be able to determine what is the best course of action for your situation. None of us can really do that remotely through this venue. A more experienced shop, will be more labor per hour, but a lot less chance the better qualified shop will waste time and money chasing their tail.

    To the posters on this thread, NS = Near side, OS = Off side. Relative the the drivers seat.
    Thanks Diagnosticator. I appreciate the advice.

    Any experienced jobs that need doing I'll get in help.

  26. #26
    Senior Member Three Rings Arnie91's Avatar
    Join Date
    Oct 28 2015
    AZ Member #
    363679
    Location
    London

    Looking for RTV sealants. What temperature spec should I be looking for?

  27. #27
    Veteran Member Four Rings Kevin C's Avatar
    Join Date
    Mar 28 2015
    AZ Member #
    323385
    My Garage
    1987 Dodge Raider G54B Turbo
    Location
    Portland OR, United States

    Quote Originally Posted by diagnosticator View Post
    If you apply low air pressure to each cylinder, with the piston at bottom dead center of the power stroke, all valves closed, cam lobes up, if you hear air leaking from the intake, or the exhaust pipe, then there are intake and or exhaust valves leaking. If that is the case you need to rebuild the cylinder head.
    I think you meant TDC, If the timing belt is attached at BDC , one set of valves will always be open. The only way around this is to remove the cams or test at top dead center on the firing stroke.
    2003 02X Six speed swapped, RS4 RSB, H&R FSB, B7 brakes, 2.0T stroker, DSMIC's, B7 CTS K04 turbo.

  28. #28
    Veteran Member Four Rings redline380's Avatar
    Join Date
    Oct 30 2008
    AZ Member #
    34773
    My Garage
    B5, B7, B8, 8V, 4M
    Location
    Big Lake, MN

    Quote Originally Posted by Arnie91 View Post

    The rocker cover is covered in dark grease or grit by the looks of it. I'm using a foam engine degreaser, and i've been using a wire brush to scrub it off. Just wanted to check that using a wire brush would be okay?

    Might be a little late to the party, on this one, but this goes for all. I found out a product called zip strip literally melts sludge away. Best product I have found or the job. Heavy deposits will require some form of mechanical help in the way of a brush, screw driver, etc.

    If you cannot find zip strip, there are other paint stripping products available.
    “You may recall we went to a PARK IN BOTSWANA." George W. Bush, 43rd President of the United States of America

    2020 SQ7- Wife's ride
    2018 RS3- Wish I could drive it more
    2010 A4- Why do I even own this?
    2007 A4 Avant 2.0T Titanium Package, aka "Big Red"
    2000 S4- Working?

  29. #29
    Established Member Two Rings
    Join Date
    Feb 02 2016
    AZ Member #
    368153
    My Garage
    02 A4 1.8t quattro Sport 5 speed, 87 4Runner (rock crawler), 06 4runner, 99 Suzuki Bandit 1200S
    Location
    Richmond, VA

    Quote Originally Posted by Arnie91 View Post
    Looking for RTV sealants. What temperature spec should I be looking for?
    Ultra Gray is what I use. Also on the timing belt, even if it was changed at 70K you're within 10K of your change interval. I'd be skeptical of that 70K change though if you don't have paperwork. I changed mine when I bought it just because it had no documentation (and a bad water pump).

    To address some of your questions (that may or may not have been addressed):
    The black plastic caps on the cam just sit there. Make sure you remember to put them back.
    Inside your motor looks clean enough to me. Do not put any degreaser or water in the engine.. If you are really concerned run some Seafoam in it right before your next oil change.
    Make sure you COMPLETELY dry out the inside of your valve cover before reinstalling. Next time use brake clean or a parts washer so you reduce the risk of getting water in the motor (by residuals stuck in the cover).
    I did my cam tensioner gasket and half moon without the tool.. It was frustrating though but not too bad. With the tool should be easier. Put ultra gray on the gasket in the places marked in the instructions (online if it doesn't come with them) and inside the half moon lip (not too much). I also put a dab in any corners on the valve cover gasket. Speaking of which the half moon you say is missing (if it's the one in the pic) should be molded into the new valve cover gasket.
    Try to get as much oil as you can out of the spark plug holes BEFORE pulling the plugs. I normally cram a rag down in there first with a screwdriver to sop up the bulk of the oil then spray brake clean into the hole then blow compressed air into the hole while holding a rag over the opening (to keep from blowing oil and brake clean all over everything). Repeat until it looks clean then you can pull the plugs.

    Good luck!

  30. #30
    Veteran Member Four Rings
    Join Date
    Aug 19 2013
    AZ Member #
    121375
    Location
    minnesota

    I would use oil resistant rtv from permatex, or reinzosil if you don't mind waiting for it. You gotta order reinzosil off ebay.

    Sent from my SM-G920V using Tapatalk
    APR exhaust, HFC, 225 injectors, APR II program, KO4, South Bend II endurance clutch and SMFW, Forge Tip+piping, Apikol SMIC, Stern motor+trans mounts, Stern Snub, 034 street density arms, Hotchkis sway bars, Lemforter links, Bilstein B8, B7 S4 calipers, powerstop braided lines, Centric drilled rotors, PowerStop Carbon Fiber pads, Timken bearings, Gates racing timing belt, DENSO IQ01-27 plugs, R8 coils, Motul Xcess 5w40, MANN 950/4 filter, gear300, CHF202, Motul RBF 660.

  31. #31
    Senior Member Three Rings Arnie91's Avatar
    Join Date
    Oct 28 2015
    AZ Member #
    363679
    Location
    London

    Quote Originally Posted by amgraham View Post
    Ultra Gray is what I use. Also on the timing belt, even if it was changed at 70K you're within 10K of your change interval. I'd be skeptical of that 70K change though if you don't have paperwork. I changed mine when I bought it just because it had no documentation (and a bad water pump).

    To address some of your questions (that may or may not have been addressed):
    The black plastic caps on the cam just sit there. Make sure you remember to put them back.
    Inside your motor looks clean enough to me. Do not put any degreaser or water in the engine.. If you are really concerned run some Seafoam in it right before your next oil change.
    Make sure you COMPLETELY dry out the inside of your valve cover before reinstalling. Next time use brake clean or a parts washer so you reduce the risk of getting water in the motor (by residuals stuck in the cover).
    I did my cam tensioner gasket and half moon without the tool.. It was frustrating though but not too bad. With the tool should be easier. Put ultra gray on the gasket in the places marked in the instructions (online if it doesn't come with them) and inside the half moon lip (not too much). I also put a dab in any corners on the valve cover gasket. Speaking of which the half moon you say is missing (if it's the one in the pic) should be molded into the new valve cover gasket.
    Try to get as much oil as you can out of the spark plug holes BEFORE pulling the plugs. I normally cram a rag down in there first with a screwdriver to sop up the bulk of the oil then spray brake clean into the hole then blow compressed air into the hole while holding a rag over the opening (to keep from blowing oil and brake clean all over everything). Repeat until it looks clean then you can pull the plugs


    Good luck!
    The gasket I have doesn't have a half moon seal moulded in.

    I've never changed the oil filter so i'm probably going to do a change. Can I put seafoam in the oil?

    Quote Originally Posted by jacobsen View Post
    I would use oil resistant rtv from permatex, or reinzosil if you don't mind waiting for it. You gotta order reinzosil off ebay.

    Sent from my SM-G920V using Tapatalk
    Don't have those brands in the UK. So I've got this. http://www.amazon.co.uk/gp/product/B...ilpage_o00_s00

  32. #32
    Veteran Member Four Rings egovreau's Avatar
    Join Date
    Sep 08 2015
    AZ Member #
    354212
    My Garage
    2017 Audi Q5, 1989 Jaguar XJS, 2005 Ford F-250, 2002 VW Passat Wagon
    Location
    Orting, WA

    Quote Originally Posted by Arnie91 View Post
    Can I put seafoam in the oil?
    You sure can. I believe it's an ounce of Seafoam for each quart of oil.

    You can use the rest of the can in the fuel (one ounce per gallon)

    Sent from my SAMSUNG-SGH-I337 using Audizine mobile app

  33. #33
    Veteran Member Four Rings
    Join Date
    Aug 19 2013
    AZ Member #
    121375
    Location
    minnesota

    Sea foam is snake oil. Don't waste your snickers money.

    Sent from my SM-G920V using Tapatalk
    APR exhaust, HFC, 225 injectors, APR II program, KO4, South Bend II endurance clutch and SMFW, Forge Tip+piping, Apikol SMIC, Stern motor+trans mounts, Stern Snub, 034 street density arms, Hotchkis sway bars, Lemforter links, Bilstein B8, B7 S4 calipers, powerstop braided lines, Centric drilled rotors, PowerStop Carbon Fiber pads, Timken bearings, Gates racing timing belt, DENSO IQ01-27 plugs, R8 coils, Motul Xcess 5w40, MANN 950/4 filter, gear300, CHF202, Motul RBF 660.

  34. #34
    Established Member Two Rings
    Join Date
    Feb 02 2016
    AZ Member #
    368153
    My Garage
    02 A4 1.8t quattro Sport 5 speed, 87 4Runner (rock crawler), 06 4runner, 99 Suzuki Bandit 1200S
    Location
    Richmond, VA

    Yes you can put Seafoam in the oil. Instructions are on the can. Like i said though i really wouldnt worry about it. Just change your oil at a decent interval and let it ride.

    Also, you probably have the wrong valve cover gasket since it doesn't have the half moon.

  35. #35
    Veteran Member Four Rings
    Join Date
    Aug 19 2013
    AZ Member #
    121375
    Location
    minnesota

    Quote Originally Posted by amgraham View Post
    Yes you can put Seafoam in the oil. Instructions are on the can. Like i said though i really wouldnt worry about it. Just change your oil at a decent interval and let it ride.

    Also, you probably have the wrong valve cover gasket since it doesn't have the half moon.
    The half moon seal and tensioner gasket are separate from the valve cover gasket.

    Sent from my SM-G920V using Tapatalk
    APR exhaust, HFC, 225 injectors, APR II program, KO4, South Bend II endurance clutch and SMFW, Forge Tip+piping, Apikol SMIC, Stern motor+trans mounts, Stern Snub, 034 street density arms, Hotchkis sway bars, Lemforter links, Bilstein B8, B7 S4 calipers, powerstop braided lines, Centric drilled rotors, PowerStop Carbon Fiber pads, Timken bearings, Gates racing timing belt, DENSO IQ01-27 plugs, R8 coils, Motul Xcess 5w40, MANN 950/4 filter, gear300, CHF202, Motul RBF 660.

  36. #36
    Established Member Two Rings
    Join Date
    Feb 02 2016
    AZ Member #
    368153
    My Garage
    02 A4 1.8t quattro Sport 5 speed, 87 4Runner (rock crawler), 06 4runner, 99 Suzuki Bandit 1200S
    Location
    Richmond, VA

    Quote Originally Posted by jacobsen View Post
    The half moon seal and tensioner gasket are separate from the valve cover gasket.

    Sent from my SM-G920V using Tapatalk
    True. There is another half moon that should be built into the valve cover gasket. Here's a pic of the VCG and tensioner gasket with the seperate half moon for under the tensioner and the one molded into the VCG:


  37. #37
    Veteran Member Four Rings
    Join Date
    Aug 19 2013
    AZ Member #
    121375
    Location
    minnesota

    Ahh

    Sent from my SM-G920V using Tapatalk
    APR exhaust, HFC, 225 injectors, APR II program, KO4, South Bend II endurance clutch and SMFW, Forge Tip+piping, Apikol SMIC, Stern motor+trans mounts, Stern Snub, 034 street density arms, Hotchkis sway bars, Lemforter links, Bilstein B8, B7 S4 calipers, powerstop braided lines, Centric drilled rotors, PowerStop Carbon Fiber pads, Timken bearings, Gates racing timing belt, DENSO IQ01-27 plugs, R8 coils, Motul Xcess 5w40, MANN 950/4 filter, gear300, CHF202, Motul RBF 660.

  38. #38
    Senior Member Three Rings Arnie91's Avatar
    Join Date
    Oct 28 2015
    AZ Member #
    363679
    Location
    London

    Quote Originally Posted by amgraham View Post
    True. There is another half moon that should be built into the valve cover gasket. Here's a pic of the VCG and tensioner gasket with the seperate half moon for under the tensioner and the one molded into the VCG:

    I need to double check my gasket is the right one then.


    I've had a look at fuse 34 in the board and it was clearly blown. Im really hoping this solves a lot of my vacuum system short to ground errors.

    Would it be okay to refresh the entire fuse board?, some of the other fuses look blown as well.

    I've got tomorrow off work, so ill be updating yall with pictures and a compression test!


    Question: Can I crank the motor with the valve cover off to see how the cam tensioner is operating?

  39. #39
    Established Member Two Rings
    Join Date
    Feb 02 2016
    AZ Member #
    368153
    My Garage
    02 A4 1.8t quattro Sport 5 speed, 87 4Runner (rock crawler), 06 4runner, 99 Suzuki Bandit 1200S
    Location
    Richmond, VA

    Quote Originally Posted by Arnie91 View Post
    Would it be okay to refresh the entire fuse board?, some of the other fuses look blown as well.

    Question: Can I crank the motor with the valve cover off to see how the cam tensioner is operating?
    Fuses wear out just like anything else. You will not hurt anything at all replacing all the fuses as long as you use the required amperages (I would do it with the battery disconnected though).

    You *should* be able to crank it over to observe the cam tensioner. I've never tried it before on one of these motors. My concern would be anything you have unhooked (coils, etc) setting something goofy in the ECU. If I were you I would just button it up then fire it and see how it sounds. It's not that hard to pop the valve cover back off if it doesn't sound right (trust me - I was putting my coils back in when I noticed those 2 plastic cam covers laying on my cowl and had to pull it back apart ).

  40. #40
    Senior Member Three Rings Arnie91's Avatar
    Join Date
    Oct 28 2015
    AZ Member #
    363679
    Location
    London

    So some updates. I'm slowly getting on with fixing the car, but have come across more parts that need to be fixed.

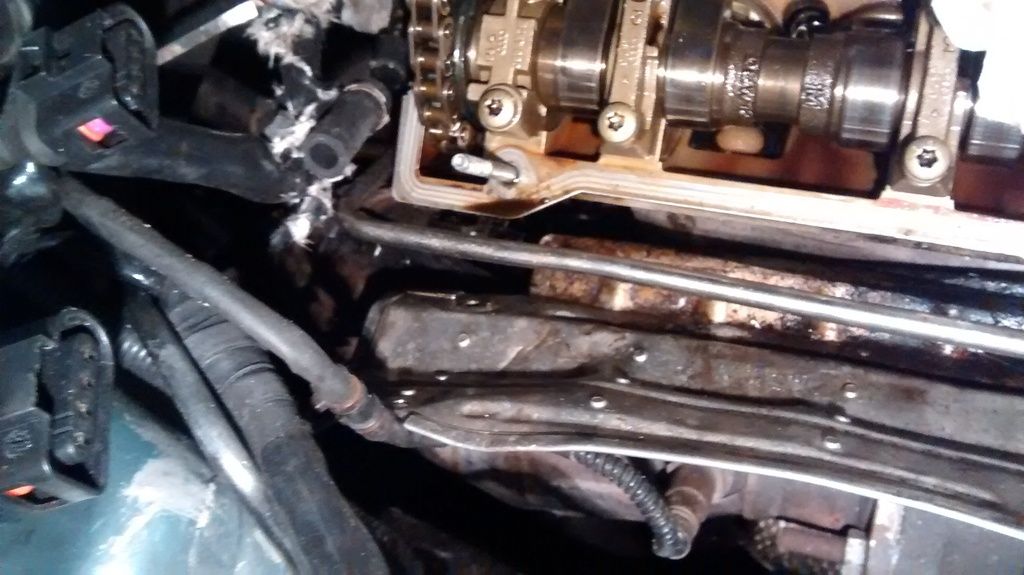
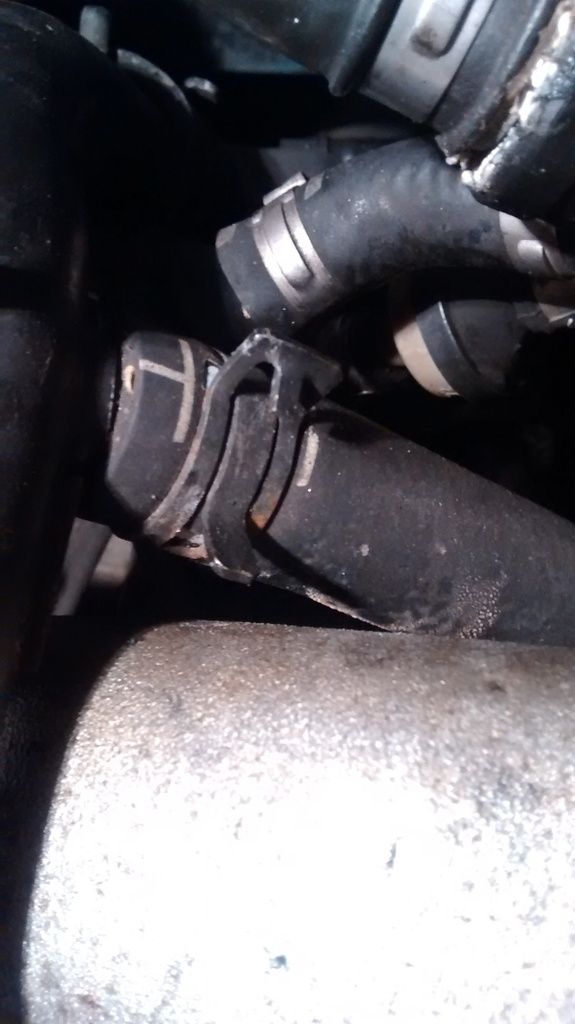
    I'm reached a dead end. I can't get one of the hardline pipes off that runs over the intake manifold. I need to take off the manifold to clean it properly. I believe it's the pipe where you can bleed the coolant system, it's got one of those really hard clamps on it, it's going to be impossible for me to take off.


    Rocker Cover cleaned up:

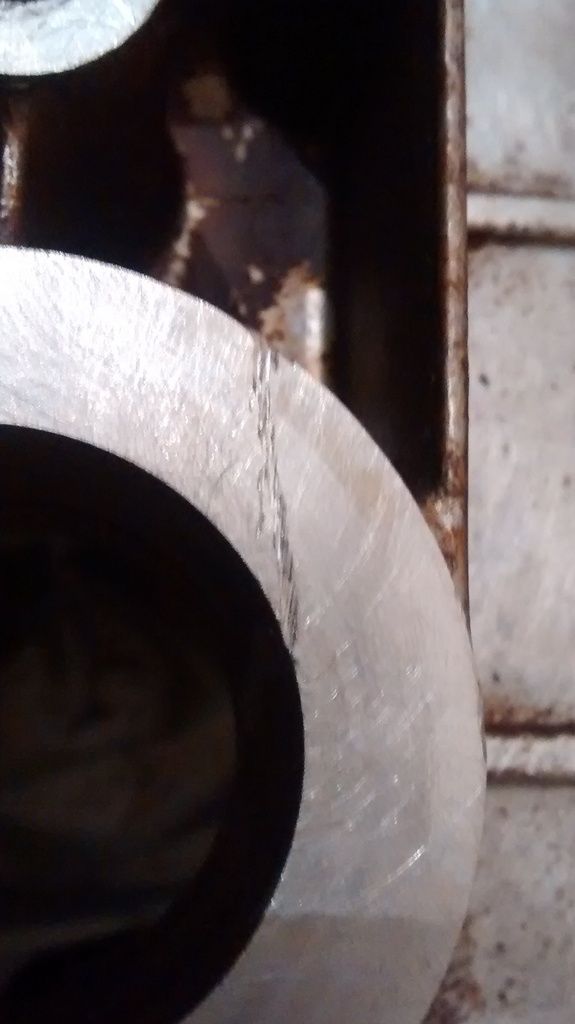
    There's a small scratch around one of the centre rings. I think this happened from cleaning. Putting some gasket cover it would stop it from leaking I hope


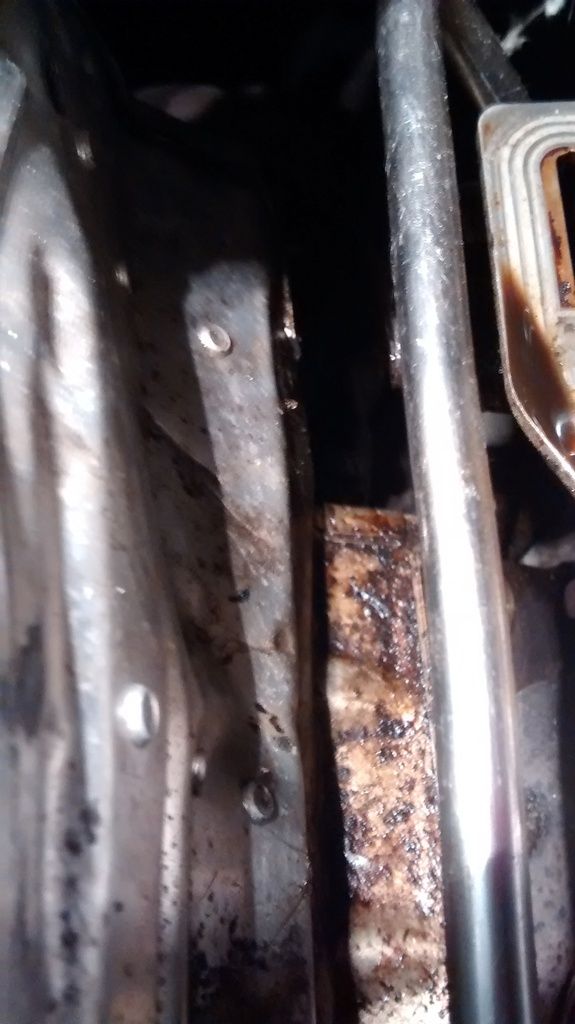
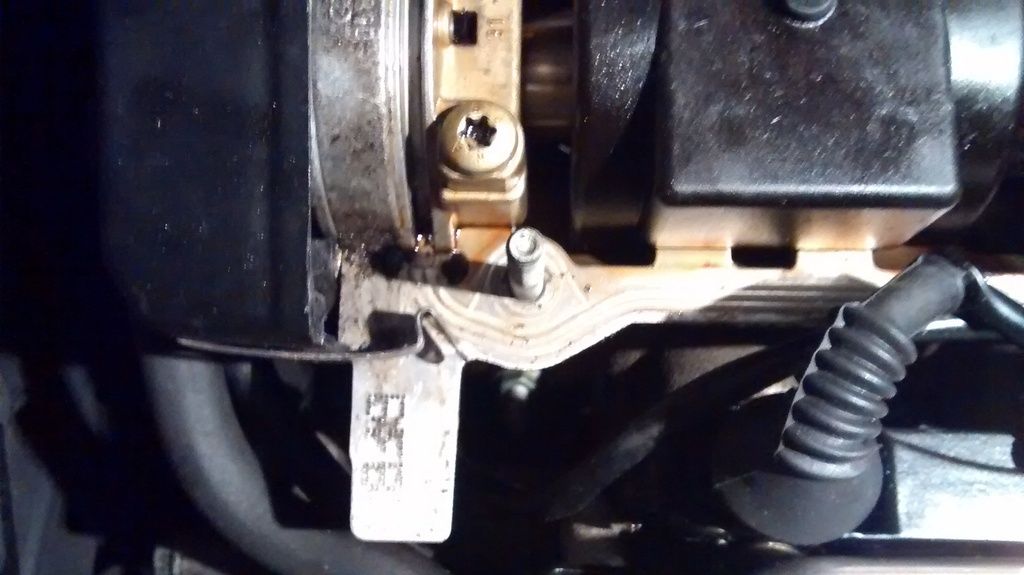
    The metal cover on the left side of the engine has no screw on the top side. Im not sure how to secure it back on or take it off. It looks like a rivet is holding it in place. I want to get it off to clean as well. Any tips?


    Suspect plate, up and close


    Moving on, I couldn't find any traces of old sealant for the valve cover gasket. Is this normal? Starting to wonder if it was replaced without sealants in the corner.

    Before Cleaning:


    On to the next issue:


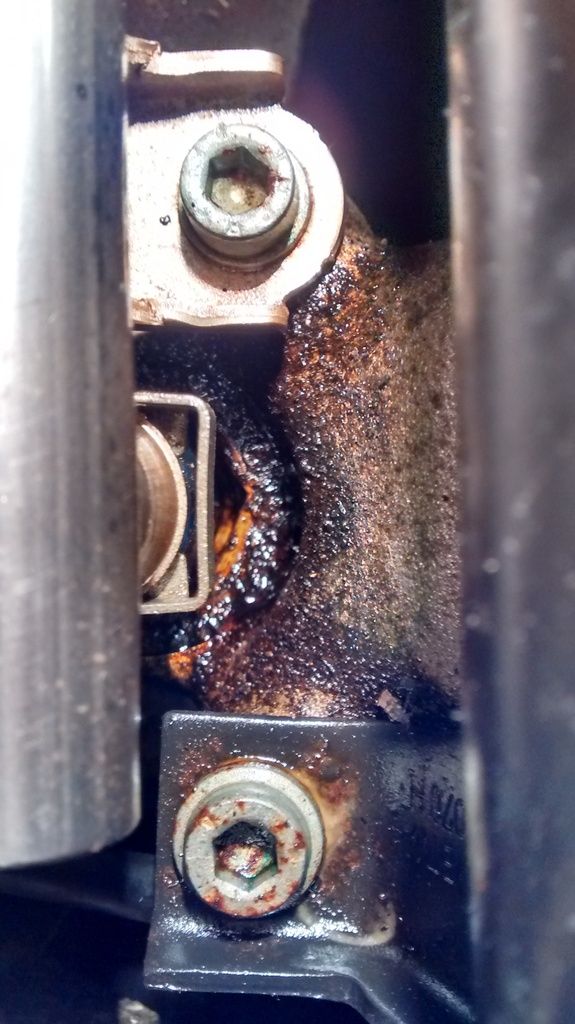
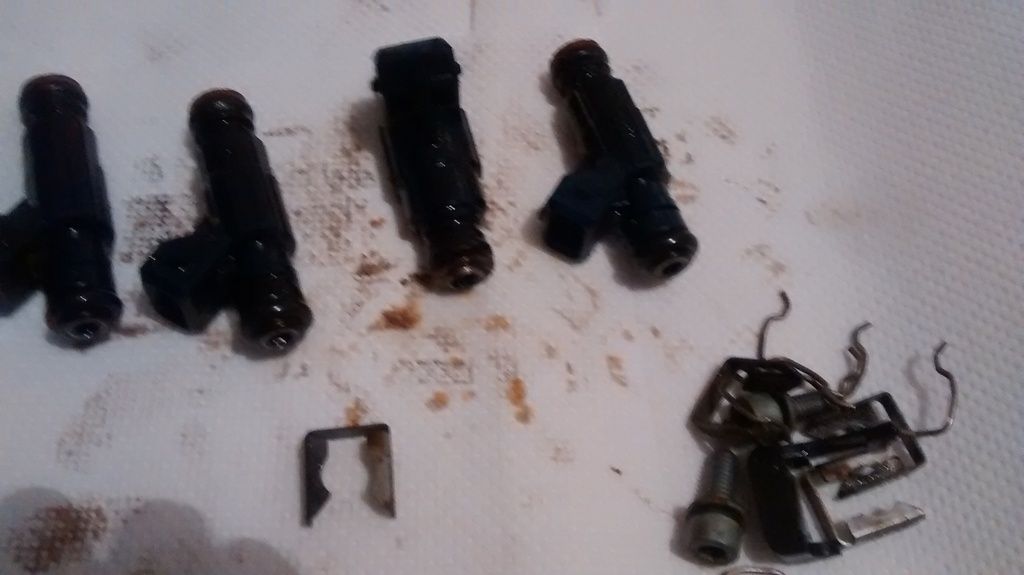
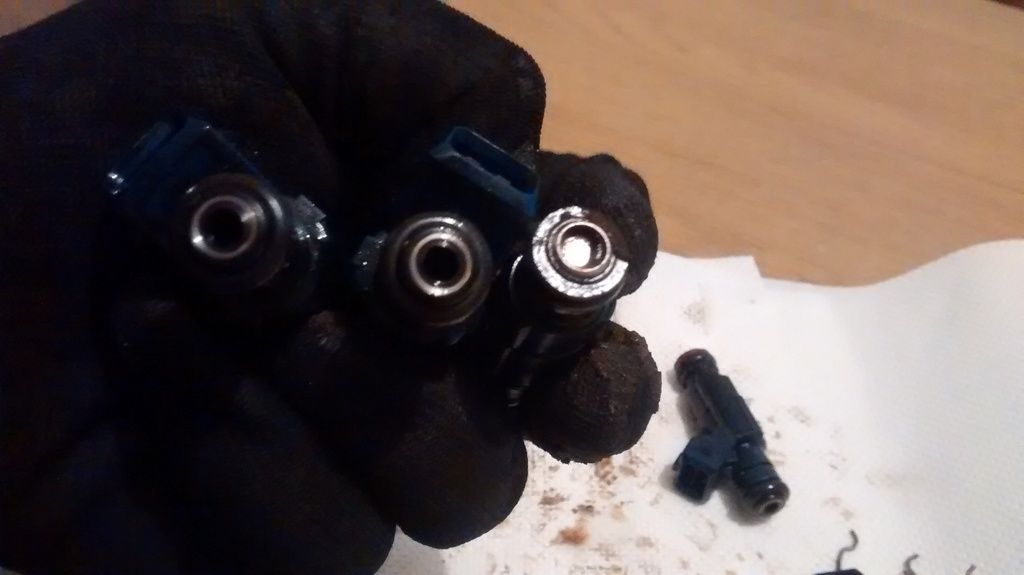
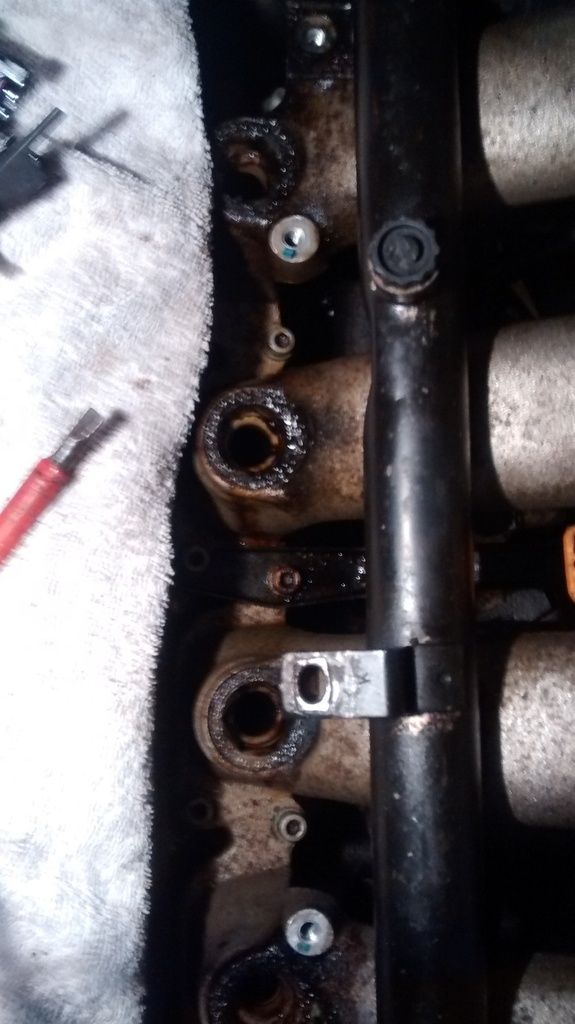
    Really badly leaking injectors, so bad that I'm worried that it's coming from inside the intake manifold and explains while theres a tiny amount of oil residue around my throttle body.

    It looks like these injectors need replacing, not just the seals. One of them has a top plastic seal broken, all though the seals look in good condition on 1 or two of them, the others are shredded up.

    I need to take the intake manifold off to get cleaning on top and underneath which is no doubt covered in oil. One of the plastic connectors that hold the injectors in place with the fuel rail was also broken when I found it.


    Leaking Injectors


    Broken Plastic Holder thing


    ************


    The clamp holding the hardline pipe which runs across the intake manifold.


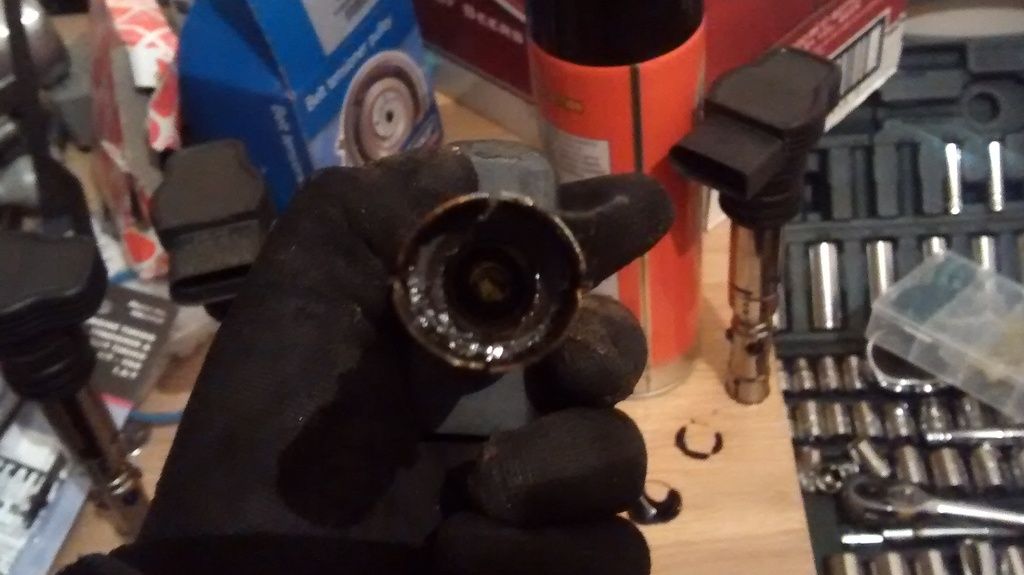
    Coil Packs were taken out last week. They had a bit of oil intake of them as the valve cover gasket failed. Wondering if they'll be okay with a clean up and new spark plugs? They look decent.


    A whole room full of toys and tools


    Everything to do the valve cover has arrived. I've also picked up a Haynes Manual for the car.

    I want to take off the hardline pipe and the broken off combi valve piece before doing the valve cover so that's the next step.

    I miss the days of having a downpipe and Diverter Valve. My audi was always the fierces on every road. Really want this back and running on the road. Suspension refresh to come after all the engine stuff is fixed.

    I've been doing most of the work on the engine at night, with only a light bulb to guide me, finishing work too late.

    Cant wait!!
    Last edited by Arnie91; 02-28-2016 at 12:24 PM.

Page 1 of 4 123 ... LastLast


Bookmarks

Posting Permissions

  • You may not post new threads
  • You may not post replies
  • You may not post attachments
  • You may not edit your posts
  •  


    © 2001-2024 Audizine, Audizine.com, and Driverzines.com
    Audizine is an independently owned and operated automotive enthusiast community and news website.
    Audi and the Audi logo(s) are copyright/trademark Audi AG. Audizine is not endorsed by or affiliated with Audi AG.