Audizine - An Automotive Enthusiast Community

Page 1 of 2 12 LastLast
Results 1 to 40 of 67
  1. #1
    Veteran Member Four Rings
    Join Date
    Jun 08 2014
    AZ Member #
    250808
    Location
    Vancouver, Washington

    "Professional" basement trunk respray!

    Guest-only advertisement. Register or Log In now!
    DISCLAIMER: I'm not a pro. I've never done any painting at this level in my lifetime and I'm doing this because I'd like to learn. If it turns out terrible, oh well, I'll CF wrap it and call it a day. The quotes from body shops to do it were crazy, so for about $100 I'm doing this in my basement. Don't hate on me plz.

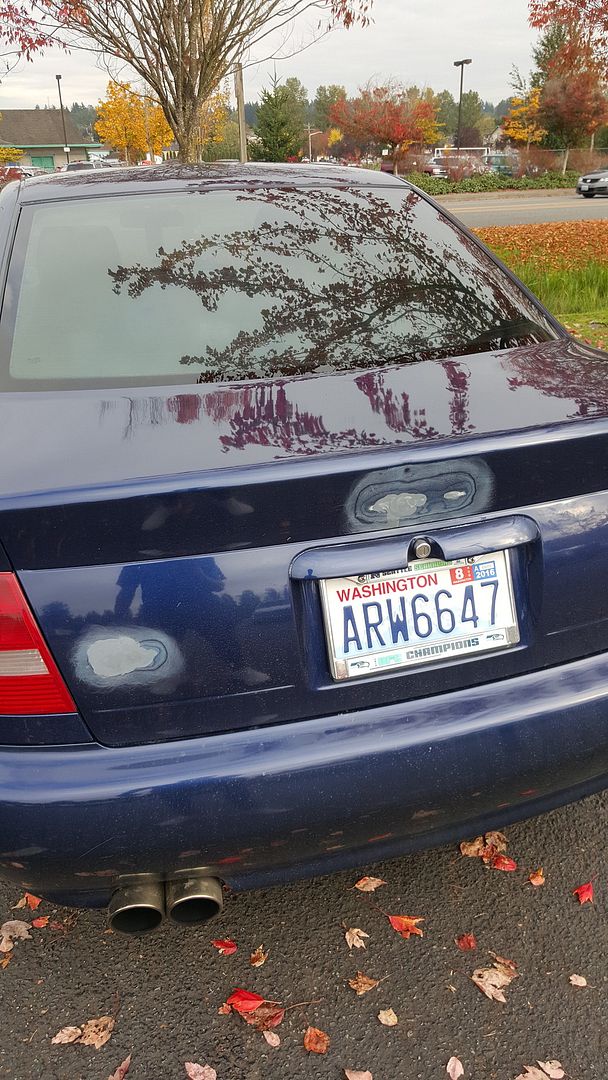
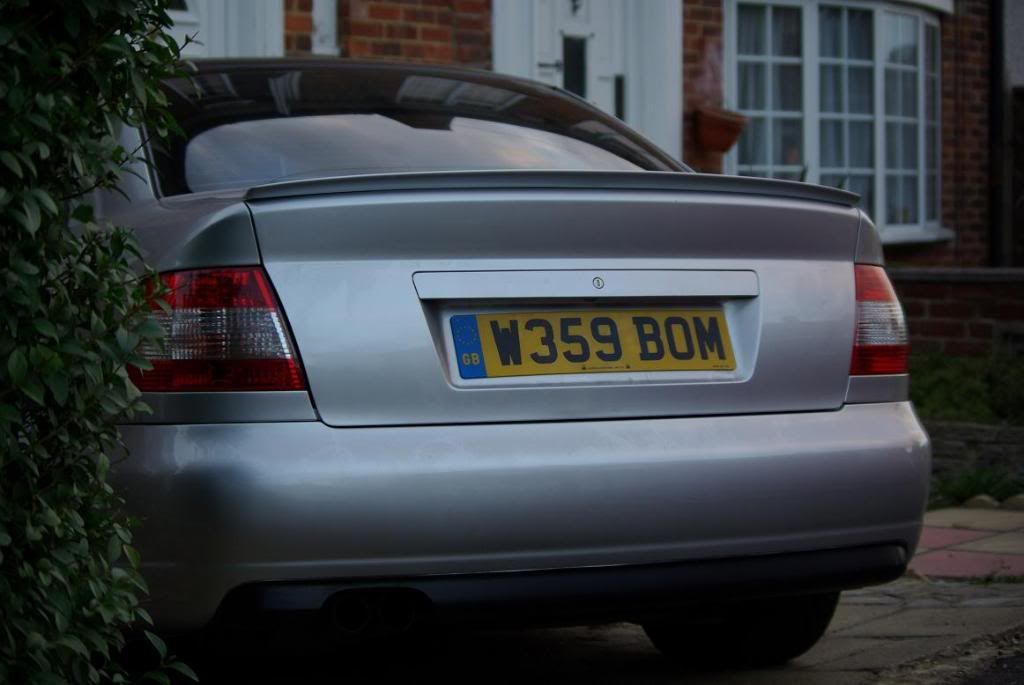
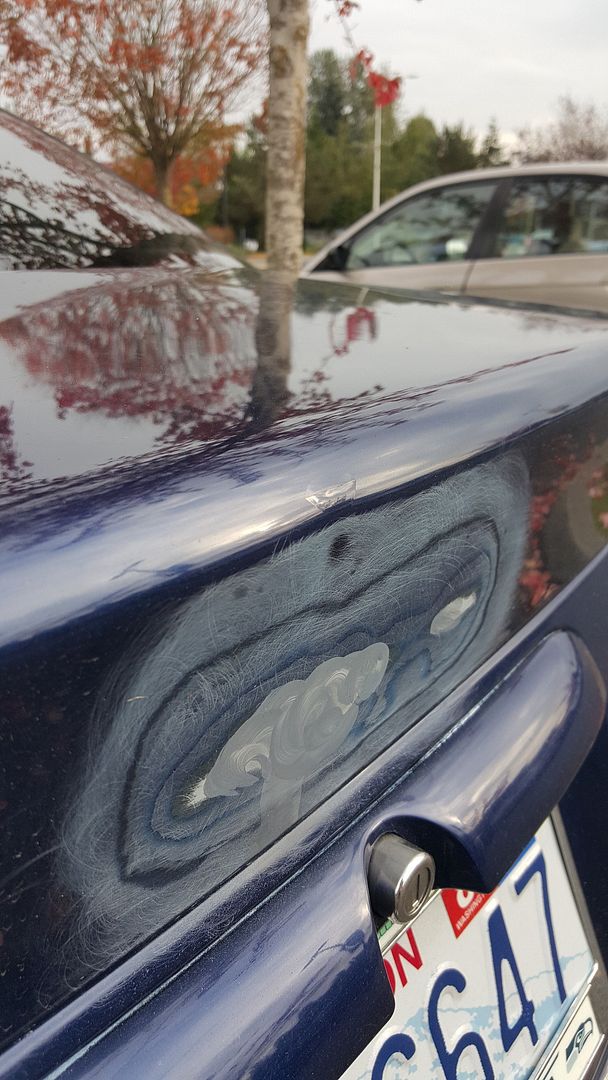
    A few months ago, I decided to de-badge my S4, with no idea of what was to come next. The previous owner had super-glued the badges on! Once they were off, the paint was chipped, bubbling, cracking, melting, anything you can think of, on the badge surface. I don't have pics of what it looked like but it was bad, and I saw this as an opportunity for a learning experience.

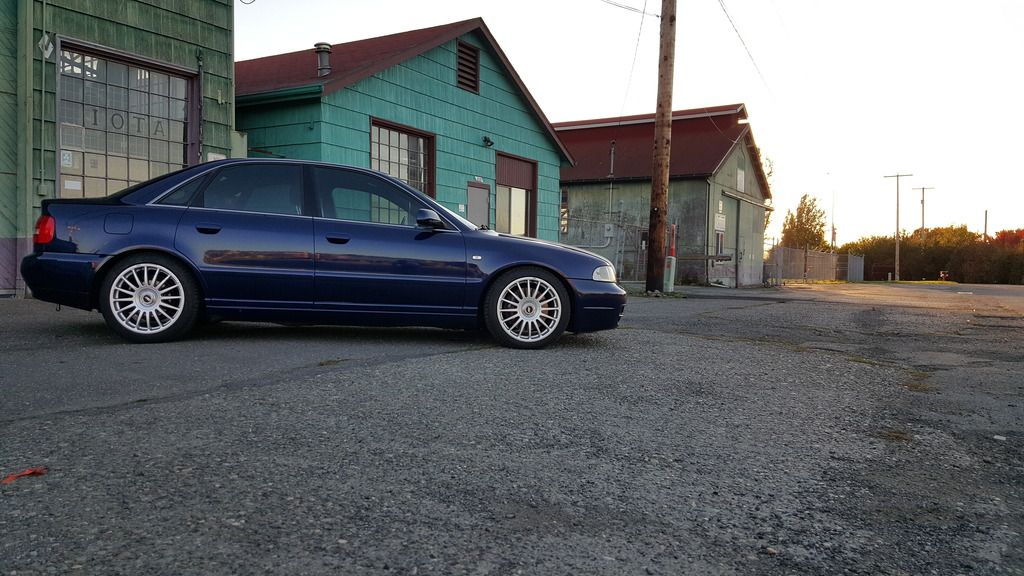
    First off, a glamour shot.. of course.


    I started off by sanding the hell out of the de-badged spots. I had to get down to bare metal on small spots to get it completely smooth. It stayed like this for a few months until I could get the time to respray it.
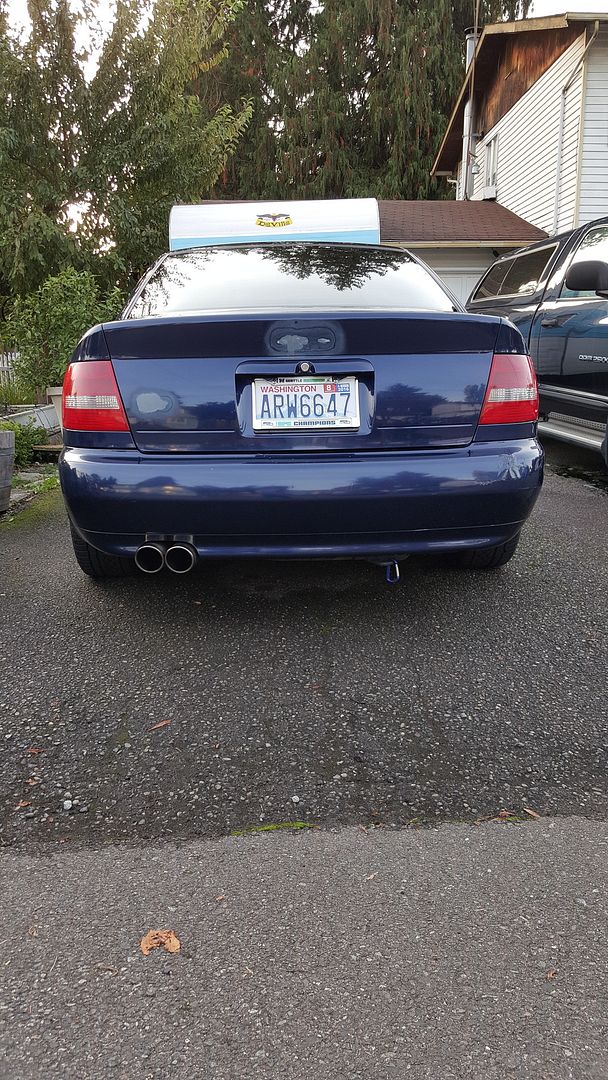


    Fast forward to now. Being a HS student, I've got break for two weeks. The stars aligned and I was able to get everything I needed to start.

    The plan: Sand the whole trunk with 800 (HIGH quality 3M wet/dry), fill the small dent above where the Audi rings were, primer the spots, 400 then 600 wet sand the spots, and re-sand rest of the trunk with 800 to remove primer over-spray, final prep/mask, apply base coat to spots, and finally the clear and final buff!

    Project photos:


    These are before


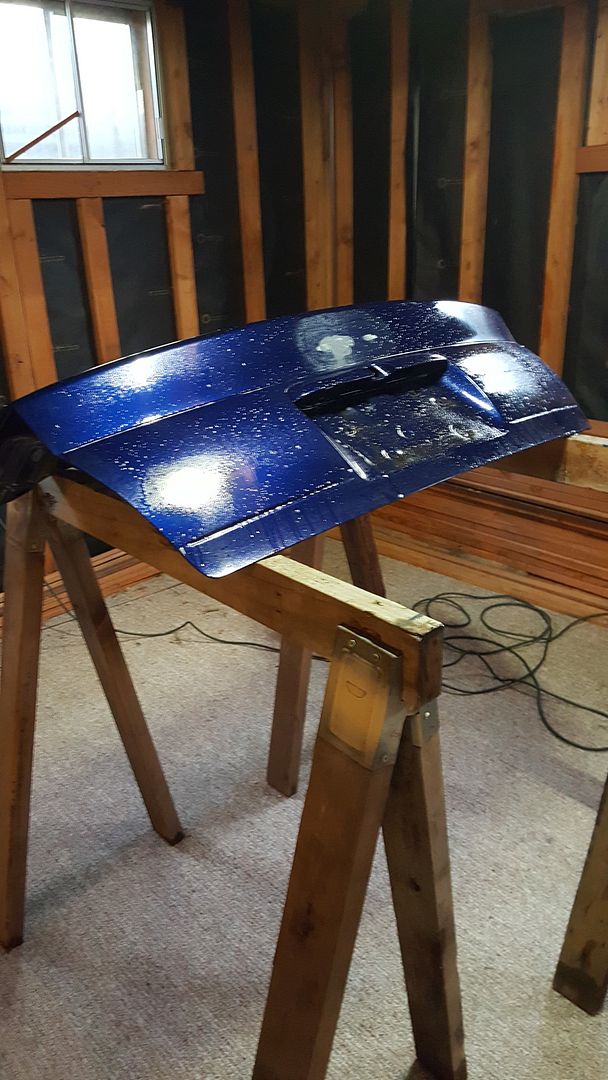
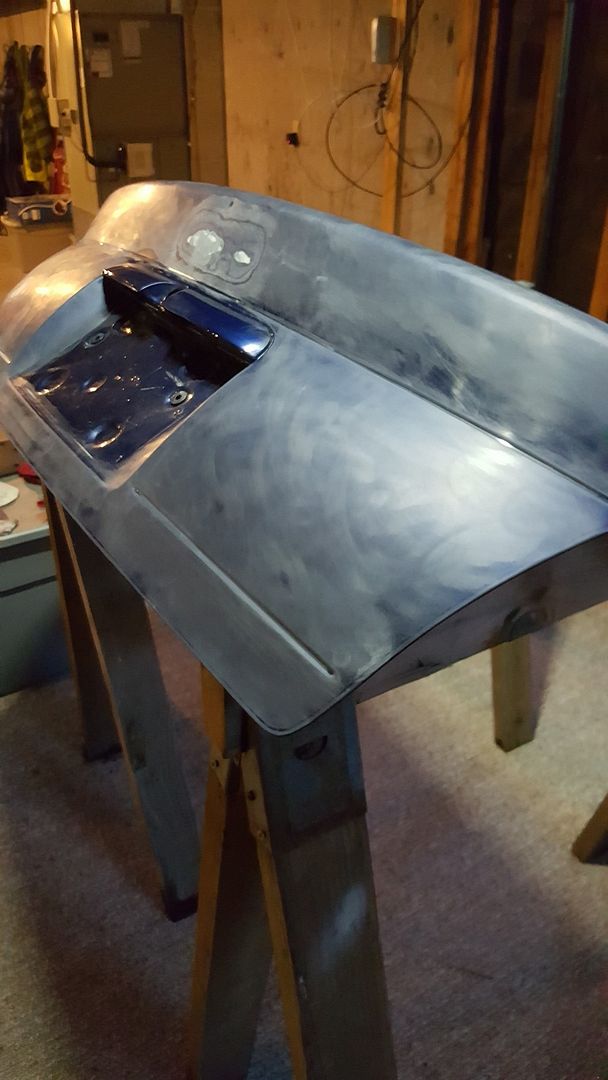
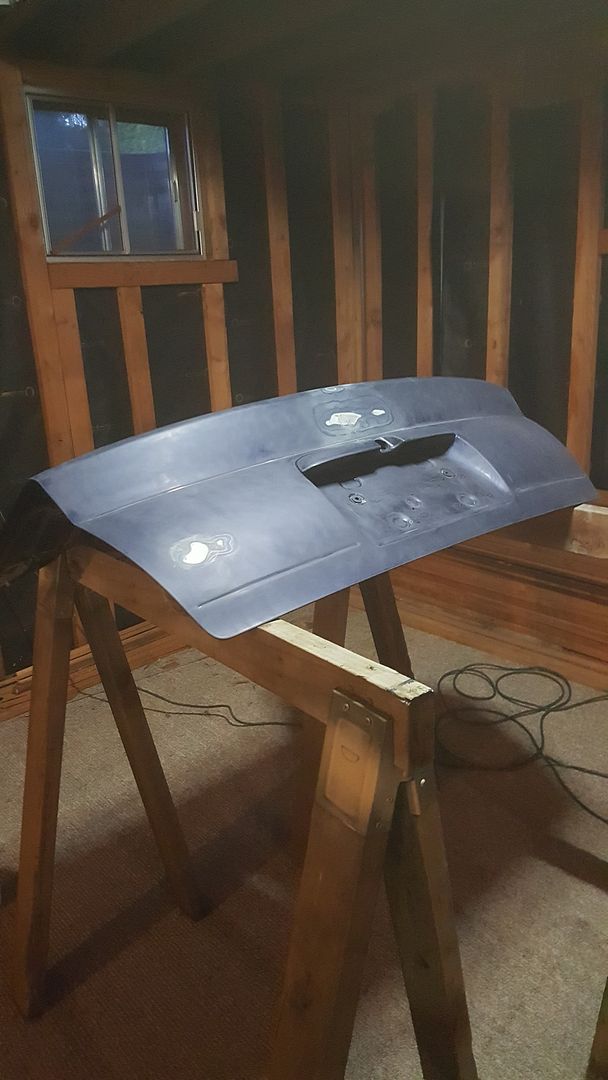
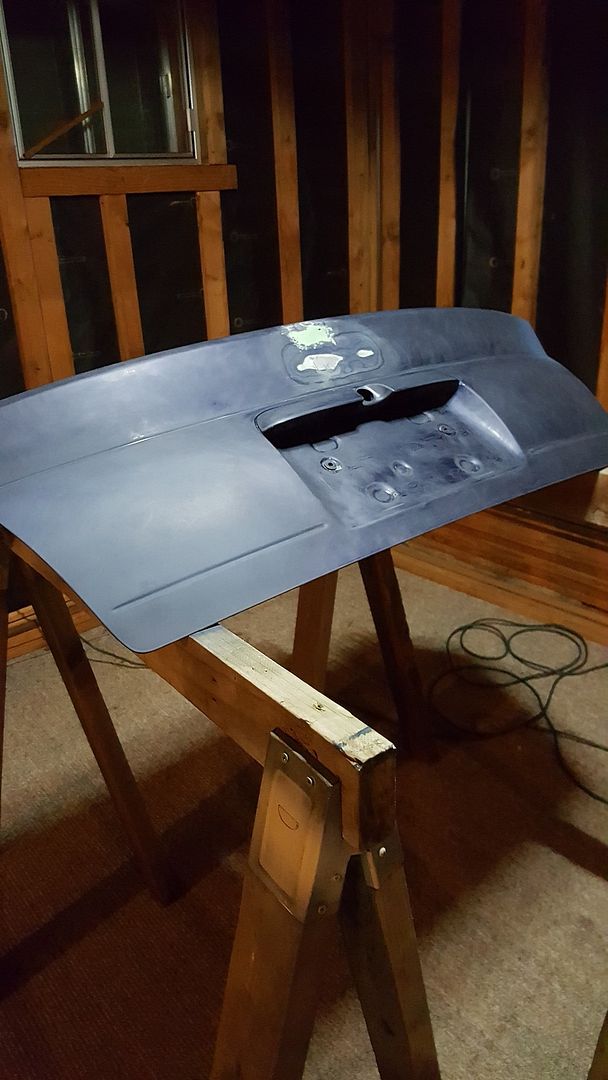
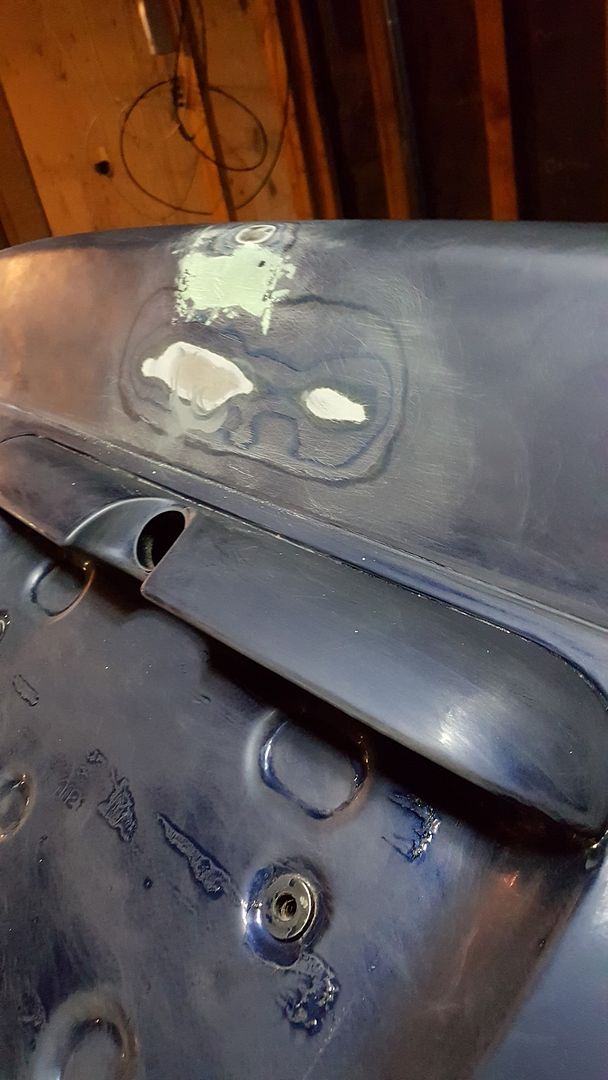
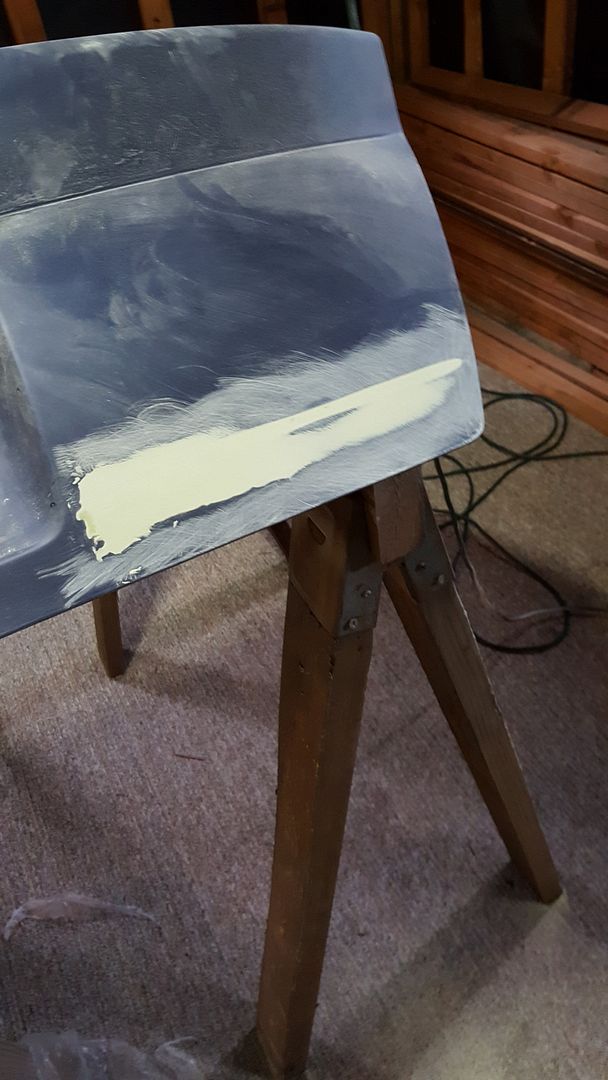
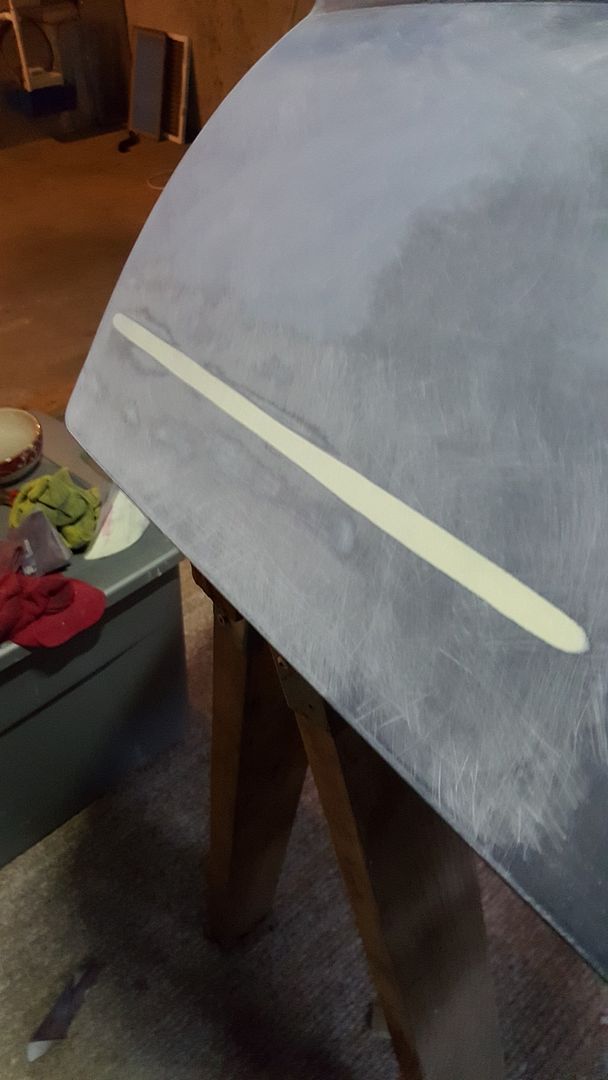
    These are all from tonight. Got this all done in one afternoon.
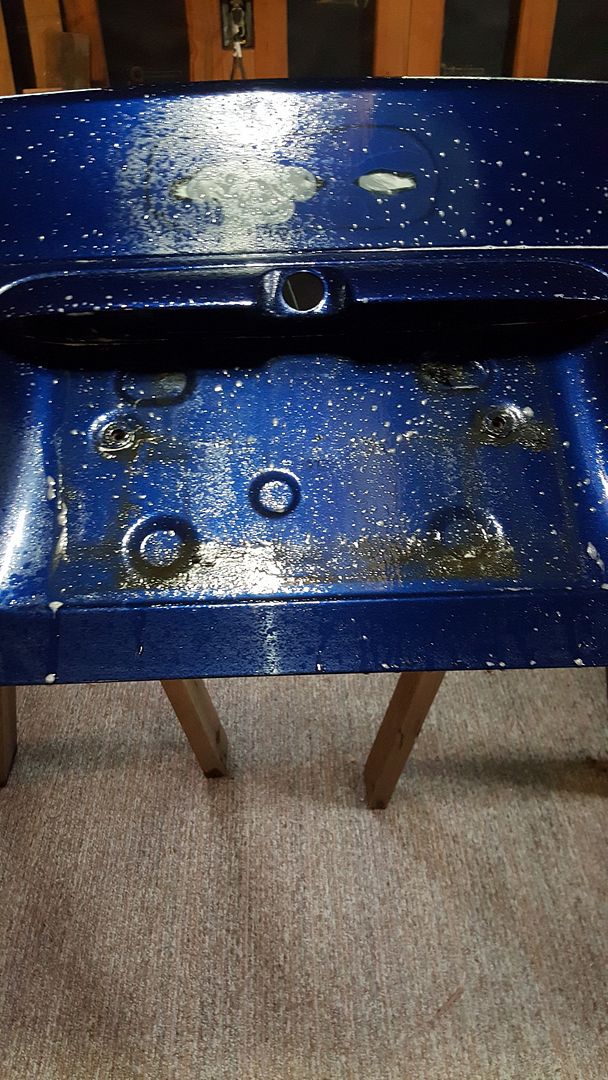


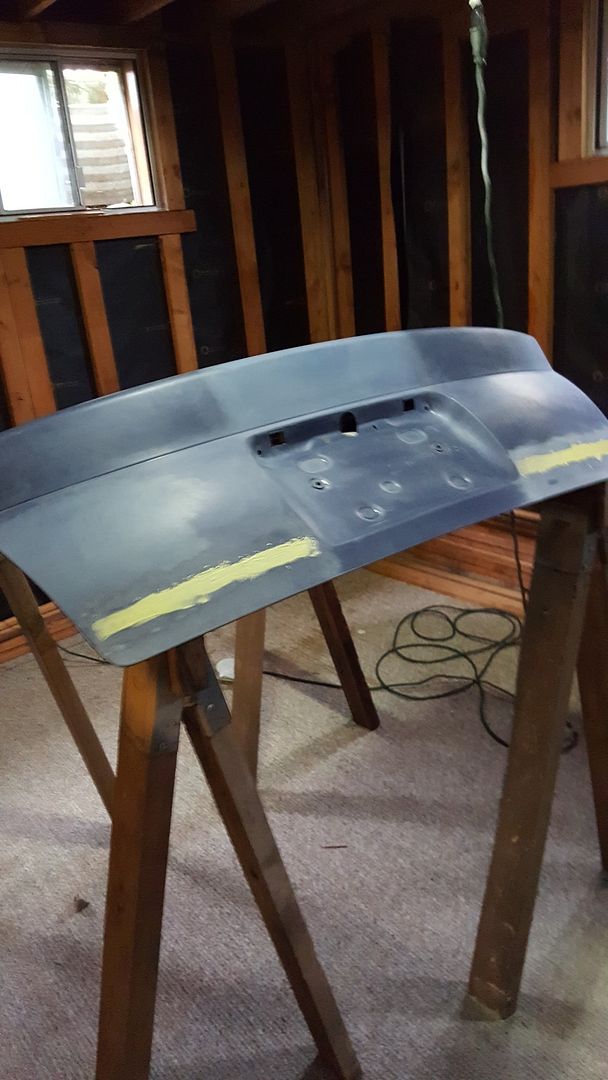
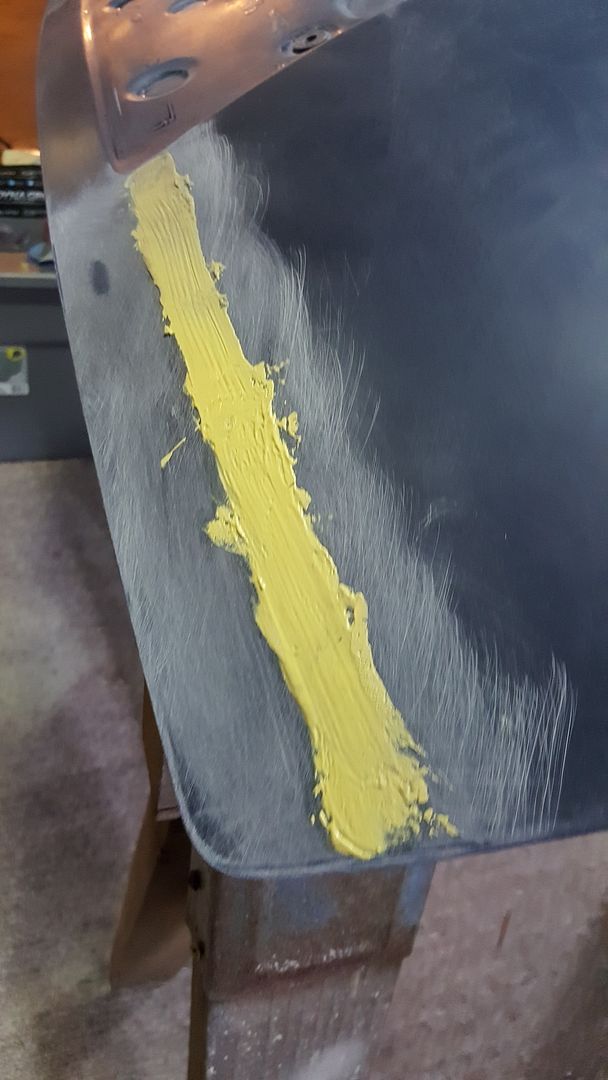
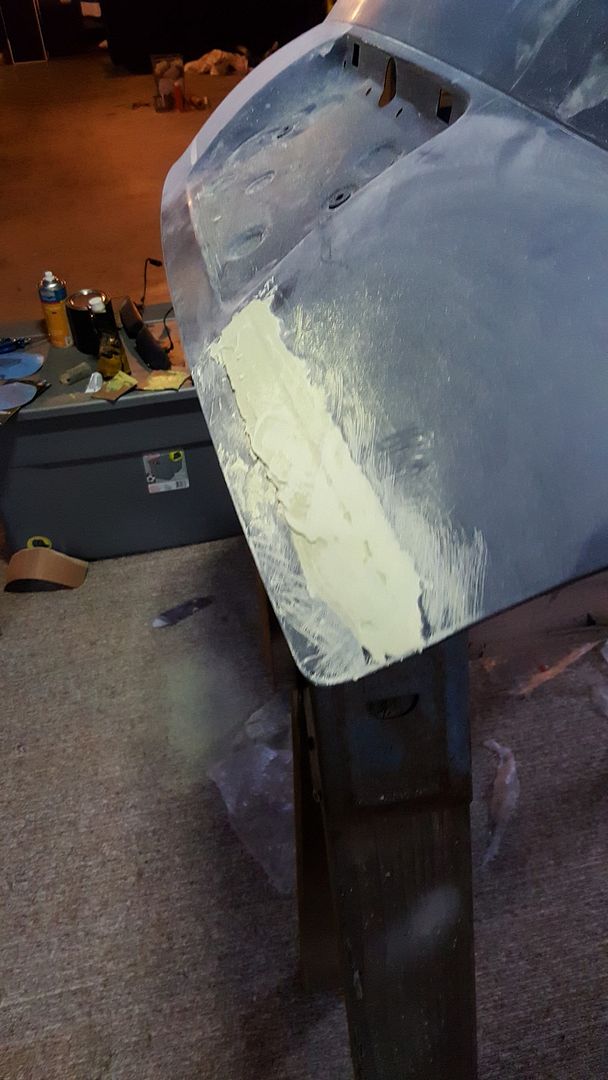
    This is what is done as of now. I'll be updating with more photos and progress of this as the week goes on. Hope to have it done by Christmas.

    If you've got some advice or helpful tips, it's very welcome! Thanks for looking

  2. #2
    Veteran Member Four Rings Bordom's Avatar
    Join Date
    Dec 10 2013
    AZ Member #
    134985
    Location
    Borden, Ontario, Canada

    *In Borat voice* "Is nice. I liike"

    Pretend this wrench is a paint brush Lol

    Seriously though, nice job
    Bordom's Allroad; Boat in the Street
    2003 Allroad 6-spd, 4.2 BBD S6 Swap

    IG: 24_et

    Sold:
    2010 Deep Sea Blue S4 6-spd

    RIP:
    2001.5 Brilliant Black S4 6-spd

  3. #3
    Senior Member Three Rings audi-hammer's Avatar
    Join Date
    Aug 28 2009
    AZ Member #
    47031
    Location
    Buffalo,NY

    look forward to the results, love how you jumped right in
    Silvia = 02 s4 stageIII

  4. #4
    Veteran Member Four Rings
    Join Date
    Jun 08 2014
    AZ Member #
    250808
    Location
    Vancouver, Washington

    Quote Originally Posted by Bordom View Post
    *In Borat voice* "Is nice. I liike"

    Pretend this wrench is a paint brush Lol

    Seriously though, nice job
    Thanks! I'll be the bob ross of resprays by the end of this, putting happy little trees everywhere haha

    Quote Originally Posted by audi-hammer View Post
    look forward to the results, love how you jumped right in
    Me too, I have no idea what to expect! Darker colors are more difficult to work with so I have to be sure the prep is perfect. Jumping right in is the best way to learn

  5. #5
    Veteran Member Four Rings AudiTechS4's Avatar
    Join Date
    Oct 19 2007
    AZ Member #
    21933
    My Garage
    2000 S4
    Location
    Scottsdale , Az

    Now is the time to remove the lower body line like the euro trunks
    2001 Audi S4 Manual - Nogaro Blue/black - Full AWE stg 3 kit w/ manifolds,h&r coilovers,jhm trans rebuild,UUC VM3 exhaust , 2.5" dp's - Needs Love - Got some love now 442awhp and 512 awtq
    2004 Audi S4 Avant manual - Silver/black - 2.7 swapped ,k24's and srm side mounts

  6. #6
    Veteran Member Four Rings vavJETTAw36's Avatar
    Join Date
    Jul 04 2012
    AZ Member #
    96276
    Location
    Woodbridge, VA

    Good job! What will you be spraying with? What size compressor etc


    Sent from my iPhone using Tapatalk

  7. #7
    Veteran Member Four Rings christianb5s4's Avatar
    Join Date
    Aug 24 2014
    AZ Member #
    277489
    Location
    Newport Beach, CA

    Quote Originally Posted by AudiTechS4 View Post
    Now is the time to remove the lower body line like the euro trunks
    I never noticed that difference between the US and Euro trunks besides the obvious wider license plate area, nice.
    Imola 2001 Stage 3 S4: 324K - 157mph 1/2 mile - 543whp/530ftlbs Mustang Dyno - Built BEL Block - RS4 cams/intake - TTE600s - Ringer Racing Stage 5 - Etspec - SRM V3 Intercoolers - AA built trans - 4:1 Diff - Vast cooler - JHM Trio - 034 - H&R Coilovers - OZ Racing - SRM/SSAC exhaust
    2024 M3 Comp xDrive
    2016 A6 prestige w/ s-line, APR Stg 1, Melen TCU, PS4S, valcona S6 interior parts

  8. #8
    Veteran Member Four Rings AudiTechS4's Avatar
    Join Date
    Oct 19 2007
    AZ Member #
    21933
    My Garage
    2000 S4
    Location
    Scottsdale , Az

    well the early euro trunks didnt have the body line.
    2001 Audi S4 Manual - Nogaro Blue/black - Full AWE stg 3 kit w/ manifolds,h&r coilovers,jhm trans rebuild,UUC VM3 exhaust , 2.5" dp's - Needs Love - Got some love now 442awhp and 512 awtq
    2004 Audi S4 Avant manual - Silver/black - 2.7 swapped ,k24's and srm side mounts

  9. #9
    Veteran Member Four Rings
    Join Date
    Jun 08 2014
    AZ Member #
    250808
    Location
    Vancouver, Washington

    Quote Originally Posted by AudiTechS4 View Post
    Now is the time to remove the lower body line like the euro trunks
    Oh thats a great idea! Should I?
    Edit: Screw it why not :D

  10. #10
    Veteran Member Four Rings
    Join Date
    Jun 08 2014
    AZ Member #
    250808
    Location
    Vancouver, Washington

    Quote Originally Posted by vavJETTAw36 View Post
    Good job! What will you be spraying with? What size compressor etc


    Sent from my iPhone using Tapatalk
    I'll update you later once I check. I got the gun from Harbor Freight so its nothing fancy but should do the trick

  11. #11
    Veteran Member Three Rings goalieman24's Avatar
    Join Date
    Mar 29 2011
    AZ Member #
    73117
    Location
    Maryland

    Definitely spend as much time as you can on all of the prep work. Poor prep can't be fixed by even the most professional painter.

    And is that where you're painting as well? If so, be very thankful for your mom and/or dad. Couldn't imagine what would've happened if I had ever tried to paint something inside and in a carpeted room.

  12. #12
    Veteran Member Four Rings
    Join Date
    Nov 02 2014
    AZ Member #
    292607
    My Garage
    06 9-3 Aero 2.8T, 96 Miata
    Location
    Winchester, VA

    Yep, if you keep up with the patience it will turn out great. If you screw up a layer, correct it before laying another, ect. Can't wait to see the end result, looks like you're on the right track!

  13. #13
    Veteran Member Four Rings
    Join Date
    Jun 08 2014
    AZ Member #
    250808
    Location
    Vancouver, Washington

    Quote Originally Posted by goalieman24 View Post
    Definitely spend as much time as you can on all of the prep work. Poor prep can't be fixed by even the most professional painter.

    And is that where you're painting as well? If so, be very thankful for your mom and/or dad. Couldn't imagine what would've happened if I had ever tried to paint something inside and in a carpeted room.
    I plan to spend a good few more hours today prepping and yes thats where I'll be painting as well. It's the unfinished basement and the carpet wont be staying haha

    Quote Originally Posted by DieselElectric View Post
    Yep, if you keep up with the patience it will turn out great. If you screw up a layer, correct it before laying another, ect. Can't wait to see the end result, looks like you're on the right track!
    I've painted small stuff before like my trim and y-pipe and there isnt a truer statement in painting, that its all in the prep work. Thanks!

  14. #14
    Veteran Member Four Rings vavJETTAw36's Avatar
    Join Date
    Jul 04 2012
    AZ Member #
    96276
    Location
    Woodbridge, VA

    Quote Originally Posted by MarlinFoundNemo View Post
    I plan to spend a good few more hours today prepping and yes thats where I'll be painting as well. It's the unfinished basement and the carpet wont be staying haha


    I've painted small stuff before like my trim and y-pipe and there isnt a truer statement in painting, that its all in the prep work. Thanks!
    I think he's referring to the fact that the fumes will get into the house. If I am assuming wrong, well, I guess that's a question to you.

    Hey nothing wrong with HF products. 90% of my tools are HF. Since you're spraying a small piece, a medium sized mobile compressor should be absolutely fine. Let me know how it goes with that particular gun. I've never painted in the car application and interested in your post

    Good luck!


    Sent from my iPhone using Tapatalk

  15. #15
    Veteran Member Four Rings
    Join Date
    Jun 08 2014
    AZ Member #
    250808
    Location
    Vancouver, Washington

    Quote Originally Posted by vavJETTAw36 View Post
    I think he's referring to the fact that the fumes will get into the house. If I am assuming wrong, well, I guess that's a question to you.

    Hey nothing wrong with HF products. 90% of my tools are HF. Since you're spraying a small piece, a medium sized mobile compressor should be absolutely fine. Let me know how it goes with that particular gun. I've never painted in the car application and interested in your post

    Good luck!


    Sent from my iPhone using Tapatalk
    Oh right I see what you're saying. We will be setting up a little paint booth down there with a fan sucking the air our and windows open so it shouldn't be much of an issue. And we do have a medium sized compressor which we used for reroofing over summer, don't know the exact size but it'll be plenty. Thanks!

  16. #16
    Veteran Member Four Rings
    Join Date
    Jun 08 2014
    AZ Member #
    250808
    Location
    Vancouver, Washington

    More pics to come later this afternoon!

  17. #17
    Senior Member Two Rings cb s4's Avatar
    Join Date
    May 11 2013
    AZ Member #
    114976
    Location
    ct

    I personally Wouldn't use a harbor freight gun. It is good for a truck frame but i dont think for the trunk.I wouldnt use one but thats me I would buy a decent gun. Also make sure u drain out water from the compressor before u spray. Also take your time on the prep work. And if you don't mind me asking were are you getting the paint

  18. #18
    Veteran Member Four Rings Bordom's Avatar
    Join Date
    Dec 10 2013
    AZ Member #
    134985
    Location
    Borden, Ontario, Canada

    Quote Originally Posted by AudiTechS4 View Post
    well the early euro trunks didnt have the body line.
    Which body line are you referring to? The very thin valley's on the top+bottom of the trunk enclosing the licence plate area?

    If you're referring to that, the facelift euro trunks didn't have that body line.

    This is the facelift rear with a euro S4 rear bumper
    Bordom's Allroad; Boat in the Street
    2003 Allroad 6-spd, 4.2 BBD S6 Swap

    IG: 24_et

    Sold:
    2010 Deep Sea Blue S4 6-spd

    RIP:
    2001.5 Brilliant Black S4 6-spd

  19. #19
    Senior Member Three Rings MTV2002's Avatar
    Join Date
    Jul 08 2009
    AZ Member #
    44722
    My Garage
    2000 Imola 6sp, 2001 Imola 6spd avant
    Location
    Del Aware

    im in the exact same boat as you with my avant, only my guy super glued the badges on, crooked mind you after paying 7K for a new pant job. so now i have perfect paint and that one blemish on my hatch that i cannot stand to look at :-)
    one slow(smokey) yellow turd (under construction)
    and a school bus....

  20. #20
    Veteran Member Four Rings
    Join Date
    Jun 08 2014
    AZ Member #
    250808
    Location
    Vancouver, Washington

    Quote Originally Posted by Bordom View Post
    Which body line are you referring to? The very thin valley's on the top+bottom of the trunk enclosing the licence plate area?

    If you're referring to that, the facelift euro trunks didn't have that body line.

    This is the facelift rear with a euro S4 rear bumper
    This is what I did, except only the bottom valley. I have it all filled and just need to sand it down then prime. I don't wanna bother with the other one because it'll be a PIA to blend then.

  21. #21
    Veteran Member Four Rings
    Join Date
    Jun 08 2014
    AZ Member #
    250808
    Location
    Vancouver, Washington

    Quote Originally Posted by cb s4 View Post
    I personally Wouldn't use a harbor freight gun. It is good for a truck frame but i dont think for the trunk.I wouldnt use one but thats me I would buy a decent gun. Also make sure u drain out water from the compressor before u spray. Also take your time on the prep work. And if you don't mind me asking were are you getting the paint
    We spent a little more on a good gun from there. It would be nice to spend a few hundred on a gun but I'm on a budget here haha. Also with the time I'm taking in prep, even if the gun does an average job, the prep should help out. Compressor is drained and I've spent about 8-9 hours on prep already (: Not sure where the paint is from as I got it from my uncle who's been in the paint business for 30 years but I'll ask him later this week when I see him.

    - - - Updated - - -

    Quote Originally Posted by MTV2002 View Post
    im in the exact same boat as you with my avant, only my guy super glued the badges on, crooked mind you after paying 7K for a new pant job. so now i have perfect paint and that one blemish on my hatch that i cannot stand to look at :-)
    That would drive me nuts. If its a fresh spray why not have the whole hatch resprayed by the same guys?

  22. #22
    Veteran Member Four Rings
    Join Date
    Jun 08 2014
    AZ Member #
    250808
    Location
    Vancouver, Washington

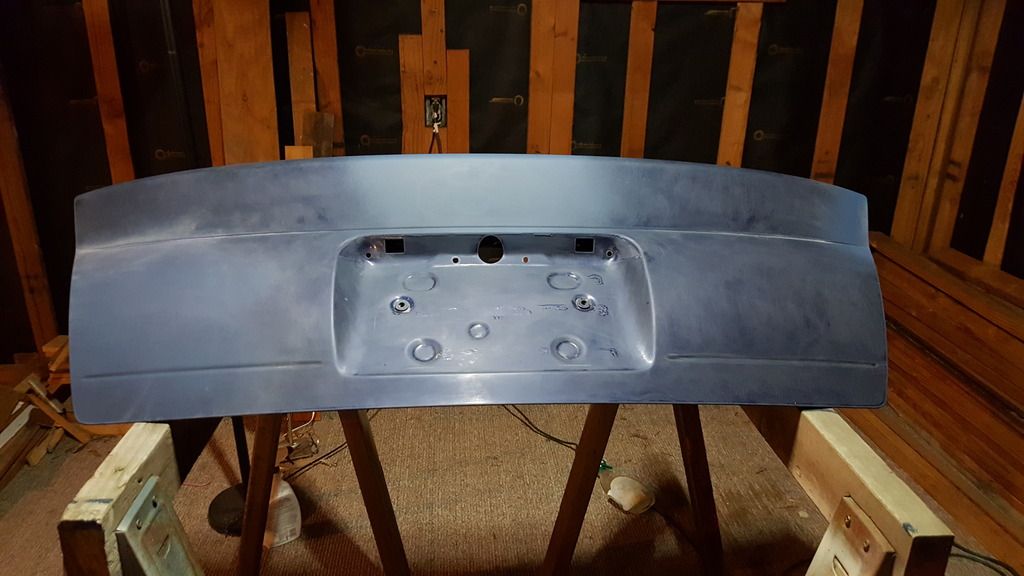
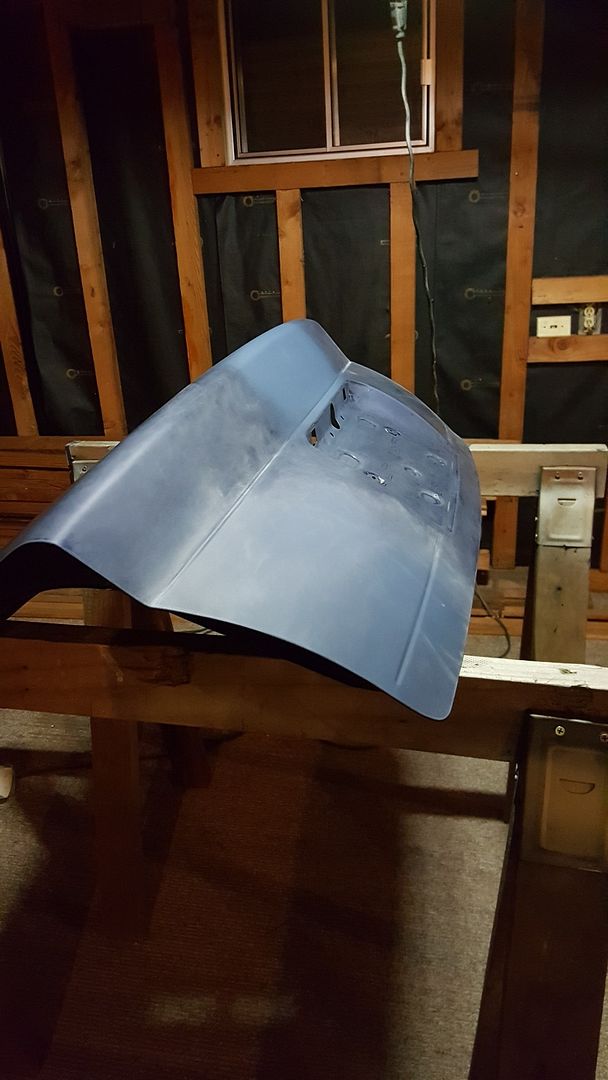
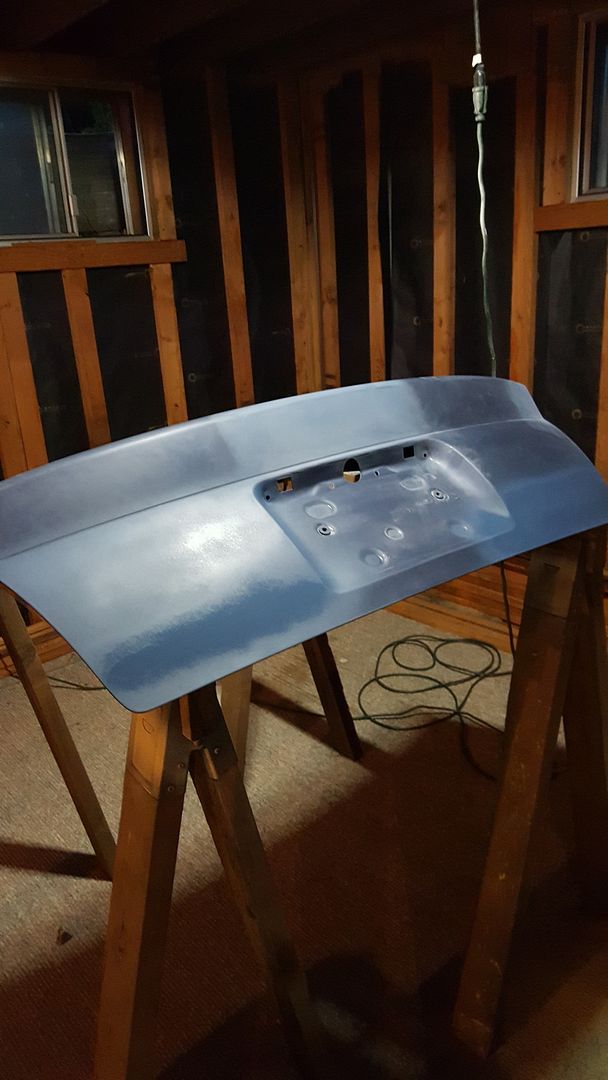
    Update time! Did some more prepping throughout the day, and decided, thanks to AudiTech, to fill the lower body line. So I've done that, and lots of sanding, and finally just got the final coat of primer on the spots. Waiting for it to dry, then sand them with 600, and the rest of the trunk with 800 and its ready for paint!

    Photosssss


    Primer in last photo is darker because it was still wet and needs to be sanded. Planning to paint tomorrow!

  23. #23
    Veteran Member Four Rings
    Join Date
    Nov 04 2013
    AZ Member #
    128426
    My Garage
    stg 3 widebody, 1990 miata, '05 gsxr 1000
    Location
    Palo Alto, CA

    prepare for disappointment. good luck to you sir!

  24. #24
    Veteran Member Four Rings
    Join Date
    Jun 08 2014
    AZ Member #
    250808
    Location
    Vancouver, Washington

    Quote Originally Posted by james 408 View Post
    prepare for disappointment. good luck to you sir!
    Shhh we wont speak of that word ;) Thanks!

  25. #25
    Veteran Member Four Rings
    Join Date
    Oct 10 2012
    AZ Member #
    102006
    Location
    Zionsville and Saint John IN

    Shouldn't you spray the trunk on the car so you can blend?


    Sent from my iPhone using Tapatalk
    -MRR GROUNDFORCE GF06 19X9.5 38MM 5X112 MACHINED SILVER -HANKOOK K110 VENTUS V12 245/35/19 -H&R Street Coilovers -Ecodes -OEM roof rack -Side blades -RS4 grille -Fog grille covers -13' shifter -HFC Eurocode -Stasis Exhaust -APR Stage II -10' B8 A4 AT

  26. #26
    Veteran Member Four Rings tchuck's Avatar
    Join Date
    Apr 11 2010
    AZ Member #
    57497
    My Garage
    '04 A4 1.8T Avant tip
    Location
    Portland, OR

    Quote Originally Posted by james 408 View Post
    prepare for disappointment. good luck to you sir!
    This. The first coat of color is when you find out how well you've prepped.
    ©Timtronic

  27. #27
    Veteran Member Four Rings
    Join Date
    Jun 08 2014
    AZ Member #
    250808
    Location
    Vancouver, Washington

    Quote Originally Posted by richardm0025 View Post
    Shouldn't you spray the trunk on the car so you can blend?


    Sent from my iPhone using Tapatalk
    I could, but it's winter, the car barely fit in the garage to not sit out in the rain, so theres no room for a paint booth in there and I cant get the car in the basement haha

    - - - Updated - - -

    Quote Originally Posted by tchuck View Post
    This. The first coat of color is when you find out how well you've prepped.
    Considering I've spent over at least 10 hours prepping by now, it should turn out well :)

  28. #28
    Veteran Member Four Rings AudiTechS4's Avatar
    Join Date
    Oct 19 2007
    AZ Member #
    21933
    My Garage
    2000 S4
    Location
    Scottsdale , Az

    Looks nice so far good job.yes you filled the line I was talking about.
    2001 Audi S4 Manual - Nogaro Blue/black - Full AWE stg 3 kit w/ manifolds,h&r coilovers,jhm trans rebuild,UUC VM3 exhaust , 2.5" dp's - Needs Love - Got some love now 442awhp and 512 awtq
    2004 Audi S4 Avant manual - Silver/black - 2.7 swapped ,k24's and srm side mounts

  29. #29
    Established Member Two Rings
    Join Date
    Feb 25 2014
    AZ Member #
    149450
    Location
    Atlanta

    Quote Originally Posted by MarlinFoundNemo View Post
    I could, but it's winter, the car barely fit in the garage to not sit out in the rain, so theres no room for a paint booth in there and I cant get the car in the basement haha

    - - - Updated - - -


    Considering I've spent over at least 10 hours prepping by now, it should turn out well :)
    It's 90% prep, and the last 10% is technique. The Harbor Freight gun is perfectly capable of putting down a good finish if you use it to it's strength.

    I've painted both bumpers on my Audi's with it. The base coat is easy, you can do thin layers if its not metallic. The clear coat you should put on as thick as possible before you get runs. Using the HF purple gun, I did the B6 at about 25psi with 4 turns out on the spray volume. I laid down the clear until it was thick enough to self level, but not enough to run. It's a fine line.

    The gaps you see is because I used a $70 Rock Auto USP front bumper on the B6.

    Last edited by R.Cade; 12-22-2015 at 11:17 PM.

  30. #30
    Veteran Member Four Rings tchuck's Avatar
    Join Date
    Apr 11 2010
    AZ Member #
    57497
    My Garage
    '04 A4 1.8T Avant tip
    Location
    Portland, OR

    Quote Originally Posted by MarlinFoundNemo View Post
    ...

    Considering I've spent over at least 10 hours prepping by now, it should turn out well :)
    Hopefully. It looks good so far.
    ©Timtronic

  31. #31
    Veteran Member Four Rings S4 John's Avatar
    Join Date
    Sep 19 2006
    AZ Member #
    11739
    Location
    The Man Cave

    Good luck! DIY ftw!
    //NEVER FOLLOW

    B5 S4 Avant - Nogaro Blue - TTE550 - ETSPEC
    8J TTRS - Panther Black - United Motorsport
    8V RS3 - Mystic Blue - TTE700 - Unitronic

  32. #32
    Veteran Member Four Rings
    Join Date
    Jun 08 2014
    AZ Member #
    250808
    Location
    Vancouver, Washington

    Quote Originally Posted by R.Cade View Post
    It's 90% prep, and the last 10% is technique. The Harbor Freight gun is perfectly capable of putting down a good finish if you use it to it's strength.

    I've painted both bumpers on my Audi's with it. The base coat is easy, you can do thin layers if its not metallic. The clear coat you should put on as thick as possible before you get runs. Using the HF purple gun, I did the B6 at about 25psi with 4 turns out on the spray volume. I laid down the clear until it was thick enough to self level, but not enough to run. It's a fine line.

    The gaps you see is because I used a $70 Rock Auto USP front bumper on the B6.
    The paint is metallic, because its Santorin, and since I'm blending into the rest of the trunk, it'll be about 3 lighter coats. The first is just 1:1 reduced, then 1:1 clear/reducer added to the last batch, and then add more reducer/clear in the final coat to add to the blending "fade" effect. First coat is only over primed spots, next goes a bit further, and the last a little past that, overlapping the last coats with each coat. I've watched some vids on it and it seems to work very well. And thanks I'll set the gun to that and see how it looks :)

    Quote Originally Posted by tchuck View Post
    Hopefully. It looks good so far.
    Thanks!

    Quote Originally Posted by S4 John View Post
    Good luck! DIY ftw!
    I've yet to send this car to any shop for work, so I'm trying to keep with the trend ;) Thanks!

    - - - Updated - - -

    Quote Originally Posted by AudiTechS4 View Post
    Looks nice so far good job.yes you filled the line I was talking about.
    I'm glad you suggested it, looks good!

  33. #33
    Veteran Member Four Rings
    Join Date
    Jun 08 2014
    AZ Member #
    250808
    Location
    Vancouver, Washington

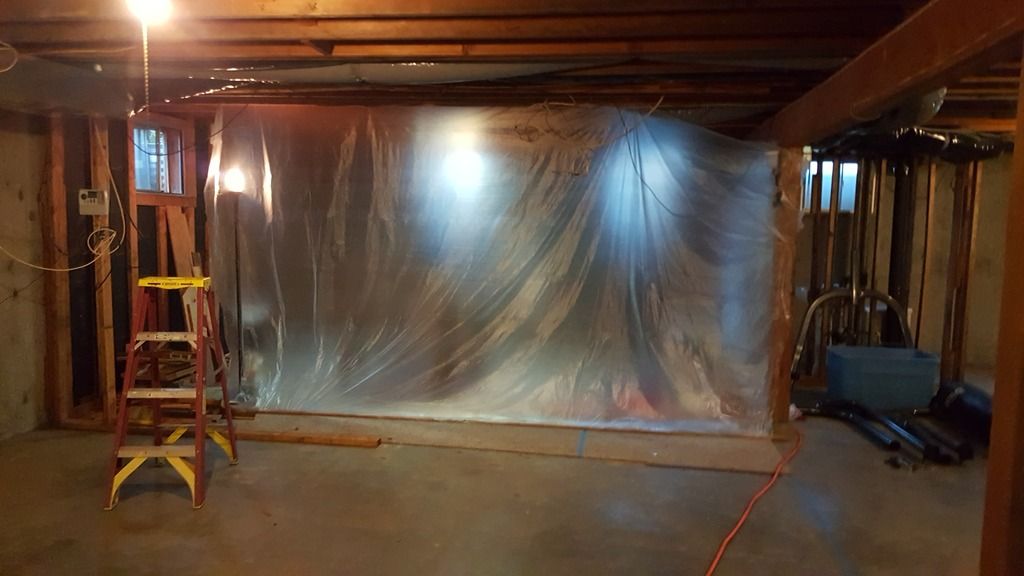
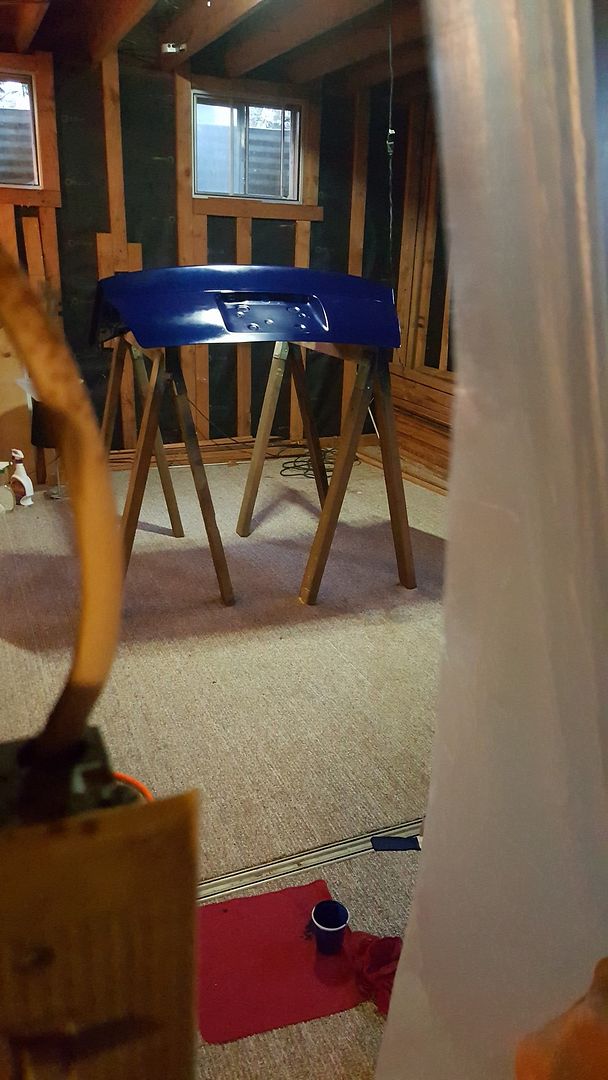
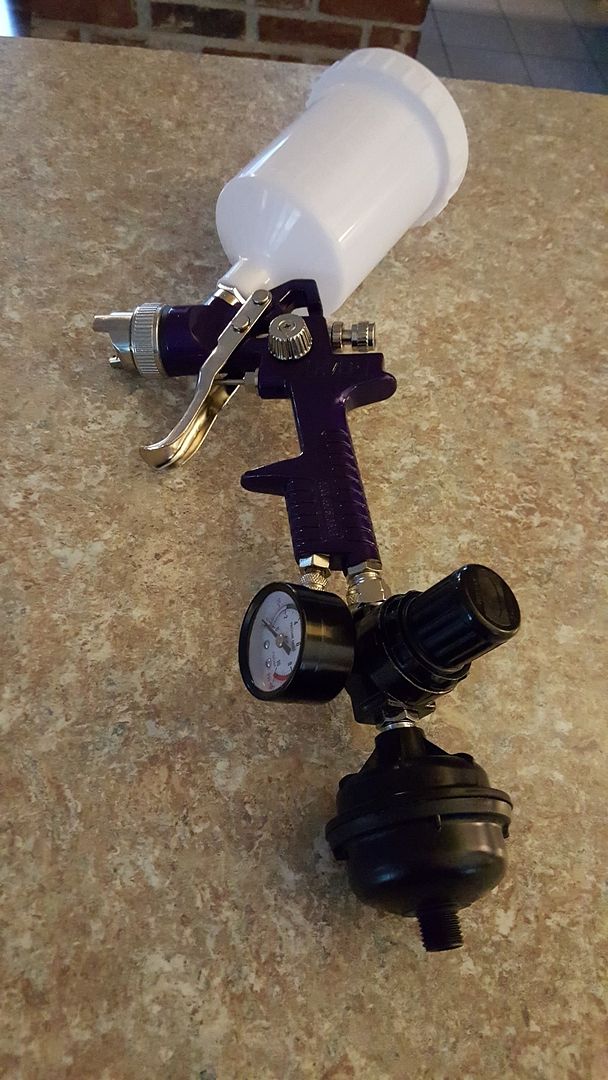
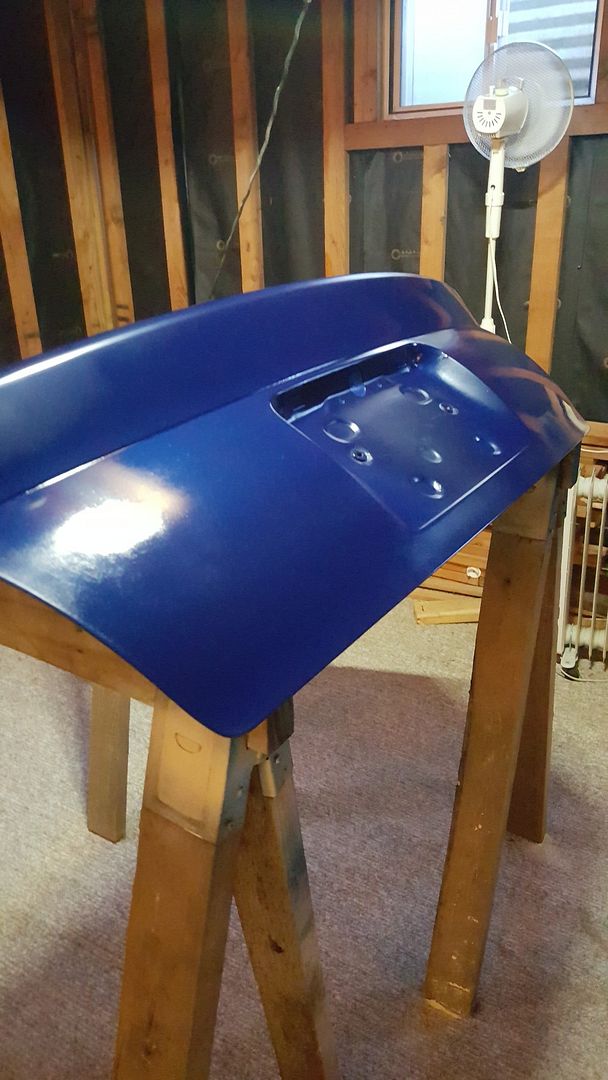
    Updates woohoo! Painted the basecoats, and ended up painting more than originally planned so it could fade well into the rear quarter panels, but it's going very well so far! Photos for your viewing pleasure :)

    The paint "booth"


    The gun.. yes I know the water trap and regulator were backwards haha


    Basecoating


    Close up of the paint! Laid very well, but since this IS in a basement, floating fibers did land around on the paint. Waiting for it to flash, then we will LIGHTLY tack rag it.


    Once tacking is done, clear coat time!

    Also, for those who are curious, the base is made my Prospray!

  34. #34
    Veteran Member Four Rings
    Join Date
    Nov 02 2014
    AZ Member #
    292607
    My Garage
    06 9-3 Aero 2.8T, 96 Miata
    Location
    Winchester, VA

    I have limited experience in auto body paint, but would a little wet sanding pre-final coat effect adhesion?

    - - - Updated - - -

    Only reason I ask is because any imperfections will definitely show their ugly rears through the clear, and you can't correct it then.

  35. #35
    Veteran Member Four Rings
    Join Date
    Jun 08 2014
    AZ Member #
    250808
    Location
    Vancouver, Washington

    Quote Originally Posted by DieselElectric View Post
    I have limited experience in auto body paint, but would a little wet sanding pre-final coat effect adhesion?

    - - - Updated - - -

    Only reason I ask is because any imperfections will definitely show their ugly rears through the clear, and you can't correct it then.
    You do not under any circumstances want to sand metallic paint because itll drag the flakes around and you'll have to rebase. I'll have to deal with the little fibers and just do a good job buffing the clear and such.

  36. #36
    Established Member Two Rings StephenCox's Avatar
    Join Date
    Jun 15 2009
    AZ Member #
    43799
    Location
    Issaquah, WA

    nice! Glad to have stumbled across this on Audizine after seeing your teaser on Instagram haha.

    can't wait to see the final product
    - 2002 S4 - Vogtland GT3 - SSAC - APR - 034 Motorsports - Apikol - PODI - Hartmann -

  37. #37
    Veteran Member Four Rings
    Join Date
    Jun 08 2014
    AZ Member #
    250808
    Location
    Vancouver, Washington

    Quote Originally Posted by StephenCox View Post
    nice! Glad to have stumbled across this on Audizine after seeing your teaser on Instagram haha.

    can't wait to see the final product
    Actually just got done with the clear! Photos incoming :D

  38. #38
    Veteran Member Four Rings Bordom's Avatar
    Join Date
    Dec 10 2013
    AZ Member #
    134985
    Location
    Borden, Ontario, Canada

    Quote Originally Posted by MarlinFoundNemo View Post
    Actually just got done with the clear! Photos incoming :D
    DON'T KEEP US WAITING MAN! SEND THE PICTURES!
    Bordom's Allroad; Boat in the Street
    2003 Allroad 6-spd, 4.2 BBD S6 Swap

    IG: 24_et

    Sold:
    2010 Deep Sea Blue S4 6-spd

    RIP:
    2001.5 Brilliant Black S4 6-spd

  39. #39
    Veteran Member Four Rings
    Join Date
    Jun 08 2014
    AZ Member #
    250808
    Location
    Vancouver, Washington

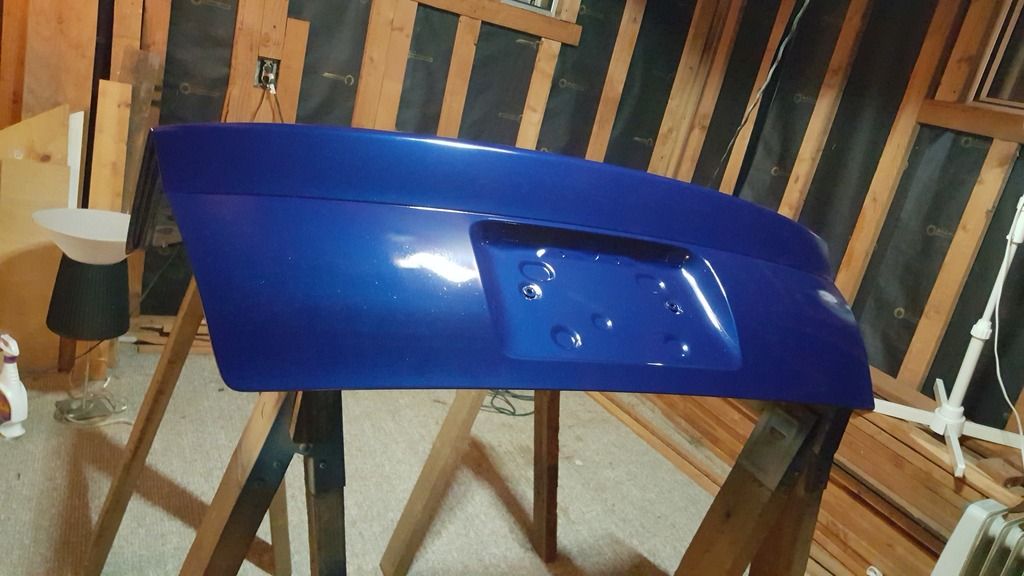
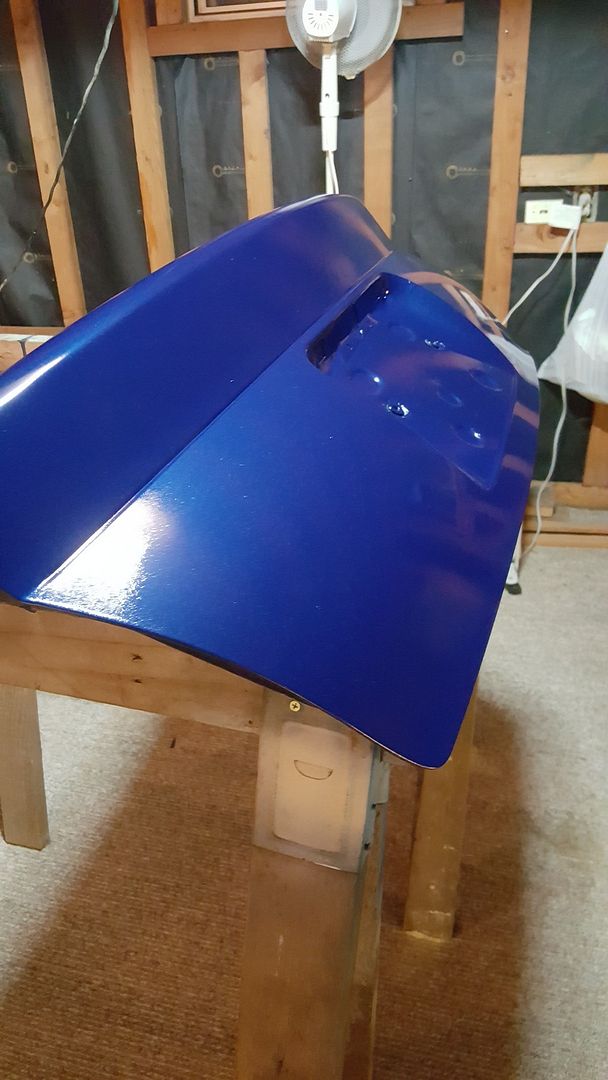
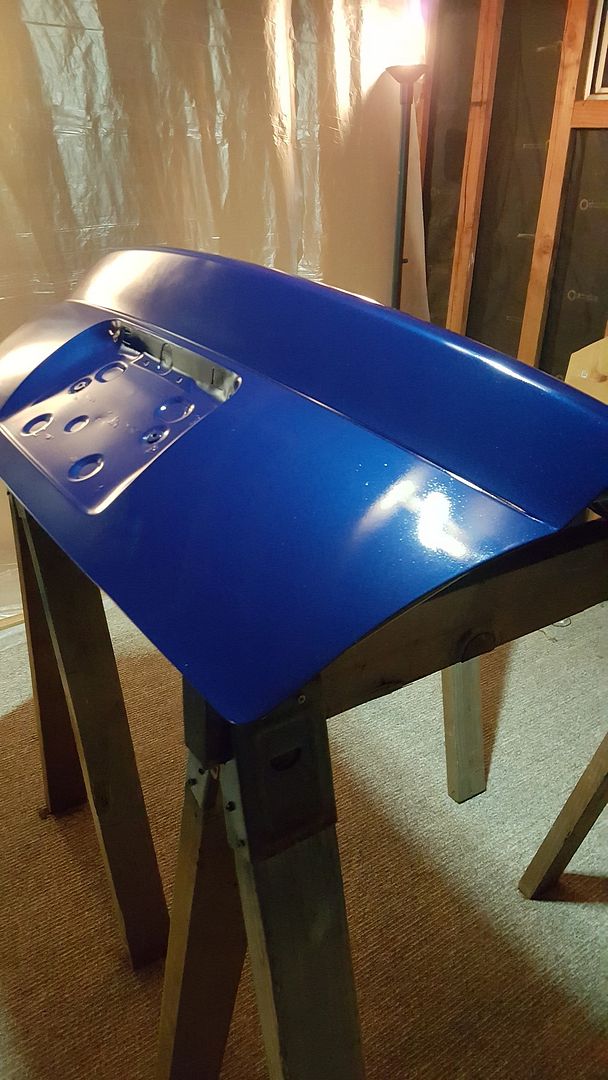
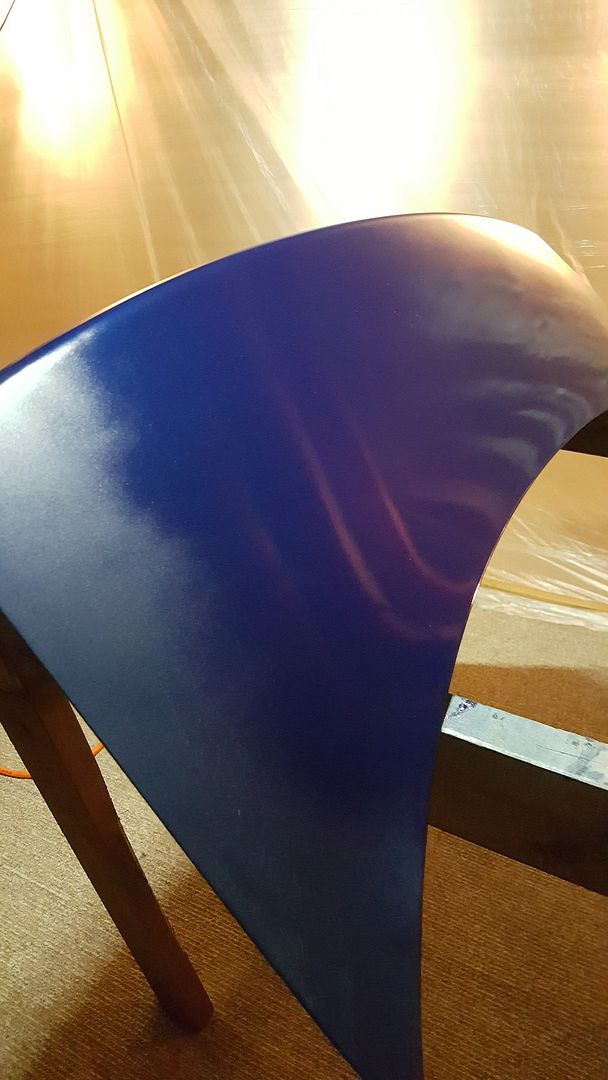
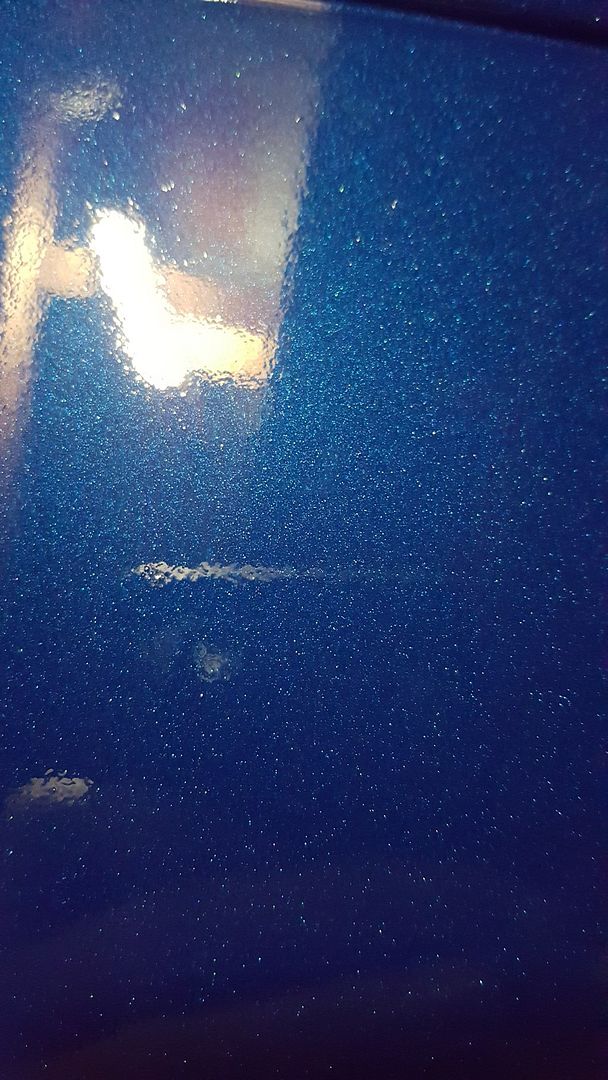
    Getting closer to the final product boys! Tonight we put down our 3 coats of clear, but unfortunately on the second coat we had a few runs (Shown in pics) but nothing that cant be fixed! Also, since this was done in a basement, theres the inevitable crap that floated around and landed on the trunk but again, something that can also be fixed! Plan to get it buffed and blemishes fixed Xmas day when down at the uncles! Enough storytime.. time for pictures!
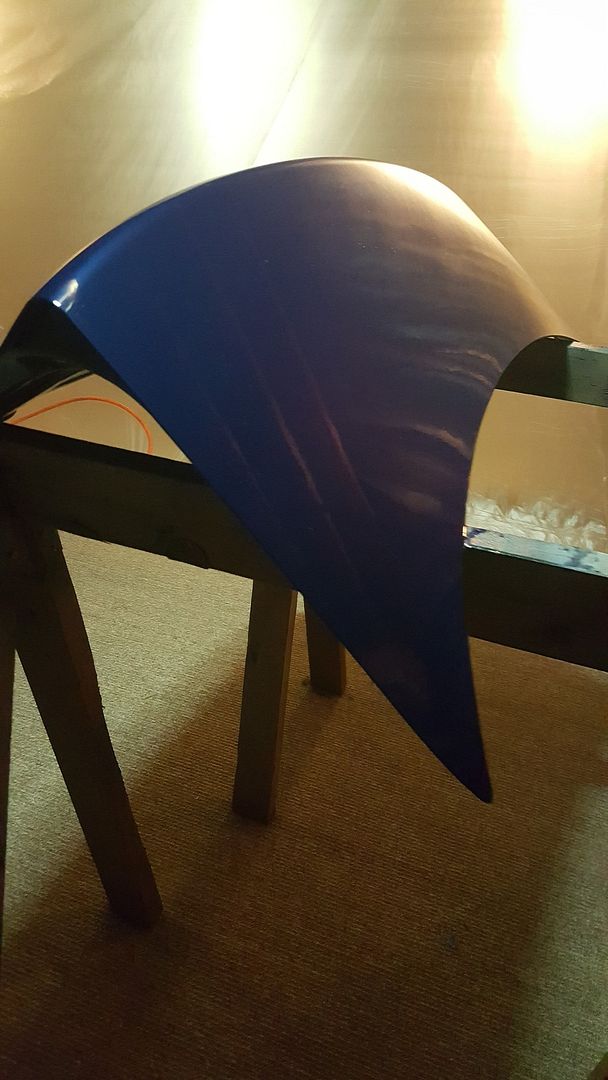
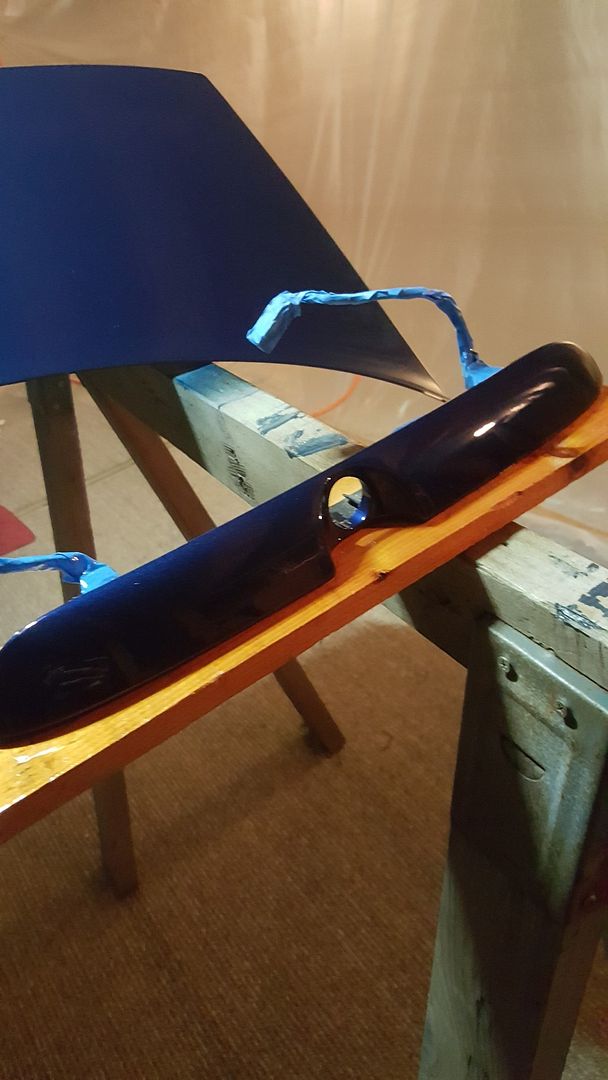
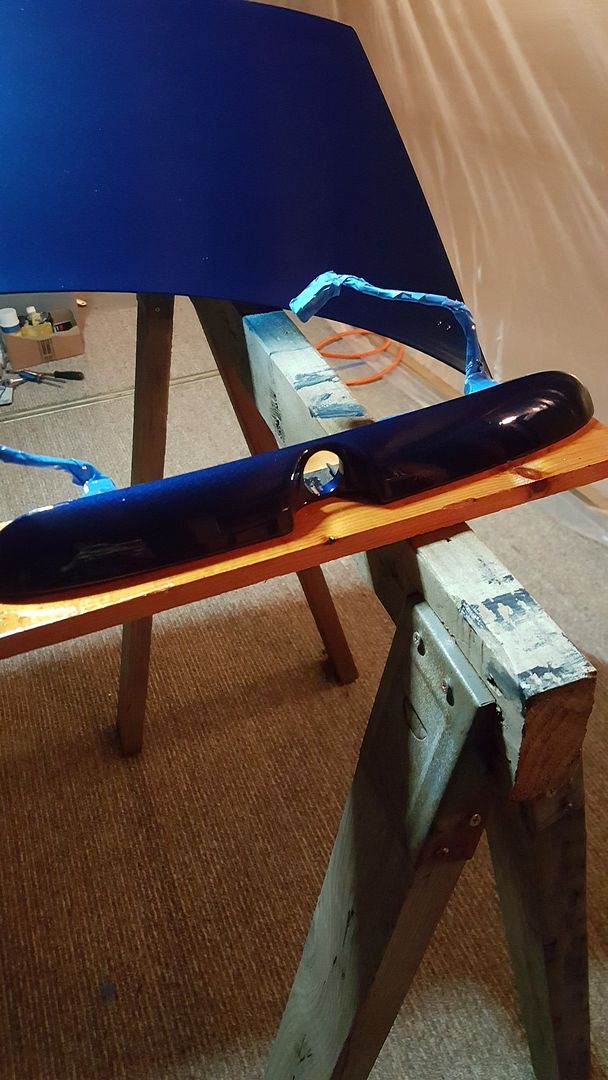
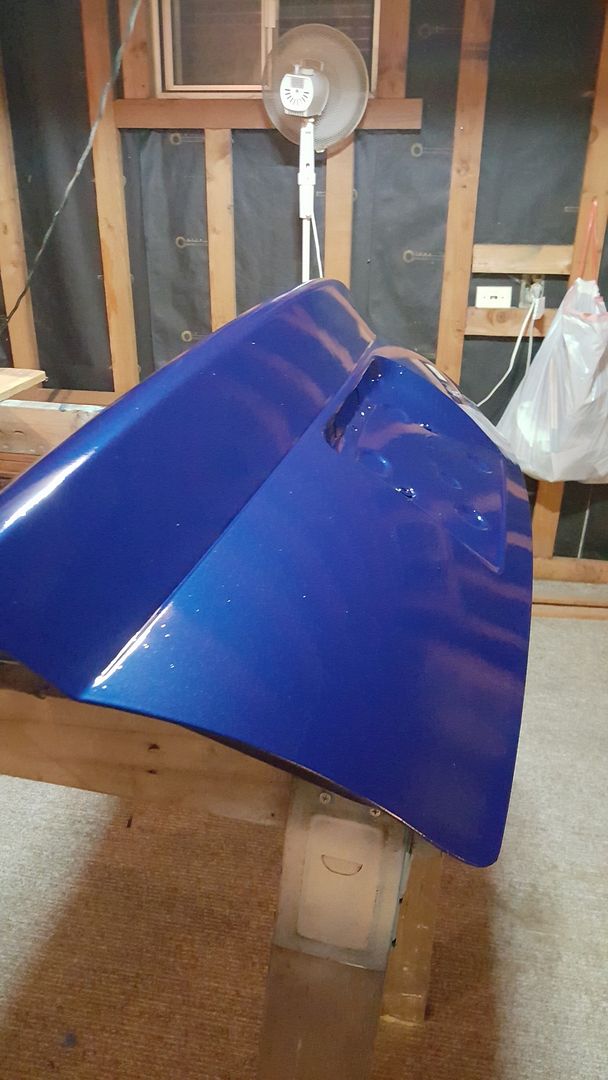
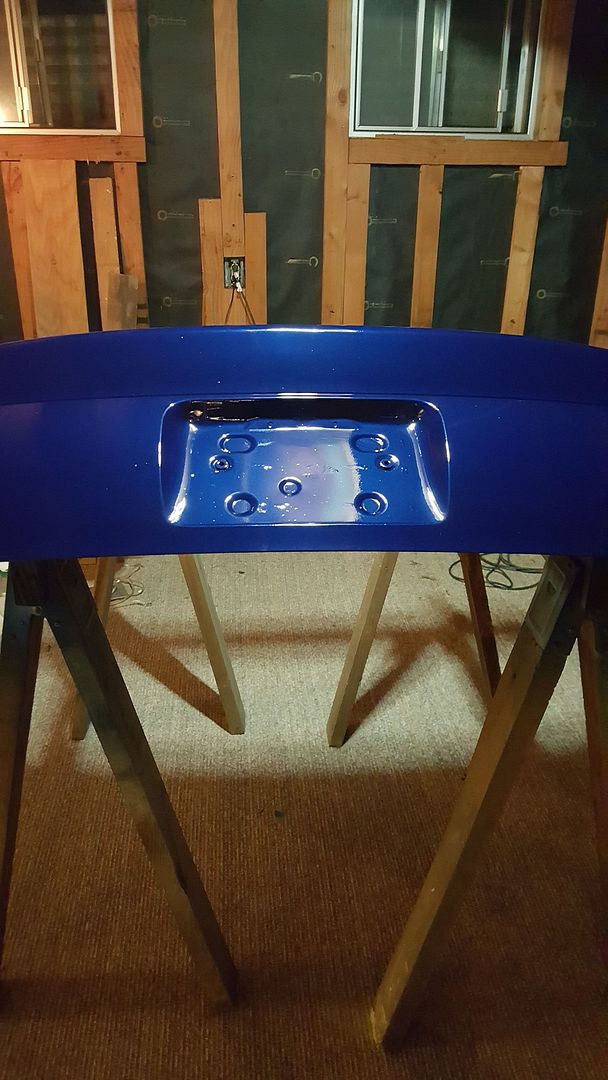
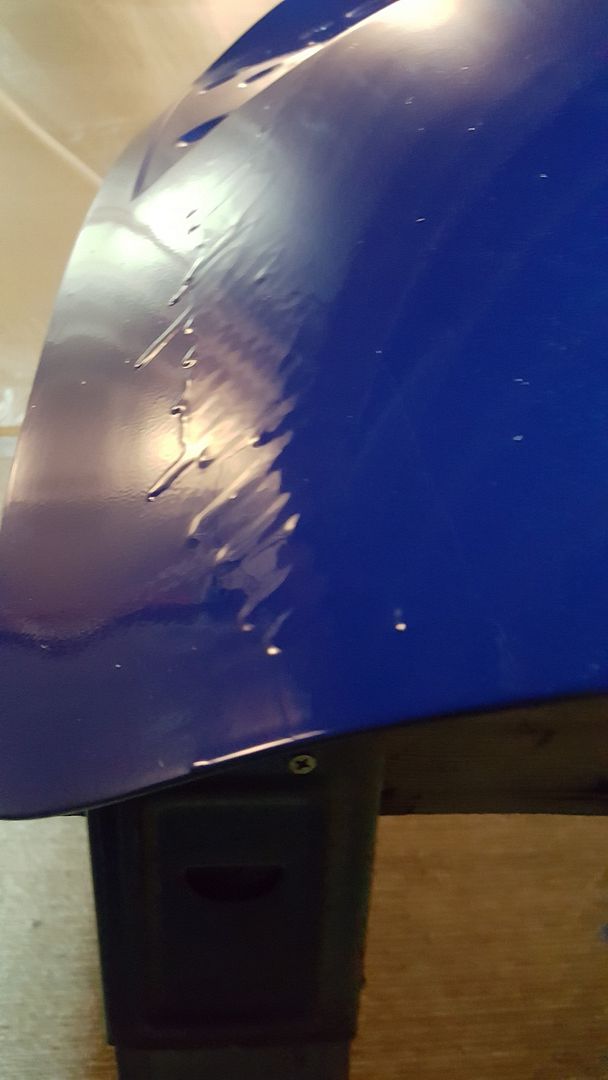
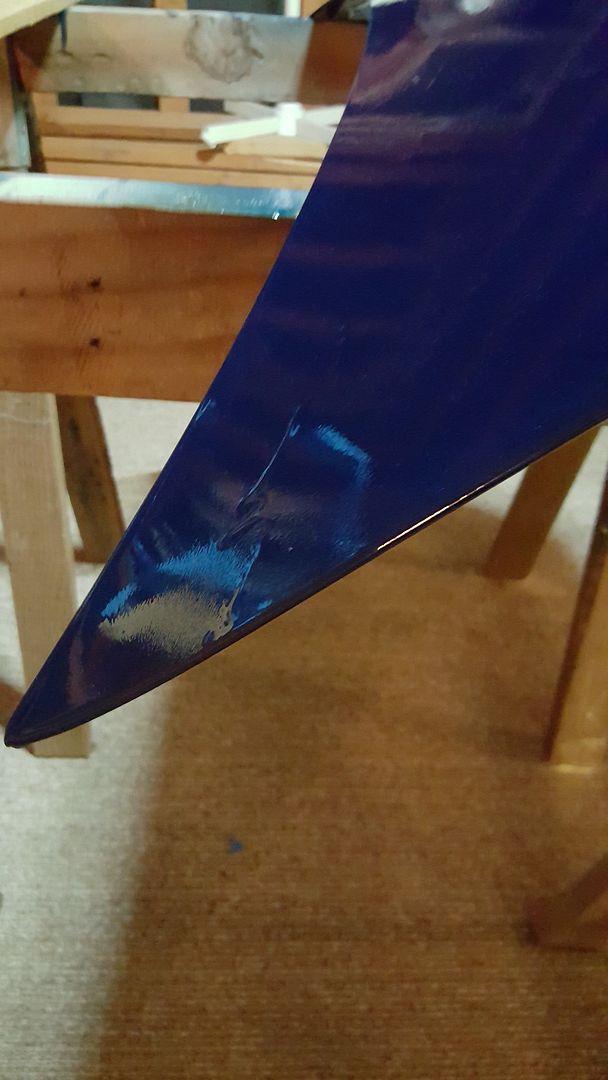
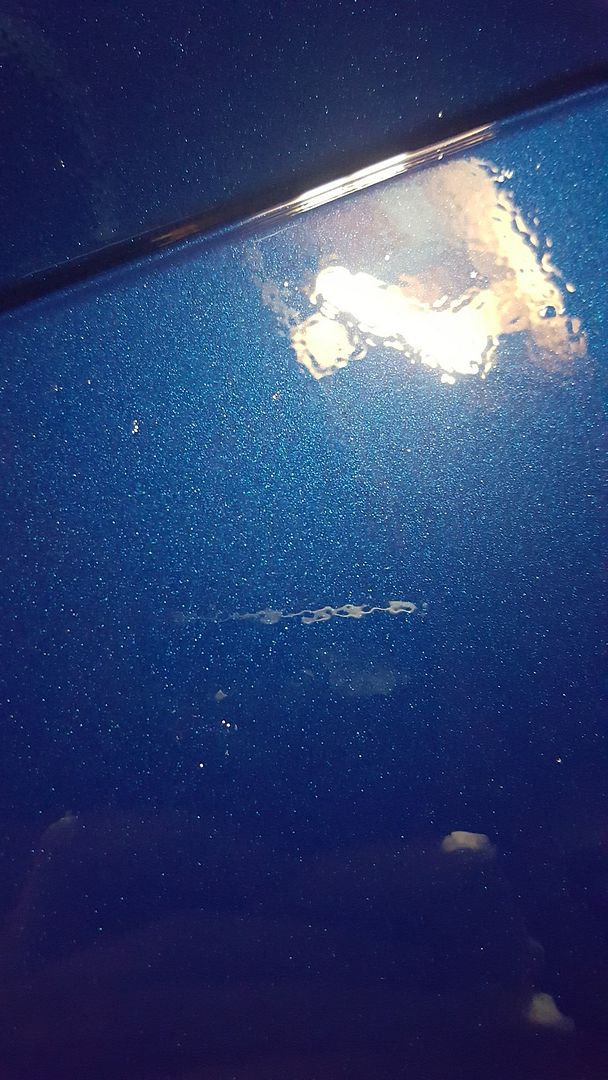


    And now the runs..


    And finally a close up :) quite a good color match!


    More work to be done throughout the week but it's nearing completion! I'm quite pleased with how well its gone so far :)

  40. #40
    Veteran Member Four Rings Bordom's Avatar
    Join Date
    Dec 10 2013
    AZ Member #
    134985
    Location
    Borden, Ontario, Canada

    Looks like someone made a mistake and got a bad case of the "runs" lol

    Looks good. Wet sand will clear most of that crap off and fix the runs
    Bordom's Allroad; Boat in the Street
    2003 Allroad 6-spd, 4.2 BBD S6 Swap

    IG: 24_et

    Sold:
    2010 Deep Sea Blue S4 6-spd

    RIP:
    2001.5 Brilliant Black S4 6-spd

Bookmarks

Posting Permissions

  • You may not post new threads
  • You may not post replies
  • You may not post attachments
  • You may not edit your posts
  •  


    © 2001-2024 Audizine, Audizine.com, and Driverzines.com
    Audizine is an independently owned and operated automotive enthusiast community and news website.
    Audi and the Audi logo(s) are copyright/trademark Audi AG. Audizine is not endorsed by or affiliated with Audi AG.