Audizine - An Automotive Enthusiast Community

Page 1 of 5 123 ... LastLast
Results 1 to 40 of 190
  1. #1
    Senior Member Two Rings Dan_Q's Avatar
    Join Date
    May 18 2011
    AZ Member #
    75696
    My Garage
    2011 BMW 335i, 392 whp
    Location
    Colorado Front Range

    B8 A4 DIY: K04 Installation

    Guest-only advertisement. Register or Log In now!
    Overall this was way easier than I expected it to be. It was still kind of a PITA but anyone doing this is probably expecting that anyway. The only thing that is going to make this install difficult is if you get a stuck/stripped bolt or nut. The other thing that could make it suck is if you are halfway through and you don’t have the right tool. And some of the tools are going to be hard to come by. In my case I did a test install where I pulled off the airbox and made sure I had a wrench that would fit on every bolt that needed to be removed. I had to then order some off Amazon because you aren’t going to find some of the things you need locally. I’ll mention the special tools you’ll need as I go. If everything goes as planned this is a pretty straightforward install. All you’re doing is removing bolts and nuts then putting them back on with the new turbo.

    Step 1: Get your car up on ramps and jack stands front and rear. Remove the rear and forward undertray panels. Remove your airbox, turbo inlet hose and catalytic converter. I wrote up a DIY on how to remove the cat here.

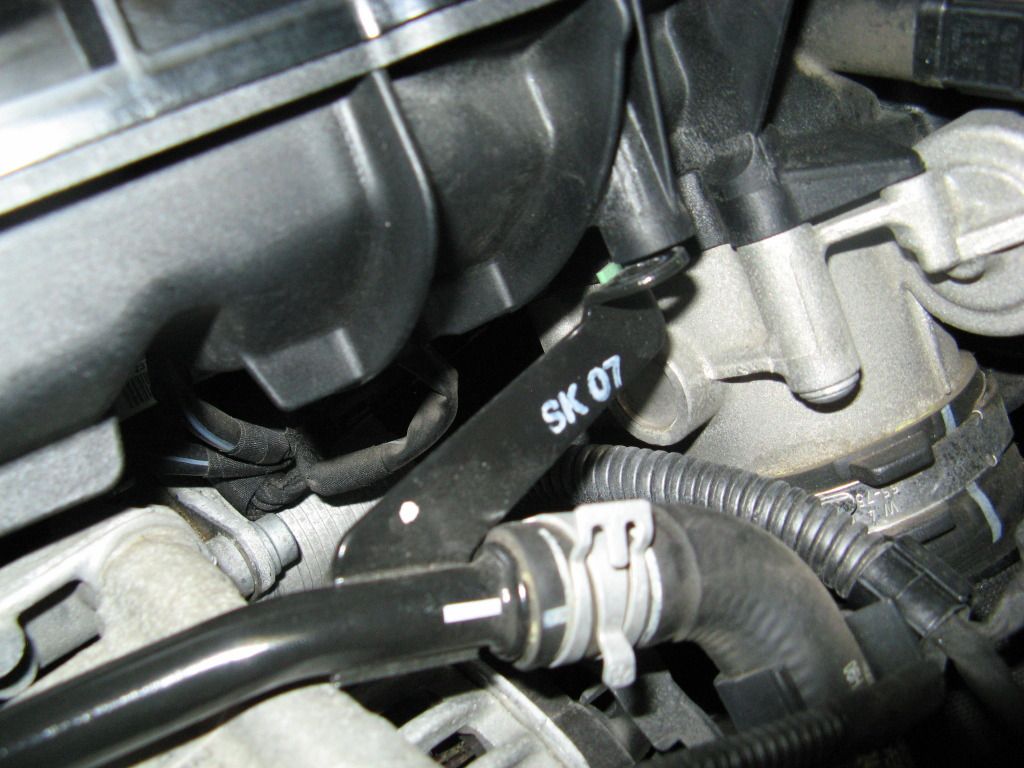
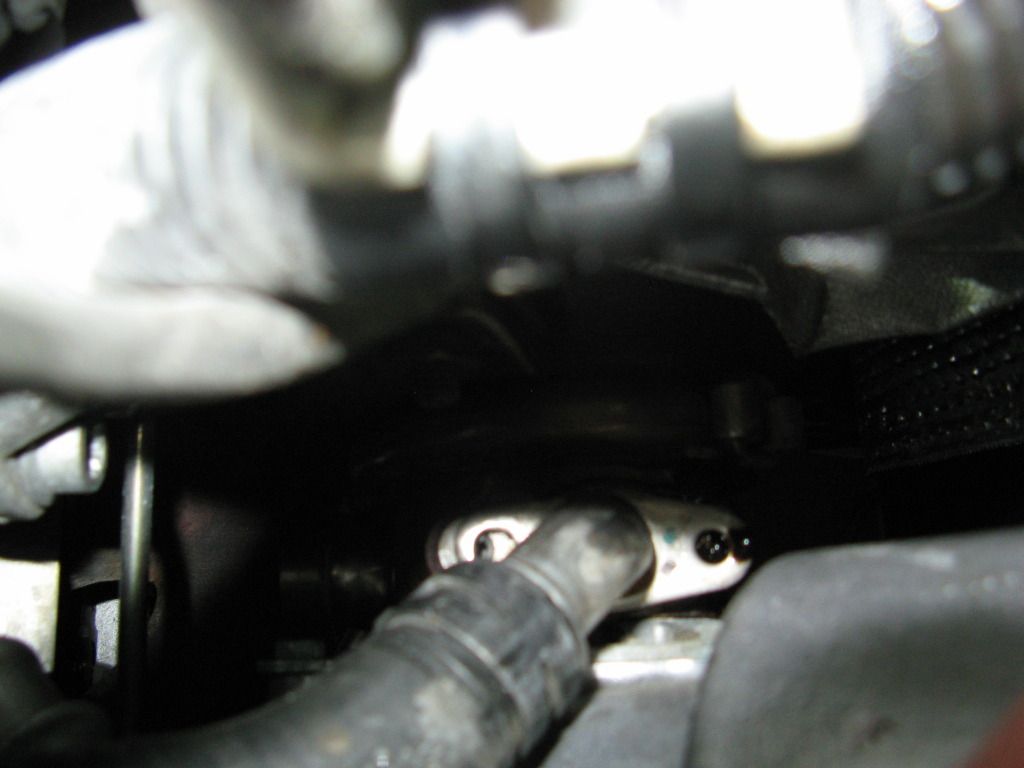
    Step 2: Remove the heat shielding on the coolant line shown below. Just use a needle nose to unsnap the four buttons.


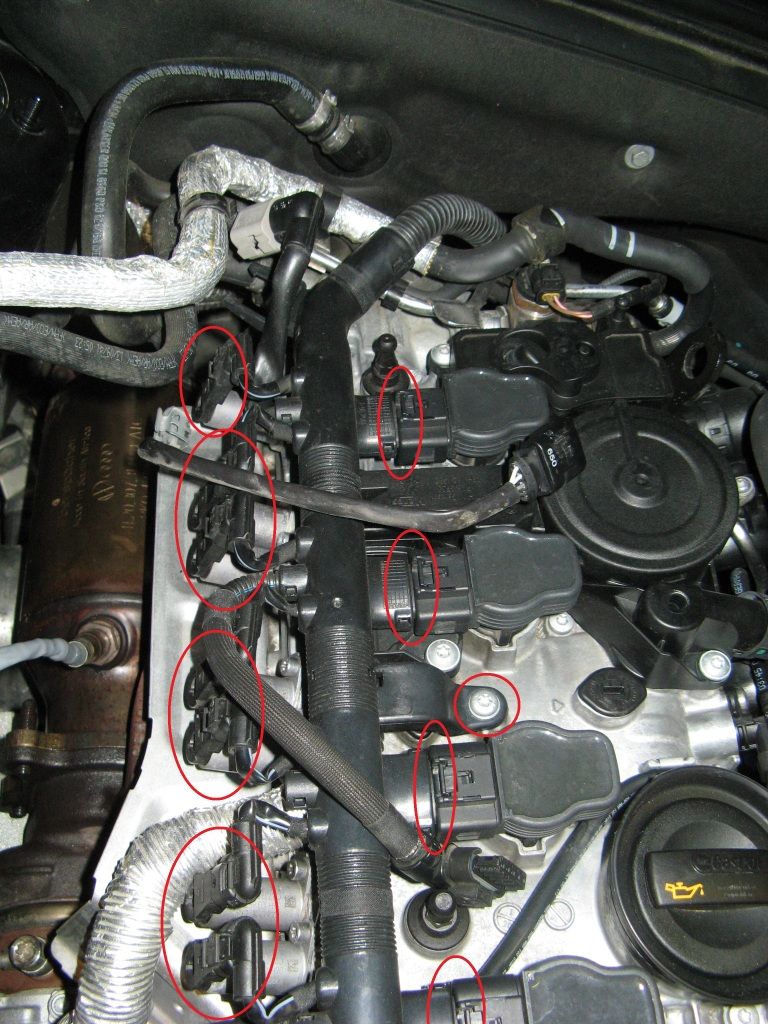
    Step 3: Remove the coil pack harness by removing a single T-30 torx bolt and then de-mating the 8 connectors on the passenger side and the four connectors at the coil packs. Move the entire thing to the top of the motor.


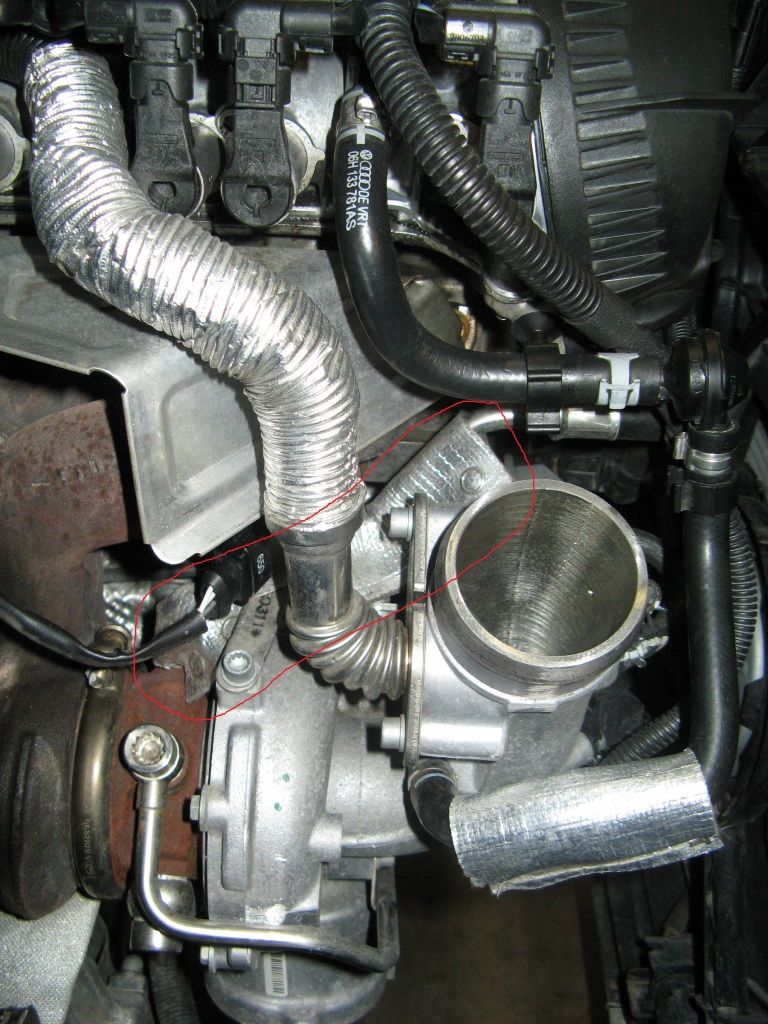
    Step 4: Disconnect this vacuum line just above the intake manifold. You just pinch in one direction and the two plastic pieces will come apart. Snake the hose out from under the coil pack harness and set it somewhere out of the way.


    Step 5: Disconnect the black rigid coolant line that is connected to the intake manifold. You will remove one T-30 torx bolt on the manifold (first pic) and one T-30 between the motor and the auxiliary cooling fan just below the oil filter (second pic). You will need an allen key style torx set because you’ll have virtually no space between the cooling fan and where the bolt is located below the oil filter. Once both are removed, use a channel locks to squeeze the hose clamp connecting the rigid line to the rubber line at the manifold and disconnect the two. Stage a disposable aluminum baking pan below so that you can drain the coolant from both lines into it. There isn't too much coolant in either line.


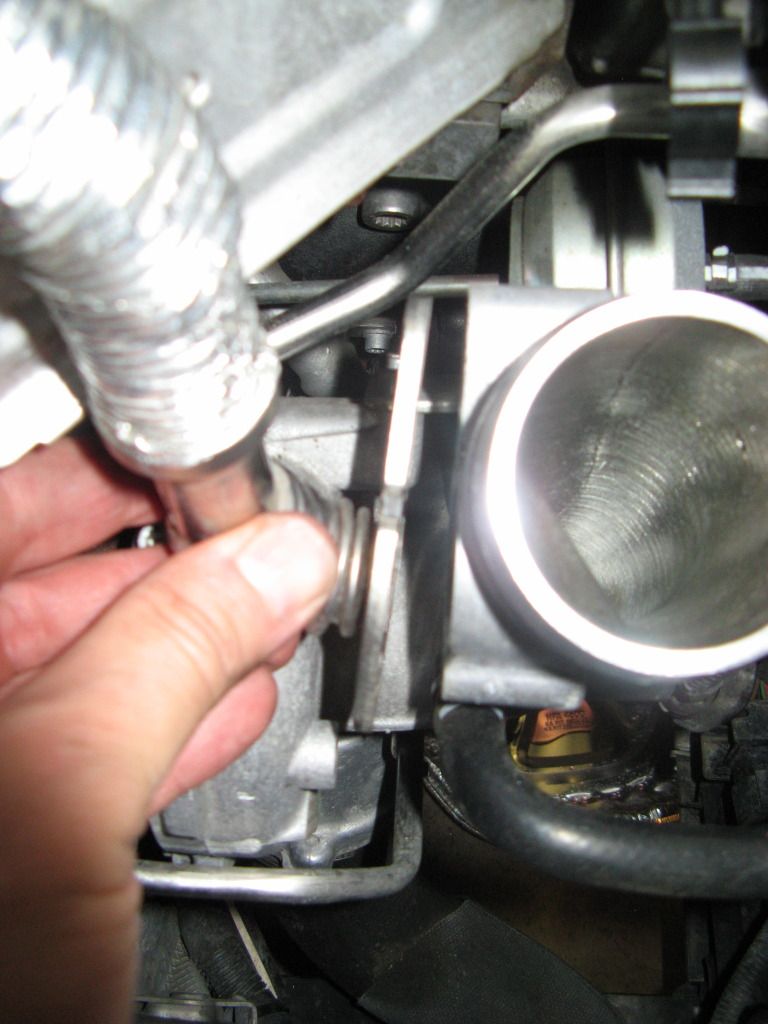
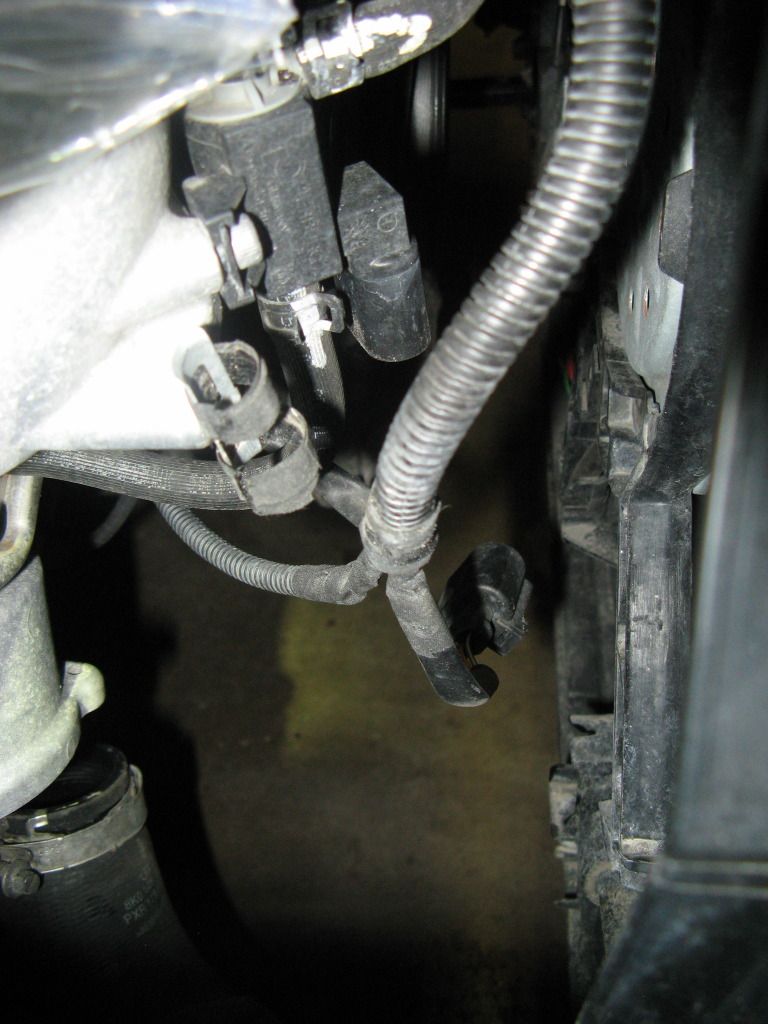
    Step 6: Remove the two 5 mm bolts holding the PCV return line to the turbo. The inboard one will require a ball end allen because you can’t line up straight on with it.


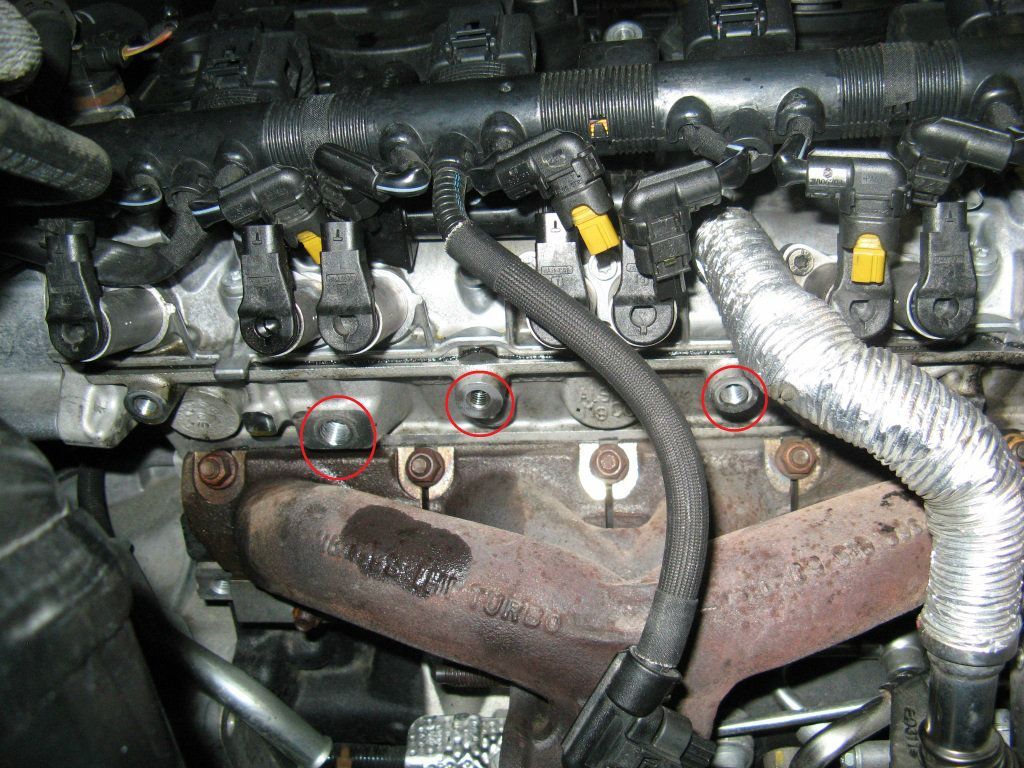
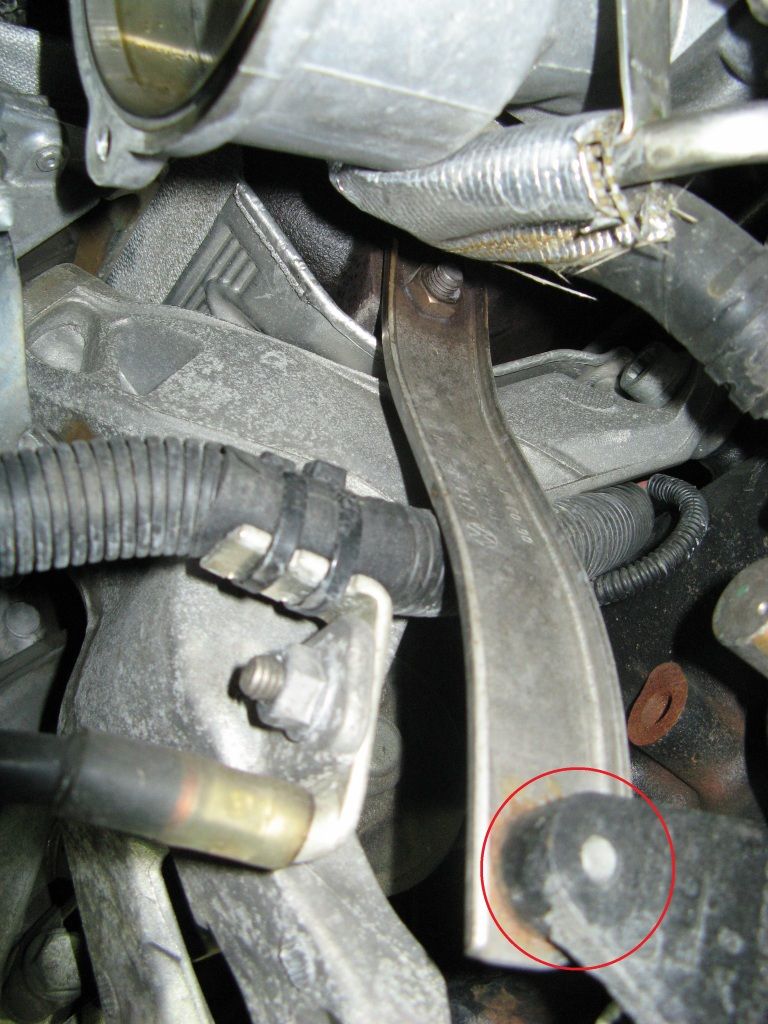
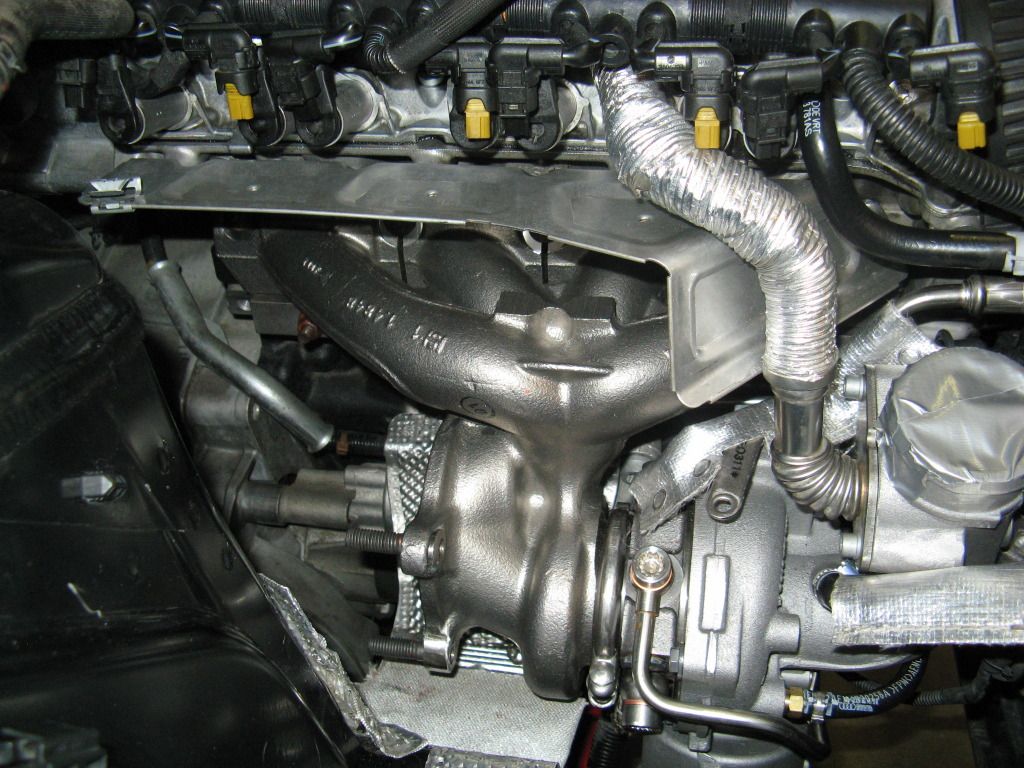
    Step 7: Remove the exhaust manifold heat shield. It is held on my two M9 triple square bolts and once 6 mm allen bolt. The allen bolt was tight as f*%k and you have little room to maneuver in front of it because the exhaust manifold will be in your way. I inserted the short end of a 6 mm allen key into it with the long end pointing toward the rear of the car. You can only move a few degrees but it lined up perfectly so that I could loosen it. If the bolt had been rotated another 10 degrees either way I probably couldn’t have lined up the allen to fit because I would have been hitting something on either the top or bottom. Once loose, I used a ball end allen socket to remove it. The bolt was so tight that if I had tried to use the ball end to loosen it, then I would have stripped it for sure. Hopefully you will have good luck with this one. Locations of the three bolts after removal of the shield is shown below.


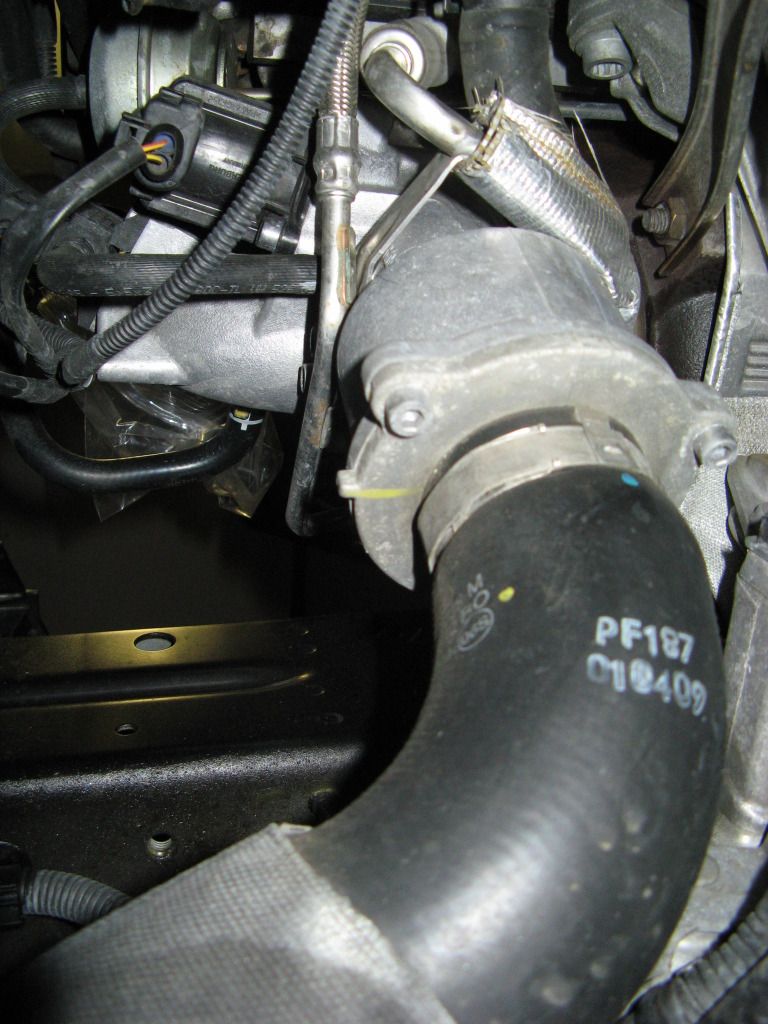
    Step 8: Remove the intercooler hose from the turbo. I found it easiest to remove the three 5 mm allens connecting the outlet cover to the hose. Then I could bend the hose into a better position and use a 7 mm nut driver to loosen the hose clamp. You can then reinstall the outlet cover back onto the turbo or leave that for later when you’ve got the turbo off. Be careful with the o-ring. It fits in a groove on the turbo and if you pinch it and damage it you’ll have a boost leak. Well you won’t have one because you are taking this thing off, but if you ever sell it or it finds its way back into use, then that person will have a boost leak. I hear the o-rings are impossible to find so if you F it up, you’re going to have a long search to find a new one.


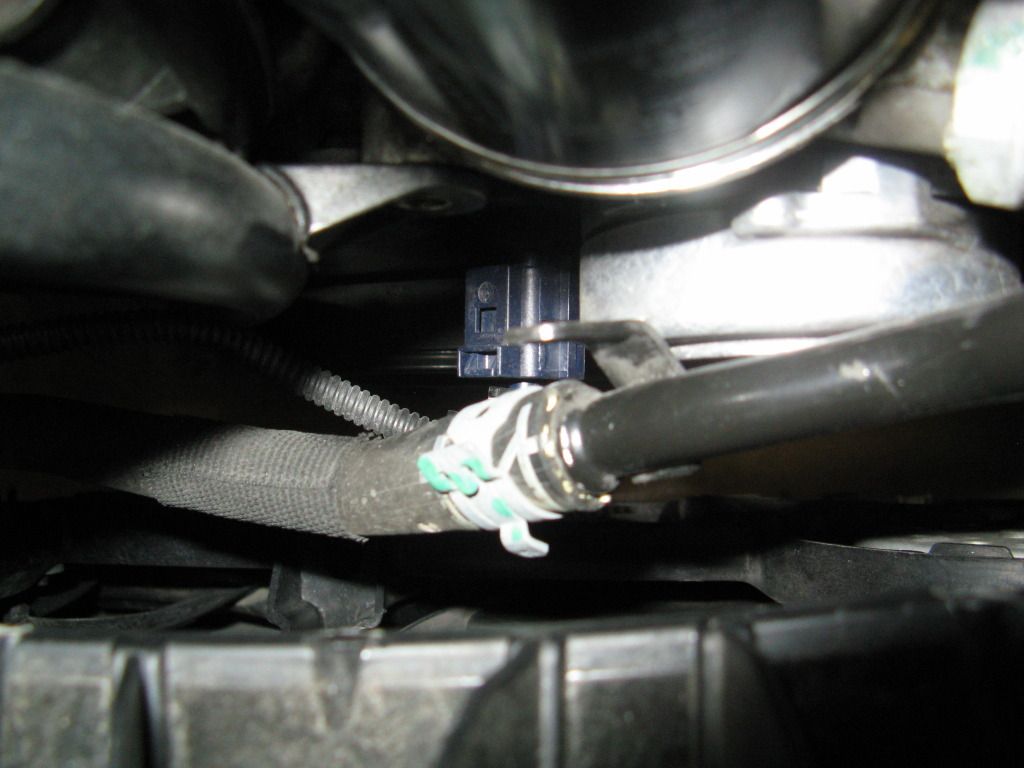
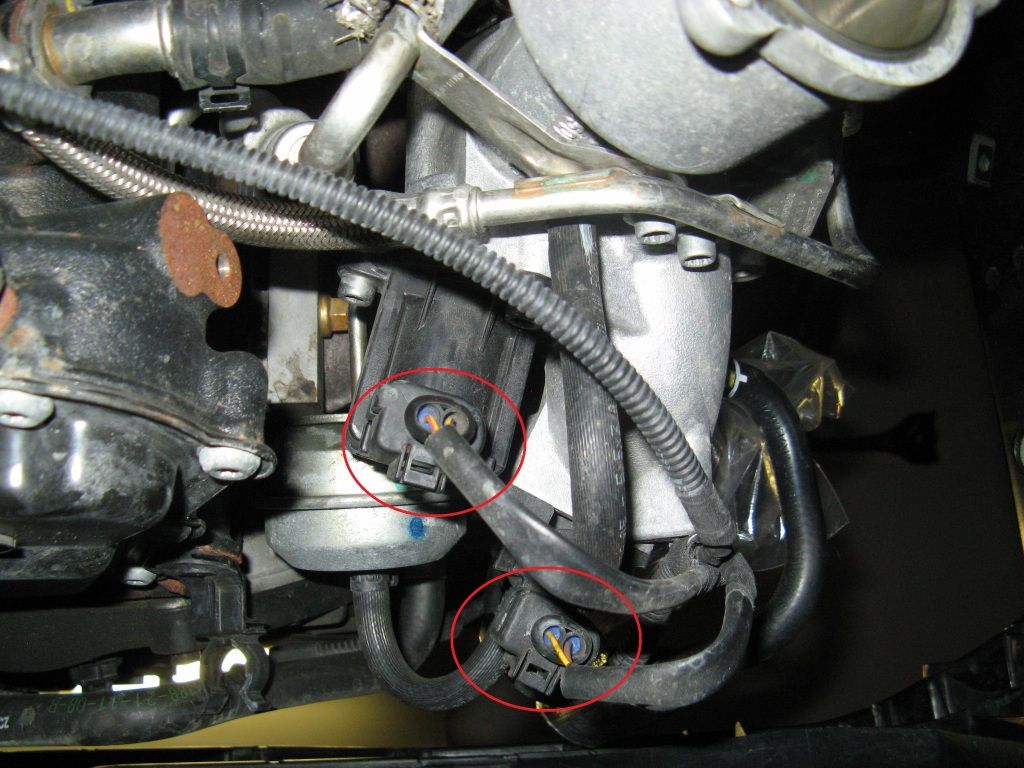
    Step 9: Disconnect the two wiring harnesses that are connected to the turbo from below. You’re also going to want to cut the tape holding the two of them to the tiny bracket on the turbo (2nd pic).


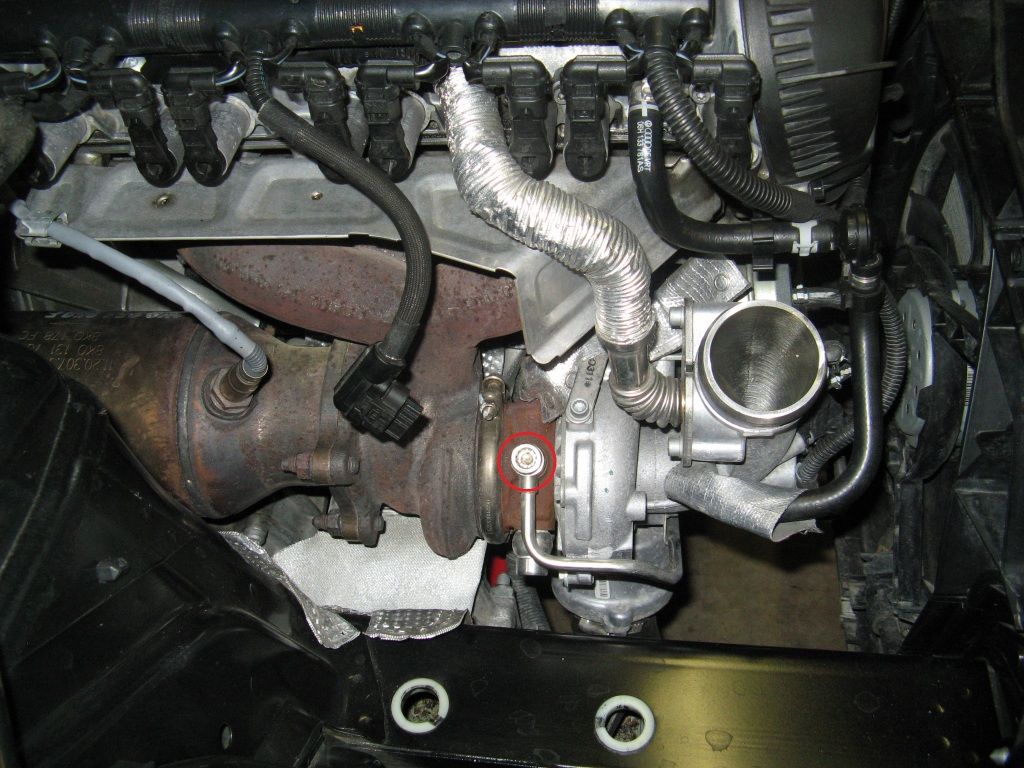
    Step 10: Remove the bracket connecting the turbo to the engine. The connection you can see at the turbo has a 14 mm nut. Don’t try and remove that because it is tack welded to the bracket. There is actually a 6 mm allen bolt on the opposite side of the turbo that connects the bracket. You can deal with that end after the turbo is out of the car. Remove the 13 mm nut on the bottom where the bracket connects to the motor. You’ll need a 13 mm box wrench to do it.


    Step 11: Remove the coolant line from the passenger side of the turbo. You're going to need an allen key type T-55 torx for this. Go onto Amazon to find one and order this in advance. You have very little room to fit it in so if the short arm is longer than about 2 inches then you are screwed. Your DIY is over unless you have a second car to use while you wait for this thing to show up in the mail. Your chances of sourcing one locally is about zero. You’re going to get a lot of coolant draining from this line so have your catch pan ready. It’s going to drain for about 10 min. Also, fair warning on this one that it is going to be a complete PITA to reinstall it, so savor how easy it was removing it.


    Step 12: Remove the oil line on top of the turbo using the same T-55 Torx key. No oil will drain out.


    Step 13: There are brackets on the rigid lines of the two hoses you just removed. Use an M8 triple square to remove one line from the other and then use the same tool to remove the other line from its connection with the turbo.


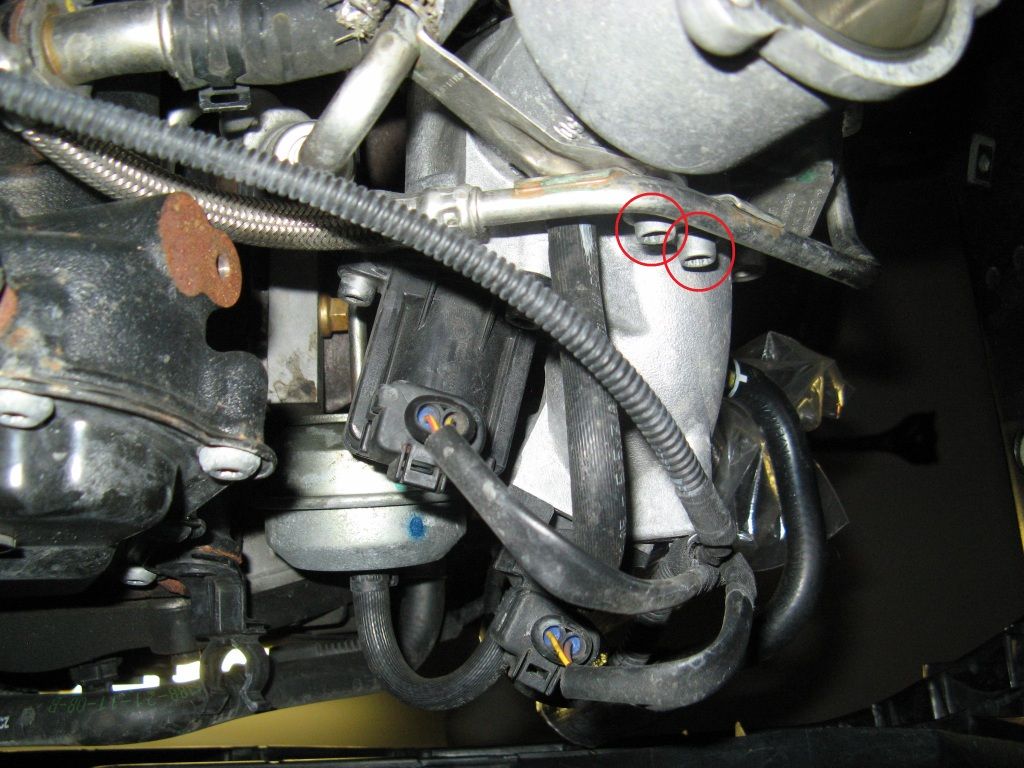
    Step 14: Now move the coolant line out of the way while trying to avoid the dripping coolant from hitting you in the face. You can now see the two M8 triple square bolts that are connecting the lower oil line. Remove these and recover the gasket at the interface. You’ll be replacing it.


    Step 15: Remove the five 13 mm nuts holding the exhaust manifold to the engine. If you’re lucky the nuts will all come off with the studs and you won’t have to loosen the plates on the bottom side. There are two plates on the bottom side that the lower edge of the manifold sits in. One on the left and one on the right. Each is held on with two 12 mm nuts. When I removed the upper nuts, I had 4 of the 5 studs come off with then nuts. The second from the rear stayed put. So I had to loosen the 12 mm bolts holding on the rearward plate. That was do-able. If you have one of the forward studs stay on, then good luck. Not sure how you’re going to get a wrench on those two bolts to loosen up the plate so the manifold can be freed.


    Step 16: The turbo is no longer connected. Finagle the thing out of there and put it on the ground. Transfer the vacuum line, the coolant line, the turbo bracket and the diverter valve over to the new turbo. I did them one at a time with the two turbos lined up side by side so I could orient them the same. I also didn’t use the pinch type hose clamp provided by APR with the kit for the vacuum line. I just bought a screw type hose clamp in advance of the install which came in handy because I had to adjust the orientation of the vacuum line after I got the turbo back on the engine. Do yourself a favor and get one too.

    Step 17: Installation is the reverse of removal. Make sure you do not cross thread any of the bolts and make sure you reinstall all the gaskets that need replacing. I remembered all of the gaskets the first time. If you struggle to get a bolt on only to then realize that you forgot the gasket, then you may be forced to cry. One note to make. Leave the turbo bracket loose when you install the new turbo. When you are about halfway reinstalled you can rotate it up to the engine and make the connection. The 6 mm allen on the aft end of the turbo can be blindly reached with a 6 mm socket and an extension. You can then tighten that connection after everything is lined up and the manifold is connected. Your chances of being able to tighten that connection at exactly the right angle with the turbo off the car is zero. You’re better off doing it with the turbo on the car.
    Removal is a pain because of stuck bolts. Installation is a pain because you are trying to line up those same difficult to access bolts that you removed. Except now you need to use some finesse to make sure they are lining up properly and nothing gets cross threaded. Be patient and you’ll get them all back in. This is what it looks like when you’re done. By this point your hands will be so destroyed that hopefully you won't need to use them for a week or two.


    Step 18: Assuming you’ve now gotten the turbo back on and everything connected back up properly, you can either pull the coil packs or you can pull the fuel pump fuse and try to start the car a dozen times. The starter should turn the motor over thereby turning the water pump over and beginning to supply coolant to the turbo so that you don’t start it up dry. Then you have to clear the code(s) thrown. Option #2 is to just start it up dry and let it idle for 10 sec at which point coolant and oil will have made it to the turbo. The latter is what APR told me they do so I didn't feel too bad about taking that approach. Plus I don't have a VCDS to clear the codes and I wanted to be able to start it up with no codes so that if a CEL came on, I would know that something actually went wrong.

    Run the car for maybe 1 min then turn it off and refill the coolant resevoir with new coolant. Turn the car back on and let it sit there until it is fully up to operating temp and make sure you have no oil or coolant leaks. If you do have a leak then you should probably go inside and call the suicide hotline for advice. If you don't then now all you need to do is get to an APR dealer and get the tune loaded. Per APR tech support, you can safely drive the car with the K04 installed using the stock ECU flash.
    Last edited by Dan_Q; 09-01-2012 at 04:53 AM. Reason: Clarify a couple of steps

  2. #2
    Veteran Member Four Rings maga4's Avatar
    Join Date
    Aug 12 2011
    AZ Member #
    79683
    Location
    Olathe, Kansas

    Awesome job on both DIYs Dan! Thanks for doing them and hope you enjoy it all
    2010 A6 3.0T Prestige, Quartz/Black
    35% Tint, VCDS, Hardwired V1, LED Interior/License Plate, Chipwerke Pro, WeatherTech
    -
    Previous: 2011 A4 P+, APR Stage 2, 35% Tint, Eibach Pro-Kit, VCDS, Gloss Black Grille, Fogs,
    LED Interior/License Plate Lights, Short Shifter, BFI Catch Can, V1, Rieger Lip Replica, FRT's FMIC, aFe Filter

  3. #3
    Veteran Member Four Rings TCHUN003's Avatar
    Join Date
    Sep 14 2006
    AZ Member #
    11290
    My Garage
    2015 Golf Sportwagen TDI, Honda Ruckus
    Location
    SoCal

    Props to you Dan for helping out Audizine B8er's. Thank you!
    -Thomas
    Current: /S3
    Previous: B6 A4/B8A4 Avant

  4. #4
    Veteran Member Four Rings oc cc's Avatar
    Join Date
    Oct 14 2011
    AZ Member #
    82564
    Location
    OC

    Awesome!
    Current: 2019 S5 Sportback Quantum Gray

    Previous: 2012 A4 Avant Glacier White

  5. #5
    Veteran Member Four Rings UmIsThisThingOn's Avatar
    Join Date
    Jun 03 2009
    AZ Member #
    43273
    My Garage
    1954 Volkswagen Beetle
    Location
    Raleigh, NC

    Looking forward to the third thread on this build: K04 Install - The Cleanup. lolZ

    Seriously, though - thanks for the super detailed DIY. It will help future modders
    Tschüß!
    Šave
    ____________________________________________
    '10 Brilliant Black A4 Sline • Hüper Optik • 034 HiFlo Turbo Hose • EC HFC • Milltek • Alu Kreuz/ÜSS • Hankook V12's • ST-40 BBK

  6. #6
    Veteran Member Four Rings Frinkferta's Avatar
    Join Date
    Aug 27 2012
    AZ Member #
    99399
    Location
    Earth

    Love it. Thanks!

  7. #7
    Veteran Member Three Rings xbimmer06's Avatar
    Join Date
    Jan 23 2011
    AZ Member #
    69889
    My Garage
    2018 CLA45, 2021 GLE53
    Location
    El Paso, TX

    Wow...are you for hire by chance? Excellent write-up and pics btw.

  8. #8
    Senior Member Three Rings audinepa's Avatar
    Join Date
    Jul 29 2010
    AZ Member #
    62041
    My Garage
    2009 Audi A4 B8, 2007 GMC Envoy XL
    Location
    NEPA

    Excellent write up.
    APR stage II, 034 Motorsports HFC, AWE dual quad tip (diamond black) exhaust, plasti dip grille, splitter and rims , all weather floor and trunk mats, vw oil dipstick, mirror covers sprayed alum/matte, red acrylic painted calipers, Vortex tuning spacers 15MM front, 20MM rear spacers, Rieger style roof and trunk lip spoiler, tinted windows 35% sides and back, 20% strip top front.

  9. #9
    Veteran Member Four Rings Wah's Avatar
    Join Date
    Jul 07 2009
    AZ Member #
    44667
    Location
    Lebanon

    Major props!
    2008 Daytona Audi B7 RS4 | MTM St 2 | Bilstein B16 | MTM DP | Milltek Non-Res | 034 Rear Sway Bar, Diff Mount Insert, MAF Hose | JHM Intake Spacers | ECS SS Brake Lines F/R, Short-Shifter | Spyder Rear LED Taillights | Full Interior and License Plate LEDs | MTM BiMoto Wheels (summer)/OE Y-Spokes (winter)

    SOLD: 2010 A5

  10. #10
    Senior Member Two Rings FourRingThing's Avatar
    Join Date
    Jun 17 2011
    AZ Member #
    77017
    Location
    Charleston, SC

    Nice work man, knowing you did it yourself will make it all that much more enjoyable when you leave someone in the dust
    2021 B9 S5, Black optics, Sorts Package, Black door handles, spoiler wrapped black, IE intake and inlet pipe, ECS Tuning strut tower support.

    (sold) 2012 C7 A6 3.0T Prestige, Innovation Package, 20" Sport Package.

  11. #11
    Senior Member Three Rings JJPquattro's Avatar
    Join Date
    Jan 04 2012
    AZ Member #
    86174
    My Garage
    2019 SQ5 (daily), 2001 B5 widebody RS4 converted
    Location
    St Petersburg, FL

    Wow man, excellent write-up/DIY! You helped a lot of AZ'ers with this one so pat yourself on the back and pour a nice cold one!
    2001 B5 S4 Pearlescent White | 034 | K04 | BC coilovers | "in progress"
    2019 Audi SQ5 | Florett Silver | Black Optic | Carbon Atlas | 21” | Forge | Cete | MTM | BC Forged
    2010 A4 - Ibis White | Prestige | S-Line | 6MT | AFE | Eurocode | KW V1 - Sold (Regrettably)
    2003 VW Golf GTI - Sold
    2000 Audi A3 1.8T (Euro spec) - Forge | ITG | NGP | Sold
    1994 VW Corrado G60 (Euro spec) - Bahn Brenner | Sold

  12. #12
    Stage 2 Banner Advertiser Four Rings Arin@APR's Avatar
    Join Date
    Aug 23 2008
    AZ Member #
    32286
    Location
    Auburn, AL

    Awesome!
    GoAPR.com | Facebook | YouTube | Twitter | Instagram
    Phone: (800) 680-7921 Local Phone: +1 (334) 502-5181 Fax: +1 (334) 502-5180
    Address: APR LLC, 4800 US HWY 280 West, Opelika, AL 36801

  13. #13
    Active Member One Ring
    Join Date
    Nov 10 2008
    AZ Member #
    35130
    Location
    Baton Rouge, LA

    First, this is an awesome DIY! Actually replacing a bad turbo as of right now...

    Second, let me add to help fellow DIY'ers!

    For the T-55 coolant fitting, we had purchased a set of these TORX bits from your local parts store (Autozone, O'rielly's) previously for another job. Using this and a 10mm angle wrench, we were able to easily loosen the bolt. Here are pictures of the pack of bits and a picture of how:


    Have fun!!!!

  14. #14
    Veteran Member Four Rings pierreb's Avatar
    Join Date
    Sep 15 2006
    AZ Member #
    11476
    My Garage
    2020 A4 allroad
    Location
    NH

    similar trick to the extraction of the master cylinder on a C5...nice!

  15. #15
    Veteran Member Four Rings TCHUN003's Avatar
    Join Date
    Sep 14 2006
    AZ Member #
    11290
    My Garage
    2015 Golf Sportwagen TDI, Honda Ruckus
    Location
    SoCal

    Awesome advice ImportStar! Thanks for sharing the tip!
    -Thomas
    Current: /S3
    Previous: B6 A4/B8A4 Avant

  16. #16
    Veteran Member Three Rings K1_Builder's Avatar
    Join Date
    Mar 20 2011
    AZ Member #
    72670
    My Garage
    2009 A4 S-line MT, K-1 Attack (in progress), 2008 R1 Fiat Replica, 2008 R6 Race Bike
    Location
    Jacksonville, FL

    Quote Originally Posted by ImportStar View Post
    First, this is an awesome DIY! Actually replacing a bad turbo as of right now...

    Second, let me add to help fellow DIY'ers!

    For the T-55 coolant fitting, we had purchased a set of these TORX bits from your local parts store (Autozone, O'rielly's) previously for another job. Using this and a 10mm angle wrench, we were able to easily loosen the bolt. Here are pictures of the pack of bits and a picture of how:


    Have fun!!!!
    I had to do the same thing when taking off that hose. What a PITA!

    Good write-up Dan.

  17. #17
    Active Member Two Rings MikeMaat's Avatar
    Join Date
    Mar 28 2012
    AZ Member #
    90795
    Location
    Gent / Evergem

    How mutch HP (less/more) will I gain with a K04 upgrade, full milletek+HFC exhaust, carbon clean ? Now I should have 211HP with my 2.0 TFSI A4 Avant, but I think there is more like 180HP left

  18. #18
    Active Member One Ring
    Join Date
    May 31 2013
    AZ Member #
    116288
    Location
    Durham NC

    Dan thanks again for this K04 A4 B8 DIY. I used your HFC DIY and this K04 DIY and had the whole thing done in about 8 hours. After the APR tuned the car feels amazing!

  19. #19
    Senior Member Two Rings
    Join Date
    May 13 2013
    AZ Member #
    115085
    Location
    Seattle

    Good stuff :).

    What did you do about software?

  20. #20
    Veteran Member Three Rings Schrubbe8210's Avatar
    Join Date
    Jun 16 2012
    AZ Member #
    95341
    My Garage
    1997 B5 A4 track car, 2017 Q7 Prem Plus
    Location
    Elm Grove, WI

    Just followed this to the T. took me about 5 hours for removal and reinstall and i have never done it before on any car. thanks for the great write up! 2 things, one, the DIY minimizes the difficulty of the oil return line bolts. those things are bastards, get ready. Also, you dont need to remove the cat for it, just take a 15mm deep socket and a 10in extension and you can get to the inside nut no problem. definitely not fun, but way easier than taking the downpipe off or trying to get at it from the bottom. I also have a parts list for the gaskets and washers, nuts, etc you need to replace, if anyone is interested, send me a PM.

    Thanks again, saved me a shitload of money.

  21. #21
    Active Member One Ring
    Join Date
    May 04 2007
    AZ Member #
    17760
    Location
    Eugene, OR

    Quote Originally Posted by Dan_Q View Post
    If you do have a leak then you should probably go inside and call the suicide hotline for advice.
    HAHAHahahaha I laughed so hard at this comment because I experienced something similar with a project I did a while back. lol.

    Great article. thanks for sharing!
    10 B8 A4 2.0T
    : Getting started. :

  22. #22
    Veteran Member Four Rings A4 Centaur's Avatar
    Join Date
    Jun 05 2009
    AZ Member #
    43360
    My Garage
    2020 Ducati Panigale V4S
    Location
    Scottsdale Arizona

    Dan, Always great work!
    2023 S4 Prestige Mythos Black. Brembo GT BBK, APR FMIC, 034 Stg 1
    2012 B8 A4 Avant, Phantom Black S-Line Prestige, 2014 CPMB Engine, 8 speed, JHM K04-R, Eurocode HFC, APR FMIC, 034 Alu Kreuz, Vogtland Coilovers, Stoptech 380mm BB Kit, H&R Swaybar, ECU with IE K04 Tune, Rev. "d" DV, R8 Coils, Folding Mirrors, S5 Rear Brakes, 034/Apikol mounts, OEM Facelift LED Brake lights ]

  23. #23
    Veteran Member Four Rings Frinkferta's Avatar
    Join Date
    Aug 27 2012
    AZ Member #
    99399
    Location
    Earth

    Ordered some tools from Amazon for this. I thought I had them all, but after a tool count some were missing!

  24. #24
    Veteran Member Four Rings auditd0rk's Avatar
    Join Date
    Feb 02 2012
    AZ Member #
    87597
    Location
    Colorado Springs

    Quote Originally Posted by Frinkferta View Post
    Ordered some tools from Amazon for this. I thought I had them all, but after a tool count some were missing!
    Looking forward to the finished product -- I think you're going to be stoked with the results
    2012 A4 Quattro, Monsoon Grey | CTS K04, HFC | APR K04 v3 Tune | AWE Exhaust | Eurocode FMIC, Alu Kreuz, Sway Bars | Bilstein PSS10 | SPC UCAs | Apikol Rear Diff Mount | 034 Transmission Mount Insert, End-links | StopTech ST-60 BBK | S4 rear brakes | CR-15 brace

  25. #25
    Veteran Member Four Rings Frinkferta's Avatar
    Join Date
    Aug 27 2012
    AZ Member #
    99399
    Location
    Earth


    Anyone know where this gasket goes? It came in the kit, but I did not take one off.

  26. #26
    Veteran Member Four Rings Alex1188's Avatar
    Join Date
    Mar 10 2013
    AZ Member #
    111092
    Location
    Forest Lake, Minnesota

    Quote Originally Posted by Frinkferta View Post
    Anyone know where this gasket goes? It came in the kit, but I did not take one off.
    Oil or coolant line on the block
    |CURRENT|01.5 S4|

    |TOTALLED|09 B8 A4 QUATTRO|EURODYNE|FRANKENTURBO F23L|

    |PAST TURBOS|IHI JH5|PROTOTYPE BW K03 BILLET WHEEL|

    - OEM IHI K03 APR STAGE 2+ V1.0-1/4 MILE TIME [email protected](-85DA)
    -


  27. #27
    Veteran Member Four Rings Frinkferta's Avatar
    Join Date
    Aug 27 2012
    AZ Member #
    99399
    Location
    Earth

    Must be oil. It looks different than the stock one


    Sent from my iPad using Tapatalk

  28. #28
    Veteran Member Four Rings Frinkferta's Avatar
    Join Date
    Aug 27 2012
    AZ Member #
    99399
    Location
    Earth

    You guys use any special technique with lining up the turbo manifold? I can't get it to sit right with the blocks underneath


    Sent from my iPad using Tapatalk

  29. #29
    Veteran Member Three Rings ddun's Avatar
    Join Date
    Jun 06 2009
    AZ Member #
    43404
    Location
    Stanton, CA

    Yeah there's only 2 of those Gaskets one for the pcv breather on the turbo and the oil line, looks different from what I remember.

    As for lining it up, gotta loosen the blocks a little more then it should drop right in.

  30. #30
    Veteran Member Three Rings ddun's Avatar
    Join Date
    Jun 06 2009
    AZ Member #
    43404
    Location
    Stanton, CA

    Make sure the upper coolant lines on the turbo are all torqued, and the gaskets make sure you're good to go before you torque down because they will only crush once

    Also on mine I couldn't line up the lower coolant line, there's 2 ports 1 is plugged I had to switch em, so check that once the turbo is dropped in before you start reassembly

  31. #31
    Veteran Member Four Rings Frinkferta's Avatar
    Join Date
    Aug 27 2012
    AZ Member #
    99399
    Location
    Earth

    Quote Originally Posted by ddun View Post
    Make sure the upper coolant lines on the turbo are all torqued, and the gaskets make sure you're good to go before you torque down because they will only crush once

    Also on mine I couldn't line up the lower coolant line, there's 2 ports 1 is plugged I had to switch em, so check that once the turbo is dropped in before you start reassembly
    That's where I'm stuck now. The lower coolant line is almost in, but I am having a hard time starting a thread. The coolant line probably got bent a little when I was pulling out the OEM turbo.

    Do any of you remember if the oil line into the turbo had two washers? Mine has one, but all the other lines have one. I guess I could always pick one up at the dealer if I have to.

    Looks like I will be driving around the Chevelle until I get everything plugged in!

  32. #32
    Veteran Member Four Rings Frinkferta's Avatar
    Join Date
    Aug 27 2012
    AZ Member #
    99399
    Location
    Earth

    Also, I noticed the coolant, oil and vacuum lines all read " F - S -" on the top of the bolt. What does this mean? and what orientation should they be in when tightened?

    Thanks!

  33. #33
    Veteran Member Four Rings Frinkferta's Avatar
    Join Date
    Aug 27 2012
    AZ Member #
    99399
    Location
    Earth

    I keep thinking of questions to ask!

    The copper washers provided in the K04 kit. Are those crush washers for the turbo lines? Or are they washers for the turbo/cat bolts?

    Also, is there any technique to thread the turbo & cat bolts? I just threaded them in the best I could by hand, used thread lock, and finished torquing them up.

  34. #34
    Veteran Member Three Rings ddun's Avatar
    Join Date
    Jun 06 2009
    AZ Member #
    43404
    Location
    Stanton, CA

    Those lines will take massive force to bend they're sturdy, I had ur same problem with that lower line, I had to switch it with the other hole on the side. Tried everything I could but couldn't thread it in, once I switched it threaded in no effort.

    The crush washers are for the banjo bolts, should be 2 washers between the line and turbo and between the line and bolt head. Also the crush washers are different sizes for the coolant and oil lines. The banjo bolts are also different for the oil and coolant, so don't mix those up.

    For the cat, yeah nothing special just thread in bolts, then torque nuts when you're done

  35. #35
    Veteran Member Four Rings Frinkferta's Avatar
    Join Date
    Aug 27 2012
    AZ Member #
    99399
    Location
    Earth

    Quote Originally Posted by ddun View Post
    Those lines will take massive force to bend they're sturdy, I had ur same problem with that lower line, I had to switch it with the other hole on the side. Tried everything I could but couldn't thread it in, once I switched it threaded in no effort.

    The crush washers are for the banjo bolts, should be 2 washers between the line and turbo and between the line and bolt head. Also the crush washers are different sizes for the coolant and oil lines. The banjo bolts are also different for the oil and coolant, so don't mix those up.

    For the cat, yeah nothing special just thread in bolts, then torque nuts when you're done
    Gotcha! Thanks for the info! I am going to add a washer to the oil coolant line. I will also adjust the coolant connection with the alternative spot.

  36. #36
    Veteran Member Four Rings Frinkferta's Avatar
    Join Date
    Aug 27 2012
    AZ Member #
    99399
    Location
    Earth

    Fitting the turbo back on should have been obvious. I finally figured it out after a little trial and error.

    The blocks have a patter that aline with the turbo manifold. The manifold can on sit in one way. The manifold have a tooth like pattern on the bottom of it, where it fits into similar grooves/teeth in the blocks. I had the blocks backwards and upside down.

  37. #37
    Veteran Member Four Rings Frinkferta's Avatar
    Join Date
    Aug 27 2012
    AZ Member #
    99399
    Location
    Earth

    When you switched out the coolant plug did you reuse the same crush washer??


    Sent from my iPad using Tapatalk

  38. #38
    Veteran Member Three Rings ddun's Avatar
    Join Date
    Jun 06 2009
    AZ Member #
    43404
    Location
    Stanton, CA

    I think I did, because I had lost so many of the washers trying to thread in that coolant line ha. Still holds up, just make sure it's torqued down enough.

  39. #39
    Veteran Member Four Rings Frinkferta's Avatar
    Join Date
    Aug 27 2012
    AZ Member #
    99399
    Location
    Earth

    Quote Originally Posted by ddun View Post
    I think I did, because I had lost so many of the washers trying to thread in that coolant line ha. Still holds up, just make sure it's torqued down enough.
    Cool! That's what I did, torqued her down hard!

    By the way, switching the coolant plug made it way easier! It helps not to have the turbo manifold bolted as well, having it loose is the way to go!

  40. #40
    Veteran Member Four Rings Frinkferta's Avatar
    Join Date
    Aug 27 2012
    AZ Member #
    99399
    Location
    Earth

    Quote Originally Posted by Frinkferta View Post

    Anyone know where this gasket goes? It came in the kit, but I did not take one off.
    I still don't know where this goes, everything has a gasket. It doesn't match any of the outlets. Keith at APR said it goes into the oil pan, but I didn't take anything off the engine oil pan.

    I also noticed a few things with the kit.

    1. The bottom of the HFC gasket is too small.
    2. The HFC Bolts are 17mm instead of 15mm, way too big.

    Strange...I checked the box and it says it's for a B8 A4 k04 conversion...weird.

Bookmarks

Posting Permissions

  • You may not post new threads
  • You may not post replies
  • You may not post attachments
  • You may not edit your posts
  •  


    © 2001-2025 Audizine, Audizine.com, and Driverzines.com
    Audizine is an independently owned and operated automotive enthusiast community and news website.
    Audi and the Audi logo(s) are copyright/trademark Audi AG. Audizine is not endorsed by or affiliated with Audi AG.