Mostly this thread will contain photos/videos of mods and the process as well as documenting changes to my Avant over time.
***Stasis/Ohlins Coilovers and Alcon BBK Review. Thread here.***
*** Forgestar CF5 wheels, 19x9.5 ET 42. Thread here.***
This thread is about my crack-enhanced runaway avalanche of an Avant that I affectionately call, Blizzard.
My intent is to show you what I have done or had done as well as document the ups and downs of certain mods over time. Hopefully you will enjoy the ride as much as I do.
I'm going to get ahead of myself by bringing you the newest mods before filling in the modifications that have brought Blizzard this far...
I had received several boxes...
So, I finally got around to getting the contents of the boxes unwrapped and installed... which led to the installation of more parts...but I am getting ahead of things(hope this doesn't become a habit)
 .
. This is what was in the longest box.

The Deval Carbon Fiber S-Line/S4 front splitter. I had been looking for a splitter but as I will show in a future post, I had very little clearance to deal with for my driveway. The moment I saw Blakes new splitter, I was on the phone to Eurogear to order up the splitter.... Wasn't out yet but the moment it was, my order was placed.
I ordered the splitter and the plate delete in a matching custom 2x2 twill weave.

which meant a little extra wait time but the results were worth it in my opinion. After talking to a few places about install, I contacted Blake and he referred me to Eurocode Tuning down in Torrance. I called and set up an appointment for the following week. What follows is a pictorial of the install and the secondary install that crawled into my engine bay...
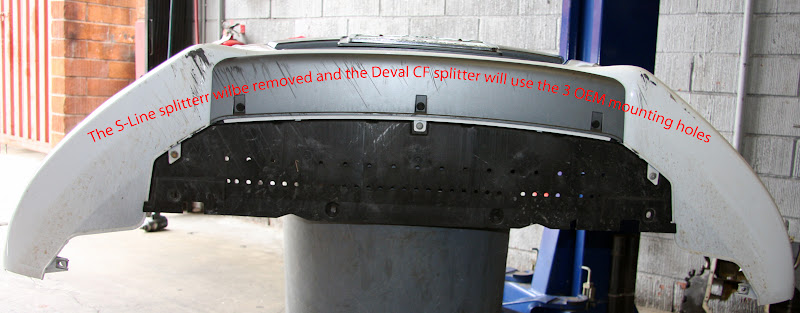

Julio, aka The Mexican(my apologies for calling you Jose bro), service with a smile. You have gotta love having a guy that loves what he's doing work on your car.:cool: Above, he is removing the OEM center splitter.

Above, you can see the bumper with OEM center splitter removed and the Deval CF splitter held in front of it prior to test mounting.
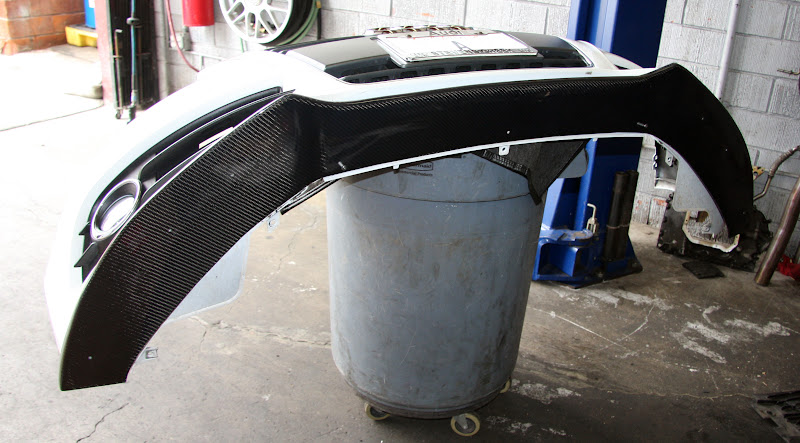
Perfect! I was worried i might need to repaint my bumper with those unsightly scrapes. Every scrape is covered.
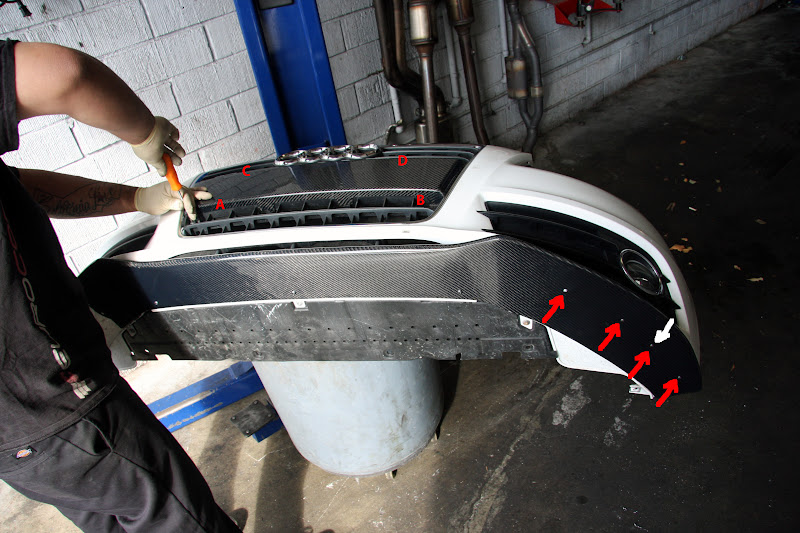
Above, the red arrows indicate where we have mounted 4 nuts and bolts fasten the splitter to the bottom of the bumper. There were only 3 holes as it came and we decided that it needed one more to achieve a more aesthetic install with improved fitment. The white arrow points at the hole that we added to achieve this. The 3 bolts across the bottom center are using the factory centor splitter mounting points as this splittler covers that portion just like the factory splitter did.
"C" and "D" are metal mounting tabs that fold back under the bumper from behind, locking the carbon fiber plate delete in place. "A" and "B" are the OE screw affixing points. Julio is tightening point "A".
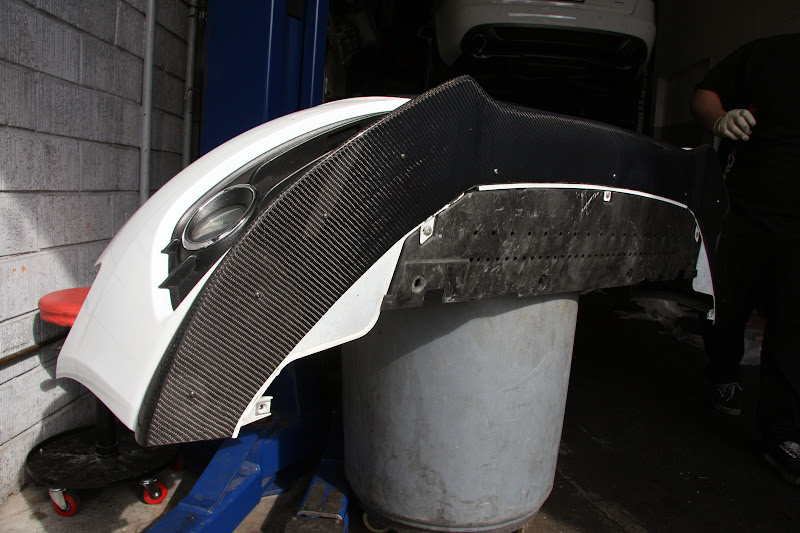
"I like it, uhlot".... Wait what is Julio coming back with?
 Julio went to get a Sharpee marker to black out the one stainless bolt head. The Deval splitter came with 3 holes in the center and 3 on each side. Remember we added a fourth hole on each side and while the Deval came with an extra nut and bolt, Jose had needed to source one and it didn't match the color. I hadn't even noticed until I saw him marking it black. Thanks Julio! Talk about attention to detail, this is the type of guy I want working on my car.
 So, now here the car is with the bumper of the car off, new carbon fiber on, and I walk into the office to talk with Dave, the owner of Eurocode and all around cool guy who has Audi in his veins. That's when it happened. I'm not sure if it was the fact that I hadn't had lunch yet or the afternoon sun blinding me but this is what awaited me inside.

At least that's what I saw.... When I came home and looked at the pictures on my computer things were different.

hot welds and hard pipes with a little bit of silicone for good measure... sounds like porn...car porn
Car porn... that is a great way to describe the EuroCode Intercooler and hard pipe upgrade. David, the ChipFather, made me an offer that I could not refuse and the installation began.

I added the horizontal red lines to indicate the alloy crash bar position. The Eurocode intercooler is mounted to the crash bar with a billet adapter And will cover space from the top red line to the bottom of the OE intercooler pictured above. This arrangement opens up space between the radiator and Eurocode intercooler instead of mounting directly against the radiator like the OE plastic/aluminum intercooler. That narrow space was filled with leaves and bug carcasses btw.

Eurocode intercooler attached to alloy crash bar
The Eurocode intercooler upgrade includes hard pipes, silicone hoses, clamps, the intercooler, and the cool turbo compressor outlet adapter below.

The right one is the OE unit and the red arrow points at a slit that (as it was explained to me) is there to combat compressor stall but also creates lag. I'm not sure about the effect of the removal of that slit yet.
This, however, I am sure makes a big difference.

Look at the difference in outlet size!

much better than that restrictive factory compressor outlet
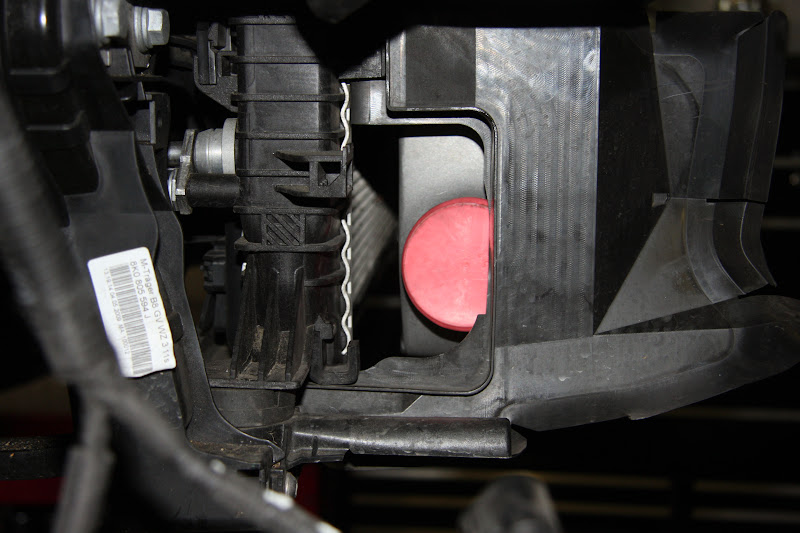
because the new intercooler is mounted further from the radiator, this shroud needed to be trimmed.

Julio roughing it out. He marked the area to cut with a grease pencil on the other side.

on the other side... now the silicone connectors will clear.

Left side hard pipe in place. Blue arrow indicates direction of airflow.
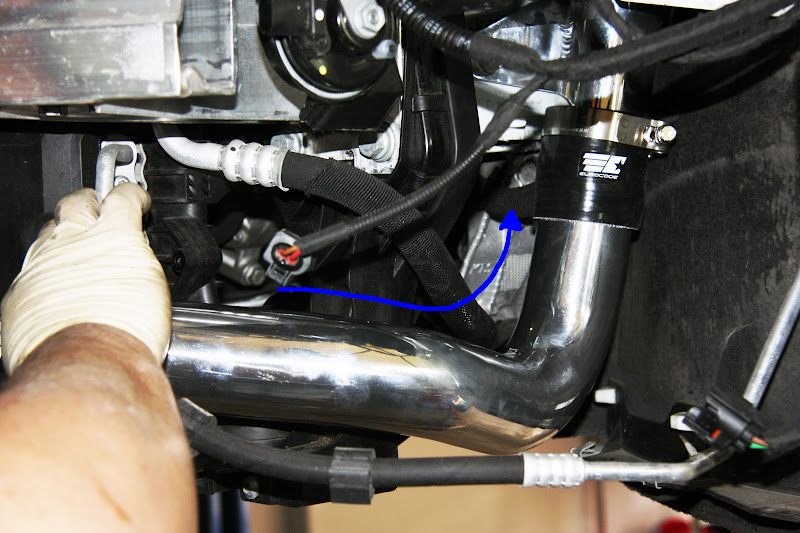
Right side hard pipe in place
The right side hard pipe connects to this pipe which replaces the factory pipe with it's attached sound box. Tough choice...LOL

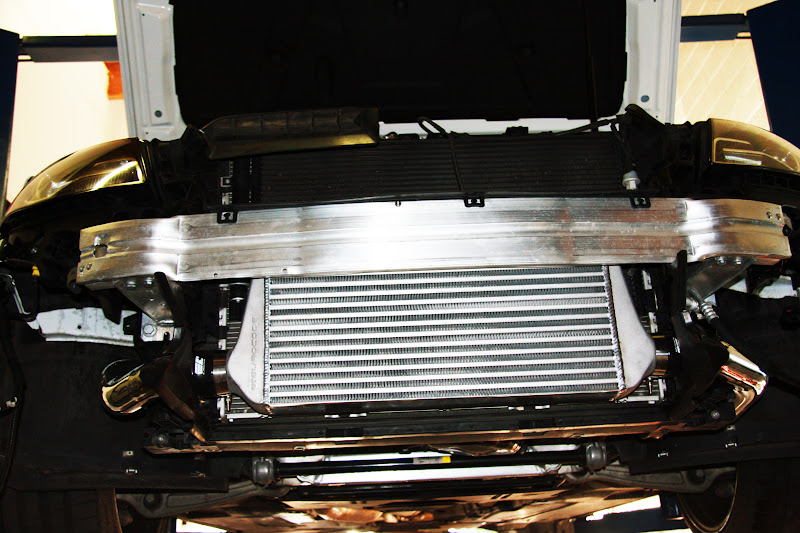
everything in place
Time to get Blizzard dressed.
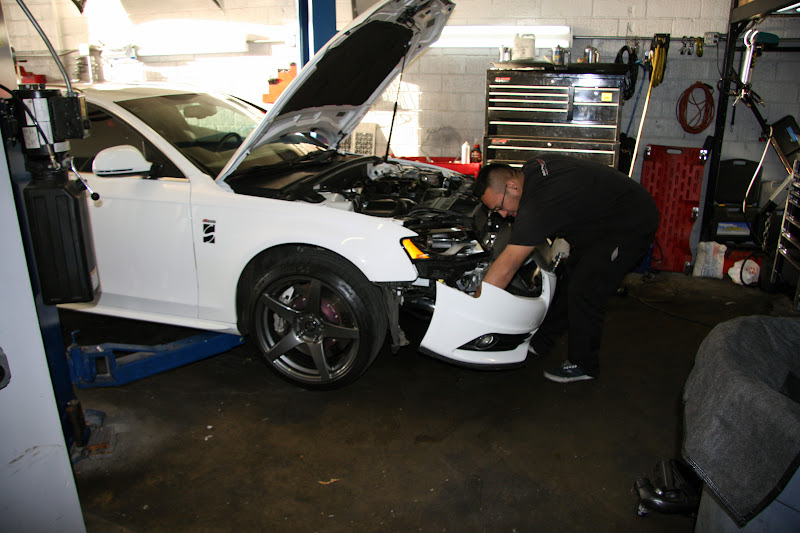
I could be wrong but I think Julio is still smiling... You rock amigo!

almost done

Eurocode silicone airbox-to-compressor hose.
Now here is where I failed to visualize the kit installed... I was certain that the polished pipes would attract attention that I didn't want so David agreed to get me a set of black anodized or black powdercoated pipes asap. All buttoned up, you would be hard pressed to spot the mod from outside the car. I do plan to open up the fog grills so the black will be nice and stealthy.
Here is how it looks from the front up close.
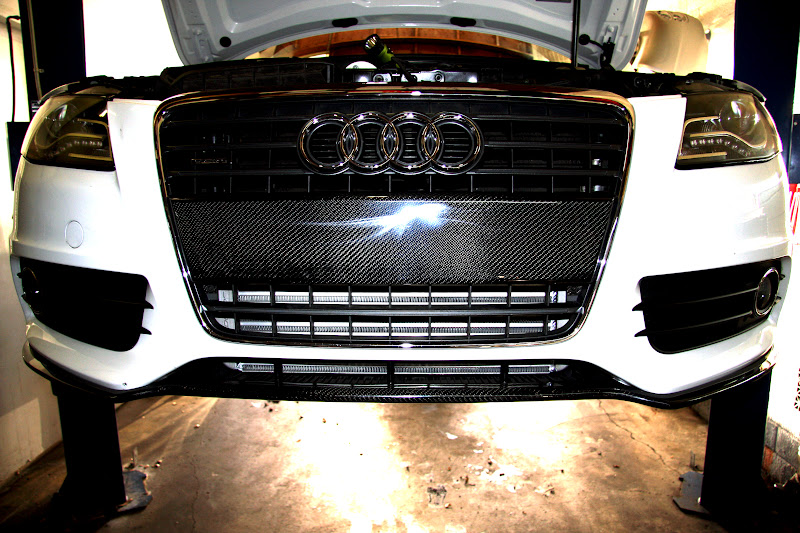
When I took it in for it's lunch bath at Lavaggio, people were commenting on Blizzard from the moment I arrived. Kind of amazing how much of a difference two small pieces of carbon fiber can make.
I'll post better photos of the CF bits mounted as soon as I can get time to edit them. And of course, I'll be posting a review of the Eurocode intercooler upgrade in the next few weeks. Probably after Targa Trophy that way I'll have some street and track time on it. I'm really interested to see how it performs at Laguna Seca later this week.
Hope it helps someone, considering these mods or tackling the install.
Time to go relax my hands.


 Reply With Quote


Bookmarks