


Every year, it's always the same.
This year, I decided I not to risk driving on the stock summer tires, and to purchase a dedicated set of winter wheels.
I had never purchased or swapped wheels before - so I didn't have much experience to draw upon. Thanks to doing a fair amount of research and reading though a number of threads it ended up being pretty painless. Here's what you need to know if you're interested in doing a swap yourself.
Step 1: Know your specs.
Know exactly what you're starting with. I'm starting with the 2010 OEM 19" wheels. Here are their vital stats:
19" five tri-spoke wheels.
Size: 19" x 8.5", offset = 43 mm, centerbore = 66.56 mm
I believe the stock 18" wheels are 18" x 8", offset = 47mm, centerbore = 66.56mm. I'm not 100% certain about the offset on these wheels, if someone knows the offset for certain, let me know and I'll edit this post.
The stock lug bolts & bolt pattern is:
* Lug bolt head requires a 17mm socket, and is 'ball seated'.
* OEM lug bolt shafts are 14mm wide, 1.5 thread, 32mm long.
* Bolt pattern is: 5 x 112.
* Torque setting is: 90 ft-lbs.
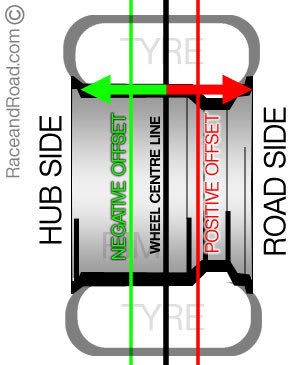
When selecting a second set of wheels, it's important that they have the same bolt pattern (5 bolts around a 112mm diameter circle, commonly known as 5 x 112). It's also important that the wheel centerbore be the correct size (66.56mm or 66.6mm). Depending on your personal preference and tire selection you have a small amount of freedom when it comes to the offset. The offset indicates how far out (or in) the hub's mounting surface is from the centerline of the rim. You don't want your wheels sticking out from underneath the fenders, nor do you want them too sunken in. Different wheels have different offsets that work best, so make sure to speak with your wheel manufacturer to make sure you choose the right offset.
Lastly, decide how large a wheel to shop for. Smaller & narrower wheels are your best choice for winter. They'll give you more sidewall cushion and the narrower wheels will not need to plow as much snow. For looks you'll want a larger wheel, and for maximum performance you'll want a wider rim. But these are just general rules of thumb, do your research and select what will work best for your specific needs. TireRack.com has a large selection of articles on winter tire selection. Give those a read if you're considering winter tires.
Step 2: Order wheels & tires.
I don't want to tell you where to shop for wheels - wherever you decide, make sure the wheels meet the technical requirements above. Make sure to specifically review the offset, bolt pattern & centerbore. Some designs may require wheel spacers (imagine a thick washer with 5 holes drilled around it that will sit behind the wheel). I don't have any experience using a wheel spacer, but I've seen enough threads complaining about them that I would recommend avoiding wheels that require spacers to fit.
For my winter wheels, I selected VMR v710's in Hyper-Silver. They look great and I think it's nice to support forum sponsors.

These wheels come in multiple sizes. I went with 18" x 8.5", offset = 35mm, centerbore = 66.6mm.
I've never had winter tires before, so I wasn't sure exactly what to select. I've heard a number of people say that All Season tires would be good enough, and others recommend Winter tires. After reading a few of the TireRack winter articles (see above), and this article from Car & Driver, I decided I would go with a set of Winter tires. I've had great experiences with Michelin's in the past, and after looking at the Winter poll results on TireRack I decided on the Michelin Pilot Alpin PA3's. Size is 245/40-18".
Step 3: Installation.
Disclaimer: Lifting your car and replacing the wheels is a task normally performed by professional, competent mechanics. If performed incorrectly, both the wheel replacement process & resulting installation can cause serious injury or contribute to an accident. DO NOT attempt this procedure if you're not comfortable assuming these risks yourself.
The wheels arrived with the tires already mounted and balanced, so we can get straight to the installation.
Start by putting a wheel stop/chock behind the wheel you are NOT changing. Make sure your car will not move around as you work on it.
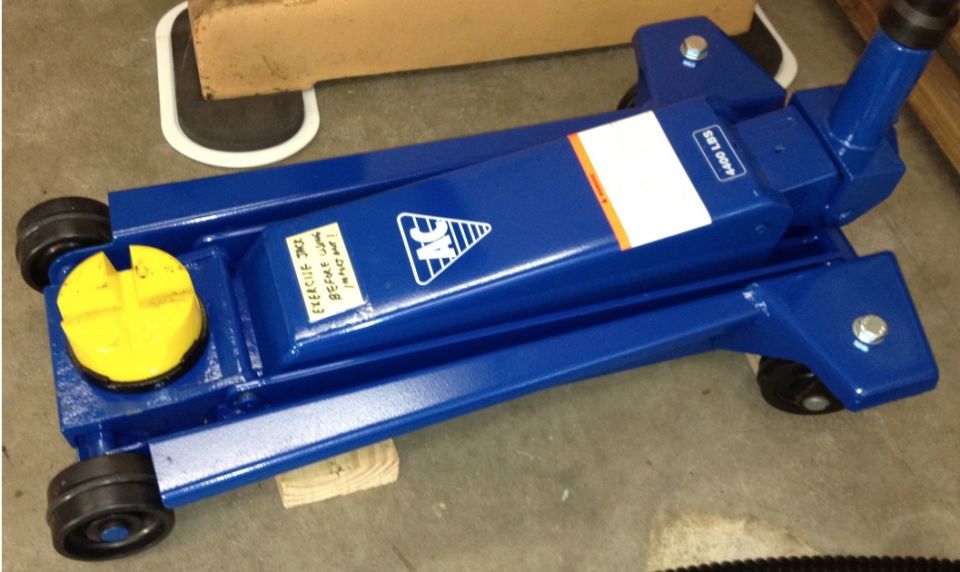
Next, lift your car at the designated jacking point. There are four identified jacking points, each identified by a small arrow indentation under the rocker trim. Just behind it you'll find a seam weld that is not covered with plastic. This is where you want to lift. Don't use a flat jacking surface to lift here, it can bend the weld or possibly slip. I used the Eastwood jack adapter to securely grab the seam & lift, but I've heard others recommend the Protech Side Lift pad (click 'Addl Images' for more pics).

Once lifted the existing wheel can be removed. Remove the lug bolt caps and remove the bolts. Be careful not to scrape your rims with your 17mm socket. I used a protective socket set from Griots Garage, although ECS Tuning also has a nice set. To loosen the bolts, I used a breaker bar from Home Depot. It has a swiveling head and is perfect for the job. Once the bolts are off it may take a bit of effort to pull the wheel loose. Be careful not to bang the wheel on the brakes or hub.
Once lifted, take the opportunity to clean out any large debris that's accumulated in the wheel well.
Now the new wheel can be installed. For this, I highly recommend using a lug bolt guide tool. It's a small peg you can screw in to the top lug bolt hole and then you can use it as a hangar or guide for the new tire. When ordering one, make sure to get the right size: 14mm x 1.5. Again, I got mine from Griots, but ECS Tuning also has one.
Here's the clean wheel well with the guide tool installed.

Next, tighten the lug bolts 'hand tight'.

Now, use a torque wrench to tighten all the bolts to 90 ft-lbs. Tighten them in a star pattern. If you labeled the bolts 1, 2, 3, 4, 5 in a clockwise manner, tighten them in this order: 1, 3, 5, 2, 4. I go through the pattern twice to make sure that every bolt is seated properly. The wrench I used also came from Home Depot. Before you change the tire check your wrench to make sure it can do 90 ft-lbs. (My old wrench wasn't large enough and I had to run out and grab a new one).

Lastly, replace the center cap and lug bolt covers, repeat for the other three wheels, and you're done!

Step 4: Keep a journal.
Lastly, to keep track of my wheel wear, I made sure to write down my mileage & date when the original wheels were removed. I've also noted & registered the serial numbers of the new wheels (use the form provided with your new tires). After cleaning the original wheels I also took note of where each wheel was installed, so I can rotate them correctly when I re-install them in the spring.
Step 5: Enjoy the result!
Here are some pictures on my freshly washed & waxed 2010 S4.
Again, these wheels are the 18", 35mm offset, VMR v710's in Hyper-Silver.
Tires are the Michelin Pilot Alpin PA3's. Size is 245/40-18".
~~


 Reply With Quote


 EPL Stage 2 | Strat Intake | AWE Exhaust | JHM Short Shifter | Alu Kreuz | Eurocode USS with end-links | Lamin-X E-codes | Hoen H11 Endurance Yellow Fogs | Tunerdomes LEDs | 35% Crystalline Tint | 3M Clearbra |VAG'd


Bookmarks