


It's fairly straightforward, and I got a lot of help from this B6 tutorial (I'll refer to it for pics I didn't remember to take, props to Stockton):
http://www.audizine.com/forum/showth...or-Replacement
I'd suggest reading all of mine and all of his before tackling this, to make sure you have everything you need and don't miss a step.
____________________________________________
Difficulty: 5/10
Time: 1-5 hours (depending on if you had to go buy a T45 bit, lost it, looked for an hour or more, found it, and then continued..)
Beers: 2 tall ones
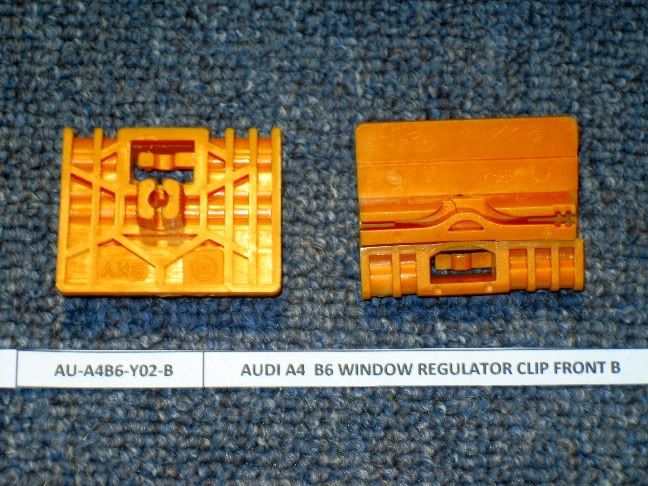
Cost: ~$150 from EuropaParts
____________________________________________
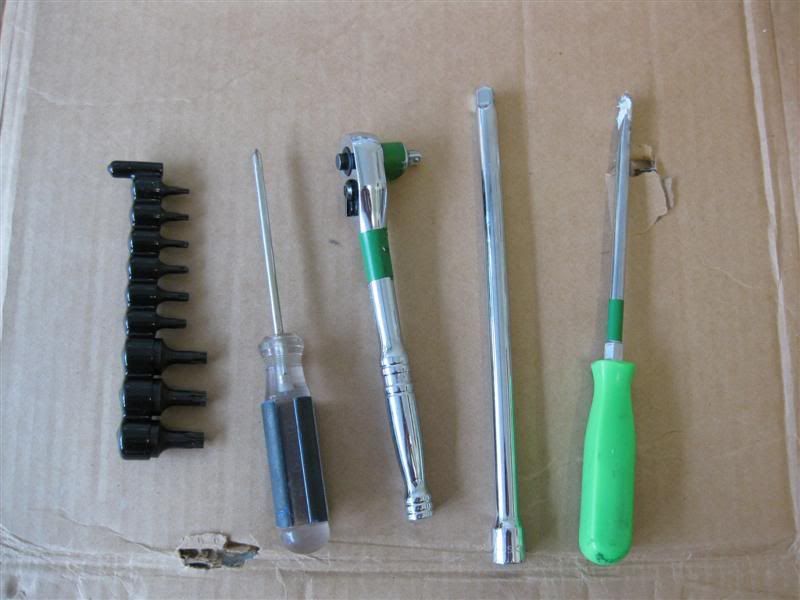
Tools:
1) Phillips bit with ratchet and extension (regular screwdriver is fine, this is just quicker)
2) T45 Torx bit, also need T25 and T30 (not pictured)
3) Normal screwdriver (see 1)
4) Pry bar of some sort (you can use a flat blade screwdriver)
5) Pen (not essential, but I'll explain)
6) Clothes pin edge (good for wedging without marking, but not strong..)
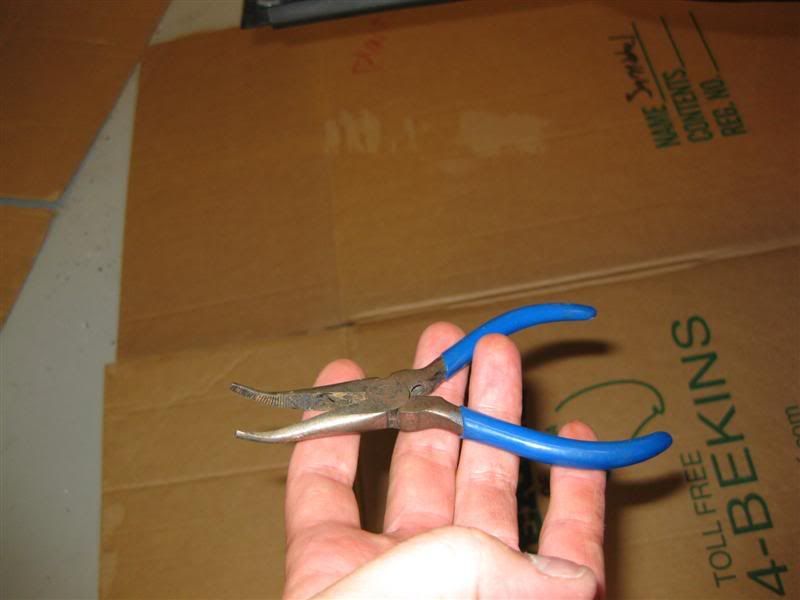
7) Needlenose pliers

____________________________________________
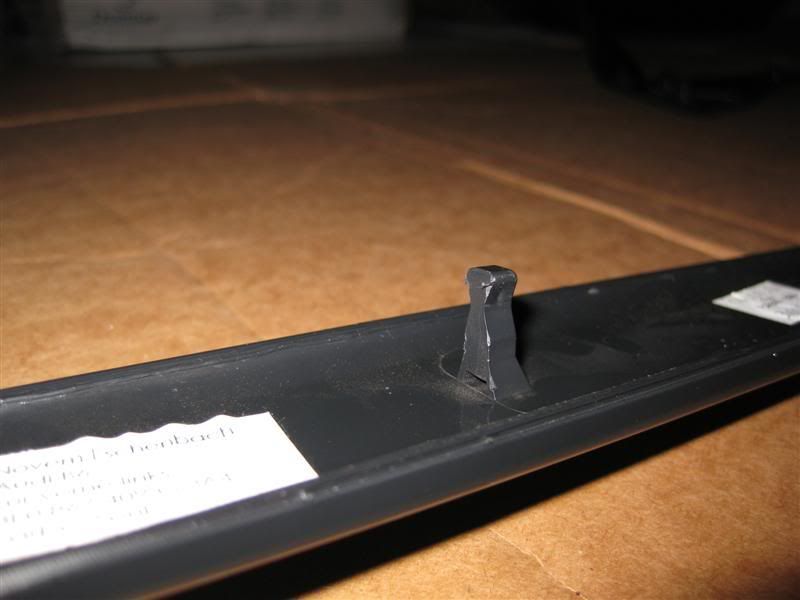
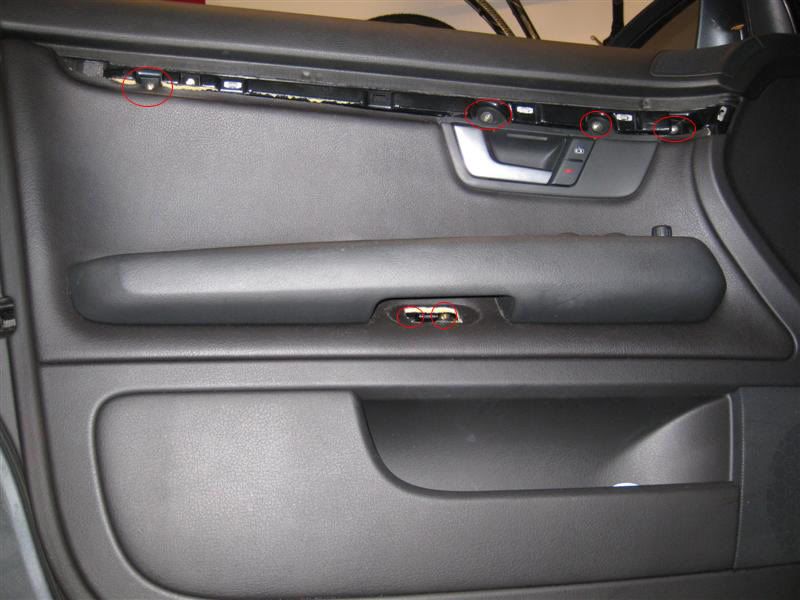
Step 1: Removing the door panel. First, put the window all the way down. Arrow at top edge of upper trim is where you will start to remove it (see 2nd photo) - it just clips in, but the last clip is L-shaped towards the outer edge, so slide it towards the interior after the other clips are disconnected and it will come right out. The two arrows below are locations for screws - you WILL need an extension for the handle one, since it's fairly recessed. The screw under the door panel is very long, so take your time and don't strip the head.


Step 2: Once the upper trim is removed, there are 4 phillips screws to remove.

See below the door handle for the approximate angle you need to remove that screw.

Step 3: Once the 6 screws are removed, start at the bottom and pull towards you to disconnect the tabs. Once you reach the top, you'll be able to slide the door card up and off the door frame. Note that it will not just come off!! There are still connections - unhook the cable for the puller (right arrow), and unplug the right-most harness from the motor, you'll see which one is trailing to the door card.

Here's the hook for the puller.

Here's the interior of the door card, to give you a better idea of what needs to be disconnected.

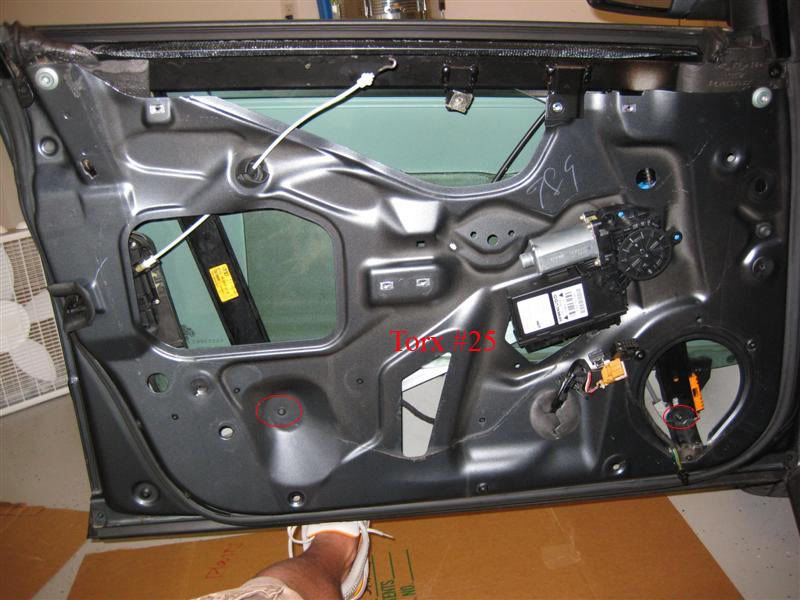
Step 4: Back to the door. This photo is kind of a clusterfvck, but you'll get the idea. Disconnect the harness at (1), it will require you to push the red slider towards the connection, afterwhich you can pull the whole thing towards you. There are three T25 screws holding the motor onto the door, the lone arrows to the top left - remove these. To remove the motor completely and set it aside, disconnect the three harnesses in the red circle.

Step 5: Disconnect the speaker. There are two harnesses, one white plug (circled) and three T25 screws. The speaker will be held to the door with a plastic plug at the top center, so you don't need to be scared you'll drop the speaker after you remove the screws. Pull gently towards you and it'll pop right out. Behind the speaker, up and to the left, you'll see two plugs holding the power mirror harness to the door frame. You can either remove the tape, or unset the plugs, but both need to be disconnected (sorry, no pics - there are a few on the B6 page).

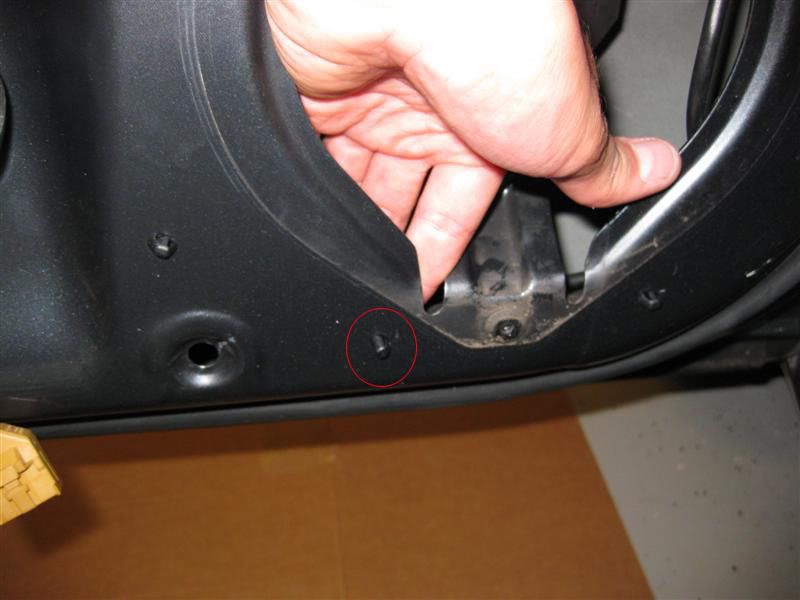
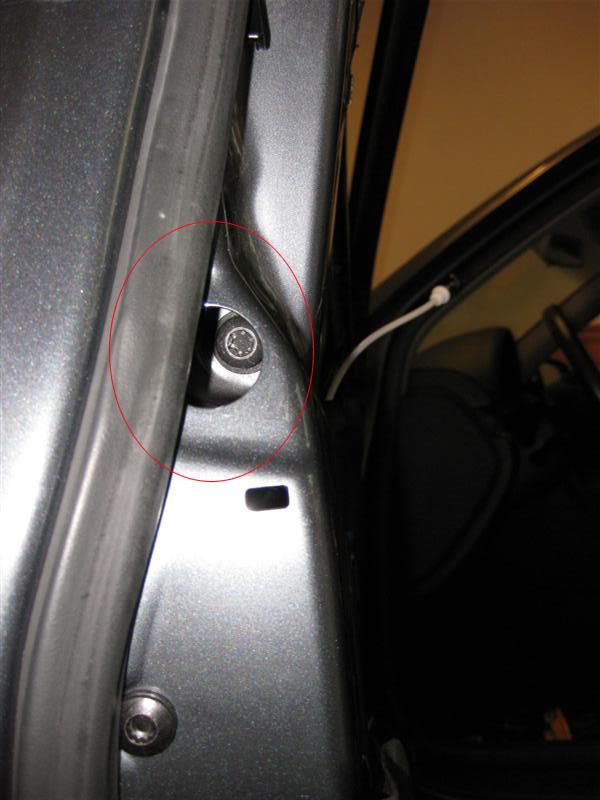
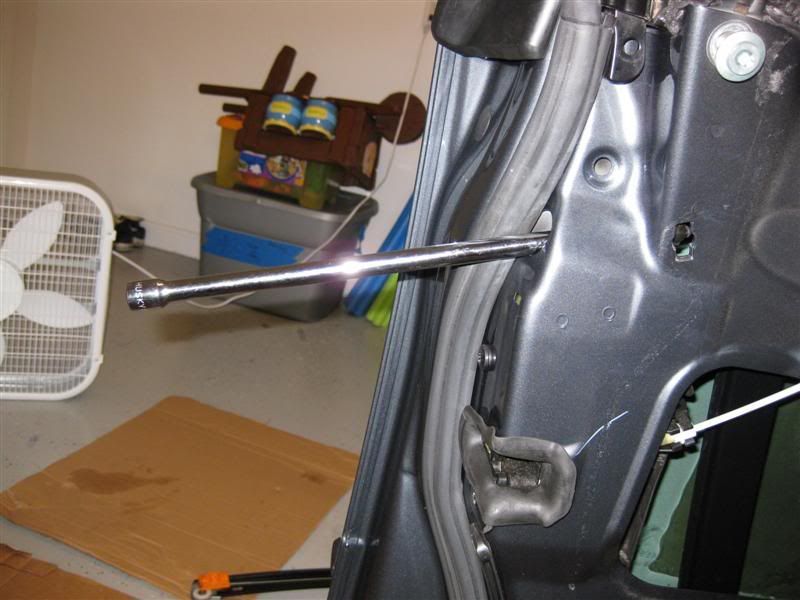
Step 6: The last few connections. Two T25 screws hold the regulator in place, one in the speaker well and another at a similar height to the right. Remove these. There are also four T45 screws, the top silver ones circled, a small black one on the left, and one recessed on the doorjamb side.

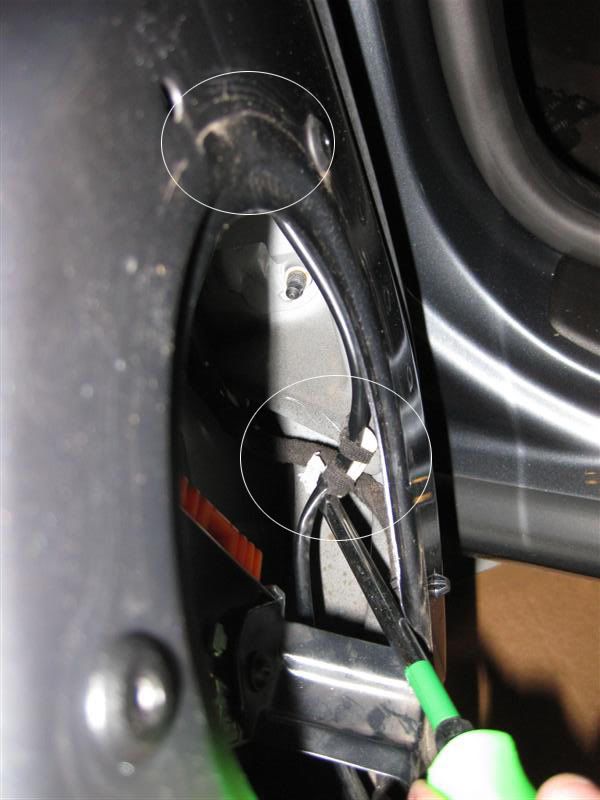
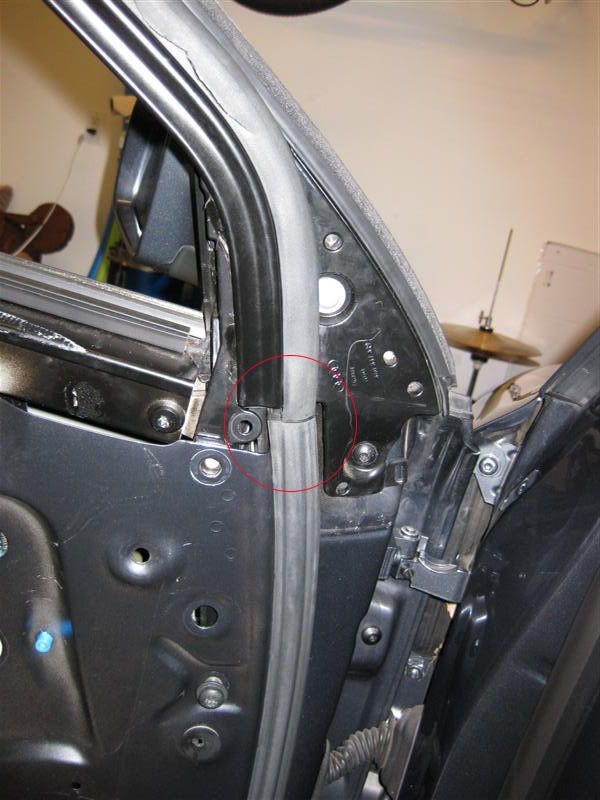
Step 7: PLEASE refer to the B6 tutorial for this step, since I forgot to take pics, and will have to pump a few steps into one. Disconnect the mirror and remove the upper weatherstripping. Basically, remove the two plastic pieces on the interior of the frame nearest the mirror. They clip in, and will pop off with a little force. Beneath the inner one, there is a T30 screw that must be removed so that the window frame can be extracted. To remove the upper weatherstripping, start from the inner side and CAREFULLY make your way up and around the window frame. Be sure to pull from the base of the stripping, and not the top. Since it's only a few years old, I wasn't too worried about it tearing, and it came out fairly easily. Once the TOP HALF ONLY of the stripping is removed and hanging, there are 4 plugs (two per side), that need to be popped out where the stripping meets the door. I believe there are pics on the B6 page, and I'm sorry I didn't snap a few, my bad.
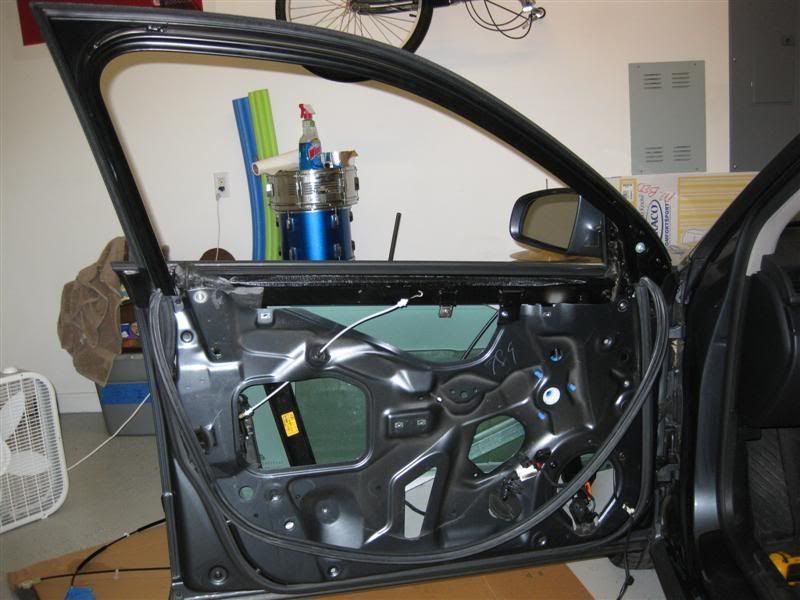
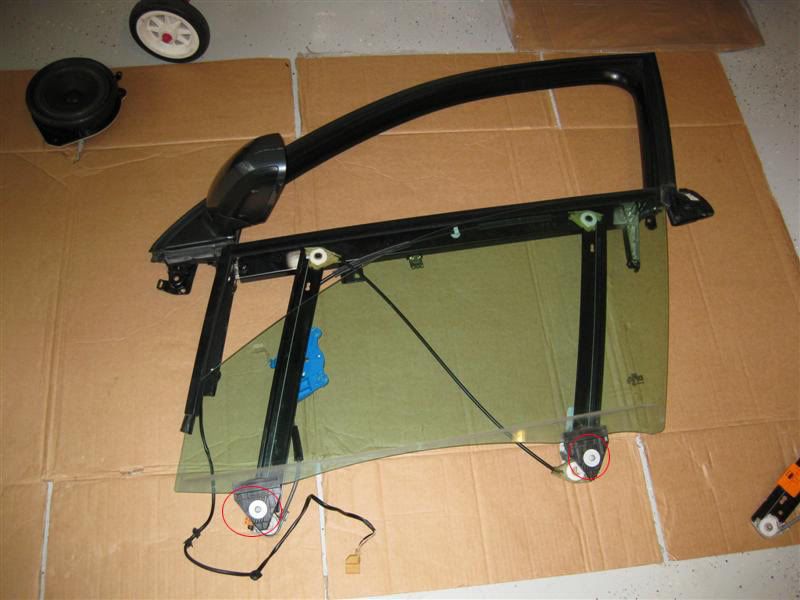
Step 8: Once you're certain all connections have been cleared, you will be able to remove the window frame (the frame, mirror, glass, and regulator will all come out). Again, no pics, but it will come out with steady force and is actually somewhat light. Make sure that the mirror harness (remember we disconnected those two plugs?) doesn't catch on anything, since it's coming with us. The frame and regulator are curved, so pulling the window frame up and towards you will allow it to come out easily. Once free, lay it down very carefully with the mirror side up. As you can see below, I just used the cardboard packing from the new regulator, but have a safe spot ready so you're not holding up the frame looking for somewhere to go.

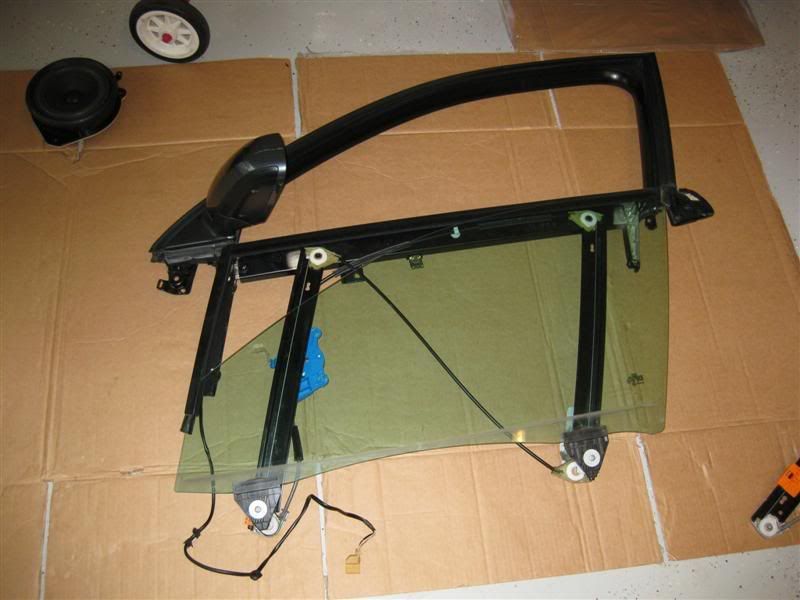
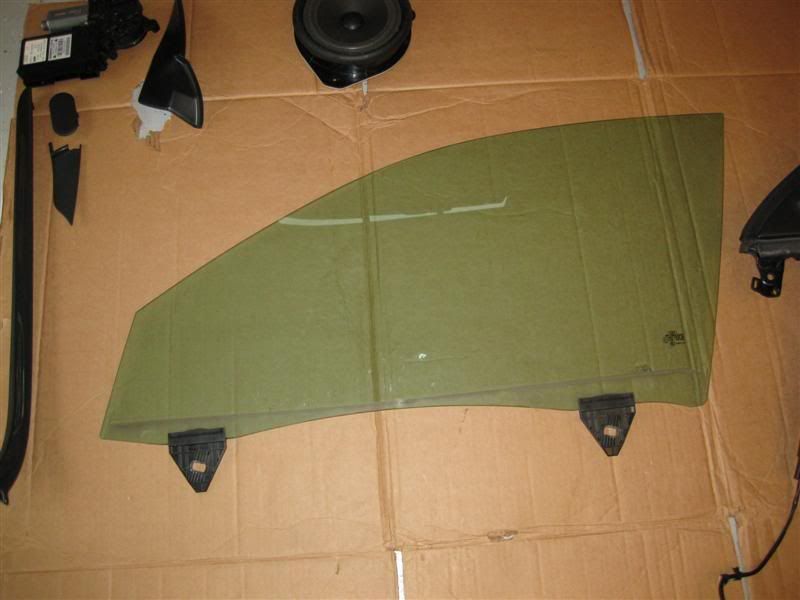
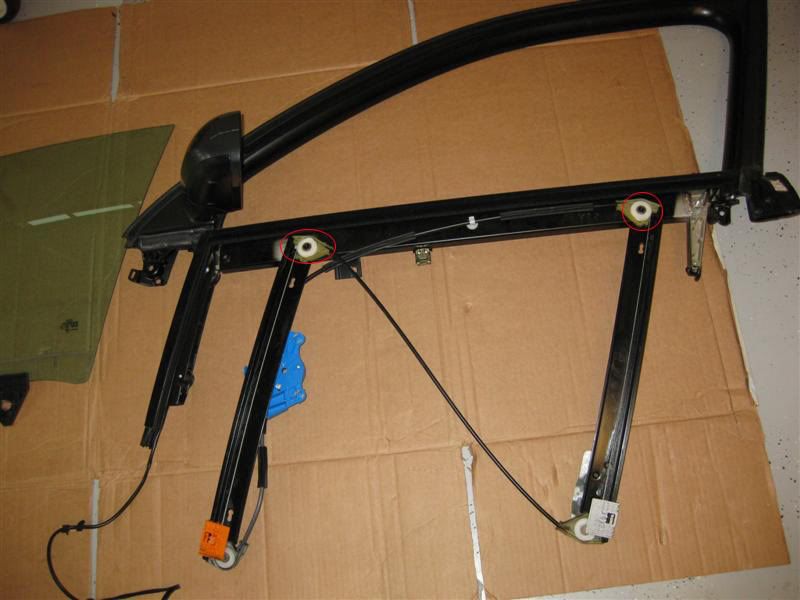
Step 9: Lay the new regulator next to the old one, ensuring that you didn't order the wrong part, and that it all faces the right way and lines up properly. Remove the two T25 screws at the base of the window glass. This will free the window itself, keeping those tabs connected. Slide the window down and towards you along the guides, and place it somewhere safe. You will then be able to remove the remaining two T25 screws holding the old regulator in place, at which point you can throw it off a bridge.
Hmm, wonder what the problem was?

Reconnect the new regulator as you disconnected the old one, slide the glass back into place carefully, and reconnect it to the slides. This all goes back in as it came out, carefully and making sure the harness doesn't catch. Take your time, and if you were smart about keeping track of the screws and bolts, reassembly will be a breeze.
Here's my big tip for doing a job like this. I took two large pieces of cardboard (from the new regulator packaging), and used the pen (told ya we'd come back to this) to draw a crude scale rendering of the door card and interior frame. For every screw I removed, I punctured the cardboard with it in it's approximate location and labeled it. This means no lost screws, and zero confusion wondering what screw goes where. Here's two pics, with larger versions linked below.

http://i55.tinypic.com/29ux3ip.jpg

http://i54.tinypic.com/2w53868.jpg
Well, this would have been a one hour / two beer job had I not needed to run out and buy a T45 bit. Also didn't help that I managed to lose the bit for an hour (since it got dark upon my return from the store), and finally found it inside the bag of candy I'd been snacking at on the way home from the store while checking out the bit. All in all, not hard if you're organized and methodical, and instantly makes me love my car again. Gas station stops were awkward for a while, but no more.
I know this is a pretty bare-bones tutorial, but hopefully it helps someone out. I'm sure I missed steps and photos, but chances are if it's not here, it's covered in the B6 page. Stockton did and awesome job on that, and I attribute my success on this one to that tutorial.. figured we could use a B7-specific version, that's all.
Cheers.


 Reply With Quote
 Good luck! Any questions, let me know.


Bookmarks