


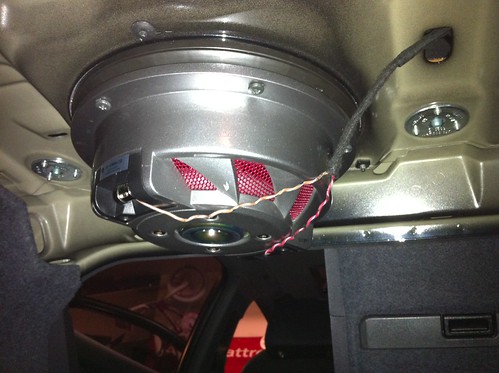
The speaker is the Pioneer shallow mount 8" suitable for free-air use:
http://www.pioneerelectronics.com/PU...llow/TS-SW841D
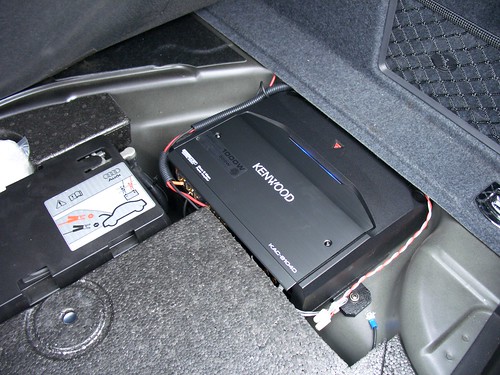
The amplifier is a Kenwood KAC-8104D:
http://www.kenwoodusa.com/car_entert...iers/kac-8104d
I like the amp for its autosensing power on/off feature and its size to fit near the battery under the trunk liner. If you're doing this on other than an RS4 you'll need a different home for it.
Safety: Always disconnect the battery when working on the electrical system
Start by lowering the back seat backrest down for access.
Tip: Be careful not to trap the buckle that comes up between the seats, under the backrest surface as it comes down, it will leave a nasty indent in the leather.
Gently pry up the front of the grille in the parcel shelf. Grab the sides and pull it forward and up to release it from the back. There are no screws.
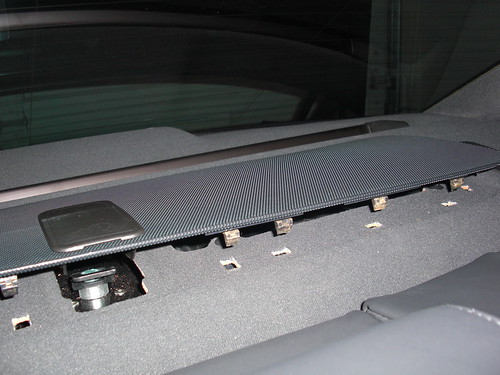
Unscrew the four T20 screws from around the speaker.
Where the shelf folds down behind the seat back, run a screwdriver under and side to side, and locate the four (or five?) poppers that the shelf clips to the body with. Pry the poppers free with your screwdriver.
Tip: Get the tip of the screwdriver as close to the poppers as you can to pry free, otherwise they can easily be ripped off the underside of the shelf if you just pull on the shelf. No big worry if you lose a couple in battle, the seat back holds the shelf down.

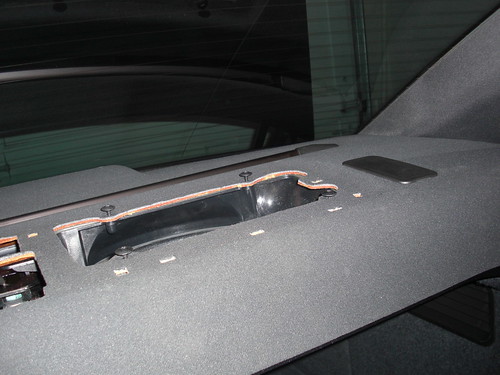
Pull up the shelf enough to get to the speaker enclosure, the shelf doesn't have to come out. There are two T20 screws to remove inside the enclosure in the front two corners very deep down next to the speaker. There is a third accessible from the trunk at the rear of the speaker grille. Unplug the speaker connection near the enclosure and you are clear to pull up the front of the whole unit and lift out.
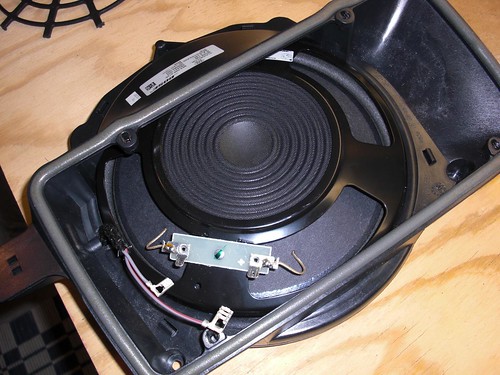
There are four little clips holding the speaker grille to the enclosure, you can see one center right next to the speaker. Pop these through and off comes the grille.

Upturned enclosure. Look at the very ends of the grille "webs", I have cut through those to remove the center of the grill to allow the rear of the new speaker to come through.

Sealant on the newly crafted mounting ring.

The new speaker comes with a rubber sleeve around its perimeter, discard it, the speaker grille surround will not fit with it in place and you can use silicon sealant to make a flexible seal which prevents any contact of the speaker with the mount. Clip the newly crafted mounting ring back in place around the speaker

Enclosure turned back over again. The original speaker wire is shown for reference to the earlier picture but you should have taken that out by now because the terminals for this new speaker are in the trunk (my bad).
Insert the enclosure back where it came from, there is adequate clearance although that was my worry when I started that it wouldn't go back in. Phew. Screw back in place with the three screws you removed and you're ready to add the amplifier. Don't refit the rear shelf yet, you'll need access to hide wires under there.

This is an even briefer guide on the amp install but it is flexible as I said.

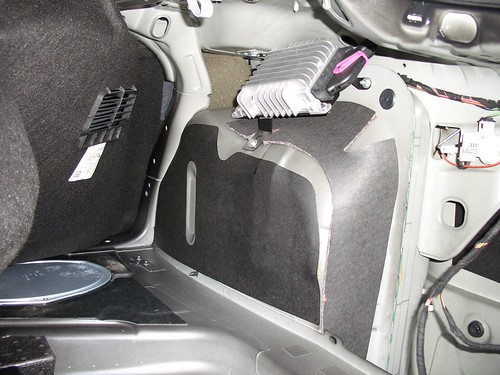
Pulling out the filler styrofoam from around the battery reveals a nice spot for an amp in the RS4. The section holding the tire pump is cut away to make room (the pump fits easily in the back of the cubby to the left of the trunk).
To remove the trunk side liner, first remove the screws holding the long trim at the bottom opening of the trunk, remove the trim, then the one or two screws holding the side liner may be removed and the liner pulled open as shown. The wire seen is for the rear power socket in the right cubby, which needs disconnecting before pulling back the liner. This is where I tapped in for +12V power, a good high current source (well high enough for this mild audio addition). The amp –ve terminal should go to a good body connection point, I drilled a small hole to screw a connection to.
This shows the original Bose amp for reference. There is a white wire I understand in that big connector, which can be used for switching an amp on/off. I used an autosensing amp instead.

Early stages of fitting. You will need to get the speaker signal from the original connector you took off up by the speaker. Extend that wire pair down to the amp speaker-level input. Also run beefy wires back up to the new speaker along the same route. These are easily hidden behind the side liner and under the rear shelf.
Replace the side liner, not forgetting to connect up the power socket in the cubby again (a little tricky) and rear trim. At this stage I added Dynomat over the bottom of the rear shelf bodywork in the trunk, and patches wherever I could fit it under the shelf inside the car. I hardly found space for two sq.ft. or so.
Put back down the rear shelf, locating the poppers in their mounting holes and push firmly. Replace the four screws around the speaker and replace the grill. Fold up the seats and pump up the volume!
For reference, I have the gain set to 0dB (minimum) and the low pass filter to 100Hz. It took me a while to realize that the gain being up any higher just did not work, there's a lot of power in that amp and the signal in is already at speaker level.


 Reply With Quote


 .
.

 , then again
 ")


Bookmarks