Audizine - An Automotive Enthusiast Community

Results 1 to 30 of 30
  1. #1
    Senior Member Two Rings NK2007's Avatar
    Join Date
    Mar 25 2008
    AZ Member #
    26847
    My Garage
    2000 Audi A4
    Location
    Ft. Collins & Colorado Springs

    Lightbulb D.I.Y. Armrest repair

    Guest-only advertisement. Register or Log In now!
    So i finally got around to fixing my armrest. Heres how i did it:

    First, remove the vinyl and begin breaking off the top layer of plastic.
    You will notice that the stock pad is attached to the top layer of plastic, then it is melted and pressed into the bottom layer. It is pretty easy to brake off with some pliers.
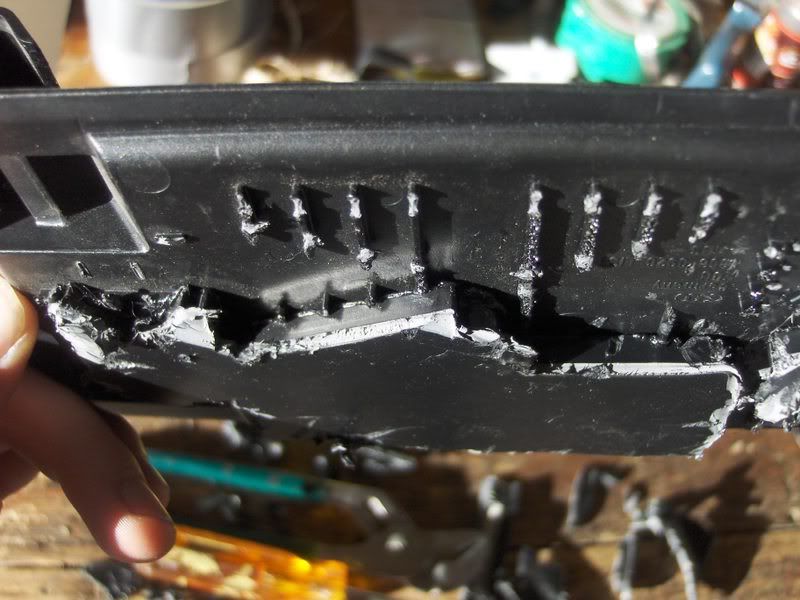

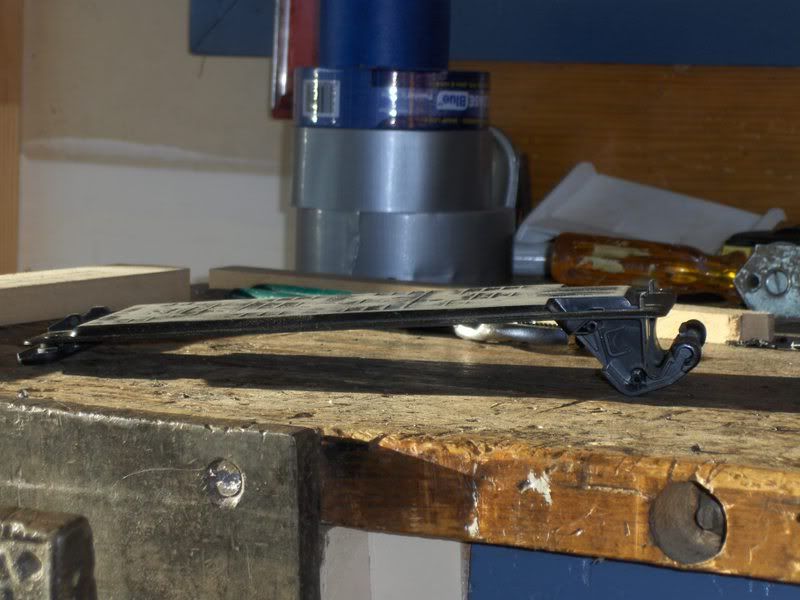
    This is what the bottom looks like once the top is removed:
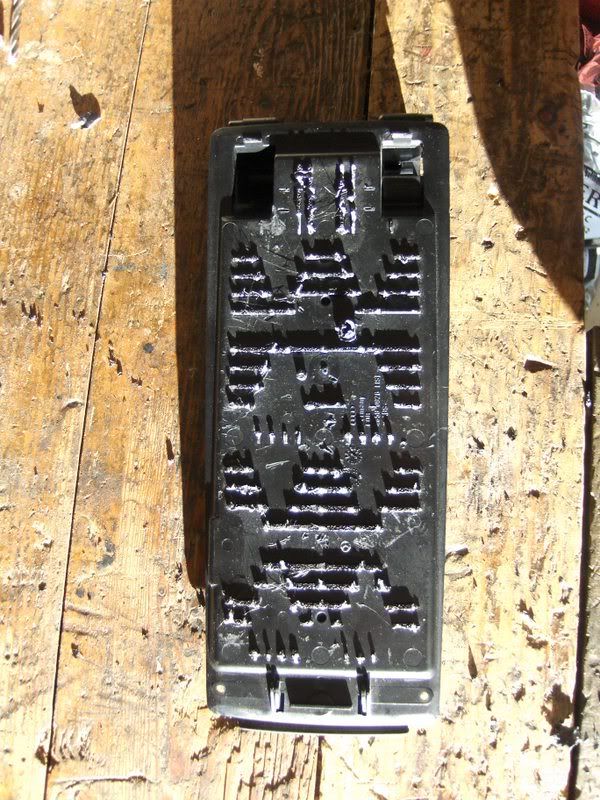

    I then took my sander and flattened out the ridges with some fairly coarse sandpaper:
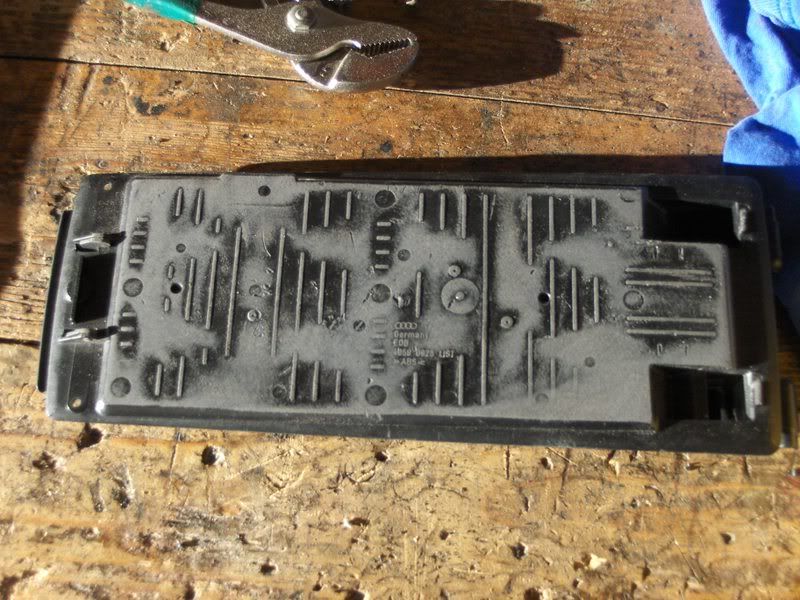


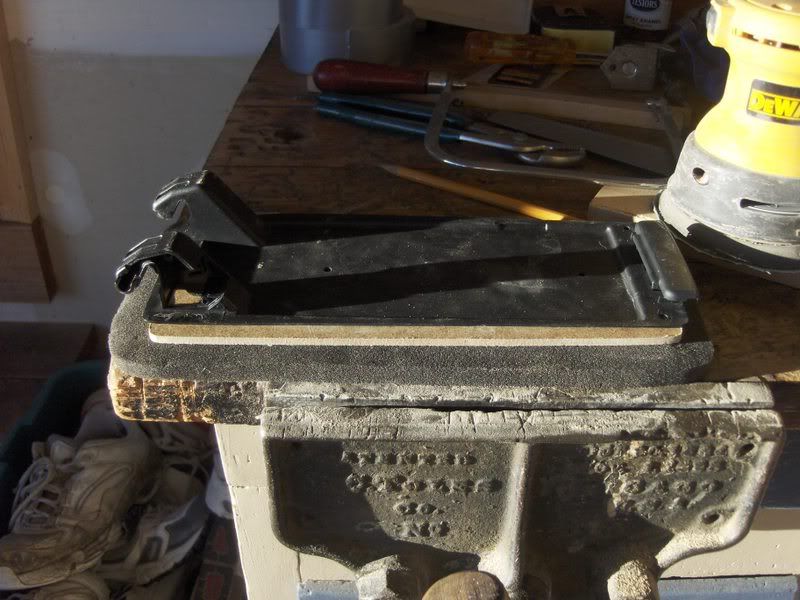
    I then traced and cut out the bottom shape on some thin particle board.
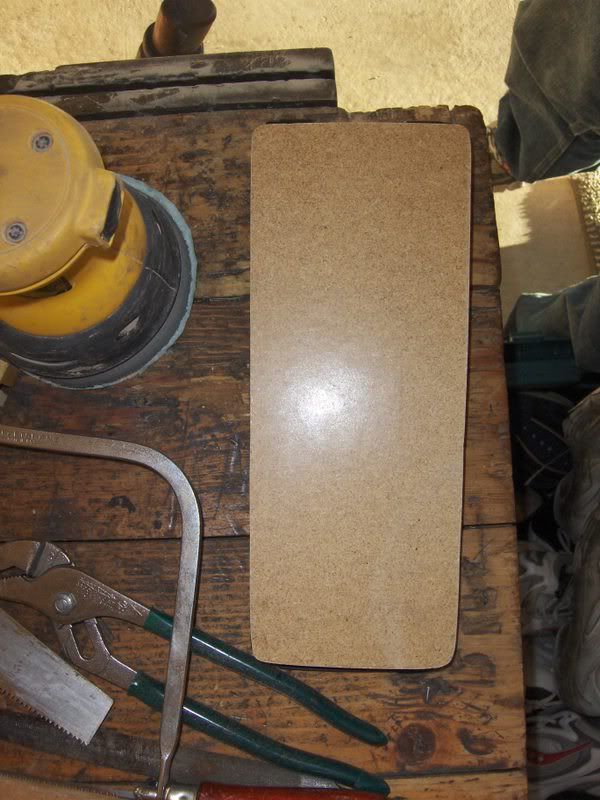

    This is how it's assembled:

    Some holes and countersunk bolts to match the holes for the rubber things in the bottom plastic piece:
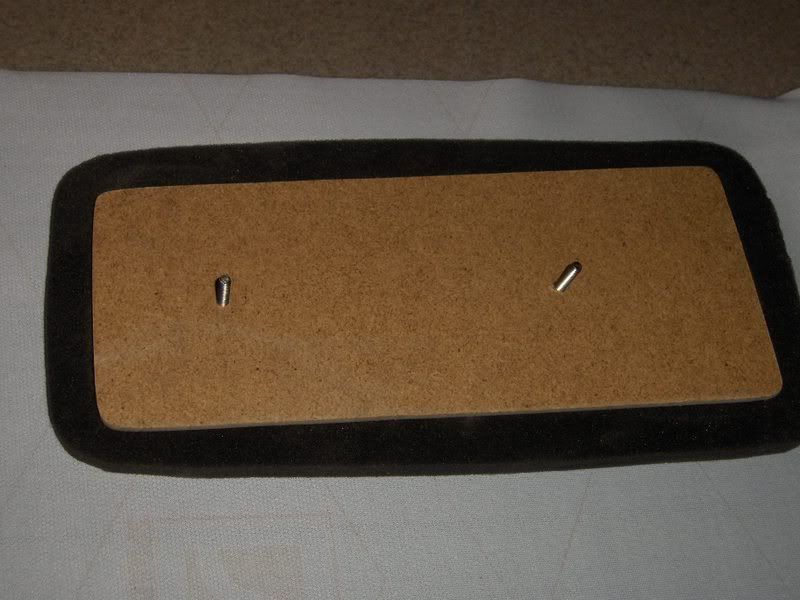

    I went to the local fabric store and picked up some high quality outdoor vinyl for cheap (yay for holiday sales!) There was a noticeable difference between the cheap stuff and some nice stuff. The cheap stuff was really stiff and didn't like to flex. The quality stuff was soft and pliable. And it supposedly has a warranty.

    Cut out your fabric a little bigger than the stock foam piece:
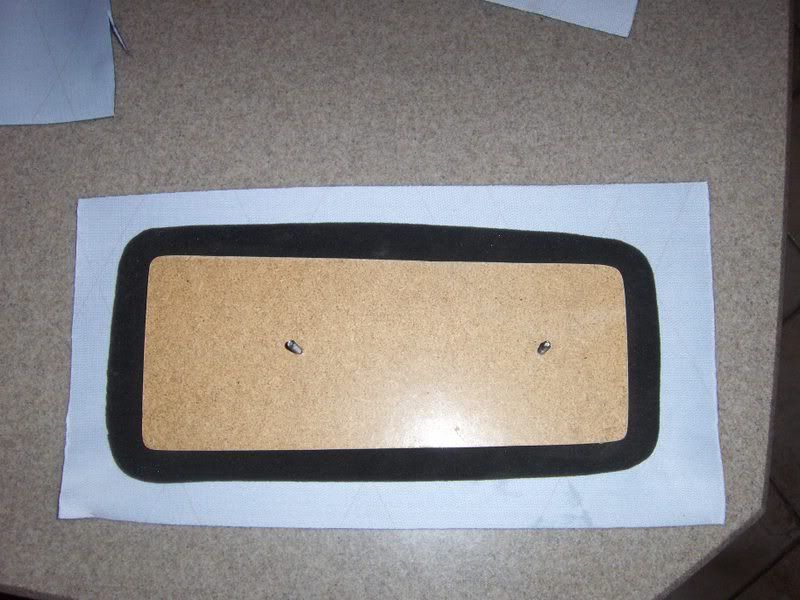

    Staple the fabric to it. This is a lot easier than it sounds! It's much easier with two people. In my case my grandma just happens to be in town... she helped me stretch it and make the corners smooth.

    staple in this order

    1920**7***3***5**910
    18*************** 11
    *******************
    1*****************2
    *******************
    17*************** 12
    1615**8***4***6**1413

    Hopefully that makes sense. The big thing here is to stretch! If you don't there will be wrinkles in the fabric.

    For the corners, start by putting one staple in on the side of the corner, then slowly stretching and folding the fabric over to make it smooth, adding staples where necessary.

    Go back and fill in any spot where the fabric is stretching wit staples.

    It should now look like this:
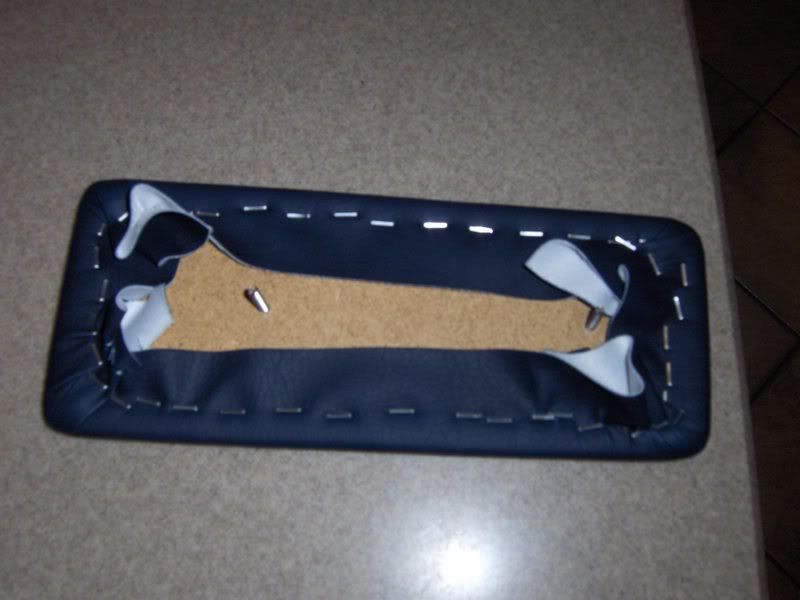

    Trim the excess fabric and flip it over!
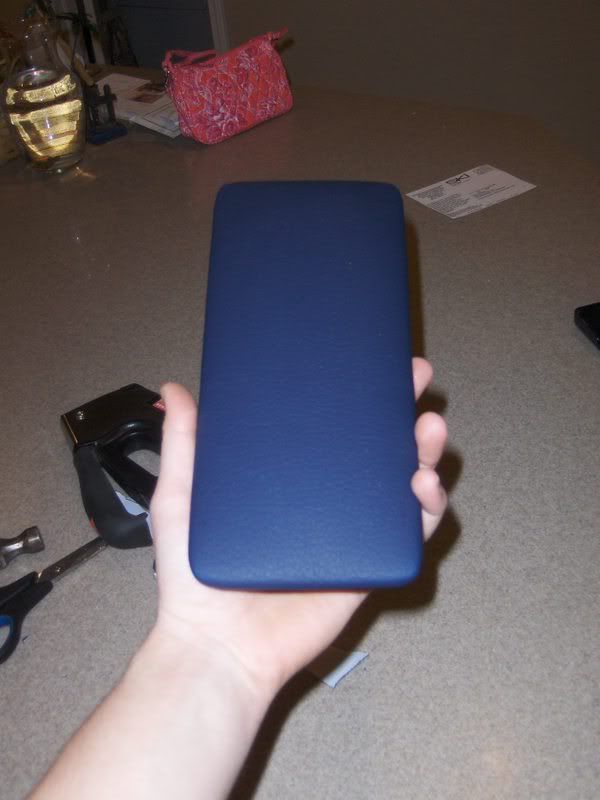

    Here's a picture of the smooth corner:
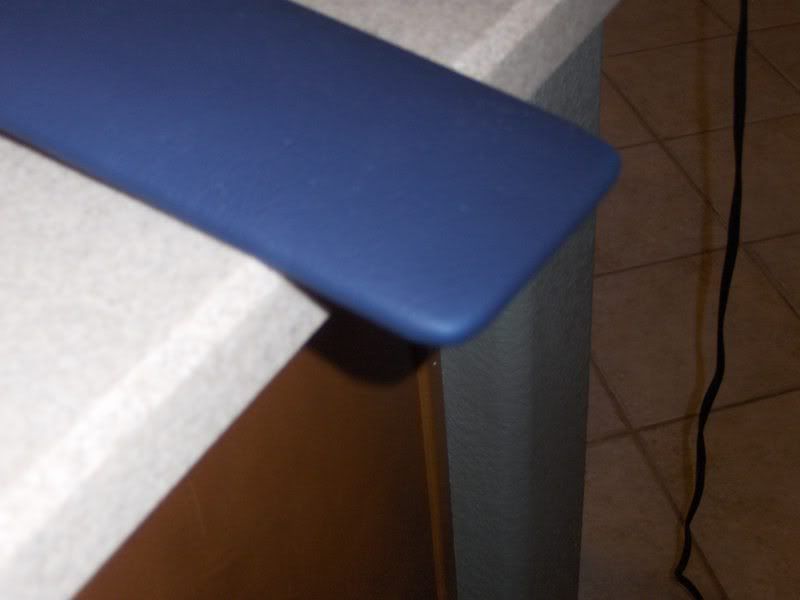

    Here it is bolted to the bottom plastic piece.
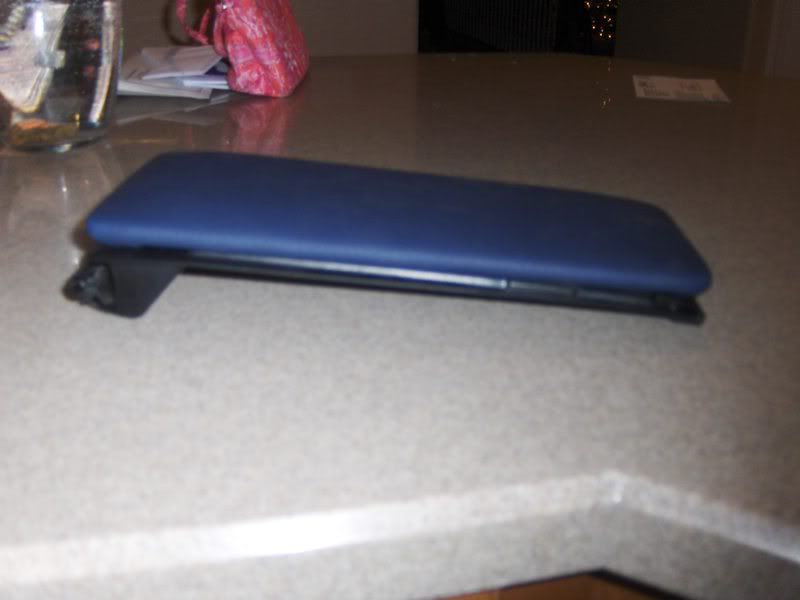

    And in the car... The color difference isn't really that bad. This was taken at night, and the flash reflected differently off the suede and vinyl. We shall see how it appears during the day...
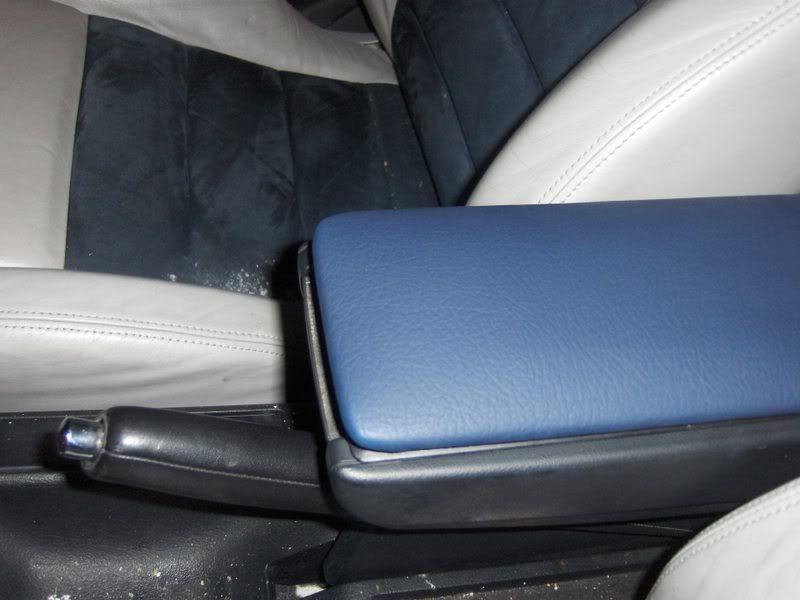

    Snort your coke line and sit in your chair, enjoying your new armrest!
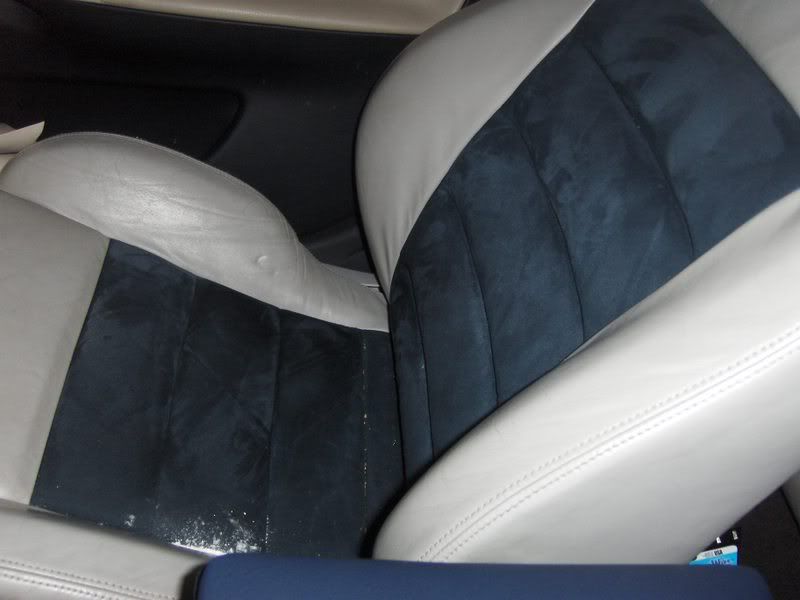
    (gotta love powdered sugar christmas cookies... can always count on them making a mess!


    After doing this, I realize i need to remake it with the wood base larger, and possibly more padding to cover up the raised plastic part on the base. If i have time tomorrow i'll give it a shot, and post up new pictures.

    Anyway, let me know what you think, and hopefully this helps some of you out!

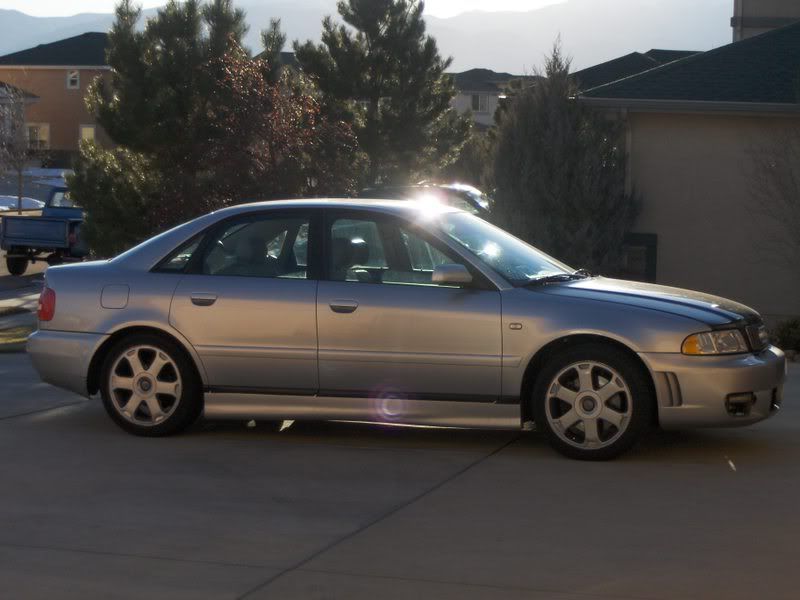
    Oh yea, random picture of my dirty car as i was working in the garage:

    ~neill
    |00 A4 TQM|K04|Revolver Cams|Greddy FMIC|Custom GIAC|Full Custom Exhaust|OEM RS4|S4 Rear|S4 Interior|HID|

    More to come!

    F.S. Rieger Side Skirts in Silver- will trade for S4

  2. #2
    Veteran Member Four Rings VTAudiA4's Avatar
    Join Date
    Oct 20 2007
    AZ Member #
    21947
    Location
    USA

    Re: D.I.Y. Armrest repair

    Great Job. Looks really good and thanks for making a DIY. Little off topic though. Is that an OEM Rs4 bumper? If so how much work did you put into it to make it fit? Im in the process of purchasing an oem rs4 and will attempt it to put it on my non WB A4.

    Edit: I also think it would be a good idea to buy some foam an insert that as well for some more padding.

  3. #3
    Established Member Two Rings The Russian's Avatar
    Join Date
    Dec 01 2008
    AZ Member #
    35852
    Location
    Boulder, CO

    Re: D.I.Y. Armrest repair

    oooo good thinkin, lots great man!
    2001 A4 4.2L v8 quattro 5spd: 4.2L V8 swap | Tein SS Coilovers | Straight Piped side exhaust | StopTech Brakes | Custom aluminum radiator | Full Cage | much more...
    1983 Porsche 944: Daily Driver
    2001 Ducati 748: geared down | dry clutch | Termignoni
    Carbon Exhaust


  4. #4
    Veteran Member Four Rings geeky's Avatar
    Join Date
    Nov 02 2008
    AZ Member #
    34851
    Location
    Boulder & Seattle

    Re: D.I.Y. Armrest repair

    I dont have a center arm rest :( its actually really annoying too

    1989 Nissan 300ZX
    Lemons Race Car
    1999 Porsche 911 Carrera
    1-Off Widebody | LS1 Swap | AST 5200 2-way Remote Coilovers | blah blah blah
    2000 Mercedes Benz C230K
    The Daily | "VIP Build"
    2000 Audi A4 1.8T
    The New Track Build
    2006 Porsche 911 Carrera S
    LN Engineering 3.8L | H&R Suspension | IPD Intake

  5. #5
    Veteran Member Four Rings Stone825's Avatar
    Join Date
    Dec 02 2008
    AZ Member #
    35890
    Location
    nowhere

    Re: D.I.Y. Armrest repair

    I don't think that is from powdered sugar cookies 0_0 lol
    Audi A6 2.7T : 6MT : 88K Miles : GIAC Chip : 2.5" Catback : Hotchkis F+R Sways : AWE DTS

  6. #6
    Senior Member Two Rings NK2007's Avatar
    Join Date
    Mar 25 2008
    AZ Member #
    26847
    My Garage
    2000 Audi A4
    Location
    Ft. Collins & Colorado Springs

    Re: D.I.Y. Armrest repair

    Yes it is oem rs4.

    To be honest, I can't say exactly how much was done to make it fit, because i bought the car with it. However, it has never fit perfectly. The bottom has always hung really low, and a couple weeks ago i let my dd drive my car, and he pulled over a parking curb and when he backed off, it broke a piece off, and cracked it.

    This has given me the opportunity to fit it better, and i bought a plastic welder to do so. unfortunately, it turns out the bumper is not abs as i thought, but instead urethane, and therefore cant be welded. So as of right now i took a die grinder to the crack to narrow the bottom of the bumper a little, and just taped it. I need to invest in some good epoxy of some sort to fix it. I believe i will also cut the sides of the bottom and narrow it there when i get this epoxy.

    What i do know:
    The bumper rebar is attached to the bumper, and the headlight squirters have been saved.

    There are only two points of attachment on either side... both go into the fender. These bolts are a pain to get on and off, and the holes in the plastic bumper are bent/stripped out easily so be sure to make a bracket that fits and not just use washers like the previos owner did.


    There appears to be body filler in the corners, and along the top of the bumper on the sides by the fender. I assume some modifications were required here. It's kinda hard to tell, but what i really need to do is just buy another bumper (maybe an s4 one) put it on, and strip this one down and redo it right.

    I'll see if i have any pictures of the bumper off. If not, i'll pull it off this weekend when i do my clutch and grab some pictures for you.
    |00 A4 TQM|K04|Revolver Cams|Greddy FMIC|Custom GIAC|Full Custom Exhaust|OEM RS4|S4 Rear|S4 Interior|HID|

    More to come!

    F.S. Rieger Side Skirts in Silver- will trade for S4

  7. #7
    Senior Member Two Rings NK2007's Avatar
    Join Date
    Mar 25 2008
    AZ Member #
    26847
    My Garage
    2000 Audi A4
    Location
    Ft. Collins & Colorado Springs

    Re: D.I.Y. Armrest repair

    Quote Originally Posted by VTAudiA4 View Post

    Edit: I also think it would be a good idea to buy some foam an insert that as well for some more padding.
    It is already using the stock foam, but i am planning on picking up some more when i redo it.
    |00 A4 TQM|K04|Revolver Cams|Greddy FMIC|Custom GIAC|Full Custom Exhaust|OEM RS4|S4 Rear|S4 Interior|HID|

    More to come!

    F.S. Rieger Side Skirts in Silver- will trade for S4

  8. #8
    Veteran Member Four Rings arorem's Avatar
    Join Date
    Mar 24 2008
    AZ Member #
    26783
    My Garage
    '99 A4 1.8TQ, '74 Triumph Spitfire
    Location
    Illinois

    Re: D.I.Y. Armrest repair

    nice write up. There is a DIY section that this could be moved to.

  9. #9
    Veteran Member Four Rings biketsai's Avatar
    Join Date
    Jun 04 2007
    AZ Member #
    18558
    My Garage
    01' A4 1.8TQM;15' Wrangler
    Location
    Austin/DFW, TX

    Re: D.I.Y. Armrest repair

    Nice!
    Btw- how much did it cost for those seats to get done?
    BetaAlphaTau Member #12
    01' A4 1.8TQMS 5spd swapped
    GT2871R|CTAPP MAFless|034 EM|Godspeed FMIC|APR 2.5"|EVO MS DV|CM FX400-LWFW
    18" RS4 Reps.|S4 Front/Skirts/Seats/Brakes|RS4 Grill|CF Trim
    Stasis SS|LLTEK Tower|KW F/R Sways|Profec Spec 2
    My 5-Speed Swap DIY
    - B6 USP
    Chris:Mod|PM me with any questions

  10. #10
    Senior Member Two Rings NK2007's Avatar
    Join Date
    Mar 25 2008
    AZ Member #
    26847
    My Garage
    2000 Audi A4
    Location
    Ft. Collins & Colorado Springs

    Re: D.I.Y. Armrest repair

    Quote Originally Posted by Stone825 View Post
    I don't think that is from powdered sugar cookies 0_0 lol
    what can i say? gotta *twitch* get *twitch* my fix *twitch*


    Quote Originally Posted by arorem
    nice write up. There is a DIY section that this could be moved to.
    Thanks! Like i mentioned before, there are a couple things i want to take care of before i submit it for the DIY section. Hopefully tomorrow if not the next day i will have a new armrest made.
    |00 A4 TQM|K04|Revolver Cams|Greddy FMIC|Custom GIAC|Full Custom Exhaust|OEM RS4|S4 Rear|S4 Interior|HID|

    More to come!

    F.S. Rieger Side Skirts in Silver- will trade for S4

  11. #11
    Senior Member Two Rings NK2007's Avatar
    Join Date
    Mar 25 2008
    AZ Member #
    26847
    My Garage
    2000 Audi A4
    Location
    Ft. Collins & Colorado Springs

    Re: D.I.Y. Armrest repair

    Quote Originally Posted by biketsai View Post
    Nice!
    Btw- how much did it cost for those seats to get done?
    Thanks,
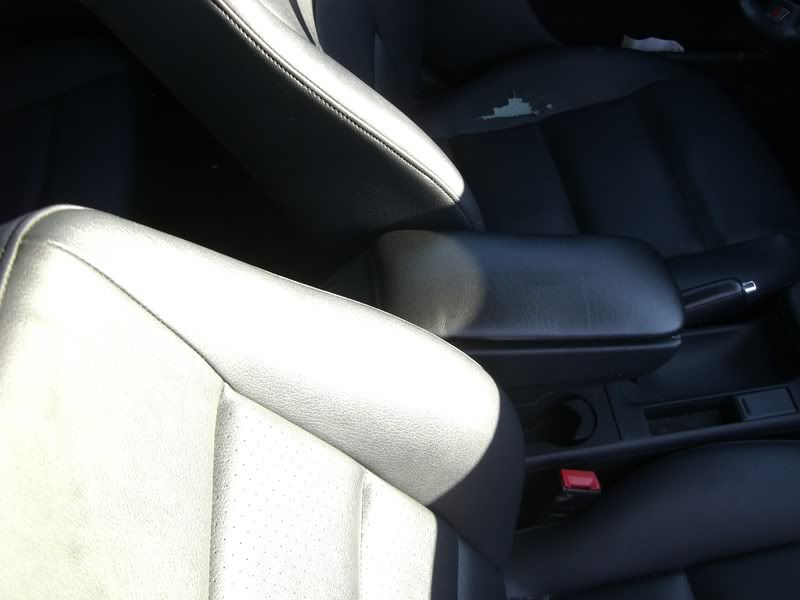
    and again, i'm not sure, PO had them in his built S4 (they are leather and power and heated, but heat isn't hooked up, hopefully another diy soon ) When he rolled the s4 in a corner on a local track, he almost didn't walk away (one of the headrests still has the blood stains!)... anyway he transfered them to the A4.
    |00 A4 TQM|K04|Revolver Cams|Greddy FMIC|Custom GIAC|Full Custom Exhaust|OEM RS4|S4 Rear|S4 Interior|HID|

    More to come!

    F.S. Rieger Side Skirts in Silver- will trade for S4

  12. #12
    Veteran Member Four Rings NorCal1.8T's Avatar
    Join Date
    Sep 15 2006
    AZ Member #
    11484
    Location
    Los Angeles, CA

    Re: D.I.Y. Armrest repair

    Nice write up i wanna do this to my armrest because its coming off on the passenger side. Could i use the same fabric over again, just do it your way? And please add to your DIY once you make smaller improvements to it, im gonna use your guide for sure!!!!!!!!
    2018 Mercedes GLC 300

  13. #13
    Senior Member Two Rings NK2007's Avatar
    Join Date
    Mar 25 2008
    AZ Member #
    26847
    My Garage
    2000 Audi A4
    Location
    Ft. Collins & Colorado Springs

    Re: D.I.Y. Armrest repair

    You could try using the same fabric, but mine was dirty, didn't match my leather seats (it was still the a4 pleather), and ripped. Its really up to you.
    |00 A4 TQM|K04|Revolver Cams|Greddy FMIC|Custom GIAC|Full Custom Exhaust|OEM RS4|S4 Rear|S4 Interior|HID|

    More to come!

    F.S. Rieger Side Skirts in Silver- will trade for S4

  14. #14
    Senior Member Two Rings
    Join Date
    Feb 02 2008
    AZ Member #
    24825
    My Garage
    17 pure white vr6 Touareg sport tech
    Location
    SoCal

    Re: D.I.Y. Armrest repair

    Great write up. One thing I cant figure out though is how to get the damn armrest top off. Care to elaborate?

    Thanks!

  15. #15
    Senior Member Two Rings NK2007's Avatar
    Join Date
    Mar 25 2008
    AZ Member #
    26847
    My Garage
    2000 Audi A4
    Location
    Ft. Collins & Colorado Springs

    Re: D.I.Y. Armrest repair

    Quote Originally Posted by destrolock View Post
    Great write up. One thing I cant figure out though is how to get the damn armrest top off. Care to elaborate?

    Thanks!
    First remove the fabric. You should then see the seam in the two plastic parts. Basically they melted the top part, and stuck it to the bottom part.

    What I found that worked great is a pair of channel locks. By first flexing the bottom plastic piece a little by hand,the bond is broken. Then grabbing the top with a pair of channel locks, break off a piece at a time, repeating the steps as necessary. It took a little while to remove all of it, probably a good 30-45 minutes, but take your time and it should all come off.

    Also, be careful as you are breaking the top off, as there are several round posts that stick out of the bottom piece. If you are not careful, it make break all the way through the bottom piece. For these, I simply broke off the top plastic around it, and went back and smashed the pin, and wiggled it back and forth until i got a clean break.

    Another way i was planning on removing the top would be to take a hacksaw in between the two layers, but i found this was not needed.
    Hopefully this helped!
    |00 A4 TQM|K04|Revolver Cams|Greddy FMIC|Custom GIAC|Full Custom Exhaust|OEM RS4|S4 Rear|S4 Interior|HID|

    More to come!

    F.S. Rieger Side Skirts in Silver- will trade for S4

  16. #16
    Senior Member Two Rings
    Join Date
    Feb 02 2008
    AZ Member #
    24825
    My Garage
    17 pure white vr6 Touareg sport tech
    Location
    SoCal

    Re: D.I.Y. Armrest repair

    Quote Originally Posted by NK2007 View Post
    First remove the fabric. You should then see the seam in the two plastic parts. Basically they melted the top part, and stuck it to the bottom part.

    What I found that worked great is a pair of channel locks. By first flexing the bottom plastic piece a little by hand,the bond is broken. Then grabbing the top with a pair of channel locks, break off a piece at a time, repeating the steps as necessary. It took a little while to remove all of it, probably a good 30-45 minutes, but take your time and it should all come off.

    Also, be careful as you are breaking the top off, as there are several round posts that stick out of the bottom piece. If you are not careful, it make break all the way through the bottom piece. For these, I simply broke off the top plastic around it, and went back and smashed the pin, and wiggled it back and forth until i got a clean break.

    Another way i was planning on removing the top would be to take a hacksaw in between the two layers, but i found this was not needed.
    Hopefully this helped!

    Awesome thank you sir.

  17. #17
    Veteran Member Four Rings flynnr's Avatar
    Join Date
    Sep 22 2008
    AZ Member #
    33341
    My Garage
    2015 Q7 TDI Prestige/S-Line
    Location
    Minnesnowta (Roch)

    Re: D.I.Y. Armrest repair

    any recommendation on how to remove the armrest lid from the whole armrest assembly? it looks like there is just the plastic 'C' molding toward the back acting as a hinge, but how do i seperate teh two i feel like im going to break it

  18. #18
    Senior Member Two Rings NK2007's Avatar
    Join Date
    Mar 25 2008
    AZ Member #
    26847
    My Garage
    2000 Audi A4
    Location
    Ft. Collins & Colorado Springs

    Re: D.I.Y. Armrest repair

    There were screws on one side of the hinge. I removed the screws and was able to slide the lid to one side enough to pop it out.
    |00 A4 TQM|K04|Revolver Cams|Greddy FMIC|Custom GIAC|Full Custom Exhaust|OEM RS4|S4 Rear|S4 Interior|HID|

    More to come!

    F.S. Rieger Side Skirts in Silver- will trade for S4

  19. #19
    Veteran Member Four Rings flynnr's Avatar
    Join Date
    Sep 22 2008
    AZ Member #
    33341
    My Garage
    2015 Q7 TDI Prestige/S-Line
    Location
    Minnesnowta (Roch)

    Re: D.I.Y. Armrest repair

    got it thanks

  20. #20
    Veteran Member Four Rings alen's Avatar
    Join Date
    May 11 2004
    AZ Member #
    2093
    My Garage
    1.8tqms
    Location
    ghettlanta

    Re: D.I.Y. Armrest repair

    Dude much props to you for writing this up. Will definitely use it as a reference.

    Thanks!

  21. #21
    Veteran Member Four Rings flynnr's Avatar
    Join Date
    Sep 22 2008
    AZ Member #
    33341
    My Garage
    2015 Q7 TDI Prestige/S-Line
    Location
    Minnesnowta (Roch)

    Re: D.I.Y. Armrest repair

    sorry for all the questions about this but i am just getting ready to staple.

    what do you mean by this

    "1920**7***3***5**910
    18*************** 11
    *******************
    1*****************2
    *******************
    17*************** 12
    1615**8***4***6**1413"

    i dont really understand.

  22. #22
    Junior Member Two Rings
    Join Date
    Sep 17 2008
    AZ Member #
    33133
    Location
    Montgomery, AL

    Re: D.I.Y. Armrest repair

    I think he just means to follow the numbers in order - look where the 1 is, then the 2, and so on. Imagine that the entire thing is the rectangle of the armrest. Does that make sense?

  23. #23
    Veteran Member Four Rings flynnr's Avatar
    Join Date
    Sep 22 2008
    AZ Member #
    33341
    My Garage
    2015 Q7 TDI Prestige/S-Line
    Location
    Minnesnowta (Roch)

    Re: D.I.Y. Armrest repair

    OOOOOO... so the 12 and 14 arent really a 1, and a 2, its a 12 and a 14... see i looked at it like do all the 1's first, then go to the 2s and so on ha. yeah that makes sense now i think. ok thanks

    does it seem like i get it now? ha

  24. #24
    Senior Member Two Rings NK2007's Avatar
    Join Date
    Mar 25 2008
    AZ Member #
    26847
    My Garage
    2000 Audi A4
    Location
    Ft. Collins & Colorado Springs

    Re: D.I.Y. Armrest repair

    Yup! Thats it.

    I still haven't gotten around to remaking this(new clutch + fw went in last weekend), but it has been working fine for me.

    What do you think? should this be moved to the diy section?
    |00 A4 TQM|K04|Revolver Cams|Greddy FMIC|Custom GIAC|Full Custom Exhaust|OEM RS4|S4 Rear|S4 Interior|HID|

    More to come!

    F.S. Rieger Side Skirts in Silver- will trade for S4

  25. #25
    Veteran Member Four Rings flynnr's Avatar
    Join Date
    Sep 22 2008
    AZ Member #
    33341
    My Garage
    2015 Q7 TDI Prestige/S-Line
    Location
    Minnesnowta (Roch)

    Re: D.I.Y. Armrest repair

    yeah i think so. i just followed your diy / looked at your pics and re did mine. i had a rip the whole length of mine and it really pissed me off. so tacky

    mine looks great now though. actually pretty much like oem. very impressed with the outcome actually. thanks a lot!

    NEXT i have to figure out my seat. and then my interior is perfect! (except clearly needs to be cleaned, ah def. one thing that sucks about winter)

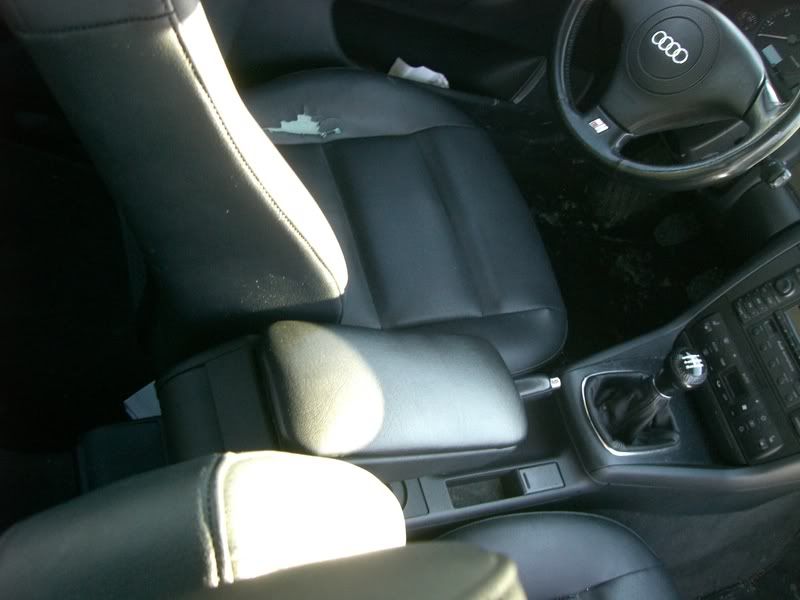
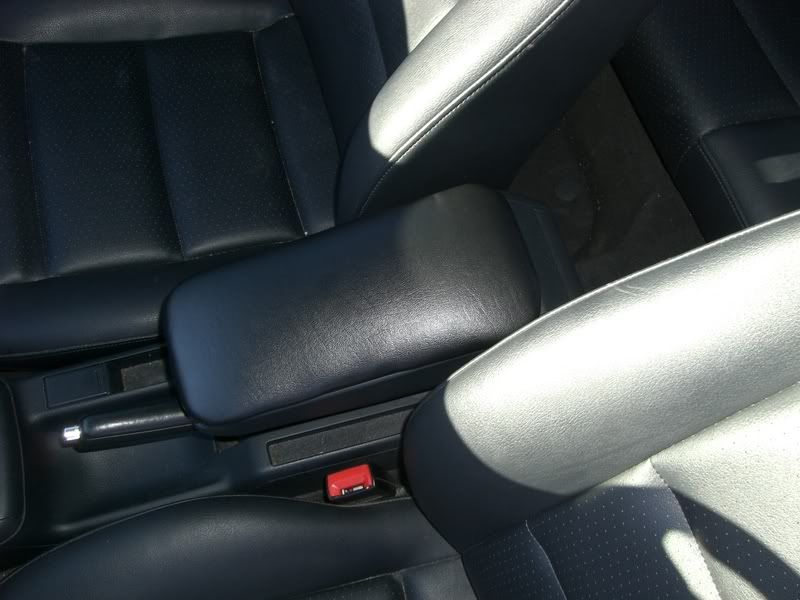
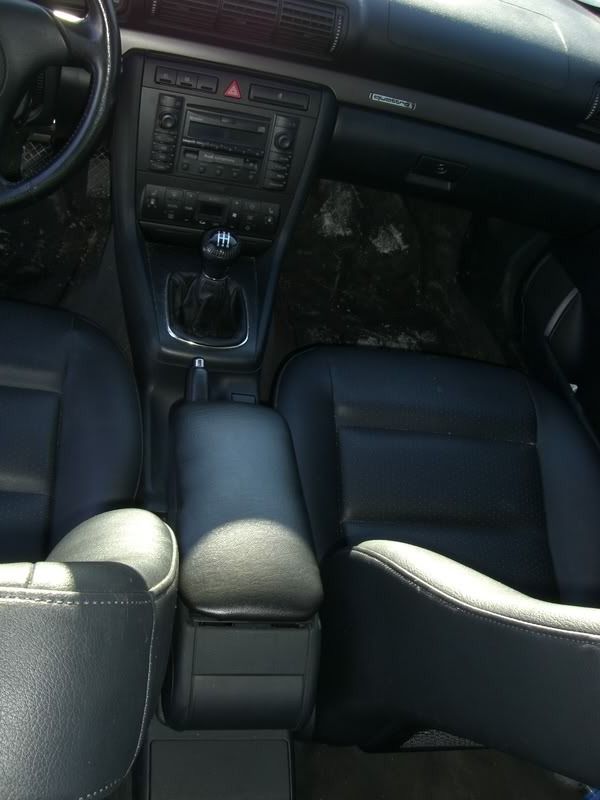
    EDIT: here are 4 pics i took of the arm rest after i put it back in the car!

    1) here is a passenger view


    2) rear / back passenger view


    3) looking down on it (here you can see that i stretched harder in some spots on accident... its kinda hard to tell how hard to pull and hold the fabric and put the staple all at the same time ha... but really it doesnt look too bad i dont think)


    4) rear / back drivers side view


    hope these help convince more people they dont need to spend $75 on an armrest cover! this took me an hour total to do!
    Last edited by flynnr; 01-08-2009 at 11:16 AM.

  26. #26
    Registered Member One Ring
    Join Date
    Nov 16 2011
    AZ Member #
    84017
    Location
    Toronto/Ontario/Canada

    Great Job,

    Can you tell me how to remove just the armrest lid from the storage portion?

    S.

  27. #27
    Senior Member Two Rings
    Join Date
    Feb 25 2013
    AZ Member #
    110223
    My Garage
    MKIII Jetta,Integra GSR built B18C1T, Mazda RX8
    Location
    United States / Georgia/ SE

    19'20'**7***3***5**9'10
    18*************** 11
    *******************
    1*****************2
    *******************
    17*************** 12
    16'15**8***4***6**14'13

    Maybe edit your original post with this. I was super confused at first, but then again I am about as smart as a sack of hammers sometimes.
    Florett Silver Metallic, Black Optic, Sport Diff, B8.5 S4

  28. #28
    Veteran Member Three Rings B5 Quattro's Avatar
    Join Date
    Feb 10 2008
    AZ Member #
    25116
    My Garage
    2000Audi A4, '88 VW Jetta 2.0l16v, 2011 Golf....
    Location
    Hamilton.Ont, Canada

    WOW.
    Thanks for showing us.
    In need of a great Detailer, pm me !
    Thats what I do !!

    http://www.detailsrkey.com/index.html

    "A man who does not change his mind is a man who has no mind"-M. Carby

  29. #29
    Veteran Member Four Rings nizmosx's Avatar
    Join Date
    Feb 13 2004
    AZ Member #
    389
    My Garage
    2007 b7 a4 6MT Ti avant / 1990 300zx TT / 2014 Honda Grom / 2012 Tiguan SE
    Location
    Lakewood, CA

    i have a black s4 leather armrest with no cracks or tears for sale at the moment. if anyone is interested, i can ship it out.

  30. #30
    Veteran Member Four Rings Bordom's Avatar
    Join Date
    Dec 10 2013
    AZ Member #
    134985
    Location
    Borden, Ontario, Canada

    Can this be done with the pre-facelift 96 center armrest?
    Bordom's Allroad; Boat in the Street
    2003 Allroad 6-spd, 4.2 BBD S6 Swap

    IG: 24_et

    Sold:
    2010 Deep Sea Blue S4 6-spd

    RIP:
    2001.5 Brilliant Black S4 6-spd

Bookmarks

Posting Permissions

  • You may not post new threads
  • You may not post replies
  • You may not post attachments
  • You may not edit your posts
  •  


    © 2001-2024 Audizine, Audizine.com, and Driverzines.com
    Audizine is an independently owned and operated automotive enthusiast community and news website.
    Audi and the Audi logo(s) are copyright/trademark Audi AG. Audizine is not endorsed by or affiliated with Audi AG.