I have searched many forums looking for a DIY for the B7 body style but found nothing. To try and help others I decided to make one myself, so here you go.
Tools needed:
1. Vehicle Jack
2. Jack Stands
3. 17mm Socket
4. 14mm Socket
5. T55 Torx Socket
6. 21mm Socket
7. C-Clamp or Large Pliers
8. T27 Torx Socket
9. Rubber Mallet
10. Lithium Grease
11. Brake Clean
12. Air Tools (For Ease of Install)
Step One: Jack up the car and support it with jack stand(s).
Step Two: Remove the wheel(s) using a 17mm Socket.
[IMG]
 [/IMG]
Step Three: Remove the 14mm bolt holding the Pad sensor bracket on the back of the caliper. This step is not necessary but I found it helps with maneuvering tools better.
[IMG]
 [/IMG]
Step Four: Remove (4) T55 bolts on the back of the caliper.
[IMG]
 [/IMG]
Step Five: Remove the front half of the caliper
[IMG]
 [/IMG]
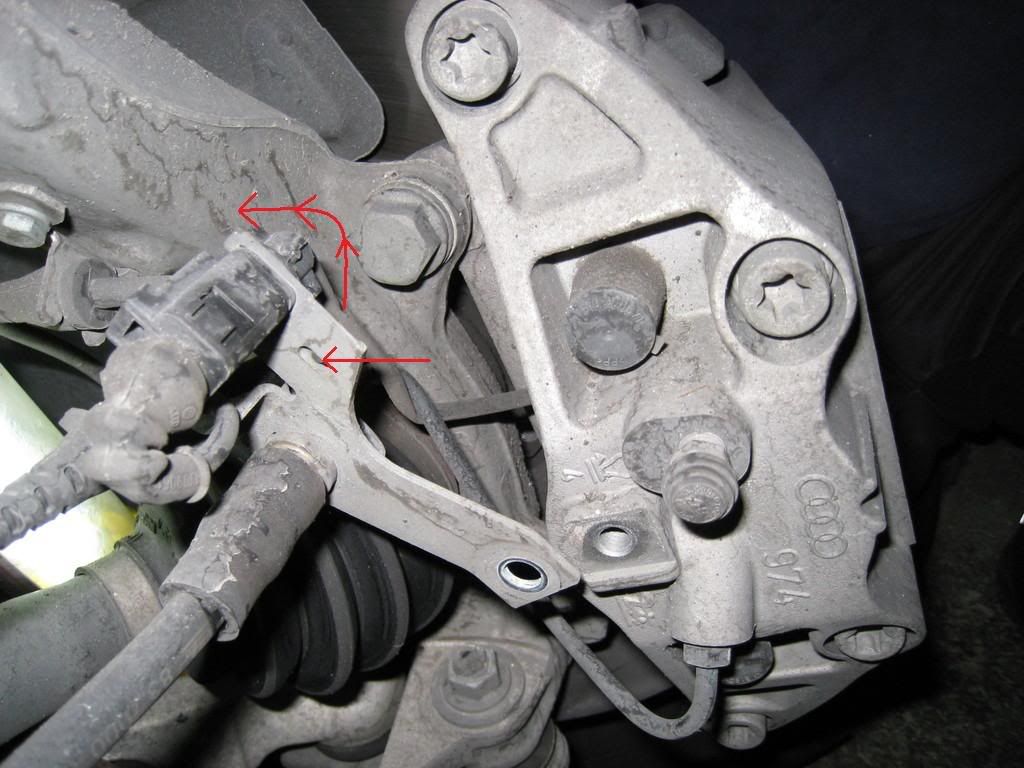
Step Six: Tilt the brake pad spring forward using the two ends of the spring. Wiggle it back and forth while tilting it forward and it should pop out. Once it is off the pad should push out easily. Take this time and remove any excess brake dust from the front half of the caliper by using some brake clean and a rag.
[IMG]
 [/IMG]
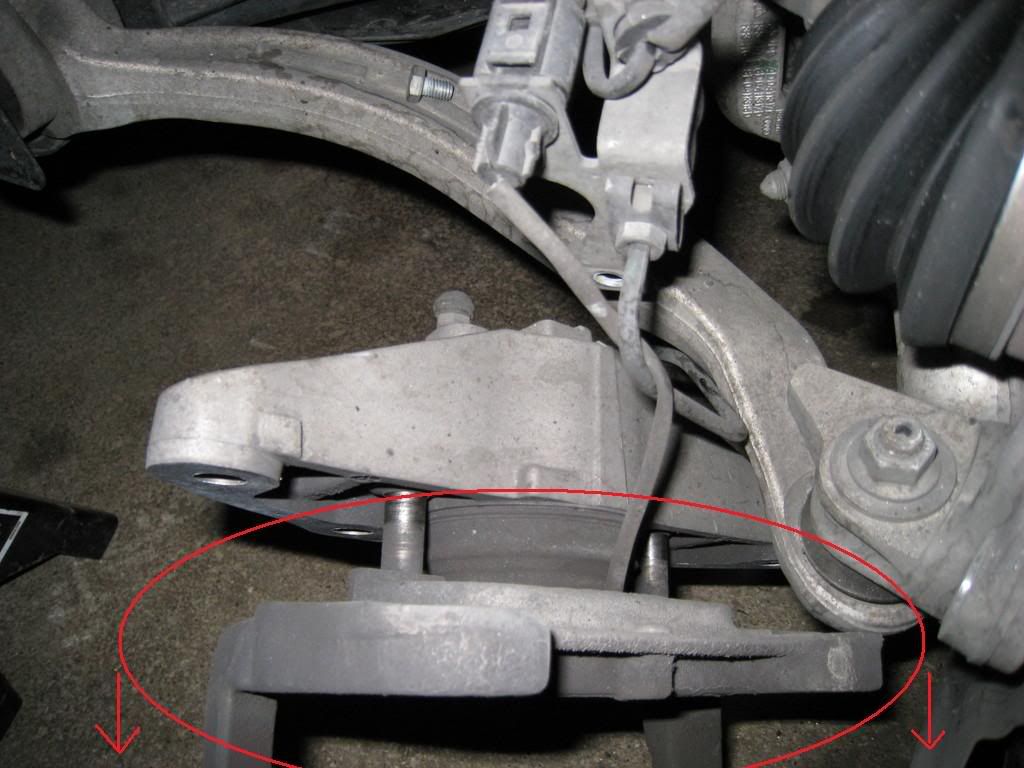
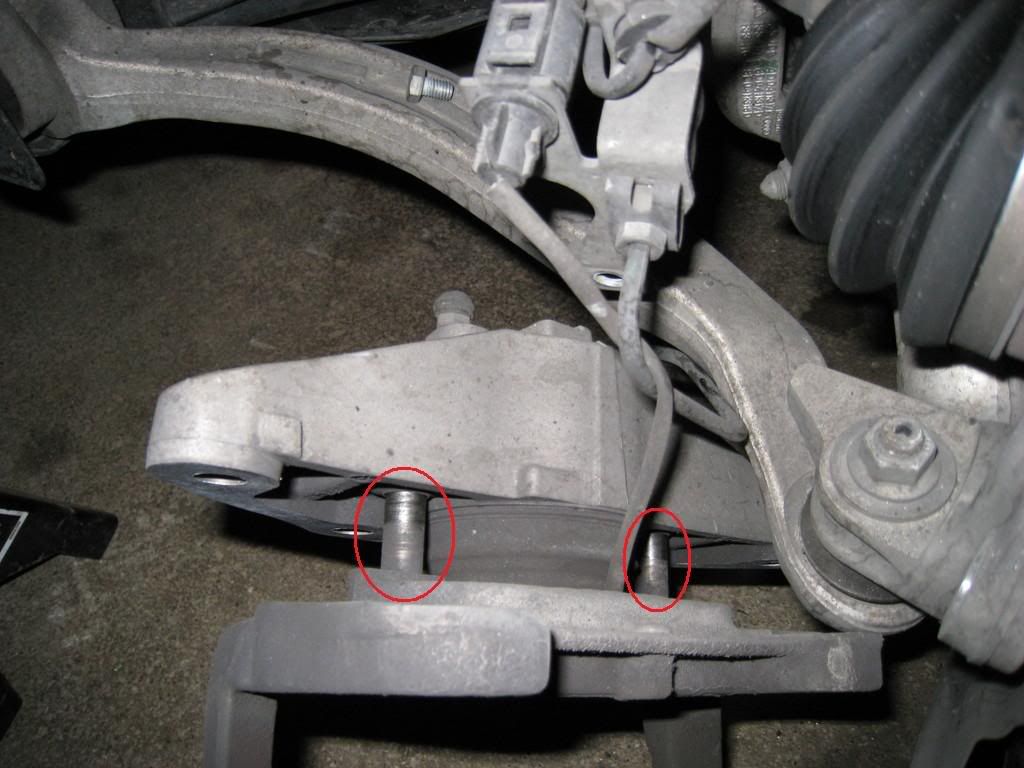
Step Seven: Remove (2) 21mm bolts from the back of the caliper. This step will free the remaining caliper assembly from the vehicle so have a jack stand waiting to rest it on.
[IMG]
 [/IMG]
[IMG]
 [/IMG]
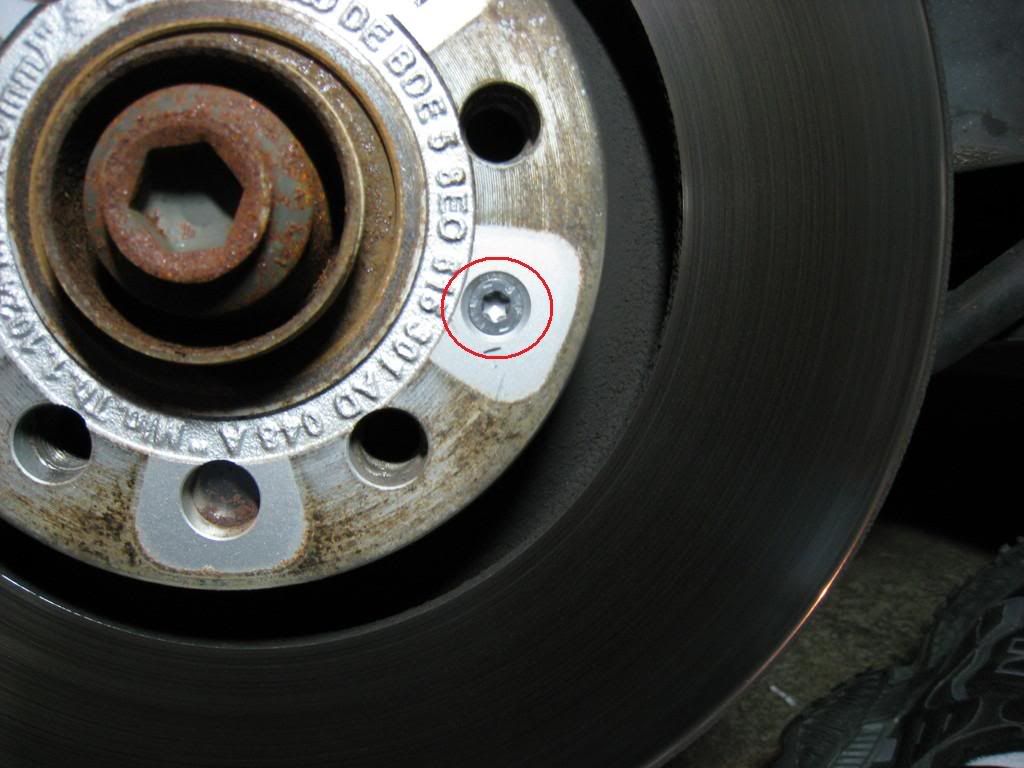
Step Eight: Remove the T27 Torx screw that holds the rotor in place.
[IMG]
 [/IMG]
Step Nine: Even with the screw removed the rotor most likely will not come off. Take a rubber mallet and hit the lower half until it breaks free. Do not hit it to hard, just slowly increase pressure until it breaks free.
[IMG]
 [/IMG]
Step Ten: If you have air tools I suggest you use a whiz wheel on the rotor mounting surface to clear away any rust build up.
[IMG]
 [/IMG]
Step Eleven: With either a C-Clamp or large pliers compress the caliper piston. I found leaving the old pad on until after this step makes it easier to compress the piston. Before you start to compress the piston open the hood and remove the cap to the brake fluid reservoir. Pack some old rags around the reservoir to catch any excess brake fluid.
[IMG]
 [/IMG]
Step Twelve: You can now remove the center section of the caliper. Pull forward and the brake pad should come with it (The pad sensor wire will still be connected, go to next step.). The piston will remain where it is until the pedal is depressed.
[IMG]
 [/IMG]
Step Thirteen: To remove the sensor wire, insert a thin screw driver into small hole on the bracket. Unplug the connector, then rotate it and pull up. Pay attention to where the wire tracks for when you have to run the new one.
[IMG]
 [/IMG]
 Step Fourteen: Take the center section and clean it off like you did with the front section. Once it is clean apply a little lithium grease to the two pistons.
[IMG]
 [/IMG]
Step Fifteen: Take the new pad and plug it in while keeping in mind the way it was routed before. After your plugged in insert the center section and then snap the pad into place. (Sorry no pic)
Step Sixteen: Take the new rotors and a can of brake clean and proceed to clean the rotors. I used a very
mild piece of sandpaper because there was overspray from when the factory painted the center section of the rotor.
[IMG]
 [/IMG]
Step Seventeen:After you mount the new rotors and tighten the T27 rotor screw, bolt the rear section of the caliper back on using the (2) 21mm bolts.
[IMG]
 [/IMG]
Step Eighteen: Take the new pad and snap it into the front section of the caliper, making sure that the pad is positioned properly. Now remount the front half of the caliper to the rest and hand tighten the (4) T55 bolts.
Step Nineteen: Take the caliper spring and reinsert it onto the caliper. Make sure the tab on the spring reinserts into the brake pad clip. Make sure you tighten everything back together including the sensor bracket and then remount the wheel
Step Twenty: . All that is left is to close the brake reservoir and hood, pump the brakes to get pressure, and take her for a test drive.
This DIY is for the front brakes, but from what I understand the rears are the same except for the needing a caliper tool. When it comes time to do the rears I will add pics.
I hope everyone approves because like I said I'm no expert. Please let me know if I missed anything.


 Reply With Quote


 TQM
TQM


Bookmarks