If I create a write-up w/pics on a doing a ps flush on a B6 3.0L... would anyone use it? Or has everyone just used the A8 flush as a start...
Update:
Okay I'll update this with new info as I need to take one or two better pics...
This was done on a 04.5 B6 3.0L with 32k miles on it. It began making noise when I started it up after thanksgiving... When I checked the fluid, it was low, but after looking at how dirty it was...I couldn't sit idle, especially after hearing about folks replacing pumps/racks/etc... I'd rather just flush it with clean fluid

Materials/tools needed:
Pliers
Flathead screwdriver
10mm socket & ratchet
T40 (I'll have to check which one exactly) torx bit (for socket driver)
4' of clear 3/8" hose
Male/male 3/8" hose barb adapter
Golf tee
Electrical tape
Milk jug (or some receptacle for the old fluid)
Small plastic bowl/lid (I used the plastic lid from a can of bondo)
Brake cleaner
Paper towels/rags for cleaning any mess
2 Liters of OEM power steering fluid (part #G-004-000-M2) $18/liter
(I didn't realize this was so blurry...I'll take another one)

Procedure:
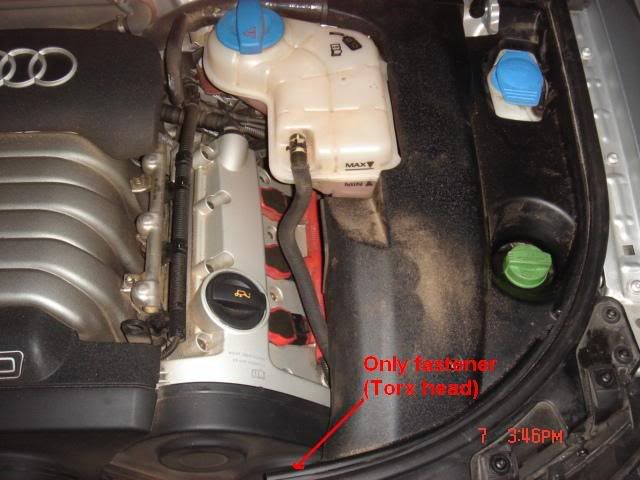
First, remove the single screw holding the plastic shroud on the driver's side of the engine.
Next, remove the two top screws that hold the driver's side headlight in place, and then loosen (don't need to remove) the two lower screws holding the headlight in place (4 total for headlight). There are two plugs directly behind the headlights held by a plastic clip, they'll pop right out. You should be able to pull the headlight out a few inches to make some room. You don't need to unplug anything.
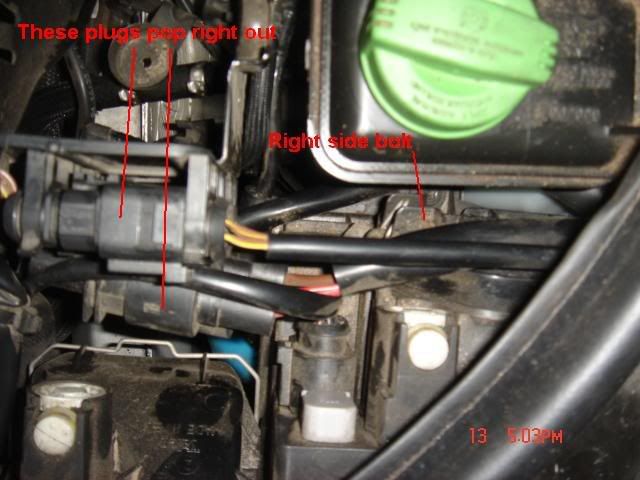

Once the headlight is out, you’ll have access to a blue reservoir underneath. Pull out the plug assembly going directly into that container. Be careful since the hoses are hard plastic, but the plug in the reservoir should pop straight up, and out.
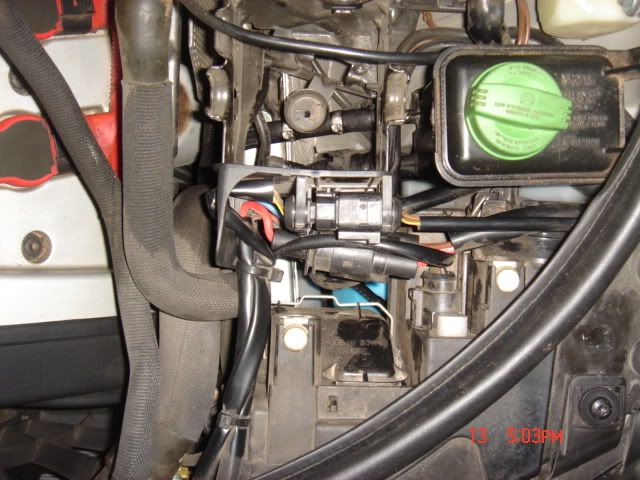
Now, take a 10mm socket and remove the two bolts holding the top of the p/s reservoir in place. (For ref: the one with the large rubber spacer is closest to the firewall) Once those are removed, the reservoir should be able to wiggle a bit... If you look at the bottom of the reservoir toward the firewall side, you'll see the last mounting point for it. It's basically just pressed into a rubber mount. Wiggle the reservoir and it'll pop out.


Now that it's free, you'll need to carefully wiggle the reservoir toward the front of the car, so the p/s hoses are no longer underneath the steel structure...continue moving it toward the front of the car, and move the hoses (going to the blue container) underneath the p/s lines... be careful when you do this part, as the hoses are hard plastic. You should now be staring at something like this:
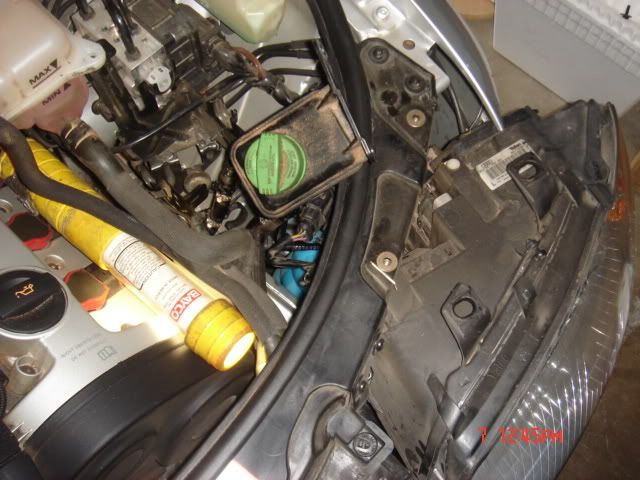
Now, locate the smaller hose (closest to the firewall) and use pliers to move the hose clamp down. You should have an idea now of how much open space is below the reservoir...use a dish/pan/tray/something small enough to fit under there, yet hold at least a pint of fluid. (I used the plastic top from a bondo can) Position this directly under where that hose feeds the reservoir. This will catch all the extra fluid in your reservoir. Now pull out the supply hose and drain everything out...should look disgusting...mine looked like this: (with only 32k miles on the clock)

Now once everything's drained out, take a look inside the reservoir, you'll see the filter in its filthy glory:
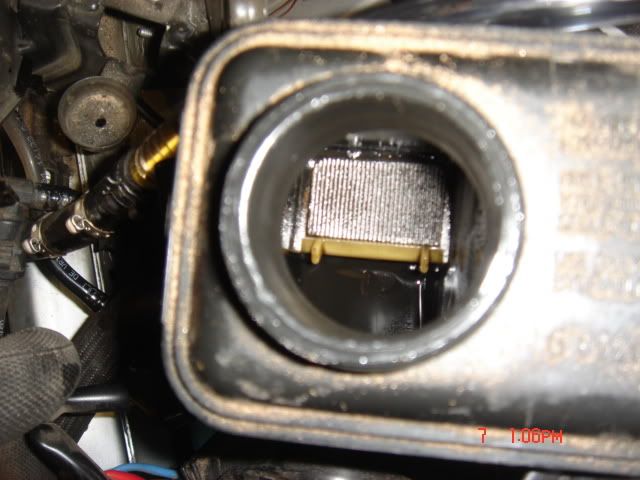
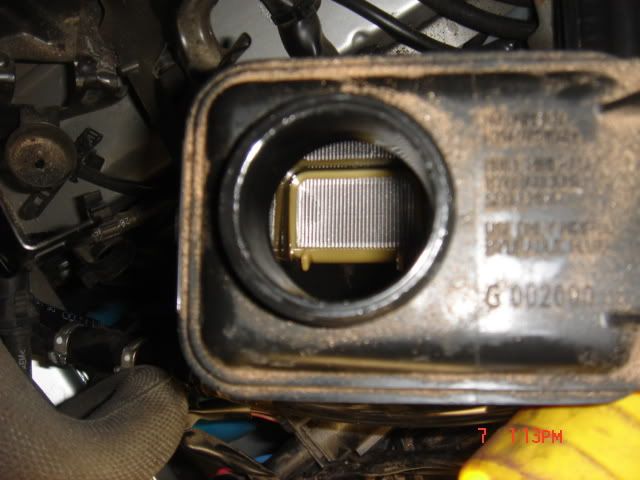
Take your can of brake cleaner and clean the filter, basically just spray it down, and let the excess drain into the collection pan you still have in place. When it's clean, it'll look like this:
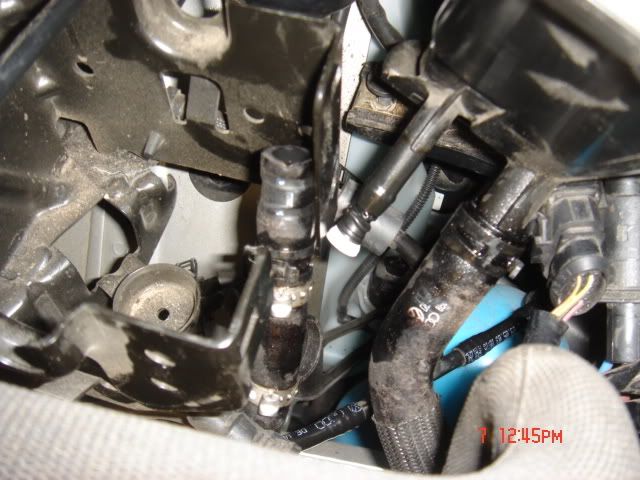
Now grab your golf tee, and your electrical tape. Wrap the tapered (top) portion of the golf tee with about 3-4 layers (winds) of electrical tape. This will help hold it in place, and create a seal to keep fluid from leaking out while you're flushing. Shove that tee into the supply hole of the reservoir so it's nice and snug:
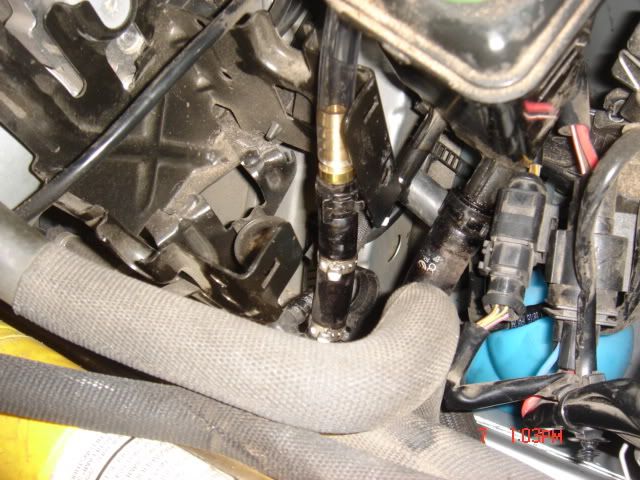
Next, grab your clear tubing, and your 3/8" hose barb. Insert one end into the clear tubing so it's past at least 2-3 of the barbs (if not all the way) and then insert the other end of the barb into the supply line of your p/s system. Use your pliers to move the hose clamp back up to its original location on the hose to keep it in place:
Run the other end of the hose into a bucket/jug/something to gather the old fluid:
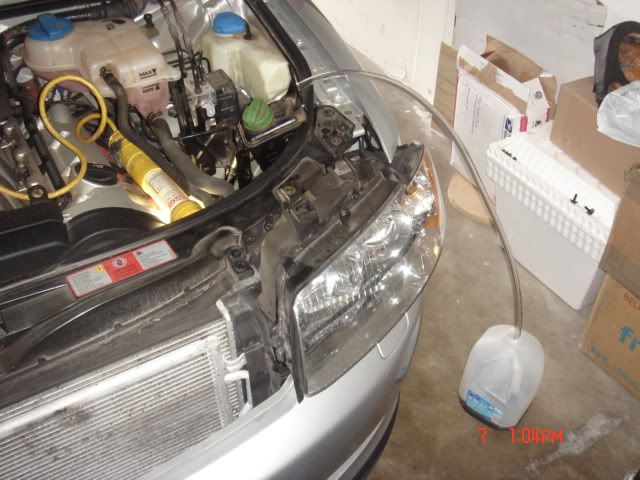
You're just about ready to start flushing, fill the reservoir up all the way (not quite to the edge or it could splash out from startup vibration)
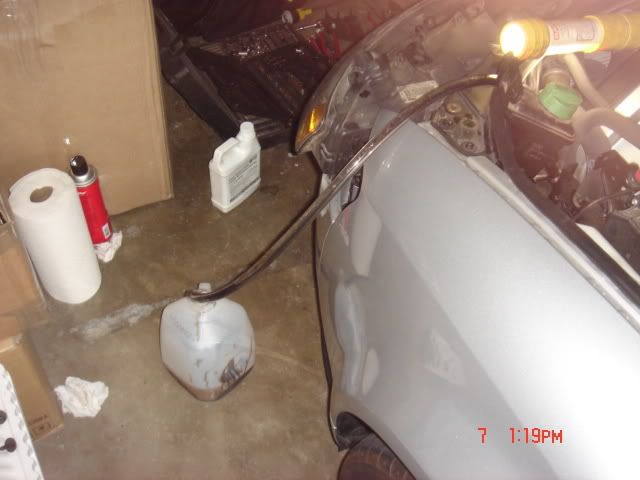
Now you're going to repeat this procedure a few times... Start the engine, from the time it turns over, count to two quickly and kill the engine on two. After a count of 1, it will consume most of the fluid in the reservoir. In your clear hose, you'll see nasty fluid like this:
Top off the reservoir again and repeat. You'll most likely get more black fluid coming out. On the third cycle, I started seeing green fluid. I also didn't kill it quite soon enough and got some air bubbles along with it:
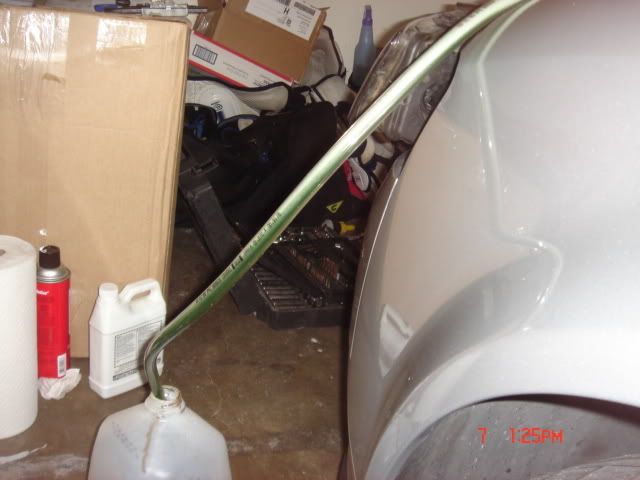
I did it quickly, one last time to get all the air out and make sure I was only pushing clean fluid. A total of 4 cycles and all is well.
Clean-up/Re-assembly
Now do your best to get all the fluid you can out of the clear hose. Position your plastic tray/cup/etc...Underneath where the two hoses are adjoined. Use your pliers to slide down the hose clamp, disconnect the hoses and collect the extra in your tray. Pull the golf tee out of the reservoir and collect all of that fluid as well. Re-attach the supply hose to the reservoir, move the clamp back up, and re-install everything in reverse order of above. Wait until you have the reservoir mounted before you fill it with fluid again, this time, only fill it to the 'full' mark. Run the car for a minute or so just to make sure you get all the air out of the system and everything’s working okay. Turn the steering wheel back and forth a few times to make sure it works through the rack. Check the fluid level again, add more if necessary, and then continue re-assembly. When re-installing the headlight, pay attention to the body-lines where the headlight lines up with the bumper, as you have some adjustment room with the lower two screws.
FYI: Here's an excerpt from the Bentley manual on flushing various parts of the system:
Power steering system, bleeding Different bleeding procedures are required after repairs to the steering system, depending on which components have been removed or replaced.
After replacement of the entire steering system or steering gear:
- Check hydraulic fluid level and top off if necessary.
-Raise vehicle until front wheels are free.
- Start engine briefly (max. 2 seconds)
-Pump must not draw in any air; steering wheel must not be turned.
- Wait approx. 30 seconds each time before starting engine again.
-Check hydraulic fluid level and top off if necessary.
-Keep repeating this procedure until fluid level remains constant.
-With engine switched off, turn steering wheel 10 times from lock to lock.
-Check hydraulic fluid level and top off if necessary.
-Start engine. Turn steering wheel 10 times from lock to lock.
-Check hydraulic fluid level and top off if necessary.
-Any air remaining in the steering system will dissipate when the vehicle has been driven 10 to 20 km.
When other steering components (except steering gear) have been removed or replaced (e.g. pump, hoses, etc.):
- Check hydraulic fluid level and top off if necessary.
- Start engine briefly (max. 2 seconds)
- Pump must not draw in any air; steering wheel must not be turned.
- Wait approx. 30 seconds each time before starting engine again.
- Check hydraulic fluid level and top off if necessary.
- Keep repeating this procedure until fluid level remains constant.
- Start engine and allow to run for 2 - 3 minutes; do not turn steering.
- Any air remaining in the steering system will dissipate when the vehicle has been driven 10 to 20 km.


 Reply With Quote


Bookmarks