Audizine - An Automotive Enthusiast Community

Page 1 of 27 12311 ... LastLast
Results 1 to 40 of 1065
  1. #1
    Veteran Member Four Rings absolutegtr's Avatar
    Join Date
    Feb 19 2007
    AZ Member #
    15762
    My Garage
    2001 BMW 540i M-sport
    Location
    Charleston, SC

    DIY - B6 1.8t - Vacuum line and Check Valve removal/simplification

    Guest-only advertisement. Register or Log In now!
    Well I just finished getting rid of all the “unneeded” check valves, vacuum lines and PCV system. There is now a lot more room to work with….valve cover gasket is about a 10 minute job, and the coolant flange is 15 minutes top!

    Honestly, you could go ahead and follow this DIY and just rid yourself of the lines/valves, but I would HIGHLY recommend you read the following two links (in order) so you can gain a better understanding of the system, how it works, and where to look if something goes wrong.

    (Most of thread is bits here and there, but mainly pages 3-5)
    http://www.audizine.com/forum/showth...hlight=in-line

    http://www.audizine.com/forum/showth...ight=n112+n249

    After reading all that, lets proceed with the pics! (Then again you read those two links fully, so you should be able to do this blindfolded……right? )

    Unfortunately all pics were taken with my Blackjack 2

    ~~~~~~~~~~~~~~~~~~~~~~~~~~~~~~~~~~~~~~~~~~~~~~~~~~ ~~~~~~~

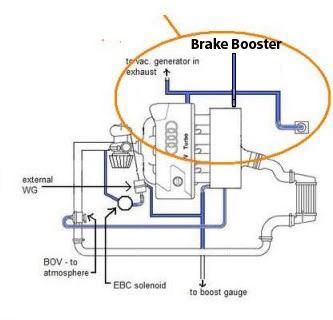
    First and foremost, make yourself very familiar with this picture and its terms and the general idea of how the vacuum lines will look like after it is all said and done: (Thanks to Daniel (b6lovin) for this beautiful diagram and his help )


    Time to start tearing your car apart!

    Remove air snorkel and airbox:
    Before
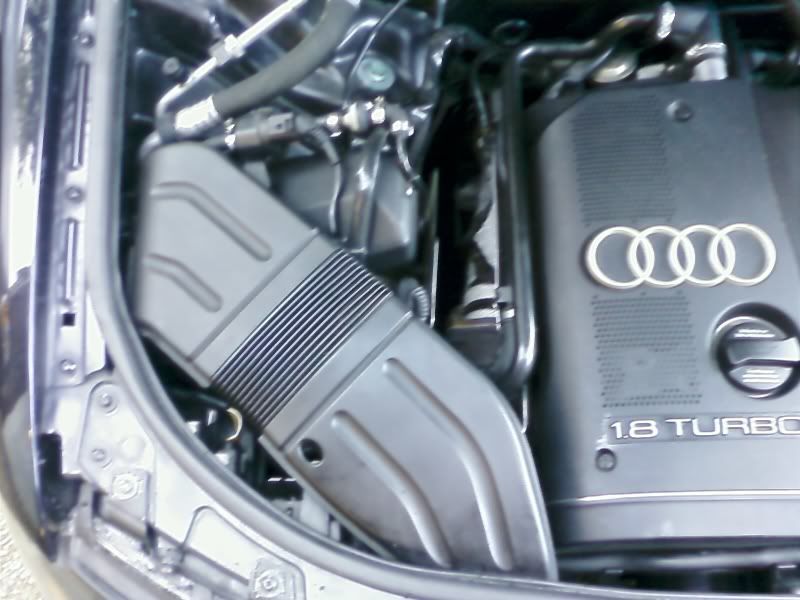

    After
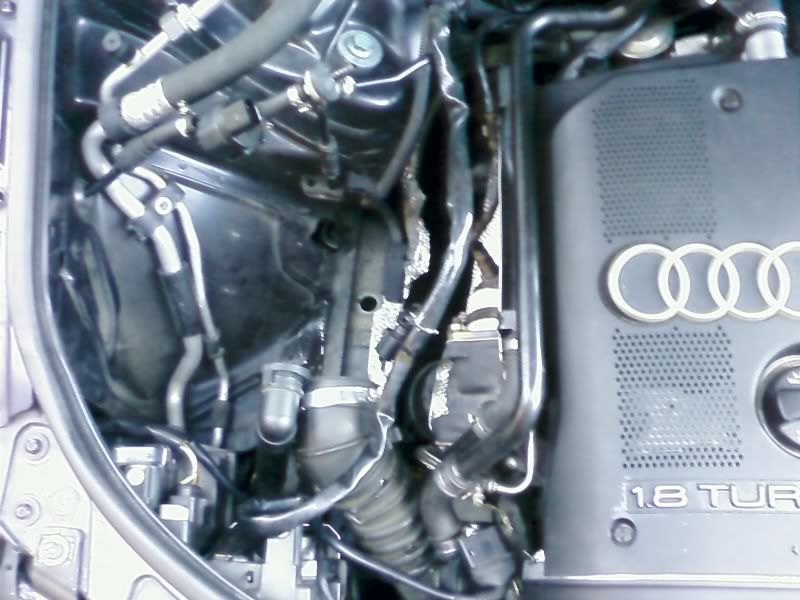


    PCV system removal

    Remove plastic cover and ignition coil harness (don’t forget to unbolt that 10mm bolt in-between coilpack 1&2)
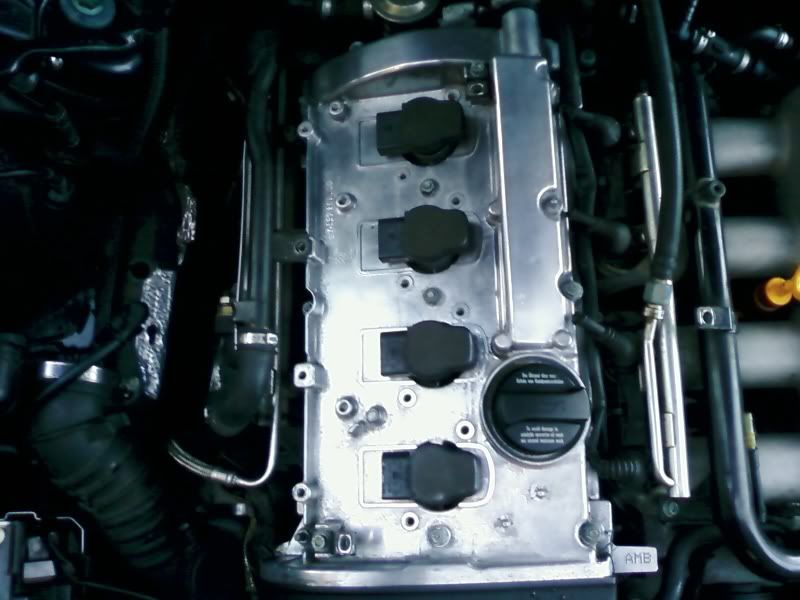

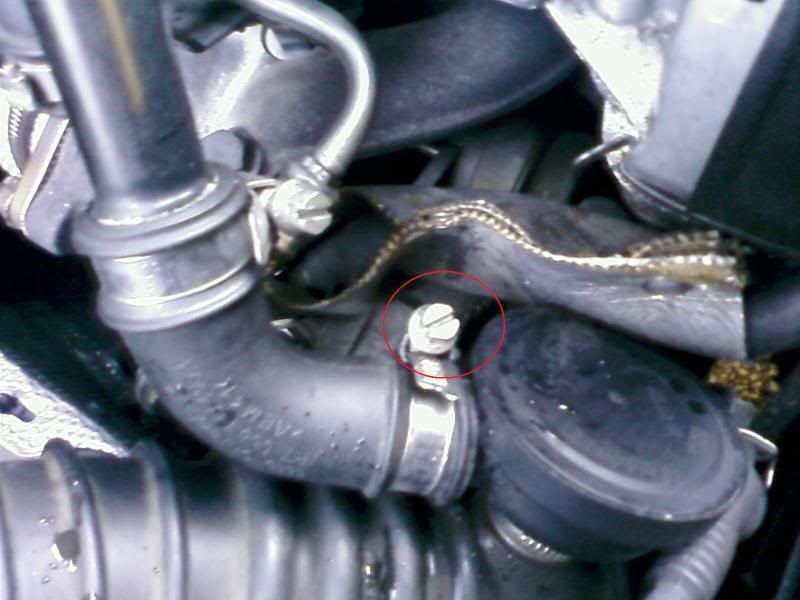
    Now we will remove the PCV breather tube:
    Loosen the hose clamp that is circled

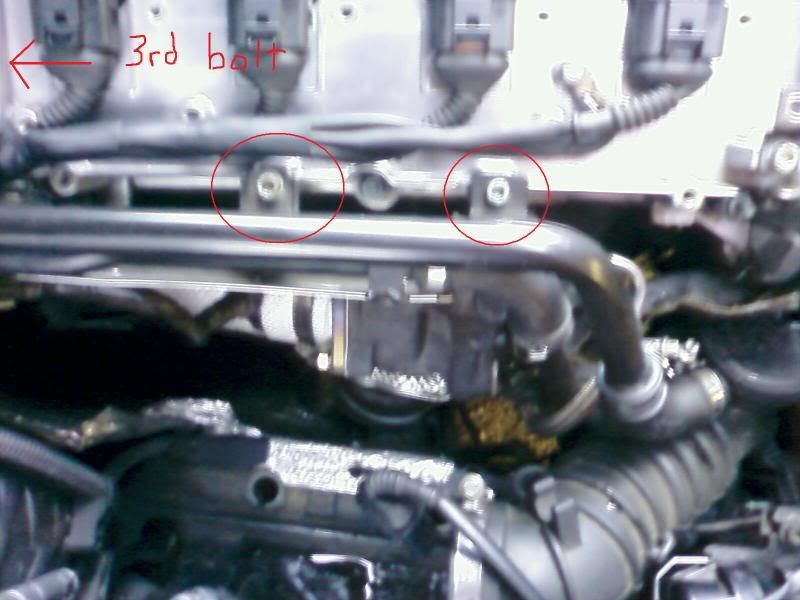
    Remove the 3 hex bolts that attach the breather tube to the valve cover (the third hex bolt can be seen in the next pic)

    Loosen the three crankcase breather hose clamps that are circled (the third hose clamp can be seen in the next pic)
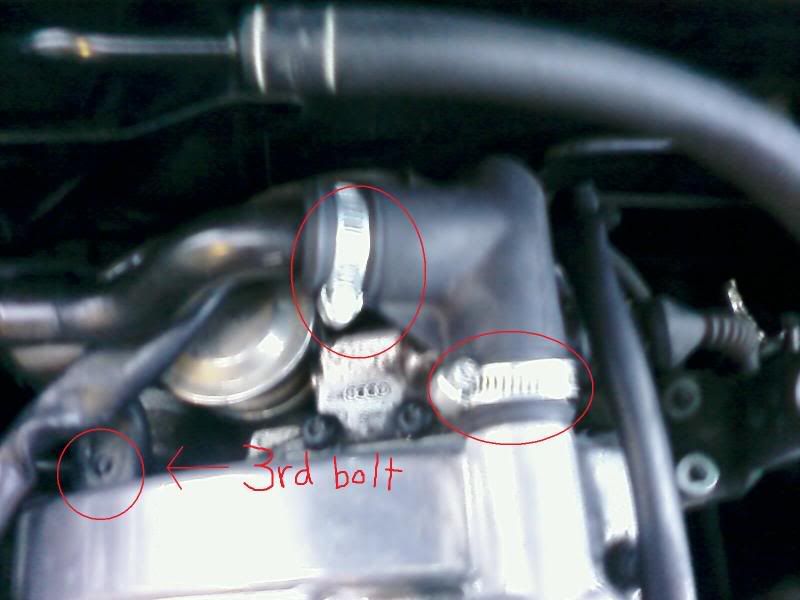
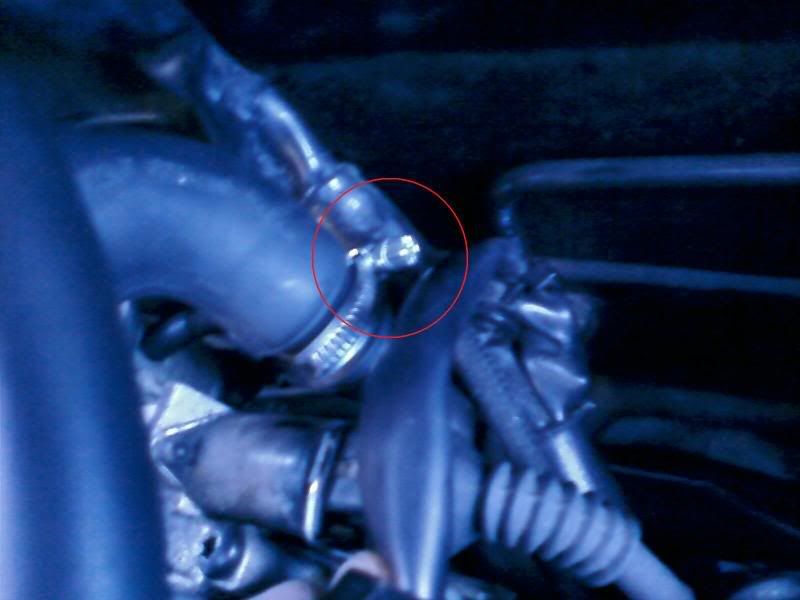


    EGR/SAI system removal

    Next we will be removing the EGR valve and its breather tube (for this you will have to have the Integrated Engineering block off plate. I would recommend you get it through Apex Tuning - great customer service )
    Remove the one-time-use hose clamp that is circled and also unbolt the three 5mm hex bolts that are in-between the head and firewall)
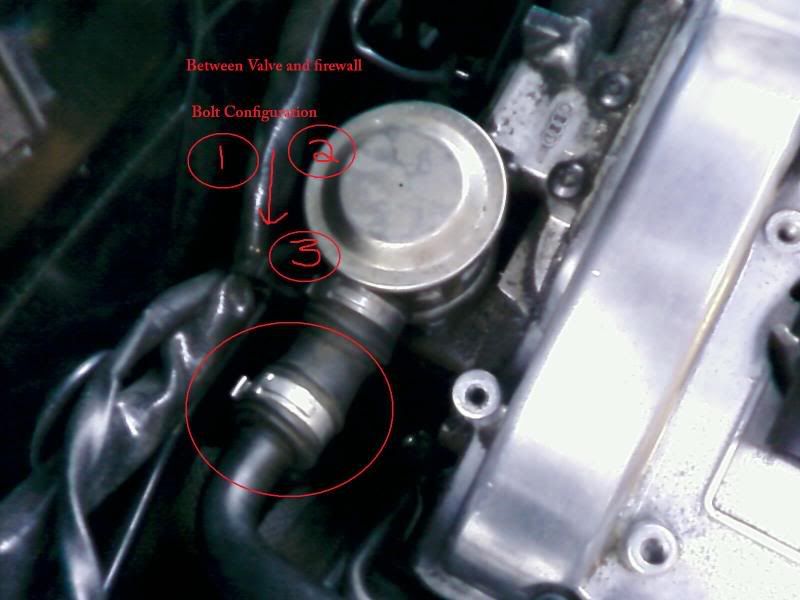

    Remove the two 10mm bolts that are circled
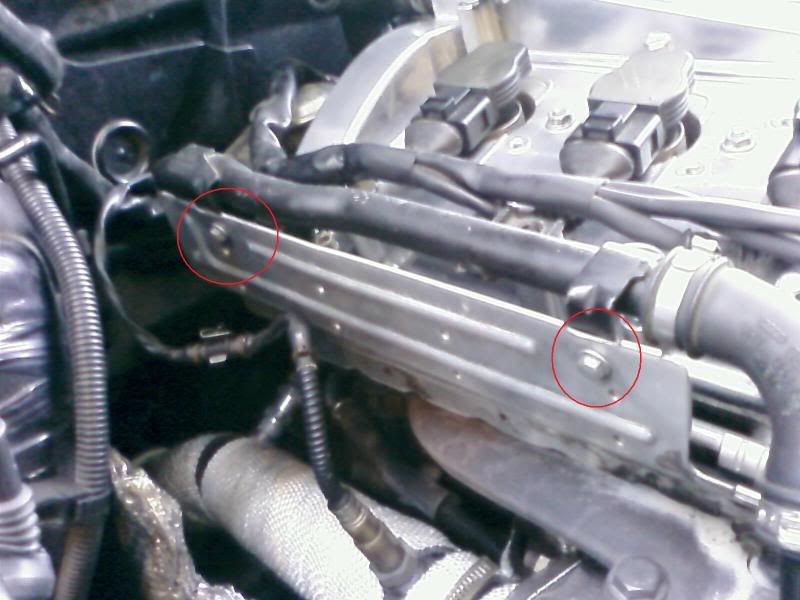

    Next remove the hose clamp at the end of that tube (near the TIP) and remove the whole tube
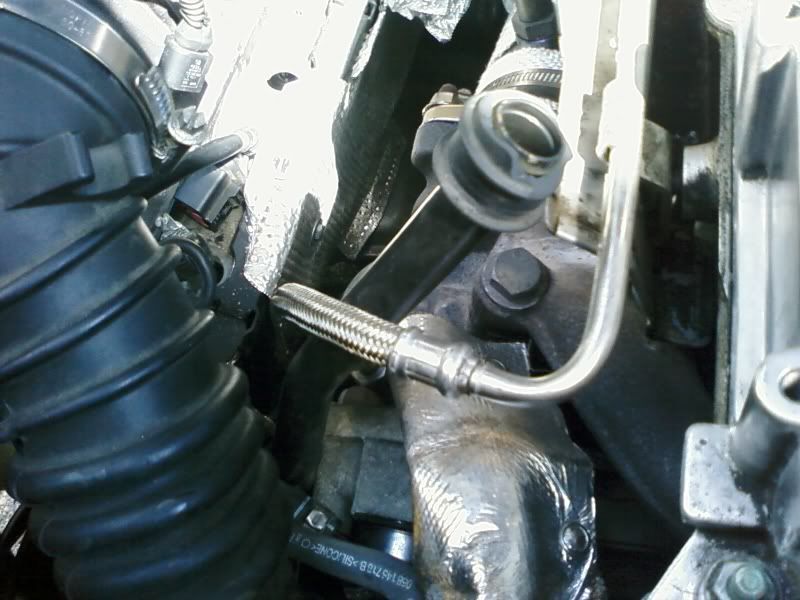

    The EGR valve will also be removed at that same time and here is a better pic of how those three 5mm hex bolts are configured
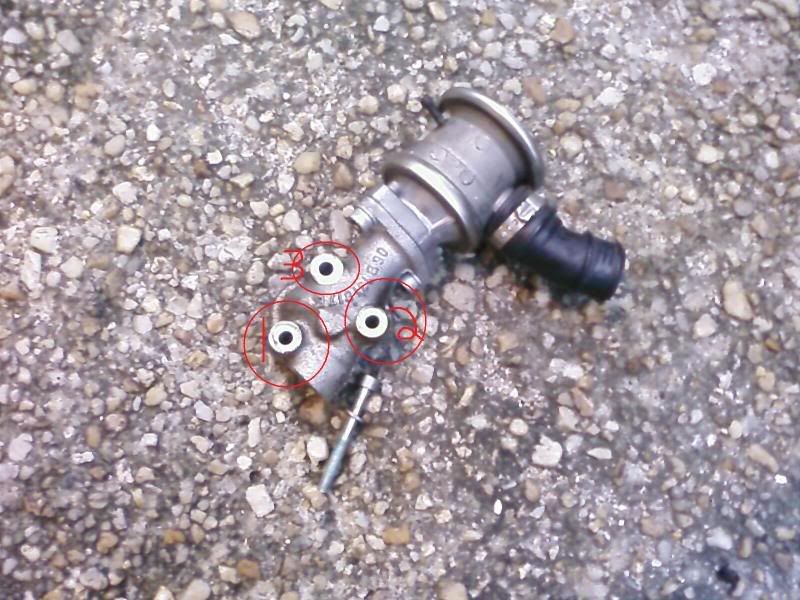

    At this point this is how it should all look
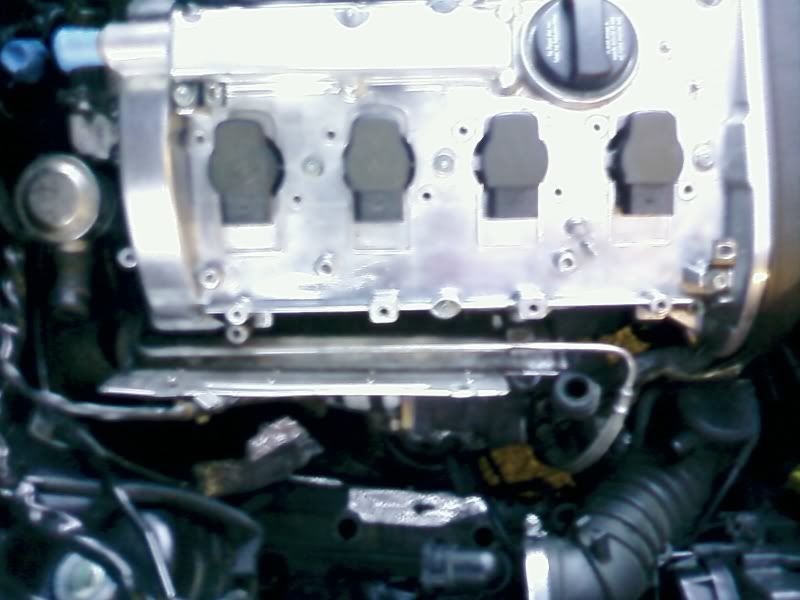

    Now we will be installing that Integrated Engineering block off plate in place of the EGR valve
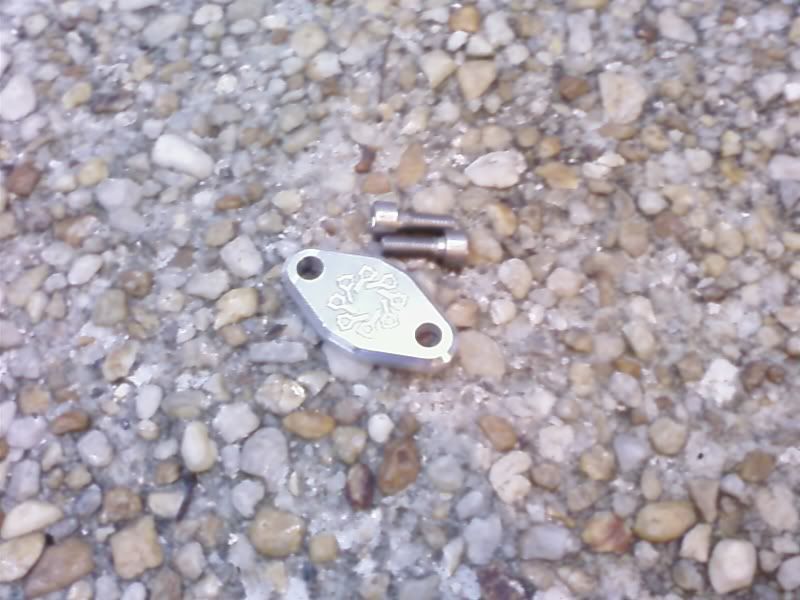

    Just bolt it in place with the supplied bolts (make sure that the supplied o-ring is also in its place)

    Now we are removing the secondary air pump. Remove the two plastic lines that are connected to the pump
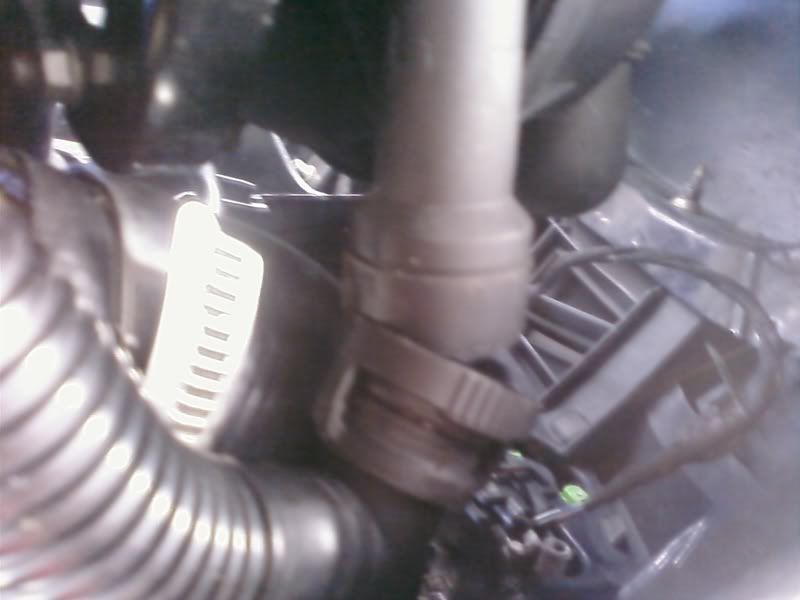
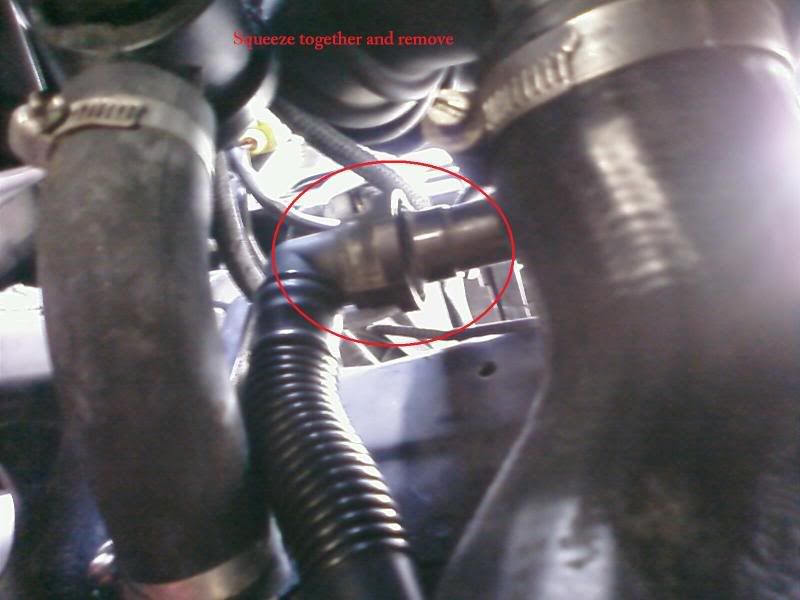


    Unclip the harness and unbolt the three bolts
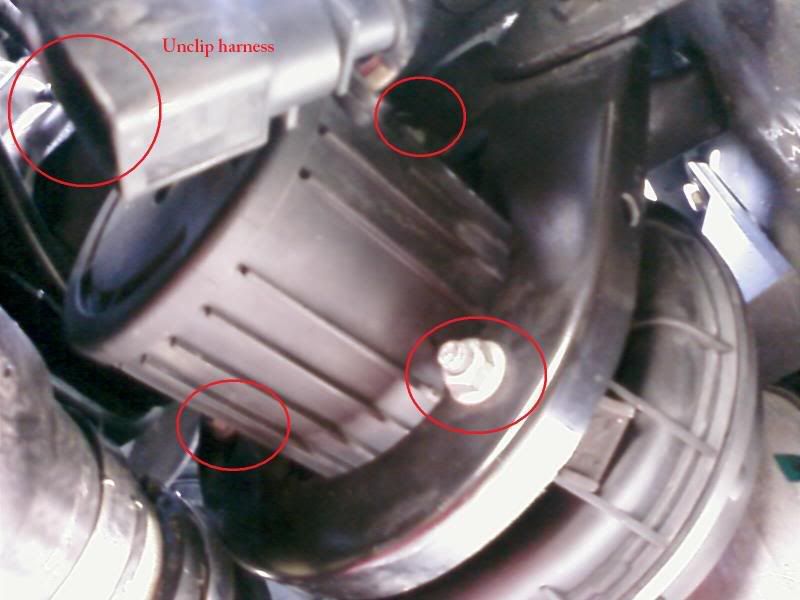

    With all that out the way you can now unbolt the air pump bracket. There are three 10mm bolts (one from under car and two from up top)
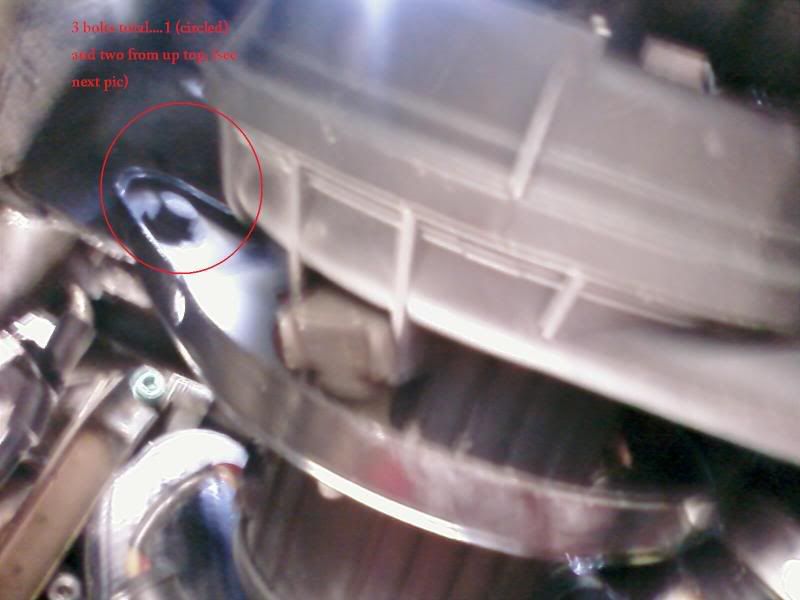
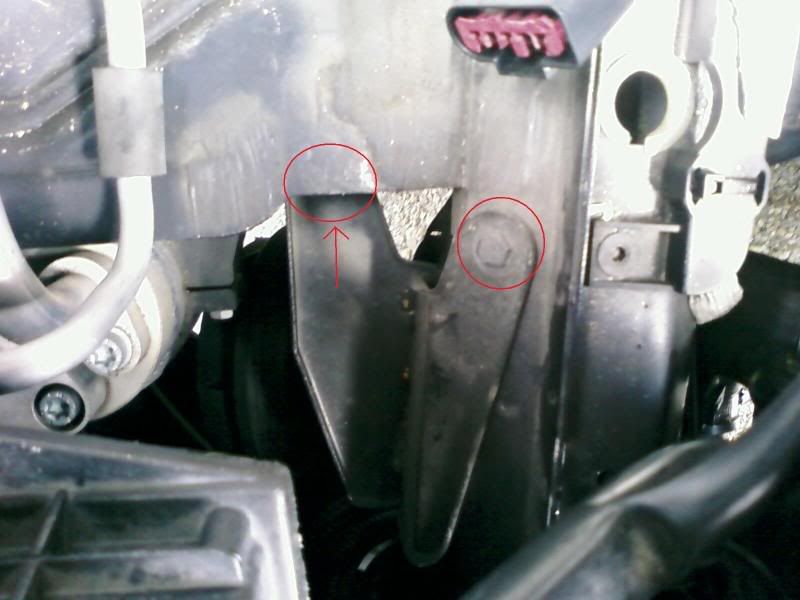


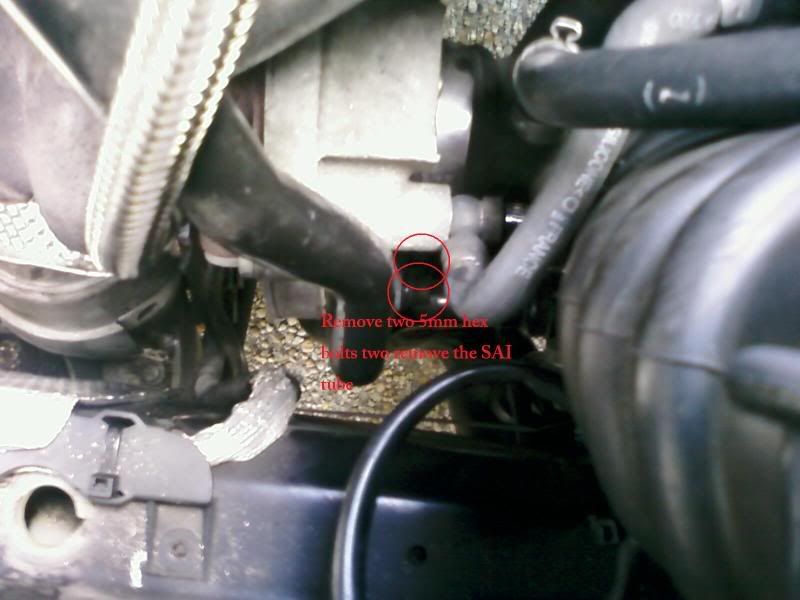
    Now lets remove this tube


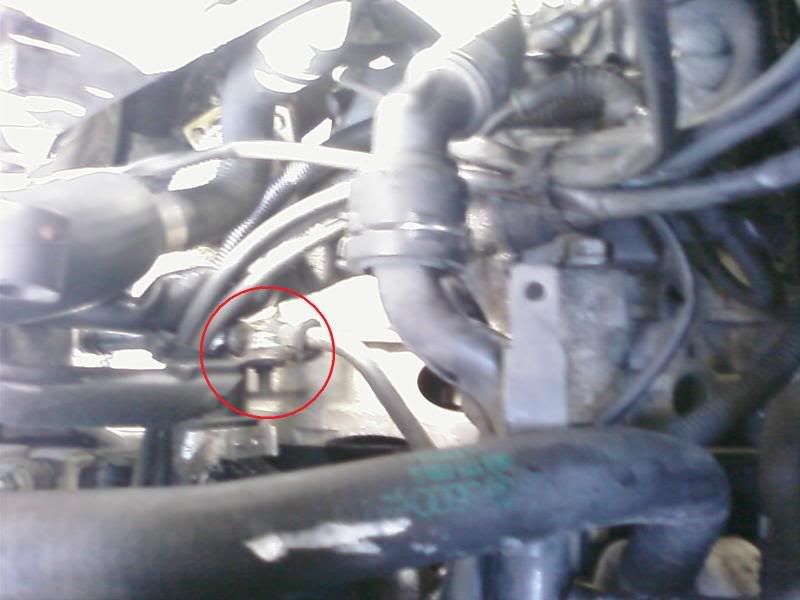
    The are two 5mm hex bolts that hold it to the turbo (one from up top and one from underneath - the bolts are adjacent to one another)

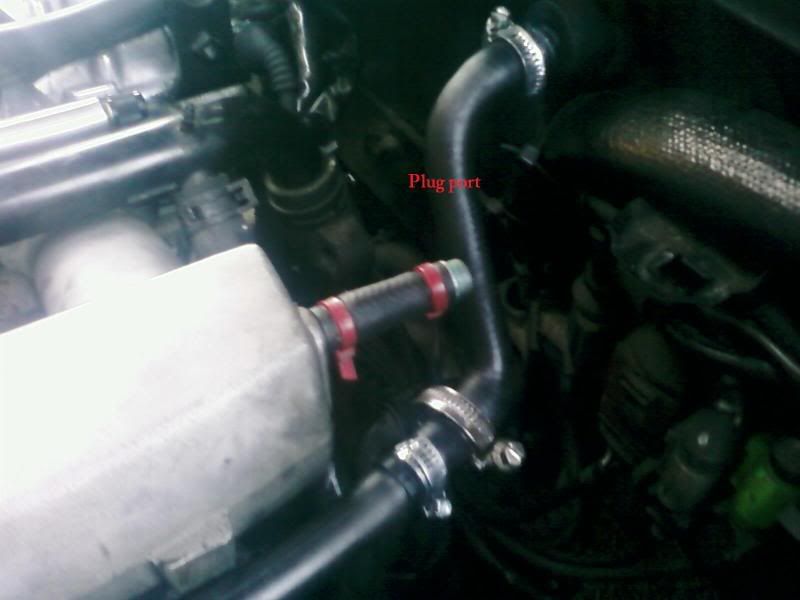
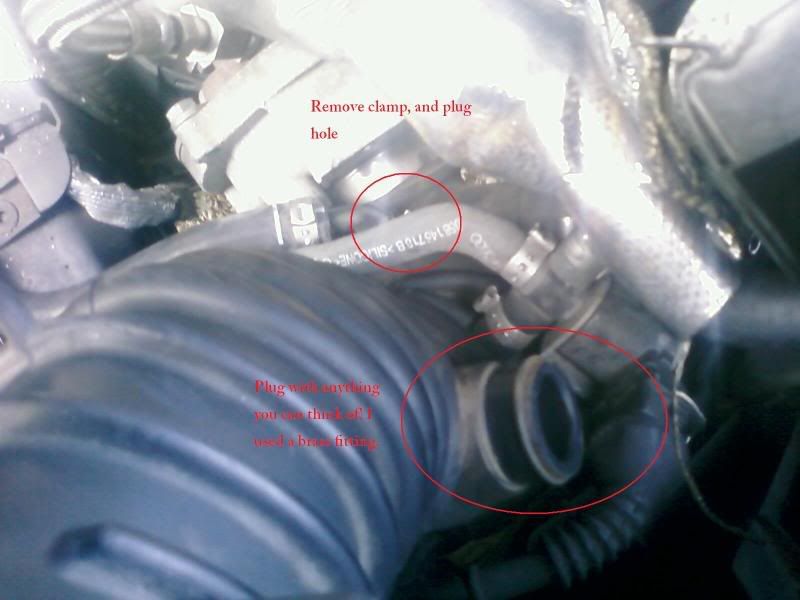
    Lets finish off with the passenger side, so let remove the hose clamp from the pancake valve and the plug up thr TIP.
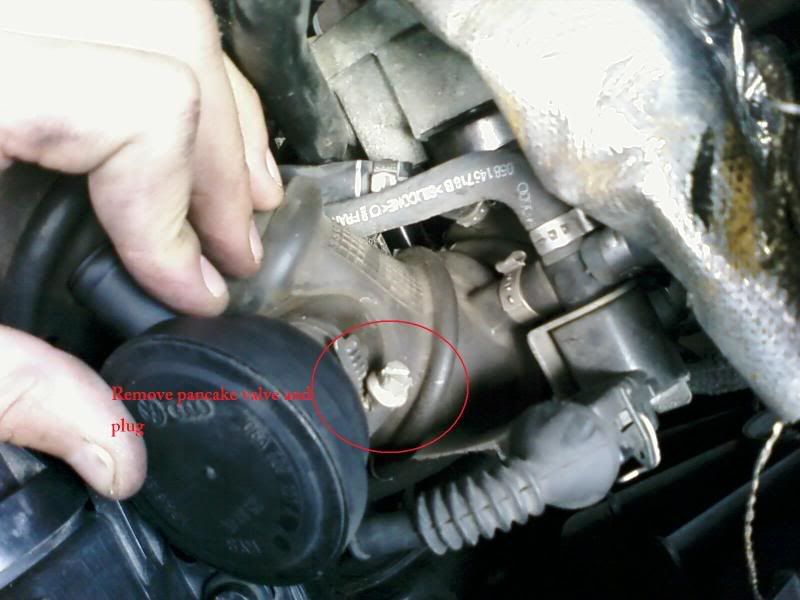

    I temporarily plugged it with this
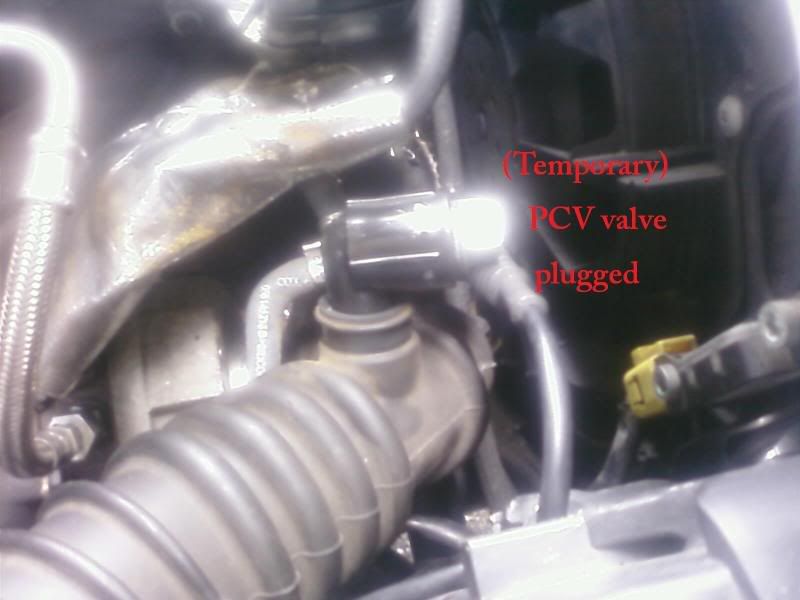

    Now we must plug one more line on the TIP (it is the line that ran off of the bottom of the airbox)….(disregard the bottom half of the picture…it does refer to the step just mentioned above though.)
    Last edited by absolutegtr; 09-16-2008 at 12:00 AM.

  2. #2
    Veteran Member Four Rings absolutegtr's Avatar
    Join Date
    Feb 19 2007
    AZ Member #
    15762
    My Garage
    2001 BMW 540i M-sport
    Location
    Charleston, SC

    Re: DIY - B6 1.8t - Vacuum line and Check Valve removal/simplification

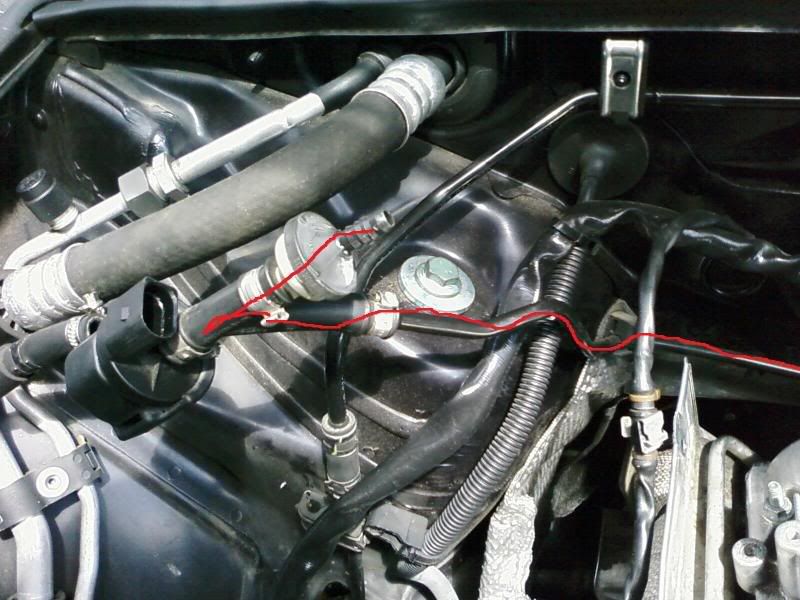
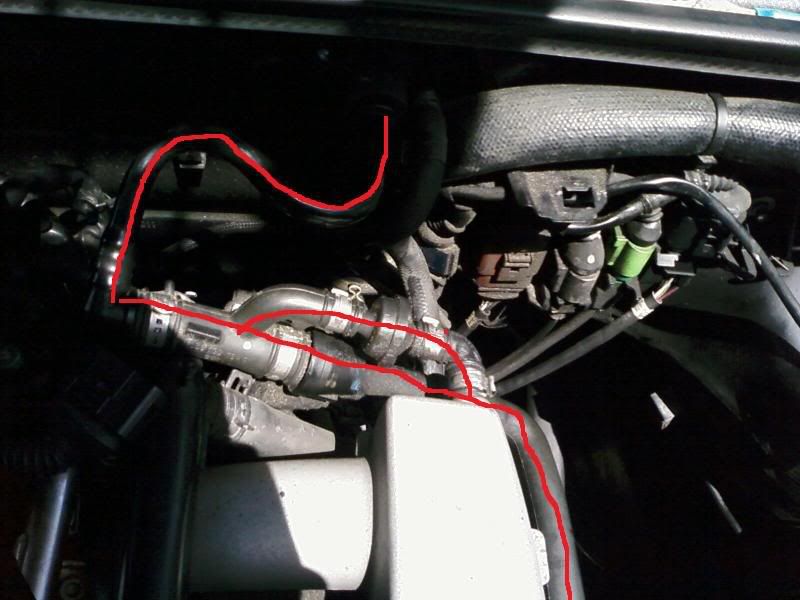
    Move over to the purge solenoid and remove the indicated (pictured red) hose. It wraps all the way around the firewall and somewhere underneath the intake manifold…remove it all.


    Time to move on to the drivers side of the car! (We just finished the passengers side lines)


    Although the drivers side (mainly underneath the intake manifold) looks fairly complicated, it is quite simple. EVERY vacuum hose underneath and behind the intake manifold is to be removed.

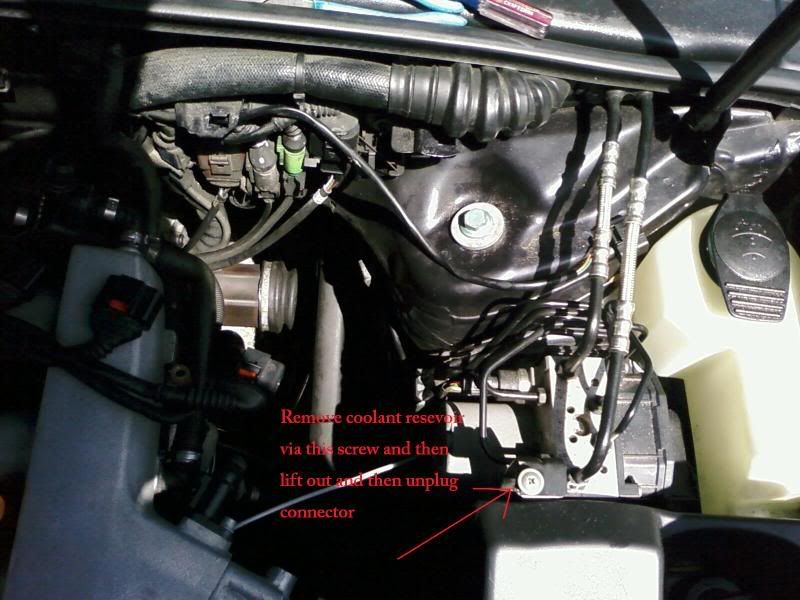
    First remove the coolant reservoir and place to the side:


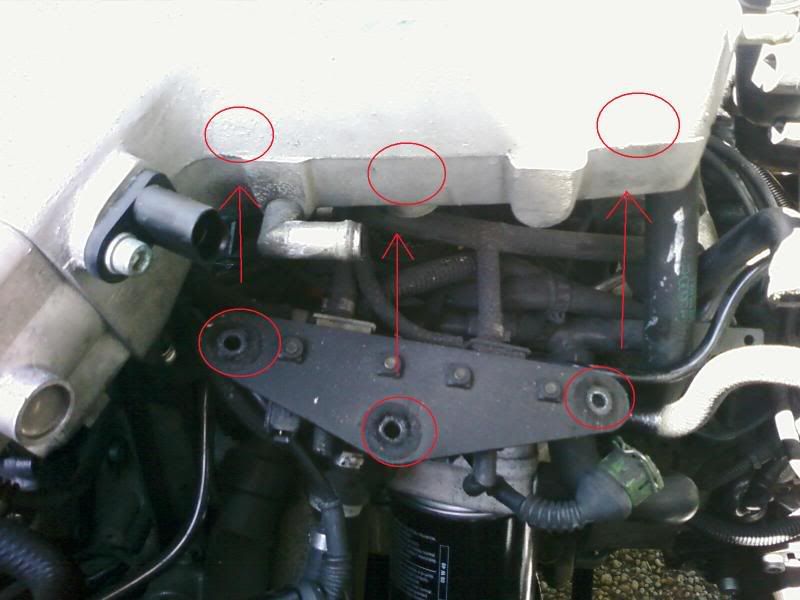
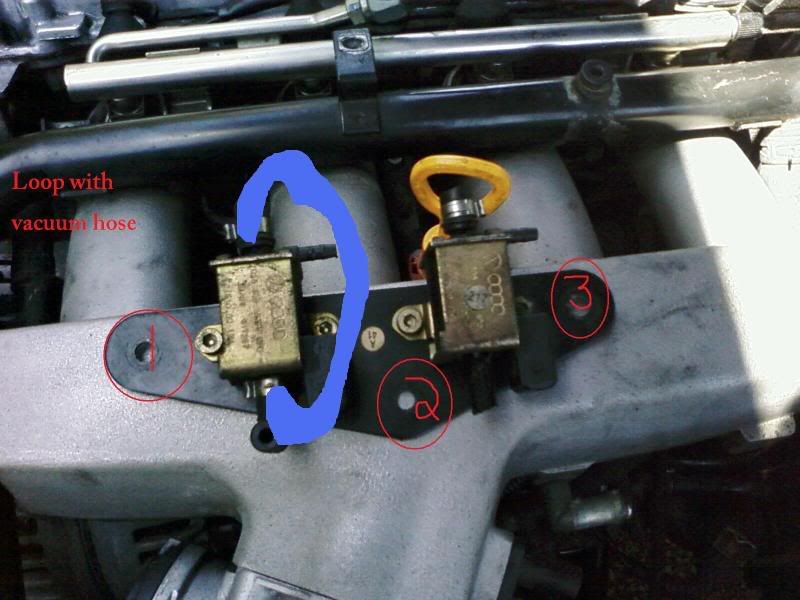
    Next unbolt the plate that carries the N112 and N249 valves. The plate is attached to the underside of the intake manifold and is secured by three (I believe) 10mm bolts. Here is the bolt configuration:


    Here is another pic with the valve totally removed (for better reference). Furthermore, with the two N-valves in plain view, go ahead and attach some vacuum hose in a loop as it is pictured by the perfect drawing of that blue-shaped monstrosity . (By the way, after this whole process is all said and done, the two valves must be plugged back in and replaced underneath the intake manifold. don’t worry about the other ports being open)
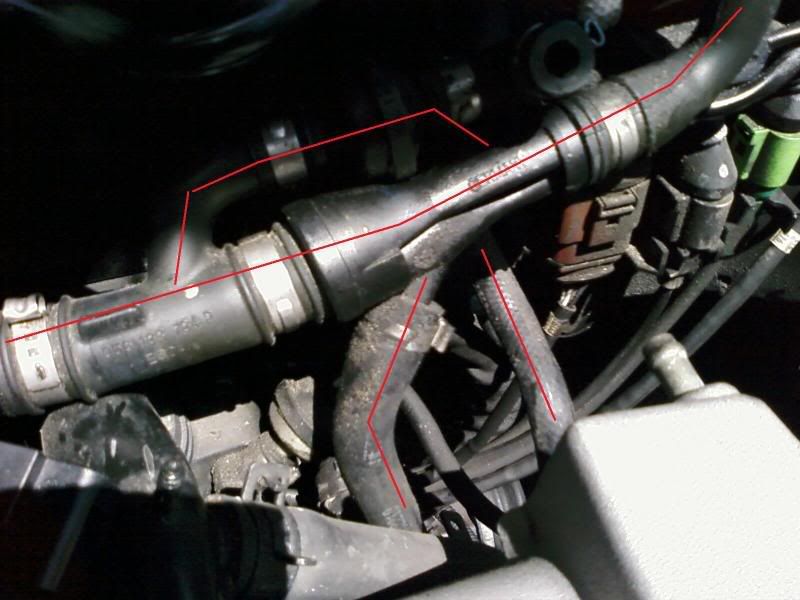
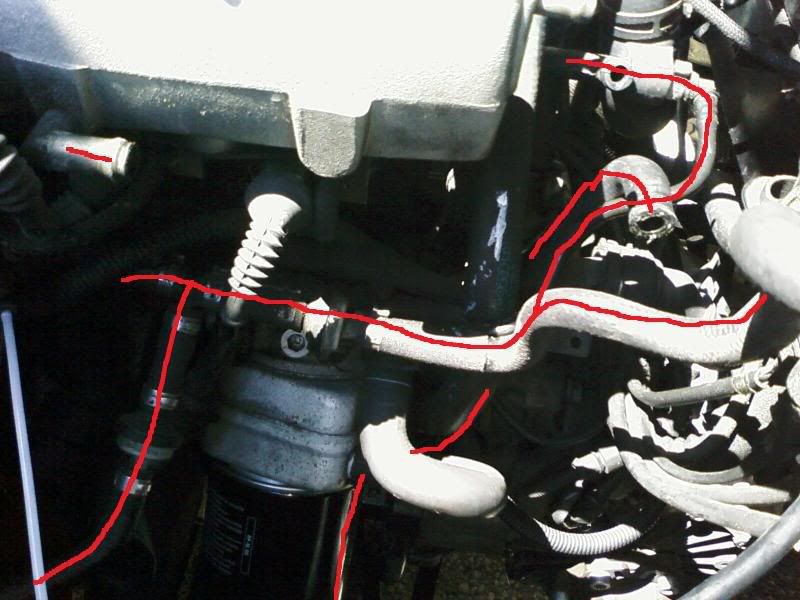
    At this point go ahead and attach the vacuum line for the diverter valve (it is the line that was initially attached to the N-249 valve) and plug it directly into the manifold, ( at the port right next to the first intake runner)…no pics.

    Now you can gain access to all the vacuum lines and check valves! All the hoses use one-time-use hose clamps which are bitch to take off, but getting a screwdriver in there and prying upon it, will easily break it loose (it is an acquired skill, that will be found taking off these many clamps, lol). In the following pics remove all the lines that are colored red. You can just cut them with some wire-cutters, but be careful because some of the vacuum lines run near/on some of the coolant lines. (Remove all lines that are in red)


    Now, if you look there will be a hard line/tube that is part of the crankcase breather system (it is behind the head and between the firewall). To remove that line….look down low, and you will see one 5mm hex bolt connected to the turbo oil line, remove it)


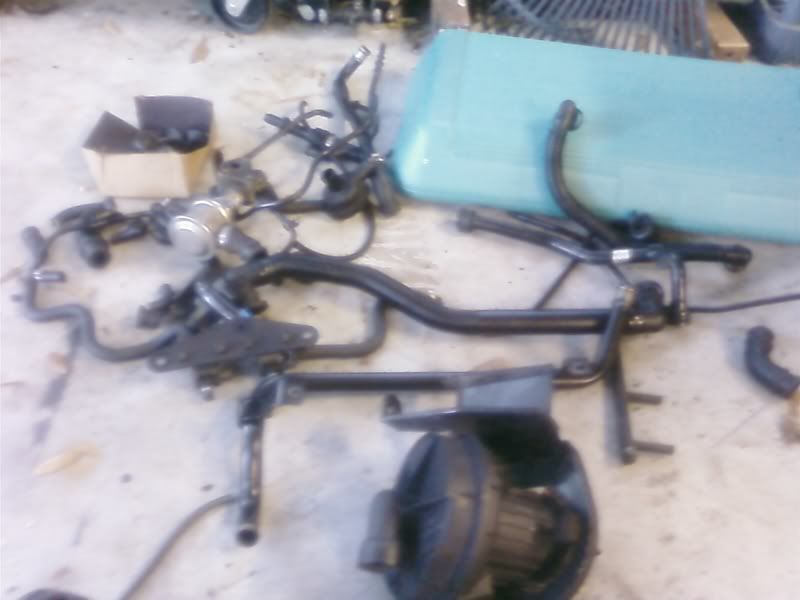
    By now, your pile of junk should look like this:


    We are finally done removing all the lines/check-valves/etc!

    Now the important stuff.

    Using either new vacuum hose or existing vacuum hose, attach the brake booster to either of the two port circled. After you attach the brake booster you must plug the other port. This is how I temporarily set it up.


    The other port that is plugged.


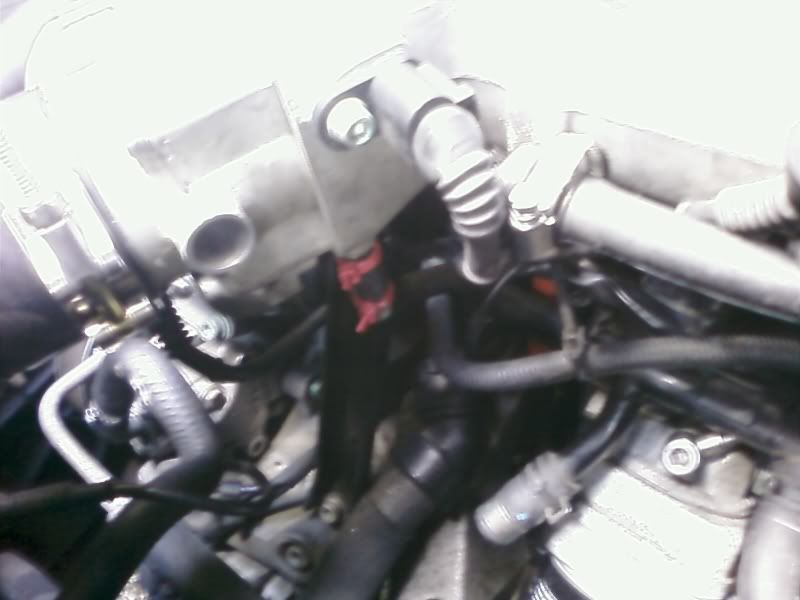
    **NOTE** There is yet ANOTHER port that must be plugged (if you have a 2002 it is underneath the throttle body area)


    If you have a 2003 or newer the third port is adjacent to the second port and its right next to the throttle position sensor,...sorry no pics.....your on your own, but since you read those two links at the very top, it provided you with more than enough info, you should completely understand!

    JUST ONE MORE STEP LEFT !!

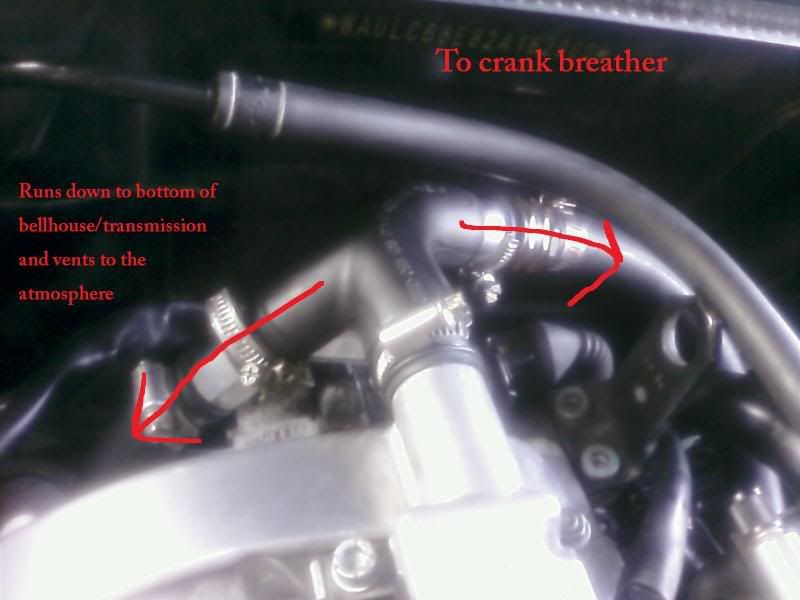
    Using the factory crankcase breather (T-fitting) run a piece of heater/vacuum hose down to the crank breather and T it with the valve cover and then run it down to the bottom of the car, so it can dump below and out of sight!


    ****Note**** I forgot which step it was but there is bolt that must be removed from the coolant flange, in order to get one of the black pipes off. You MUST replace that bolt right after you remove that black pipe. I just went through 2 gallons of coolant before I realized where the hell the leak was coming from!!


    Now double check everything! Here is the diagram for the people who are still running the stock N75 valve and a TIP.


    This is how it should look like all done!


    Crank your car up and make sure it runs good and there are no vacuum leaks….otherwise your car will be misfiring like a mofo….ask me how I know


    I hope this all make sense, and I will go over my spelling/grammar errors in the morning, I’m tired, lol

    Have fun!

    -Sami
    Last edited by absolutegtr; 09-17-2008 at 01:47 PM.
    -Sami-

  3. #3
    Veteran Member Four Rings AudiA4Turbo22's Avatar
    Join Date
    Dec 06 2007
    AZ Member #
    23140
    My Garage
    '03 Audi A4 1.8TQ Tip, '14 Mbz E63 S-AMG, '02 GMC Sierra Denali, '75 DJ5 Postal
    Location
    SoCal

    Re: DIY - B6 1.8t - Vacuum line and Check Valve removal/simplification

    i love u lolllll. This rocks i might have to give this a go.
    -Kirk
    AZ's First 2.0 Stroker 3076R Powered Tiptronic B6 Built by RavenMS. Powered by PSI Concepts & GIAC

    BetaAlphaTau Member #58

    "The last time someone tried to put GRAMMAR in their shit it caused a massive over boost and their motor shit the bed." - Turbavanttro

  4. #4
    Veteran Member Three Rings Dirty's Avatar
    Join Date
    Feb 07 2008
    AZ Member #
    24988
    My Garage
    05 A4 1.8T 6spd Quattro
    Location
    Orlando, FL

    Re: DIY - B6 1.8t - Vacuum line and Check Valve removal/simplification

    Awesome , Thank you!
    15 S6 4.0T Quattro
    DS1 stg1//B.E. TCU Tune

    05 A4 1.8T 6spd Quattro
    S4 Door Blades//CC'd S4 Bi-Xenon//AWE Boost Gauge//RS4 Rear Sway Bar//K&N filter//Forge 007 DV//12" Audibahn sub-1500w//ATP 3" TP//Hitachi "E" coil packs//Revo Stage 2//FMIC & PS cooler//S6 LED's//RS style fog grills//Hawk HPS Pads//Tein SS Coilovers//19x10 et35f/et25r Rotifrom MIA's//Falken 235/35

  5. #5
    Veteran Member Three Rings ThatGuyAlex's Avatar
    Join Date
    Jan 24 2008
    AZ Member #
    24515
    Location
    NorCal BayArea

    Re: DIY - B6 1.8t - Vacuum line and Check Valve removal/simplification

    any cells yet? And thank you!

  6. #6
    Senior Member Two Rings starfriend's Avatar
    Join Date
    Oct 17 2007
    AZ Member #
    21867
    My Garage
    A4 GTRS
    Location
    Norway

    Re: DIY - B6 1.8t - Vacuum line and Check Valve removal/simplification

    wow, i've done this myself when i went bt, but man... this must be one of the best DIY on the forums! thanks for doing this!
    A4/B6-2001 [Eurospec]
    430cc Genesis //GTRS// REVO //ATP// CUSTOM 3" EXHAUST w/ Magnaflow Mufflers //BSR OPTIFLOW INTAKE// FORGE SPLIT-R //Neuspeed Xtreme TIP// Racetec FMIC //Hitachi E//

  7. #7
    Veteran Member Four Rings HTA A4's Avatar
    Join Date
    Jul 11 2008
    AZ Member #
    30784
    My Garage
    2002 1.9L HTA3076R A4
    Location
    Illinois

    Re: DIY - B6 1.8t - Vacuum line and Check Valve removal/simplification

    'Ata boy! BTW, how do you keep your engine bay so clean??
    Anthony

    Eurocode Tuning | fifteen52 | Speed Freaks Fabrication
    BetaAlphaTau Member #41

  8. #8
    Veteran Member Three Rings Killerteve's Avatar
    Join Date
    Nov 09 2006
    AZ Member #
    13247
    My Garage
    02 A4 1.8TQM
    Location
    SF

    Re: DIY - B6 1.8t - Vacuum line and Check Valve removal/simplification

    You're awesome man! This will simplify things so much when I make my custom intake for my BT setup. Ur gettin a thumbs up.
    REVO GT2871r Elim - 034 - Southbend - Racetec - Forge - HID's - RS4 reps - Podi - APR Snub - Tein - Genesis - Neuspeed

  9. #9
    Veteran Member Four Rings dougyfresh's Avatar
    Join Date
    Dec 03 2005
    AZ Member #
    9070
    My Garage
    2 pedals 1FG
    Location
    connecticut

    Re: DIY - B6 1.8t - Vacuum line and Check Valve removal/simplification

    Quote Originally Posted by Alex@GMS View Post
    any cells yet? And thank you!
    You will get one for SAI 'Insufficient Flow' unless your tuner has changed that within the ECu. IF the N249 and N111 are plugged in you should not get a code for those.


    Sammi, looks good, however you still want a few checkvalves to keep the flow of crankcase vapors in one direction. Did you tie it back into your TIP or into a catch-can?
    -Doug
    2002 A4 Avant EPL tuned 2.7T K04 6spd

  10. #10
    Active Member Four Rings A4ringedONE8T's Avatar
    Join Date
    Feb 17 2005
    AZ Member #
    5337
    Location
    Sarasota, FL

    Re: DIY - B6 1.8t - Vacuum line and Check Valve removal/simplification

    Looks good except just to clarify, make sure your crank vent and valve cover vent are not connected to the vac source going to the brake booster. The first diagram is a little deceiving.

  11. #11
    Senior Member Two Rings
    Join Date
    Jan 31 2008
    AZ Member #
    24739
    My Garage
    2004 Audi A4 1.8T White
    Location
    Oviedo, FL

    Re: DIY - B6 1.8t - Vacuum line and Check Valve removal/simplification

    Damn this is awesome. I can't wait to get to it. To bad I work 7days a week. I will find time though. THank you.

  12. #12
    Registered Member Two Rings zims666's Avatar
    Join Date
    Apr 17 2008
    AZ Member #
    27795
    My Garage
    '05 A4 B6 1.8t 6speed
    Location
    Chapel Hill, NC

    Re: DIY - B6 1.8t - Vacuum line and Check Valve removal/simplification

    thanks for this long awaited write up.
    good work.

  13. #13
    Veteran Member Four Rings jbrown7815's Avatar
    Join Date
    Mar 12 2008
    AZ Member #
    26335
    Location
    Portales, NM

    Re: DIY - B6 1.8t - Vacuum line and Check Valve removal/simplification

    Great DIY

  14. #14
    Registered Member Two Rings zims666's Avatar
    Join Date
    Apr 17 2008
    AZ Member #
    27795
    My Garage
    '05 A4 B6 1.8t 6speed
    Location
    Chapel Hill, NC

    Re: DIY - B6 1.8t - Vacuum line and Check Valve removal/simplification

    not thread jacking or taking ANY credit, but here is some useful info that i had saved from other threads on this topic. tried to clean it up a bit... all this does is put names to the faces supplied above


    --Nothing in the PCV system is connected to the ECU.
    Remove all the crank vent shit under the intake manifold as well as its connection to the intake manifold.

    --Run a 1" hose from the crank breather (on top of the oil filter housing) up to the valve cover breather, T it to another 1" line which you can either dump under the car or connect it to a catch can, then run a line from the catch can to the TIP, your choice.
    The only thing that needs the 1" hose is the crank and valve cover breather, (which you T those two together, then dump them under the car)
    It is preferred to have absolutely zero oil crap going into the motor so just have a 1" stainless hose running down below to tranny to vent any excess pressure or oil residue

    --Without triggering a CEL, you can remove pretty everything except SAI. To remove SAI without CEL, use block off plate: (google: APEX TUNING) will not trigger a CEL as long as the solenoid is plugged in (the one thats on the back of the intake box from the factory).

    --You can remove the N249 and N112 vac lines as long as you keep the solenoids plugged in (or put resistors in there place)

    --The hard plastic line connection to the airbox is the feed for the SAI pump. If you remove that or the SAI system, you will get a CEL.

    --The suction pump can be removed, that gets rid of 3 check valves.
    You will then need to connect the brake booster directly to the intake manifold.

    --The other 3 check valves that are small (black/grey) are for EVAP, one on top of the air box and two over under the intake manifold. That can be removed if you wish, no CEL.

    --You will need to keep the solenoid connected on the pass side of the car to the line coming from the fuel tank. The solenoid still needs to be able to purge vapor pressure build up from the tank. If there is gas pressure in the tank it will vent on it's own. That's how equalizing pressures work
    Everything between the solenoid and the motor after the solenoid on the passenger side can be removed; including its connections to the TIP and to the intake manifold.
    EVAP purge valve needs to stay connected to the line from the tank, the line that comes from the passenger fenderwell.

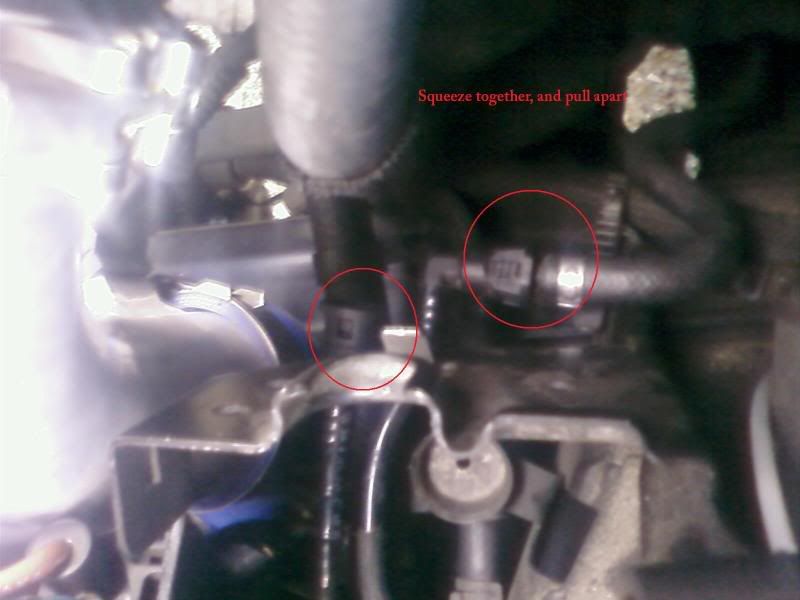
    --The two check valves on the driver side are the feed lines for the charcoal canister in the drivers side wheel well. There are two quick disconnects for those lines right under the power steering fluid resevoir. Just disconnect them there unless you want to pull the canister and everything from the fenderwell.

    --The only things remaining after that are the vac line feeds for the N112 and N249. N112 is for SAI, it needs to remain if your keeping SAI. N249 is how the ECU electronically controls the DV. It can be removed, just connect the DV directly to the intake manifold which yields quicker DV response from boost/vac pressure, NOT the ECU!


    1) But I still am confused as to what i do with the EVAP purge valve. Doesnt that release gas-fume build up from the tank? That is obviously necessary.
    1) EVAP purge valve needs to stay connected to the line from the tank, the line that comes from the passenger fenderwell. Everything between the solenoid and the motor can be removed. It needs to stay plugged in and connected to the tank feed line in order to bleed off any fume or pressure buildup. if there is gas pressure in the tank it will vent on it's own. that's how equalizing pressures work

    2) Another thing is what is the LDP (Leak Detection Pump - V144) and where does that lead to?
    2) The LDP (leak detection pump) is mounted beside the charcoal canister and as long as the EVAP purge valve stays intact it will function normally. The LDP is up under the spare tire next to the EVAP charcoal canister accessed from underneath the car. It vents under the left rear wheel liner. So obviously the charcoal canister and LDP must stay..... couldn't tell you for sure, must've taken mine out though.. no issues to speak of
    3) Do all the TIP connections/ports get blocked off (with the exeption to the N75 connection)?
    3) Yes, everything unless you're using an N75, even then it doesnt HAVE to be connected to the TIP. If you're running an external wg setup, the N75 port normally in the TIP can be connected to the top port on the WG. yes block them all off. if you still have your MAF/TIP leave the N75 in and connected. if you're like me and have no MAF/TIP you probably don't need the n75


    1) What gets done with the Vacuum reservoir? 1Take it out. The vacuum reservoir helps maintain vacuum within the system when the engine is boosting. It is located under the front left wheel liner
    2) The N112 valve must stay to avoid a CEL, correct? 2) leave it plugged in the harness or put a resistor in its place. i've left all my valves PLUGGED IN for now, but they are all secured out of the way (sort of in the battery tray)
    3) What gets done with the N249 valve? 3) same as 2
    4) Do you just cap off the line coming from the Charcoal canister (after or before the sensor)?
    4) Either remove it, or leave it as is. If you remove just the quick disconnects by the power steering reservoir, no need to cap anything off, it will not have anything coming to or from it after you disconnect the line from the purge solenoid on the pass side. i have shortened and capped the line on the PASSENGER side. everything after that line (on the EVAP system) has been removed on my car


    sorry, hope this didnt muddy the waters TOO much. i also am wanting to do this mod, but am living fear of CEL's and crankcase vapor...

  15. #15
    Veteran Member Four Rings absolutegtr's Avatar
    Join Date
    Feb 19 2007
    AZ Member #
    15762
    My Garage
    2001 BMW 540i M-sport
    Location
    Charleston, SC

    Re: DIY - B6 1.8t - Vacuum line and Check Valve removal/simplification

    zimms66, thanks for that! Those mare pretty much all the good bits of info
    -Sami-

  16. #16
    Veteran Member Four Rings absolutegtr's Avatar
    Join Date
    Feb 19 2007
    AZ Member #
    15762
    My Garage
    2001 BMW 540i M-sport
    Location
    Charleston, SC

    Re: DIY - B6 1.8t - Vacuum line and Check Valve removal/simplification

    Quote Originally Posted by dougyfresh View Post
    You will get one for SAI 'Insufficient Flow' unless your tuner has changed that within the ECu. IF the N249 and N111 are plugged in you should not get a code for those.


    Sammi, looks good, however you still want a few checkvalves to keep the flow of crankcase vapors in one direction. Did you tie it back into your TIP or into a catch-can?

    As of right now, I just have it dumping out besides the bellhouse. In the VERY near future, I will be going with Daniels suggestion and running it attached to the exhaust (since the exhuast flow will create a constant vacuum)

    In theory it makes good sense
    -Sami-

  17. #17
    Veteran Member Four Rings absolutegtr's Avatar
    Join Date
    Feb 19 2007
    AZ Member #
    15762
    My Garage
    2001 BMW 540i M-sport
    Location
    Charleston, SC

    Re: DIY - B6 1.8t - Vacuum line and Check Valve removal/simplification

    Quote Originally Posted by A4ringedONE8T View Post
    Looks good except just to clarify, make sure your crank vent and valve cover vent are not connected to the vac source going to the brake booster. The first diagram is a little deceiving.

    EDIT** Updated with a better drawing


    Here is the diagram for the people who are still running the stock N75 valve and a TIP.

    Last edited by absolutegtr; 09-16-2008 at 06:03 PM.
    -Sami-

  18. #18
    Active Member Four Rings A4ringedONE8T's Avatar
    Join Date
    Feb 17 2005
    AZ Member #
    5337
    Location
    Sarasota, FL

    Re: DIY - B6 1.8t - Vacuum line and Check Valve removal/simplification

    And for your own good for the brake booster line, clamp that shit @ the grommet that goes through the firewall. I think Ive blown that f'er off 20 times, finally gave up on the barbed fitting holding it and put a clamp on it. No problems since!

  19. #19
    Veteran Member Four Rings LampyB's Avatar
    Join Date
    Apr 25 2007
    AZ Member #
    17584
    Location
    MA

    Re: DIY - B6 1.8t - Vacuum line and Check Valve removal/simplification

    this is an awesome DIY, thanks Sami! i'm going to get this done some time before winter hits.

    Custom Trunk Badges For Sale!

    | 2004 A4 USP 1.8TQ | 6SPD | GIAC 1+ | APIKOL | HYPERBOOST | FORGE TIP | NGK | 20% TINT | VMR | OFE SS | PODI | N249 Delete |

  20. #20
    Established Member Two Rings smarrick's Avatar
    Join Date
    Apr 07 2008
    AZ Member #
    27400
    My Garage
    04 A4 18T 6MT QT SPORT, 07 X3, 74 Lincoln Continental
    Location
    Fort Collins, CO

    Re: DIY - B6 1.8t - Vacuum line and Check Valve removal/simplification

    Awesome.

    As long as eveyone knows if you do this there is no way to pass emissions. But fuck the govrment anyway right?

  21. #21
    Veteran Member Four Rings absolutegtr's Avatar
    Join Date
    Feb 19 2007
    AZ Member #
    15762
    My Garage
    2001 BMW 540i M-sport
    Location
    Charleston, SC

    Re: DIY - B6 1.8t - Vacuum line and Check Valve removal/simplification

    Quote Originally Posted by smarrick View Post
    Awesome.

    As long as eveyone knows if you do this there is no way to pass emissions. But fuck the govrment anyway right?

    Hey, they're screwing us over anyways.

    But yea, there is no way you would pass emissions
    -Sami-

  22. #22
    Veteran Member Four Rings jbrown7815's Avatar
    Join Date
    Mar 12 2008
    AZ Member #
    26335
    Location
    Portales, NM

    Re: DIY - B6 1.8t - Vacuum line and Check Valve removal/simplification

    Great DIY, but damn your camera [guessing phone] sucks.

  23. #23
    Veteran Member Four Rings dougyfresh's Avatar
    Join Date
    Dec 03 2005
    AZ Member #
    9070
    My Garage
    2 pedals 1FG
    Location
    connecticut

    Re: DIY - B6 1.8t - Vacuum line and Check Valve removal/simplification

    Quote Originally Posted by absolutegtr View Post
    But yea, there is no way you would pass emissions
    If there is no visual and your car passes readiness checks they you should pass.

    My car passes because there is no visual and all my readiness checks are green (pass) when you plug the computer into my OBDII port.
    -Doug
    2002 A4 Avant EPL tuned 2.7T K04 6spd

  24. #24
    Veteran Member Three Rings ThatGuyAlex's Avatar
    Join Date
    Jan 24 2008
    AZ Member #
    24515
    Location
    NorCal BayArea

    Re: DIY - B6 1.8t - Vacuum line and Check Valve removal/simplification

    Quote Originally Posted by absolutegtr View Post
    Hey, they're screwing us over anyways.

    But yea, there is no way you would pass emissions
    all depends on the guy at the smog station. lol if ur nice to him and bring him Starbucks im sure he will pretend he saw everything under the hood in good order

  25. #25
    Registered Member Two Rings zims666's Avatar
    Join Date
    Apr 17 2008
    AZ Member #
    27795
    My Garage
    '05 A4 B6 1.8t 6speed
    Location
    Chapel Hill, NC

    Re: DIY - B6 1.8t - Vacuum line and Check Valve removal/simplification

    Quote Originally Posted by dougyfresh View Post
    If there is no visual and your car passes readiness checks they you should pass.

    My car passes because there is no visual and all my readiness checks are green (pass) when you plug the computer into my OBDII port.
    ok mysterio. out with it. how do you pull that one off? i know how to clear the visual, but the readiness checks?
    granted, i live in NC & the moe moes at jiffy lube will pass anything with 4 wheels... but that info would help

  26. #26
    Established Member Two Rings smarrick's Avatar
    Join Date
    Apr 07 2008
    AZ Member #
    27400
    My Garage
    04 A4 18T 6MT QT SPORT, 07 X3, 74 Lincoln Continental
    Location
    Fort Collins, CO

    Re: DIY - B6 1.8t - Vacuum line and Check Valve removal/simplification

    Also completely depends on where you live. Sometimes it is a 16 year old at Jiffy Lube that doesn't give a shit and sometimes it is a state run testing facility that knows and cares about the tests. Harder to cheat those. All depends on your State and Local emissions standards.

  27. #27

    Re: DIY - B6 1.8t - Vacuum line and Check Valve removal/simplification

    Quote Originally Posted by zims666 View Post
    ok mysterio. out with it. how do you pull that one off? i know how to clear the visual, but the readiness checks?
    granted, i live in NC & the moe moes at jiffy lube will pass anything with 4 wheels... but that info would help
    sounds like his tuner did the hex edit mod. ;) haha. something like this.


    contact via email please.

  28. #28
    Veteran Member Four Rings dougyfresh's Avatar
    Join Date
    Dec 03 2005
    AZ Member #
    9070
    My Garage
    2 pedals 1FG
    Location
    connecticut

    Re: DIY - B6 1.8t - Vacuum line and Check Valve removal/simplification

    Quote Originally Posted by zims666 View Post
    ok maestro. out with it. how do you pull that one off? i know how to clear the visual, but the readiness checks?
    granted, i live in NC & the moe moes at jiffy lube will pass anything with 4 wheels... but that info would help
    My tuner has gone into the ECu and adjusted a few things for me. I went through inspection this past February and passed with flying colors with the car as it currently stands (albeit 1.8L versus 2.0L but still a big turbo with SAI removed).

    There have been a few discussions about this in the B6 A4 forum (search). Specifically passing the readiness for SAI Insufficient flow (what I have done).

    In some states you do not have to pass all the readiness checks but a certain percentage (ex: 7 out of 9). Its best to check with your state on their requirements.


    EDIT: Yes, Ian.
    -Doug
    2002 A4 Avant EPL tuned 2.7T K04 6spd

  29. #29
    Veteran Member Three Rings ThatGuyAlex's Avatar
    Join Date
    Jan 24 2008
    AZ Member #
    24515
    Location
    NorCal BayArea

    Re: DIY - B6 1.8t - Vacuum line and Check Valve removal/simplification

    Quote Originally Posted by absolutegtr View Post
    Indeed. Heres a better drawing.


    my only question is...

    my car is stock besides full APR exhaust, gutted airbox and soon to be GIAC chipped and maybe front mount and Dahlback DV.

    Will i still need the N75?

    or can you make a picture for everyone with still stock stuff and not BT yet. lol (im just getting confused looking at the pictures with eveything missing and rerouted, just cause i do not see a TIP)

    thanks

  30. #30
    Veteran Member Four Rings FORCE_FED_DUB's Avatar
    Join Date
    Aug 10 2008
    AZ Member #
    31806
    Location
    Denver, Colorado

    Re: DIY - B6 1.8t - Vacuum line and Check Valve removal/simplification

    you CAN fail visual (if you have visual inspections), but the readiness can be kept if:
    1) you leave everything plugged in
    OR
    2) put resistors in place of deleted electrical components
    OR
    3) Unitronic can write them out as part of their BT chips (although a BT may cause you to fail visual in the first place)

    and i guess option #4, register the car in a non-emissions place (county, state, etc). EX: in CO only denver metro counties have emissions. Also keep in mind the sad day when you will part with your car, as it is seller's responsibility to make the car pass emissions (again, atleast in CO, your area may differ).

    i pulled all this emissions related or otherwise flawed BS off of the 1.8T in my GTi. gotta love 1992 emissions standards!

  31. #31
    Veteran Member Four Rings Capt. Obvious's Avatar
    Join Date
    Nov 14 2006
    AZ Member #
    13388
    My Garage
    600hp glorified Beetle, e-tron, 1G DSM
    Location
    Gig Harbor, WA

    Re: DIY - B6 1.8t - Vacuum line and Check Valve removal/simplification

    AWESOME write-up. This is going to help a lot of people!
    -Darrick

  32. #32
    Veteran Member Four Rings absolutegtr's Avatar
    Join Date
    Feb 19 2007
    AZ Member #
    15762
    My Garage
    2001 BMW 540i M-sport
    Location
    Charleston, SC

    Re: DIY - B6 1.8t - Vacuum line and Check Valve removal/simplification

    Quote Originally Posted by Alex@GMS View Post
    my only question is...

    my car is stock besides full APR exhaust, gutted airbox and soon to be GIAC chipped and maybe front mount and Dahlback DV.

    Will i still need the N75?

    or can you make a picture for everyone with still stock stuff and not BT yet. lol (im just getting confused looking at the pictures with eveything missing and rerouted, just cause i do not see a TIP)

    thanks
    Yes you should keep the stock N75.

    I will make a pic for the stock people (like myself) to better understand
    -Sami-

  33. #33
    Veteran Member Three Rings ThatGuyAlex's Avatar
    Join Date
    Jan 24 2008
    AZ Member #
    24515
    Location
    NorCal BayArea

    Re: DIY - B6 1.8t - Vacuum line and Check Valve removal/simplification

    Quote Originally Posted by absolutegtr View Post
    Yes you should keep the stock N75.

    I will make a pic for the stock people (like myself) to better understand

    sweet. thank you

  34. #34
    Veteran Member Four Rings absolutegtr's Avatar
    Join Date
    Feb 19 2007
    AZ Member #
    15762
    My Garage
    2001 BMW 540i M-sport
    Location
    Charleston, SC

    Re: DIY - B6 1.8t - Vacuum line and Check Valve removal/simplification

    (I am adding this to my original/2nd post)

    Here is the diagram for the people who are still running the stock N75 valve and a TIP.

    -Sami-

  35. #35
    Veteran Member Four Rings AudiA4_20T's Avatar
    Join Date
    Oct 29 2005
    AZ Member #
    8553
    My Garage
    10speed
    Location
    San Francisco, CA

    Re: DIY - B6 1.8t - Vacuum line and Check Valve removal/simplification

    ballin, thanks man

    Tell me this, what did u do with the EVAP shit, did u give any of it a vacuum source?
    - Clint

    Current : 2013 Q5 3.0T Prestige S-Line - 11.6@117 - 034 Stage2+ FBO
    Gone : One of the first ever 2.7T Swaps - White '04 S4 2.7T - Stage 2+
    Gone : Fastest B6 A4 ever - 464awhp/12.1@116

  36. #36
    Veteran Member Four Rings absolutegtr's Avatar
    Join Date
    Feb 19 2007
    AZ Member #
    15762
    My Garage
    2001 BMW 540i M-sport
    Location
    Charleston, SC

    Re: DIY - B6 1.8t - Vacuum line and Check Valve removal/simplification

    Quote Originally Posted by AudiA4_20T View Post
    ballin, thanks man

    Tell me this, what did u do with the EVAP shit, did u give any of it a vacuum source?
    No. I am just venting the purge solenoid (the one on top of the airbox) to the atmosphere. The other two lines (that branch off of it) were just closed/disconnected)
    -Sami-

  37. #37
    Veteran Member Four Rings AudiA4_20T's Avatar
    Join Date
    Oct 29 2005
    AZ Member #
    8553
    My Garage
    10speed
    Location
    San Francisco, CA

    Re: DIY - B6 1.8t - Vacuum line and Check Valve removal/simplification

    Quote Originally Posted by absolutegtr View Post
    No. I am just venting the purge solenoid (the one on top of the airbox) to the atmosphere. The other two lines (that branch off of it) were just closed/disconnected)
    dont you need a vacuum source?
    - Clint

    Current : 2013 Q5 3.0T Prestige S-Line - 11.6@117 - 034 Stage2+ FBO
    Gone : One of the first ever 2.7T Swaps - White '04 S4 2.7T - Stage 2+
    Gone : Fastest B6 A4 ever - 464awhp/12.1@116

  38. #38
    Veteran Member Four Rings absolutegtr's Avatar
    Join Date
    Feb 19 2007
    AZ Member #
    15762
    My Garage
    2001 BMW 540i M-sport
    Location
    Charleston, SC

    Re: DIY - B6 1.8t - Vacuum line and Check Valve removal/simplification

    Quote Originally Posted by AudiA4_20T View Post
    dont you need a vacuum source?
    From the info I have gathered from shawn and daniel, its that it can be vented.

    Both of them just have the line and solenoid (it must be plugged in) in the front passenger fenderwell.....which I plan to do when i get a chance.
    -Sami-

  39. #39
    Account Terminated Four Rings
    Join Date
    Sep 15 2006
    AZ Member #
    11477
    My Garage
    2001 S4 GT28, 2001 S4 168K
    Location
    Long Island, NY

    Re: DIY - B6 1.8t - Vacuum line and Check Valve removal/simplification

    removing CEL Sensors out of the ECU is always fun :)

  40. #40
    Veteran Member Three Rings Killerteve's Avatar
    Join Date
    Nov 09 2006
    AZ Member #
    13247
    My Garage
    02 A4 1.8TQM
    Location
    SF

    Re: DIY - B6 1.8t - Vacuum line and Check Valve removal/simplification

    I've ready in previous threads that removing the CAI can hurt cold starts. It gets pretty cold here in the winter some times- cold enough for my car to cough a little starting in the morning. I know test pipes affect this too(which I also have), so would you not recommend removing the SAI in places where it gets cold or is it no big deal?
    REVO GT2871r Elim - 034 - Southbend - Racetec - Forge - HID's - RS4 reps - Podi - APR Snub - Tein - Genesis - Neuspeed

Page 1 of 27 12311 ... LastLast


Bookmarks

Posting Permissions

  • You may not post new threads
  • You may not post replies
  • You may not post attachments
  • You may not edit your posts
  •  


    © 2001-2024 Audizine, Audizine.com, and Driverzines.com
    Audizine is an independently owned and operated automotive enthusiast community and news website.
    Audi and the Audi logo(s) are copyright/trademark Audi AG. Audizine is not endorsed by or affiliated with Audi AG.