Last Wednesday I went down to VMR to have my VMR Boost Gauge installed. Don happily agreed to help me with the install. Much thanks to him for taking the time to do the install for me!!

I like the OEM look of the gauge as well as the fact that the needle matches the OEM needles quite well.
Here are the pics of the install....

..

..


..

..


..

..


..

..


..

..

I haven't driven the car much the since the install, but I'm pleased with the quality and the look of the gauge.
The install, from my perspective as Don was doing the work and me lending a hand here and there, seemed very easy if you knew what you were doing. After Don finished, I think I could have managed the install myself, but I still learned a few things watching him do the install.
If there is anything I can change about the gauge it would only be that I wish it was a little dimmer. It is much brighter than the stock gauges. Other than that, everything else is

Also, a tip for the installation that I didn't think of until afterwards. You should use some of that rubber heat activated shrink tubing and put it around the wires going to the gauge. That way you can't see the wires through the vent opening or at least it'll blend in with everything else. Here is what mine looks like....

And on my way home from the install saw this bad boy on the 55 to the 5 interchange...
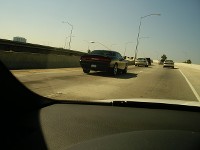
Challenger SRT8. This thing looks amazing in person!!


 ... right now
 Reply With Quote


Bookmarks