It doesn’t make any difference because this is pretty much the same for all B6’s but mine is a 3.0 v6 with FWD.
** NOTE: Something VERY important is the fuel filter, don’t go to ECS tuning or any other website for your fuel filter, because there are THREE different types of them for this car… I bought my first filter at Kragen, and they sold me one with one in hole and one out. Went then to ECS, same deal, so I had enough and went to the dealer. The parts guy told me at the end of the part number (8EO-201-511____) there is a letter, it will either be G,L,J,D! The L is the new G, so if you have a G there going to give you an L. To find out which one you have the dealer will look it up with your VIN. The three types look the same, just the sizing of the inlet and outlets are bigger/smaller… pain in the rear! **
Parts you will def need:
1x OEM Fuel Filter
Gloves, I had 2 kind; nitrate dipped for when the fuel was present, and some leather ones to grip the tools and keep clean.
Goggles! Big time MUST HAVE!
10mm socket
Torx 25
Small flathead
6-8 Rags + bucket (opt)

Install Time
It took me about 45 minutes
Process:
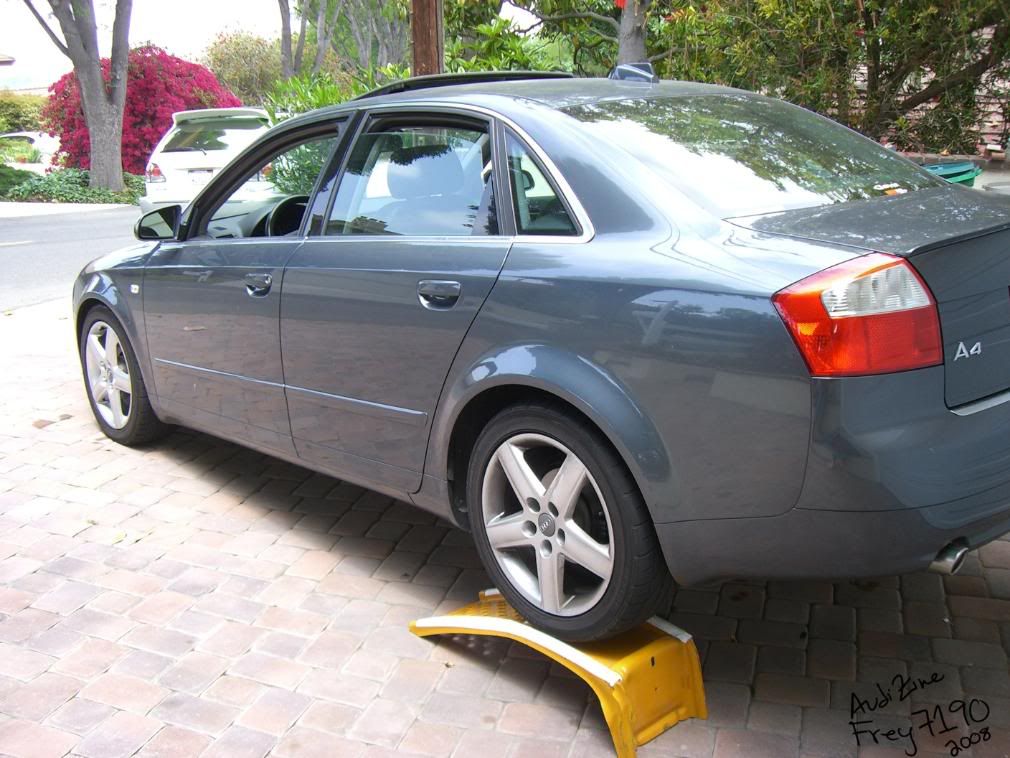
1. Find a way to get your car’s rear end off the ground. You may consider using jack stands, or like I did use drive up ramps, and reverse onto them. Make sure that it doesn’t hit the mufflers or any pipes.

2. To gain access to the entire wiring and fuel filter you have to remove the black housing around it, its simple just take the 10 mm socket and remove the nut that is located right on the end of the skirt molding, then right by the front of the rear wheel you will see two torx screws, remove them as well. To the left of the filter you will see a black “plug” looking screw made of plastic, take the flat head screw driver and pry it out.
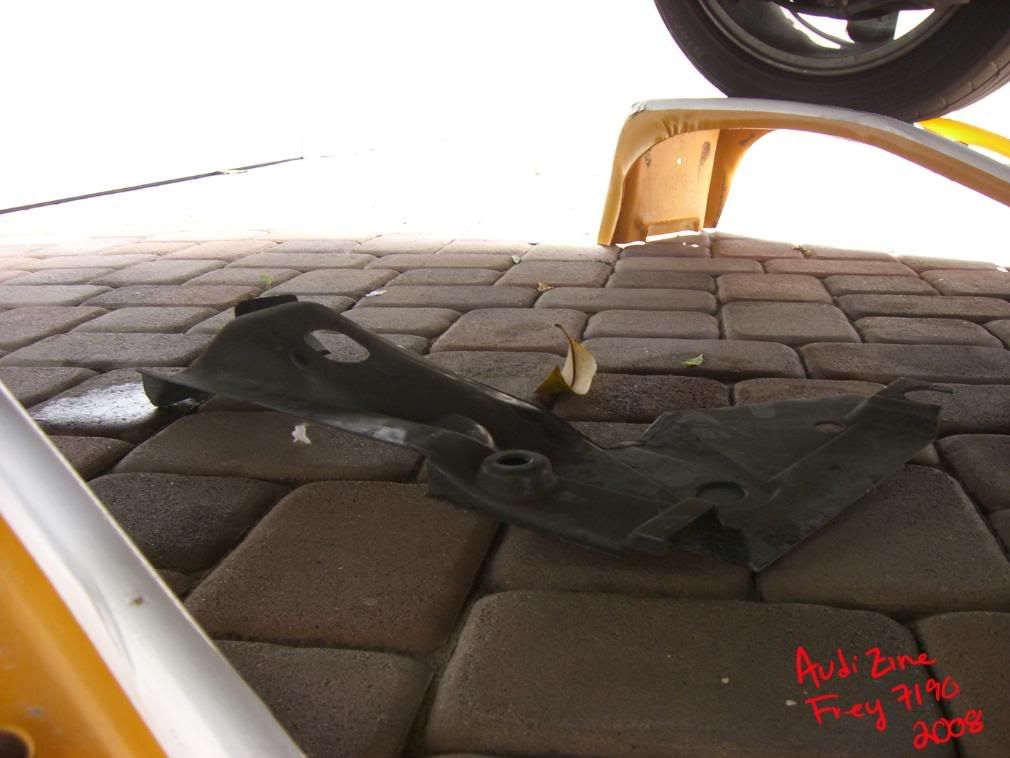
3. Now that the plastic covering is off you will see the entire filter and all the fuel lines. Take your TORX 25 and un screw the filter from the enclosure. Once you do that, you will need to dislodge the brake line running right to the side of it. That is done by pushing up on the line evenly on both sides so that we don’t bend it and then once out letting it hang down. Once that line is out of the way your going to need to “play” with the filter to get it out of that housing.
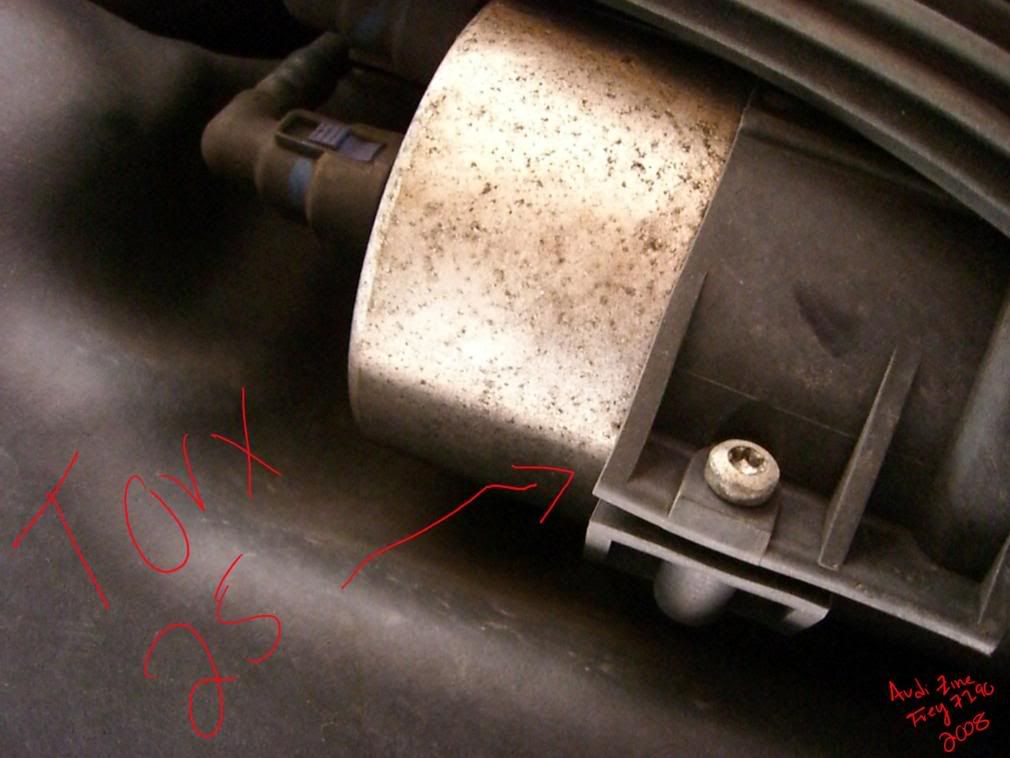
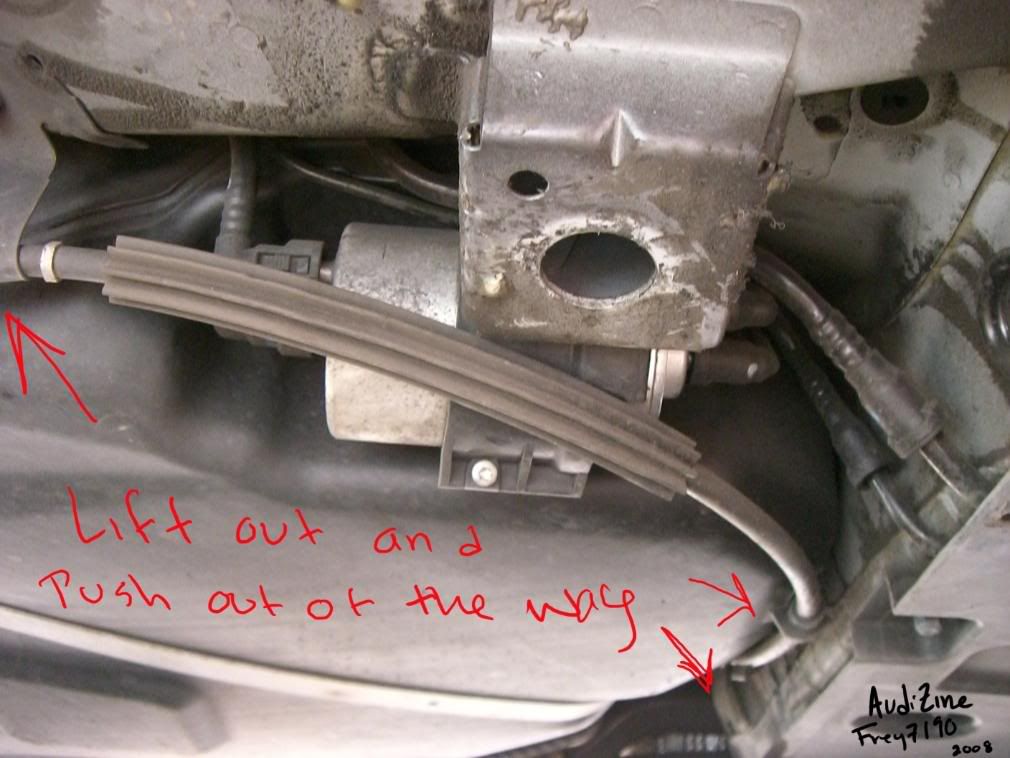
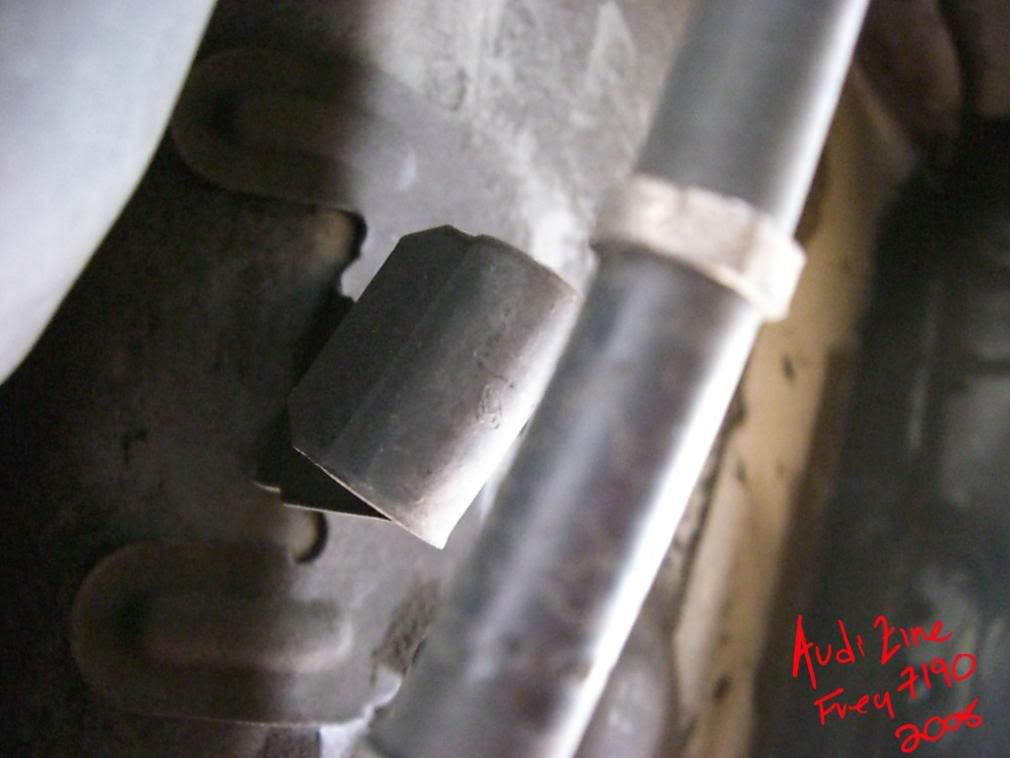
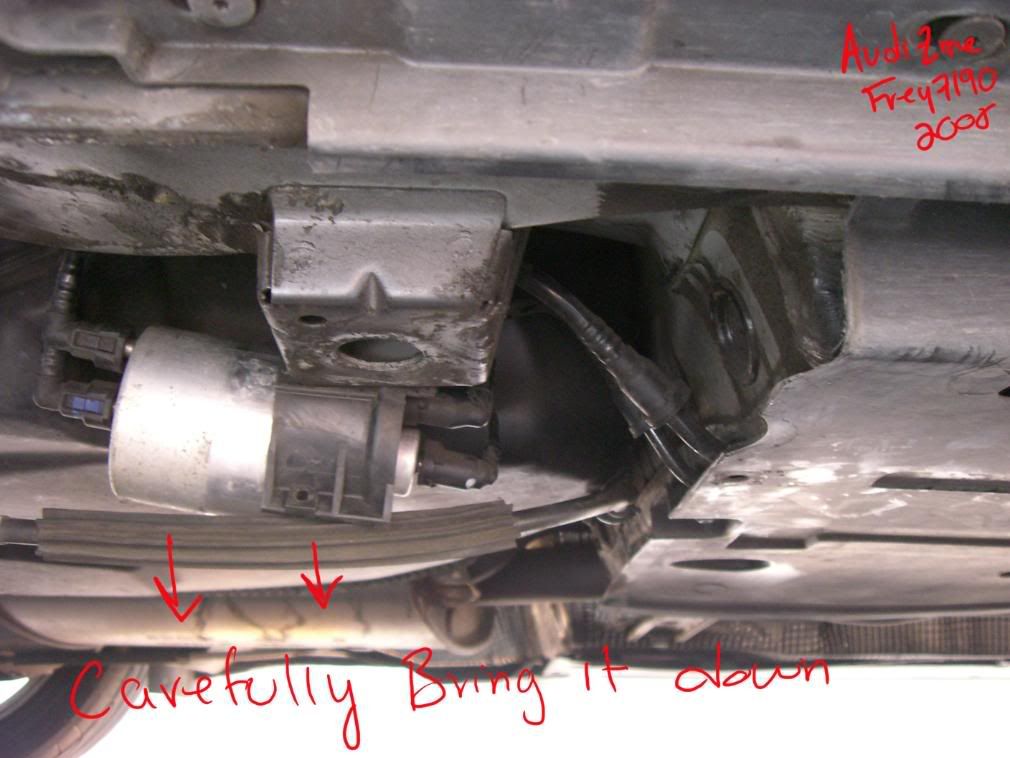
4. Alright breath.. Your 50% there! Ok so while your up taking a breather from being stuck down underneath the car, unscrew the gas cap a little and leave it like that. (It will get rid of any pressure that has accumulated in the tank)
5. Go underneath your car again, because now the fun begins! Now to remove the lines from the filter, its really simple take your flat head and push the clamps in on the hoses. Before you disconnect them, make sure you have plenty of rags, your goggles on, and the new filter in hand. Like you see in the photos, it is a good idea to keep one side of the filter plugged up with the yellow caps that came with your filter.. Trust me, it stopped the leaking and gave me time to unhook the other side of the old filter off.
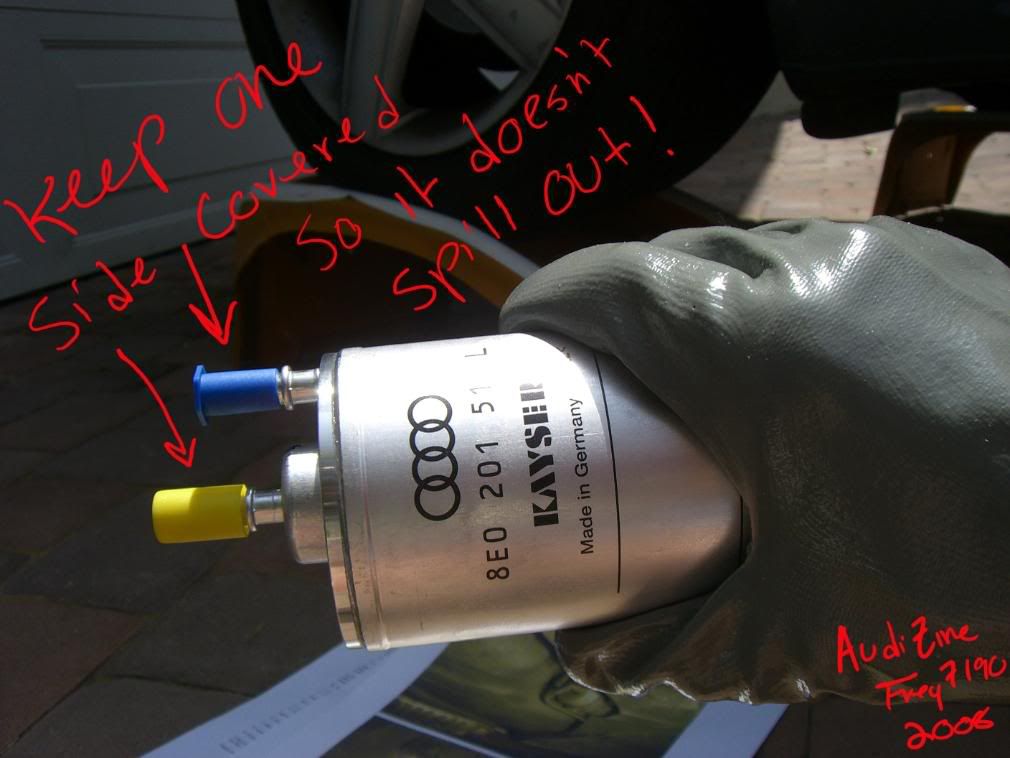
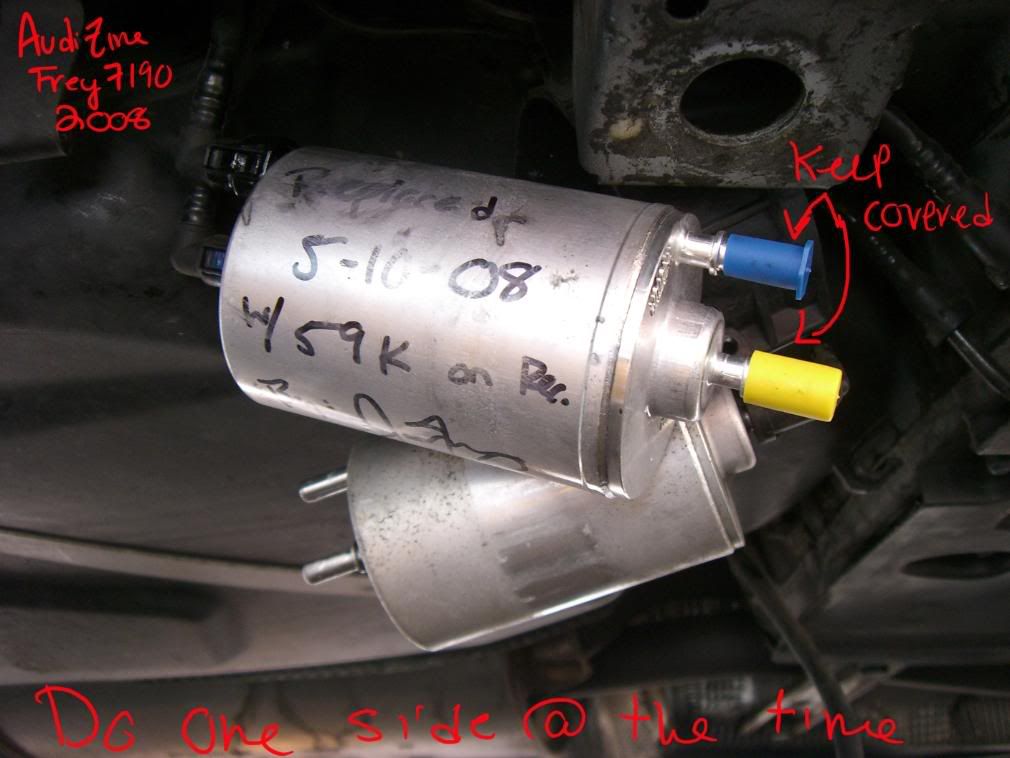
6. Once you have removed the old filter and have installed the new one you MUST check for leaks by pulling on the lines and seeing that they are truly connected.

7. Your done! Now all you got to do is put everything back. Start off by mounting the fuel filter in the housing, then putting back that line on the clamps. Lastly put that plastic cover on (includes two torx 25 screws, a plastic cap, and the 10mm nut) Oh and don’t forget to tighten up the gas cap again or the MIL light will turn on!
-- Start her up… might take 2-3 starts to get the fuel pumping in her veins again but she’ll start right up purring like new --
Just thought you might want to see what was inside the filter; just look at that dirt! By the way, this car has only been filled with 91 octane and still Premium has all this! Yuck!
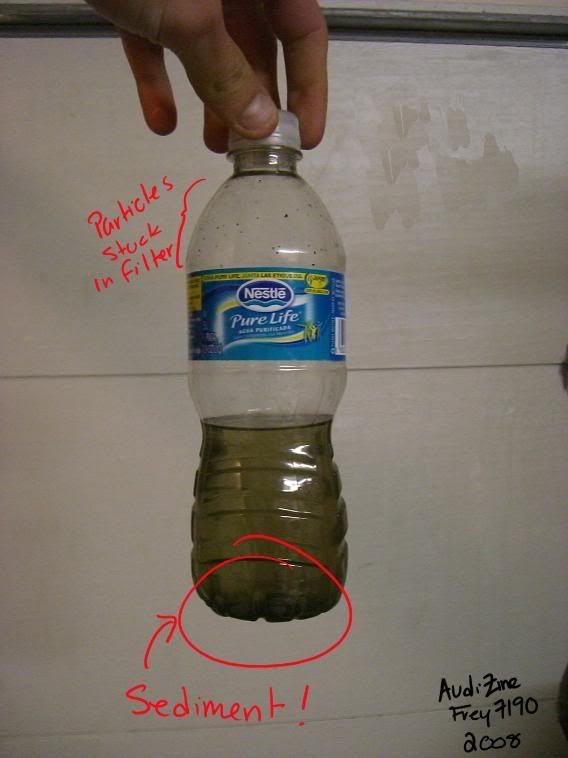
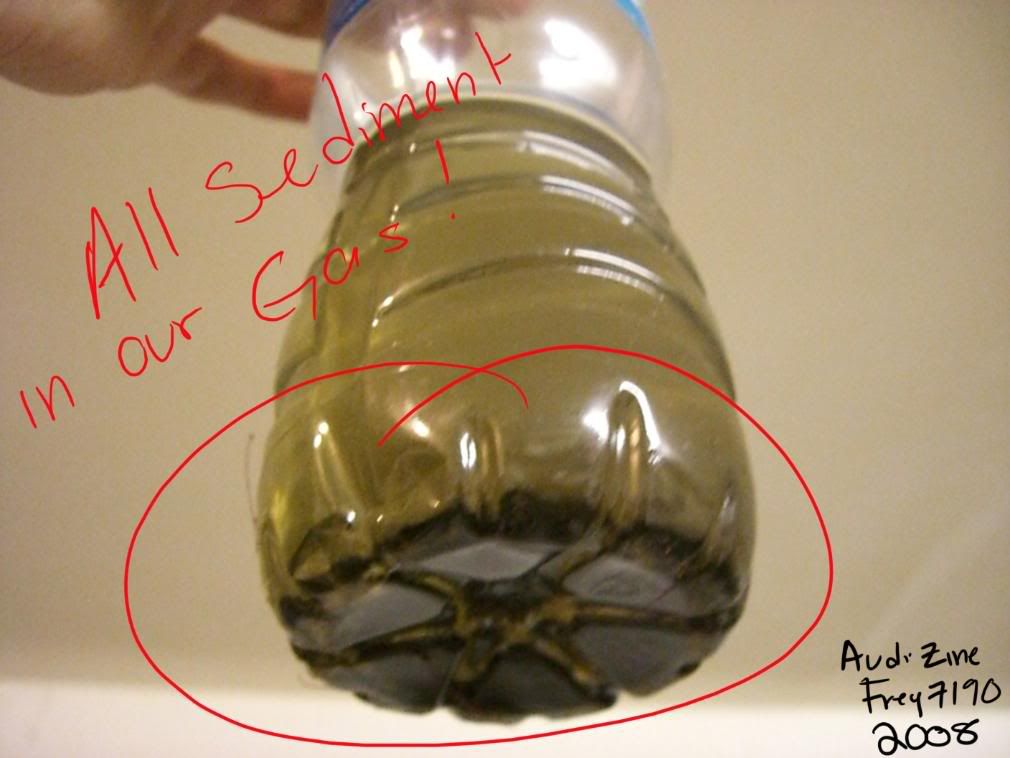
Well that’s all, enjoy your ride for the next 30k until this has to be done again! Hope you are happy with the DIY!
BTW the gloves and goggles were bought from www.Liftsafety.com I have to say they are the BEST gloves I have ever owned. Not only are they built really well they are well priced and they work great for car repairing and more!


 Reply With Quote
 1.8T Avant quattro|


Bookmarks