Audizine - An Automotive Enthusiast Community

Results 1 to 11 of 11
  1. #1
    Veteran Member Four Rings njm23's Avatar
    Join Date
    Feb 28 2007
    AZ Member #
    16023
    My Garage
    04 a4 USP ; ATS
    Location
    NJ

    filling in headlight washer holes..

    Guest-only advertisement. Register or Log In now!
    I wanna try to fill in the headlight washer holes on my s4 front before I get it painted, what's the best way to do this? I've got a few ideas, but I know some of you guys are real good with body work and what materials to use.. So, whats the right way to do it? Thanks

  2. #2
    Senior Member Two Rings a4_1.8t_01's Avatar
    Join Date
    Feb 24 2008
    AZ Member #
    25676
    My Garage
    A4 1.8TQM 01
    Location
    NY

    Re: filling in headlight washer holes..

    You can glue a piece of plastic on the back and then fill it.
    Unitronic tuned. love it.

    Need any services done in NYC area please PM me. I will diagnose and fix your car. Also do clutch replacements, Timing-belt services, Turbo upgrade/installation, Fluid changes, boost leaks and pretty much anything.

  3. #3
    Veteran Member Four Rings biketsai's Avatar
    Join Date
    Jun 04 2007
    AZ Member #
    18558
    My Garage
    01' A4 1.8TQM;15' Wrangler
    Location
    Austin/DFW, TX

    Re: filling in headlight washer holes..

    Quote Originally Posted by a4_1.8t_01 View Post
    You can glue a piece of plastic on the back and then fill it.
    fiber glassing the back would be alot better. Its really easy
    BetaAlphaTau Member #12
    01' A4 1.8TQMS 5spd swapped
    GT2871R|CTAPP MAFless|034 EM|Godspeed FMIC|APR 2.5"|EVO MS DV|CM FX400-LWFW
    18" RS4 Reps.|S4 Front/Skirts/Seats/Brakes|RS4 Grill|CF Trim
    Stasis SS|LLTEK Tower|KW F/R Sways|Profec Spec 2
    My 5-Speed Swap DIY
    - B6 USP
    Chris:Mod|PM me with any questions

  4. #4
    Veteran Member Four Rings njm23's Avatar
    Join Date
    Feb 28 2007
    AZ Member #
    16023
    My Garage
    04 a4 USP ; ATS
    Location
    NJ

    Re: filling in headlight washer holes..

    I have read that fiberglass and the plastic do not go so well together? Also, wouldn't that be prone to cracking? fiberglass is pretty stiff.

  5. #5
    Veteran Member Three Rings
    Join Date
    Dec 14 2006
    AZ Member #
    14197
    Location
    Halifax, NS, Canada

    Re: filling in headlight washer holes..

    I know nothing about body work on cars, but I know from working with fiberglass for boats, that polyester resin is more brittle and stronger (what u get for cars normally I believe) where as Epoxy resin is more flexible but it is considerably more expensive and much more difficult to mix right.
    2001.5 1.8T Manual Quattro Celebration | Startup Racing Vogtland Coilovers | Giac X Chip | SPP A pillar with VDO Gauge | Boxster/A8 Front brakes S4 rears | Neuspeed Catback VMR Testpipe |

    NOW DEAD :(

  6. #6
    Veteran Member Four Rings djwimbo's Avatar
    Join Date
    Feb 15 2008
    AZ Member #
    25294
    My Garage
    E46 323i 5-Sp
    Location
    616/MI

    Re: filling in headlight washer holes..

    Quote Originally Posted by njm23 View Post
    I have read that fiberglass and the plastic do not go so well together? Also, wouldn't that be prone to cracking? fiberglass is pretty stiff.
    Nope, fiberglass can be used to repair many things. Rocker panels, Hoods, Shaving door handles, lawnmower decks, etc.
    NTM it's really easy. Just don't put too much MEKP(liquid hardener) in it. Shit can hit the fan really quickly if you over do it.
    "Thank god I had my body, because it felt so good."

  7. #7
    Account Terminated Four Rings mike-2ptzero's Avatar
    Join Date
    Jul 07 2004
    AZ Member #
    2716
    My Garage
    630AWHP A4, Nissan Titan
    Location
    socal

    Re: filling in headlight washer holes..

    Here is what I did.


    I cut out some lexan that was slightly longer then the opening. Put a screw thru the center so I had something to hold it up while the epoxy set. Once it was set I just filled in the rest of the area with a fiber glass product like Kitty Hair. Used that to fill in the rest of the opening and then sanded it flat with the surface of the bumper skin.


    Results


  8. #8
    Veteran Member Three Rings
    Join Date
    Sep 11 2007
    AZ Member #
    21010
    Location
    Dirty Jersey

    Re: filling in headlight washer holes..

    while all the responses above might work, none is really correct

    I'd use a donor bumper to source some TPO material, use a plastic welder to take the patch in from the top, then I'd reinforce the patch on the bottom with a TPO adhesive, then I'd fully plastic weld the top , and sand/ paint

    fiberglass in the conventional form of resin and hardener will not adhere properly to you bumper and will fail at some point
    Nine [O_O] Eight Tuning
    custom work, fabrication, bumper shaving, fender rolling, plastic & fiberglass fabrication and repair

    Turbo charged and lowered for better grocery getting :screwy:

  9. #9
    Veteran Member Four Rings djwimbo's Avatar
    Join Date
    Feb 15 2008
    AZ Member #
    25294
    My Garage
    E46 323i 5-Sp
    Location
    616/MI

    Re: filling in headlight washer holes..

    yea, that's probably true, But I'll stick with the homebrew techniques.
    "Thank god I had my body, because it felt so good."

  10. #10
    Account Terminated Four Rings
    Join Date
    Jan 09 2008
    AZ Member #
    23986
    My Garage
    B5 A4 Quattro 4,2L V8 6 Speed
    Location
    United Kingdom

    Re: filling in headlight washer holes..

    Mike, tripping for your car big time, looks fantastic!

    Talk to me about a CF bonnet. Problem is, I'm in the UK.

    I still want one though.

  11. #11
    Veteran Member Four Rings onemoremile's Avatar
    Join Date
    Mar 09 2004
    AZ Member #
    1174
    My Garage
    99.5 A4 Avant, 01 allroad
    Location
    nw michigan.

    Re: filling in headlight washer holes..

    Plastic welding is messy and a pain in the butt. Fiberglass, or Duraglass, or Kitty Hair is the way to go here. Don't worry about flexibility since this portion of the bumper is not flexible due to it's proximity to curves and the bumper beam.

    There are a couple ways to do it depending on what you have on hand. You can superglue or epoxy a piece of plastic, mesh, or screen behind the opening and then use the Duraglass or Kitty Hair to fill it in. Wait for it to set and then sand it smooth. Be sure it is fully cured before painting otherwise the painter's curing oven may shrink it and put a hairline crack in the paint. Be sure to put a layer of glass on the backside too to make it all stronger.

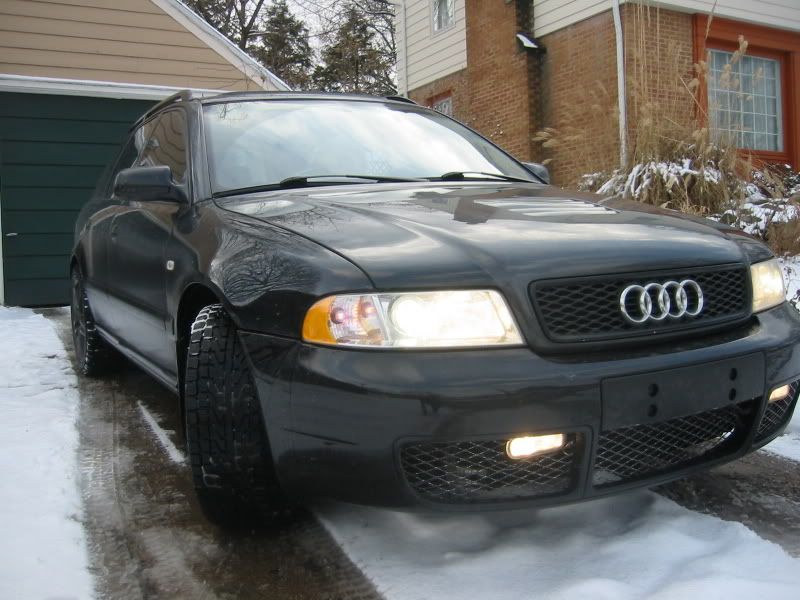
    Even though I knew better, I used body filler and it cracked in the paint curing oven. It isn't bad and could easily be touched up so that it was invisible.


    You can't see the hairline crack from more than a foot or two away. You can, however, see where a mountain bike frame fell from the garage rafters and nailed the bumper...

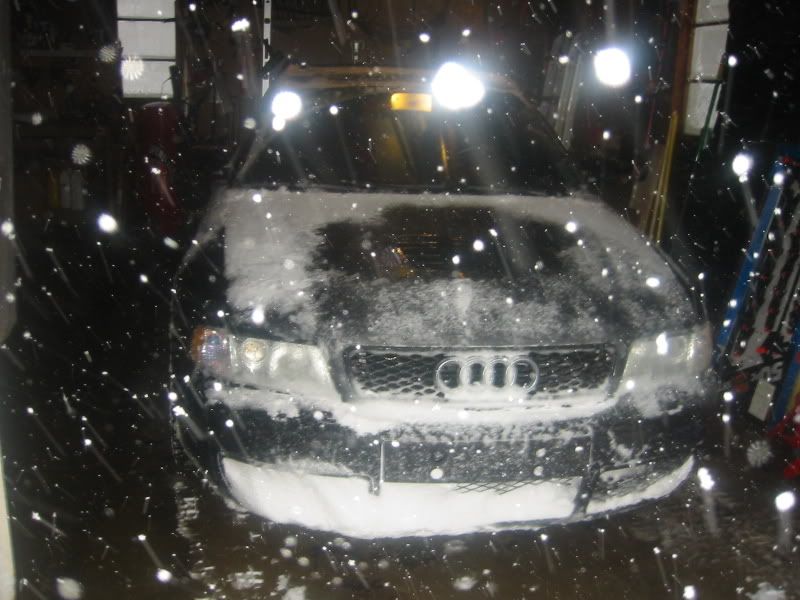
    It has held up through some pretty crazy weather. This was after getting run off the road, biffing a huge snowdrift, and spinning across two lanes before pulling a nice 20mph Rockford (J-turn) and casually carrying on.
    Last edited by onemoremile; 04-29-2008 at 02:26 PM.
    Jim

    We cannot achieve the future by being timid. It requires aggressive imagination.

    I Do Werk.

Bookmarks

Posting Permissions

  • You may not post new threads
  • You may not post replies
  • You may not post attachments
  • You may not edit your posts
  •  


    © 2001-2024 Audizine, Audizine.com, and Driverzines.com
    Audizine is an independently owned and operated automotive enthusiast community and news website.
    Audi and the Audi logo(s) are copyright/trademark Audi AG. Audizine is not endorsed by or affiliated with Audi AG.