


For starters, be safe - you will be lying on your back looking up at the undercarriage of your car, so eye protection is a good idea, and as always, make sure that the car is secure before crawling underneath (jackstands, etc.).
BTW, there are larger versions of all these images available in my gallery, so if you need a closer view, etc., help yourselves.
The tools I would recommend you have available:

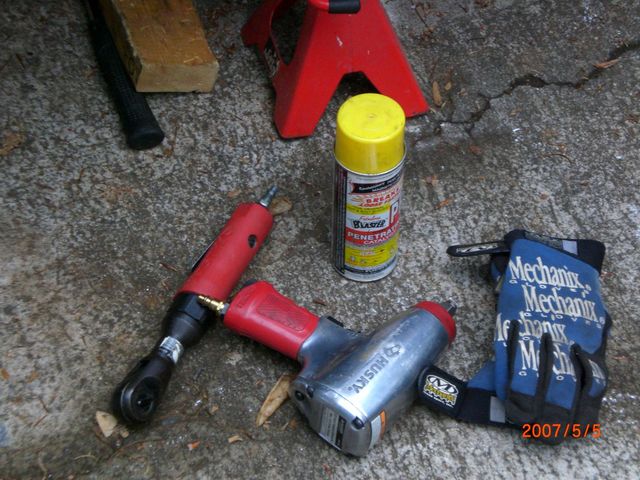
While a compressor is not required, I highly recommend one to anyone planning to do regular maintenance on their own car. It makes life so much easier.
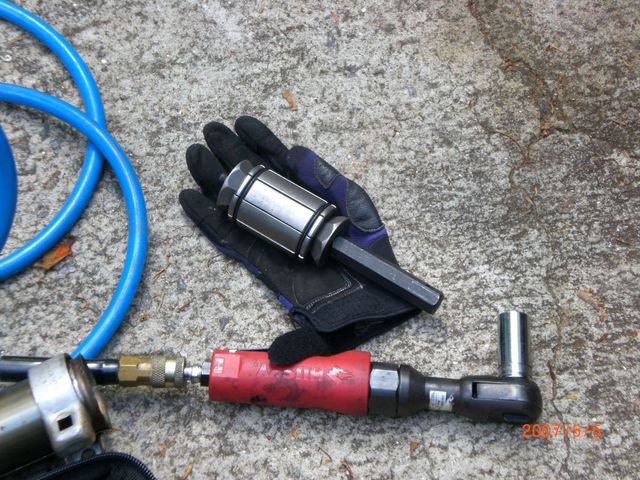
I found that a pipe expander was helpful. In my case, I rented one from the Autozone (shameless plug) down the street - just had to leave a deposit that I got back when I returned the tool.
The stock system:
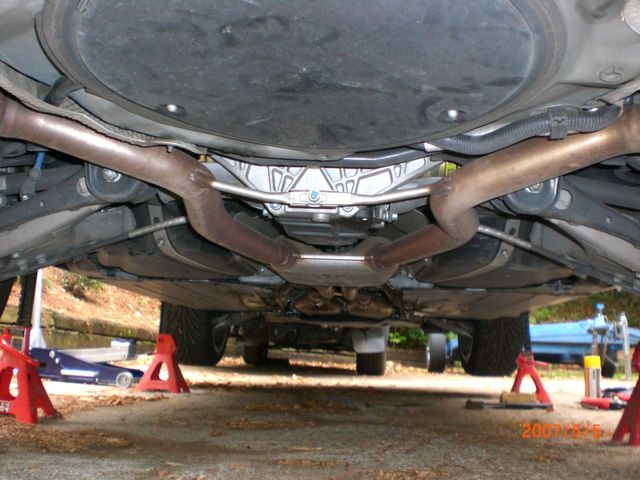
From front to back...the stock system is typical Audi high-quality.

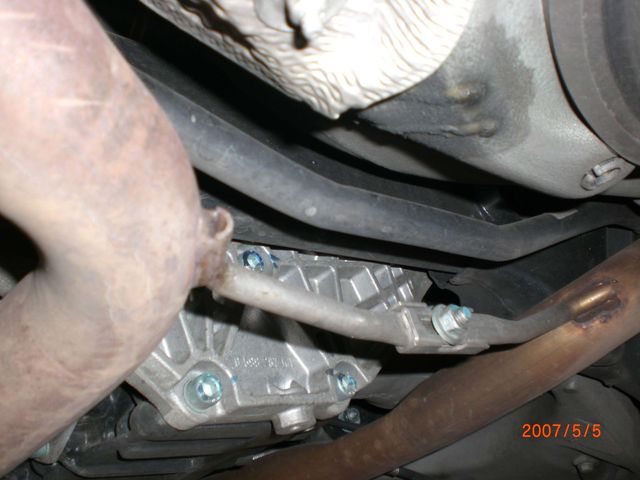
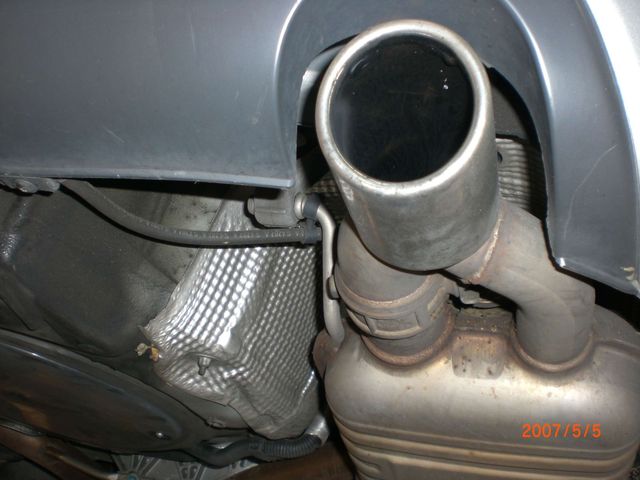
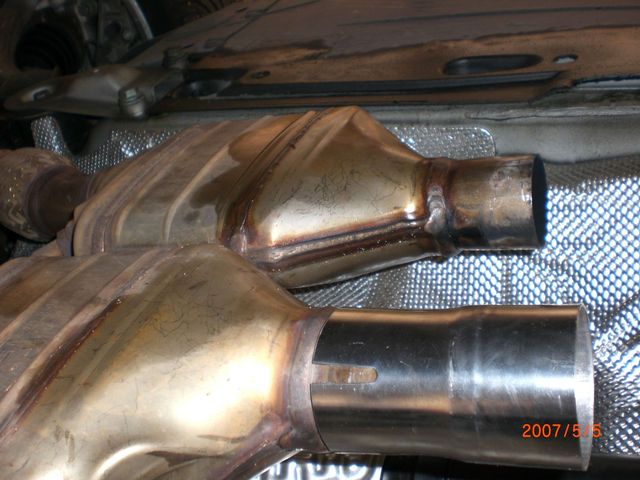
The stock downpipes (with integral catalytic converters) connect to the remainder of the system with these well designed, double-wall sleeves. Loosening these bolts allows the sleeves/adapters to slide off the ends of the cats and the head pipes to slide out of the sleeves (Liberal use of PB Blaster on key bolts will help ensure that everything goes smoothly). Once these are loosened and the sleeves can be moved, leave it all in place to support the front of the system for now.
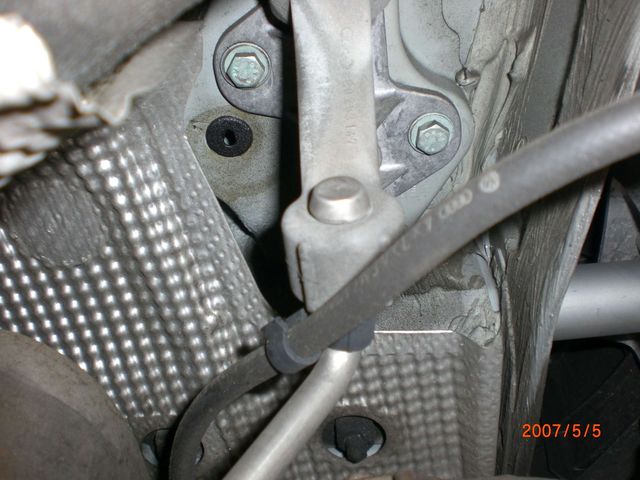
This is one of the exhaust hangers next to the stock resonators that you'll have to get loose. I slid a screwdriver between the rubber and metal post to initally separate any bind between the two, then using a pair of channel locks, grabbed the rubber and slowly worked it over the end of the bracket. It takes a little maneuvering, but patience pays dividends here - several efforts moving the rubber hanger off a little bit each time seemed to work best for me.
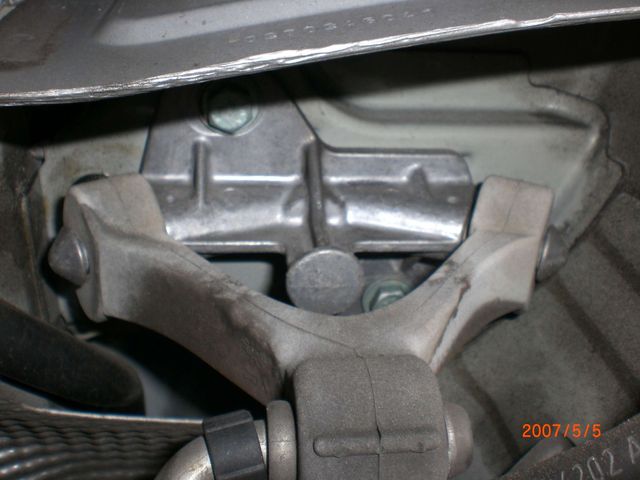
At the back of the car, the mufflers are hanging from these brackets. I opted to unbolt the brackets from the car first, then remove the hangers from the exhaust system later.
Don't get too carried away just yet!
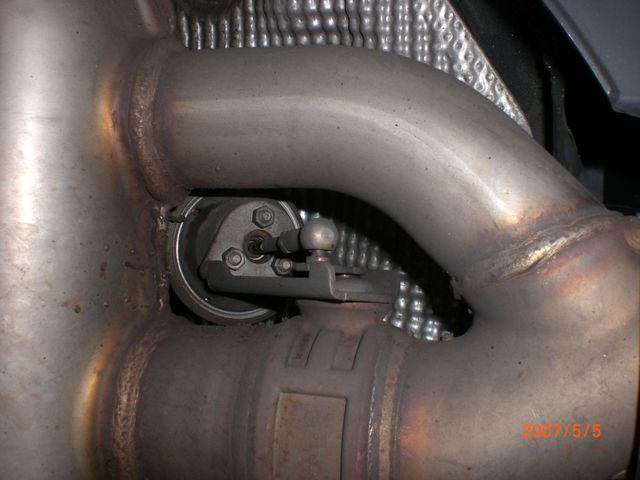
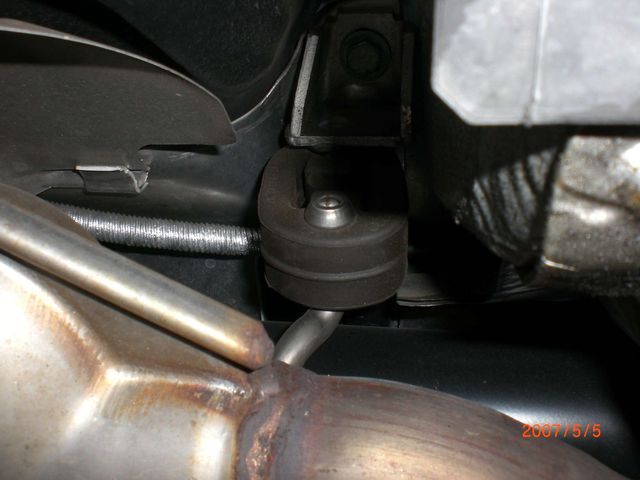
The stock system uses a vacuum activated flap in each muffler to help minimize noise and manage backpressure. Under part throttle the flapper closes one of the pipes coming out of the muffler, but when vacuum increases, the flapper opens so that both pipes allow exhaust gasses to exit. The hose carrying vacuum to the flapper, and the flapper mechanism can be seen clearly in these pictures.
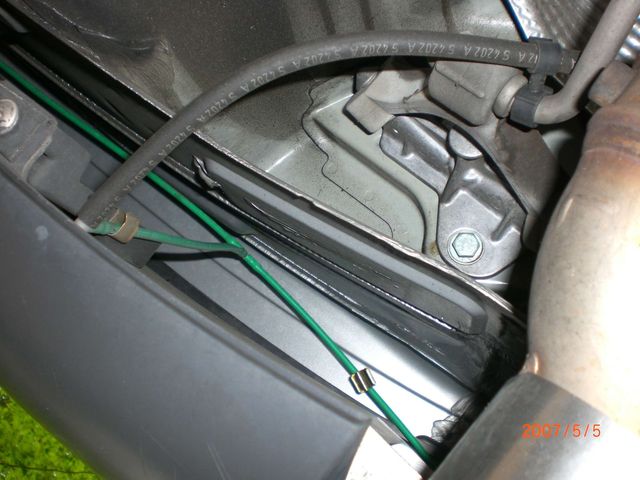
Here you can see the black hose running from the flapper, tied to the rear hanger bracker, and connecting to a system of green hoses (hidden behind the rear bumper cover) that carry vacuum from the engine. I disconnected the black hoses from the green, and sealed the ends of the green hoses with vacuum plugs I got at my Friendly Local Auto Parts Store (a.k.a., FLAPS).
Now you probably want to get someone to help you pull the stock system out from under the car. With the sleeves at the cats loose, and the hangers near the resonators disconnected, I unbolted each of the rear hangers from the chassis and rested each muffler on a jackstand. I got my assistant (my wife...and who am I kidding - she's the boss, not my assistant) to hold the tips and pull the exhaust rearward as I was under the car making sure the cat adapter sleeves came loose and kept the system from dragging on the way out. It's not very heavy, so once you get it about halfway out from under the car, its pretty easy for one person to handle it from there (thanks honey...you can go now).
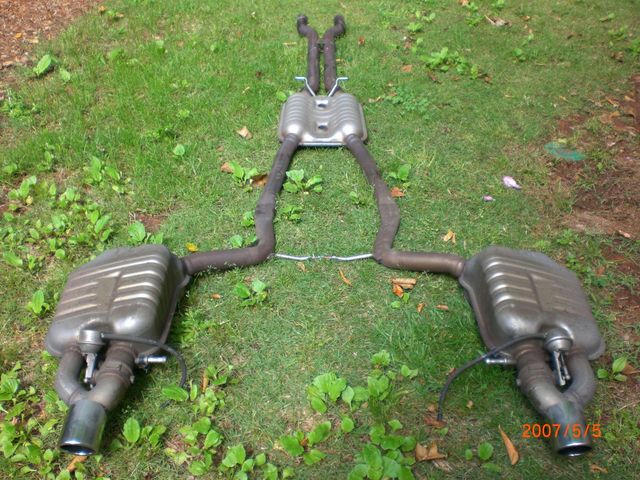
Here is a shot of the complete stock system out from under the car (yes, I know...my grass sucks...I plan to work on the weeds this fall and hopefully it will look better next summer).
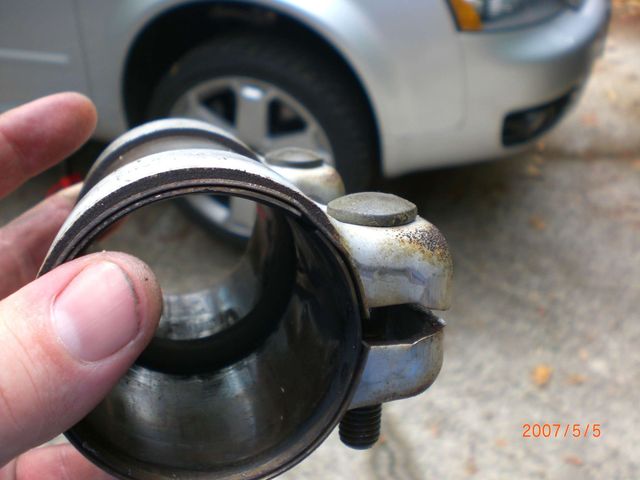
Here is a picture of those nice sleeves Audi uses. Notice that the two layers each split in different places to allow the sleeves to expand and contract but not leak...I thought they were pretty slick.
Now let's get the new system on...
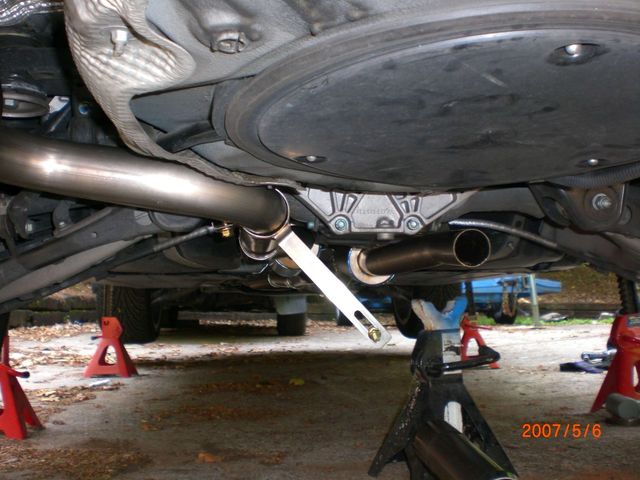
The Motorklass system came with two of these adapters to connect the headpipes to the stock downpipes/cats. This is where the pipe expanding tool came in handy, to stretch the small end of the adapter slightly to slip easily over the end of the downpipe. BTW, in case you were wondering, this picture was taken while lying on my back looking up at the cats, thus the strange perspective.
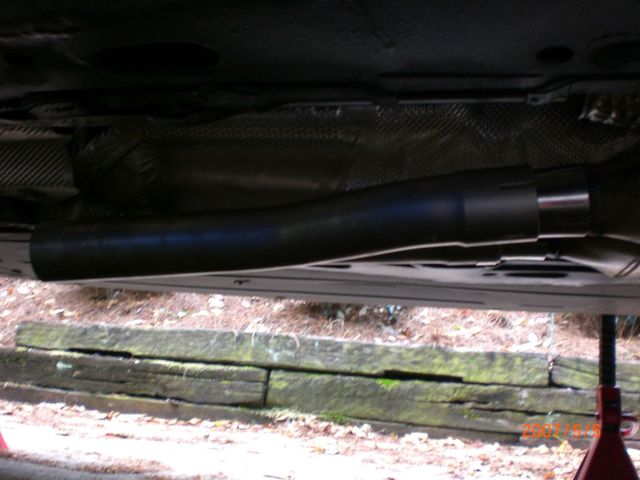
Here you can see the headpipe slipped over the adapter which is slipped over the end of the downpipe (...kneebone connected to the thighbone...).
From there it should just be a simple matter of slipping the b-pipe/resonator into place (hang it using the stock hanger), etc.
But...

(Before)
(after)
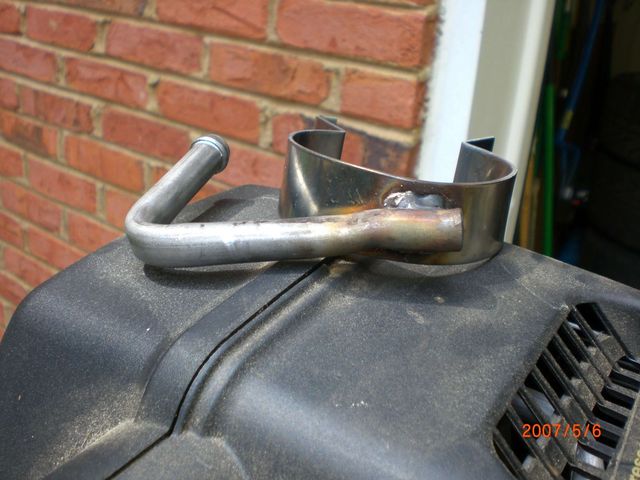
...the only problem I had with the pieces I received from Motorklasse - this one hanger had a bend in it, but the other didn't. Unfortunately the bend pulled the system up too close to the underside of the car, and it needed to be straigtened. I eventually had to break down and take it to my FLAPS and have them put some heat to it to be able to bend it (and even then, it was not easy). Not that big of a deal, and the guy who did it didn't even charge me anything (although he did recieve a gratuity). All told this added about 3 hours and a little bit of frustration to the process, but just about all tasks like this install are more about figuring out how to overcome obstacles.
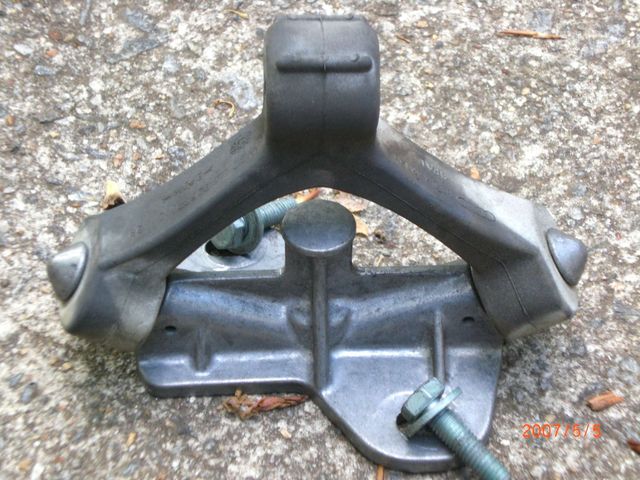
As I said, I opted to unbolt the rear hangers from the chassis.

I attached the hanger to the muffler hanger, then slipped the muffler into place (connected to the b-pipe) and bolted the hanger to the chassis.
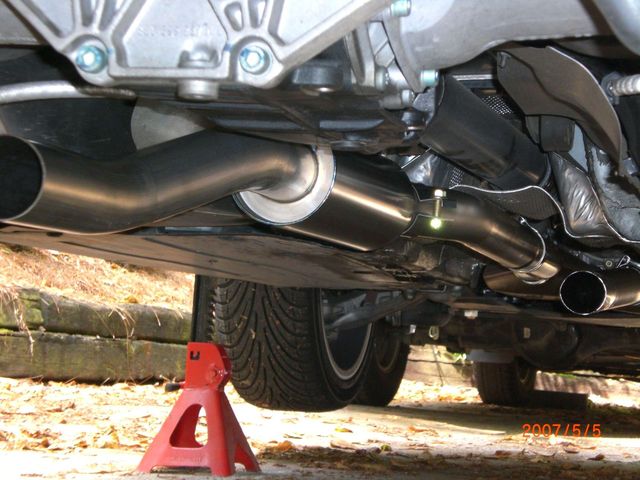
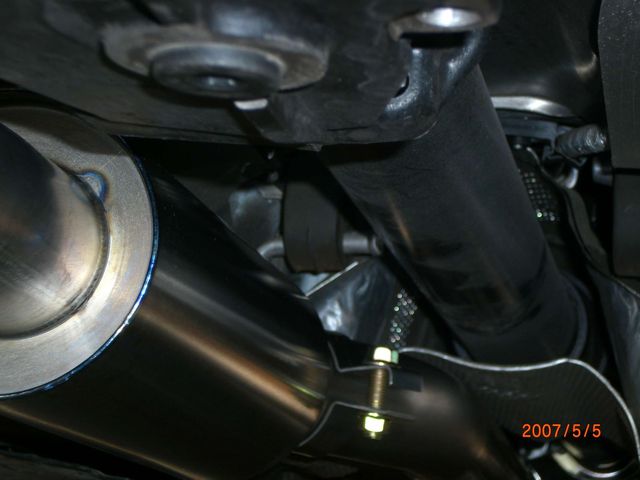
Here is one of the mufflers in place and part of the bracket to help align the pipes.
The system came with a tube of sealant to be used at each of the pipe joints, but I opted to initially hang it without the sealant. My goal was to let the system settle a little bit, adjust it again, then when I was comfortable with where it was hanging, to mark each of the joints with a Sharpie, disconnect it, slather on the sealant, then reconnect it lining up the marks. So far I have only gotten to the "adjust it again" stage. There is a little bit of audible leaking at idle, so I would not recommend skipping this sealant step.
All told, I took a couple afternoons, took my time, and got it installed (including a trip to fetch the pipe expander and have the hanger straightened), but I could easily see it being done in a couple hours or less if all the needed tools are on hand and there are no hitches.
Here is a link to the before sound clip.
Here is a link to the after sound clip.


Bookmarks